
Home security is a top priority for many homeowners. Installing security cameras is an effective way to protect your home and loved ones from potential threats. Whether you want to monitor your property while you’re away or keep an eye on your kids playing in the backyard, having security cameras can provide you with peace of mind.
Before you start installing security cameras, it’s essential to plan and strategize. Begin by identifying the vulnerable areas of your home, such as entrances, windows, and high-traffic areas. These are the spots where you should focus your camera installation to maximize coverage. Additionally, consider the lighting conditions of these areas to ensure optimal camera performance.
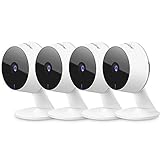
Once you have determined the ideal locations for your security cameras, it’s time to gather the necessary tools and equipment. You will need cameras, cables, a power supply, a monitor or recording device, and any mounting brackets or hardware. Make sure to choose cameras with high resolution and night vision capabilities for clear images day and night.
Now, let’s move on to the installation process. Start by mounting the cameras in the designated spots using the provided brackets or hardware. Ensure that the cameras are positioned at the right angles for optimal coverage. Then, run the cables from the cameras to the power supply and recording device. Conceal the cables for a neat and professional installation.
After connecting the cables, it’s time to set up the monitoring or recording device. Follow the manufacturer’s instructions to connect the cameras to the device. Configure the settings, such as motion detection and recording options, to suit your preferences. Once everything is set up, test the cameras to ensure they are functioning correctly.

With the installation complete, you can now enjoy the added security and peace of mind that security cameras bring. Remember to periodically check the cameras and perform maintenance to ensure they continue to operate efficiently. By following these steps and taking the time to properly install your security cameras, you can enhance the safety and security of your home.
Don’t wait any longer – start installing security cameras today and protect what matters most to you!
Choosing the Right Security Camera System
Investing in a security camera system for your home is a wise decision, as it provides an added layer of protection and peace of mind. However, with so many options available in the market, choosing the right system that meets your specific needs can be overwhelming. Here are some factors to consider when selecting a security camera system.
Indoor or Outdoor Cameras: Determine where you want to install the cameras. If you need surveillance inside your house, opt for indoor cameras. On the other hand, if you want to monitor the exterior of your property, choose outdoor cameras that are built to withstand various weather conditions.
Resolution: The resolution of a security camera determines the clarity of the video footage. Higher resolution cameras provide more detailed images. Consider a system with at least 1080p resolution for clear and sharp video quality.

Field of View: The field of view refers to the area that the camera can capture. Wide-angle lenses offer a larger field of view, allowing you to monitor a larger area with fewer cameras. Consider your specific surveillance needs and choose a camera system with an appropriate field of view.
Wired or Wireless: Decide whether you prefer a wired or wireless security camera system. Wired systems require running cables but provide a more reliable and stable connection. On the other hand, wireless systems offer flexibility and ease of installation, as they do not require cables. Choose a system that best suits your preferences and needs.
Features: Consider additional features that the security camera system offers, such as night vision, motion detection, two-way audio, and remote access. These features enhance the functionality of the system and provide greater convenience and security.
Budget: Set a budget for your security camera system and stick to it. There is a wide range of options available at different price points, so ensure you choose a system that provides the features you require within your budget.
By considering these factors, you can choose the right security camera system that meets your specific needs and provides reliable and efficient surveillance for your home.
Factors to Consider Before Buying
When it comes to purchasing security cameras for your home, there are several important factors to consider before making a decision. Taking the time to evaluate these factors will help ensure that you choose the right cameras to meet your specific needs and requirements.
1. Purpose
Before buying security cameras, it is crucial to determine their purpose. Are you looking to monitor the exterior of your home, the interior, or both? Do you need cameras that can capture clear images at night, or are you primarily concerned with daytime surveillance? Understanding the specific purpose of the cameras will help you narrow down your options and choose the right features.
2. Camera Type
There are various types of security cameras available, including dome cameras, bullet cameras, and PTZ (pan-tilt-zoom) cameras. Each type has its own advantages and disadvantages, so it’s important to research and understand which type would work best for your home. Consider factors such as the coverage area, ease of installation, and level of visibility when making your decision.
3. Resolution
The resolution of a security camera determines the quality of the images or videos it captures. Higher resolution cameras provide clearer and more detailed footage, but they also come at a higher cost. Assess your needs and budget to determine the appropriate resolution for your home security cameras.
4. Connectivity
Consider how you want your security cameras to connect to your recording device or network. Wired cameras offer a more stable and reliable connection, but they require professional installation and may require drilling holes to run the cables. Wireless cameras, on the other hand, are easier to install but may experience signal interference depending on your Wi-Fi network’s strength and other devices in your home.

5. Storage
Decide how you want to store your security camera footage. Some cameras offer local storage options like SD cards, while others rely on cloud storage. Consider the cost, convenience, and security of different storage methods before making a decision.
6. Budget
Lastly, determine your budget for security camera installation. Consider not only the upfront cost of purchasing the cameras but also any additional expenses such as professional installation, storage subscriptions, and maintenance. It may be helpful to prioritize the features and factors that are most important to you and allocate your budget accordingly.
By carefully considering these factors, you can make an informed decision when purchasing security cameras for your home. Remember to research different brands and models, read customer reviews, and seek professional advice if needed to ensure you choose the best cameras to meet your specific needs.
Understanding Different Types of Cameras
When it comes to installing security cameras at home, it is important to understand the different types of cameras available on the market. Each type of camera has its own unique features and specifications, making it suitable for specific surveillance needs. Here, we will discuss some of the most common types of security cameras:
1. Dome Cameras
Dome cameras are named after their dome-shaped housing. They are usually mounted on ceilings and offer a wide viewing angle, making them ideal for monitoring large areas. Dome cameras are often used in commercial settings, but they can also be used in homes for indoor and outdoor surveillance.

2. Bullet Cameras
Bullet cameras, also known as cylindrical cameras, have a long and cylindrical shape. They are typically used for outdoor surveillance and can be easily mounted on walls or ceilings. Bullet cameras are known for their larger lens size, which allows them to capture more detail over longer distances.
3. PTZ Cameras
PTZ stands for Pan-Tilt-Zoom, which refers to the movement capability of these cameras. PTZ cameras can pan or tilt to provide a wide range of coverage, and they can also zoom in to capture detailed images of specific areas. These cameras are commonly used in areas where active monitoring is required, such as in large outdoor spaces or at entrances.
It is important to consider your specific surveillance needs before choosing a camera type. Factors such as the location, lighting conditions, and desired coverage area will dictate which type of camera is most suitable for your home security system.
| Camera Type | Features |
|---|---|
| Dome Cameras | Wide viewing angle |
| Bullet Cameras | Larger lens size for capturing detailed images |
| PTZ Cameras | Pan, tilt, and zoom capabilities for active monitoring |
Deciding on Camera Placement
One of the most important factors to consider when installing security cameras at home is the placement of the cameras. The right camera placement can greatly enhance the effectiveness of your security system. Here are some key points to keep in mind:
1. Identify Vulnerable Areas
Start by identifying the vulnerable areas of your property. These are the areas where intruders are most likely to attempt unauthorized access. Common vulnerable areas include entry points such as doors and windows, as well as blind spots such as driveways or secluded corners. By focusing on these areas, you can maximize the coverage and effectiveness of your security cameras.

2. Consider Field of View
When deciding on camera placement, consider the field of view of each camera. The field of view refers to the area that the camera can capture and monitor. Ensure that the camera’s field of view covers the entire vulnerable area, without any blind spots. Depending on the camera, this may require adjusting the camera angle or installing additional cameras.
Pro Tip: Consider using cameras with adjustable lenses or pan-tilt-zoom (PTZ) functionality, as these features provide flexibility in capturing areas with different field of view requirements.
3. Evaluate Lighting Conditions
Lighting conditions can greatly impact the quality of the captured footage. Assess the lighting conditions of each camera location to determine if any adjustments are needed. Avoid placing cameras in locations with direct sunlight or bright artificial lights, as this can result in overexposed footage. Additionally, ensure that areas with poor lighting are adequately covered by installing cameras with night vision capabilities.
Note: It is advisable to test the camera’s visibility and image quality after installation to ensure optimal performance.
Remember to follow any local regulations or legal requirements regarding camera placement and privacy. By carefully considering camera placement, you can create a comprehensive home security system that provides peace of mind and enhances the safety of your property.

Identifying Vulnerable Points
When installing security cameras at home, it’s crucial to identify the vulnerable points in your property. These are areas that are more prone to break-ins or suspicious activities. By identifying these points, you can strategically place your cameras to provide maximum coverage and protection.
Here are some common vulnerable points to consider:
- Entrances: Including front and back doors, as well as windows on the ground floor.
- Garage: If you have a garage, it’s important to monitor it since it can provide easy access to your home.
- Driveway: Keeping an eye on your driveway can help detect any suspicious vehicles or individuals approaching your property.
- Backyard or garden: These areas are often less visible from the street, making them attractive targets for burglars.
- Basement and attic: If your home has a basement or attic, make sure to secure these areas as well since they can serve as entry points.
By assessing these vulnerable points, you can determine the number of cameras needed and their ideal placement to ensure comprehensive surveillance of your property.
Strategic Locations for Placement
Installing security cameras at strategic locations around your home is essential for maximising their effectiveness. Here are some key areas to consider:
| Location | Reason |
|---|---|
| Entrance Points | Place cameras near all entrances, including front and back doors, as these are the primary access points for potential intruders. |
| Driveways and Parking Areas | Monitoring driveways and parking areas can help deter theft or vandalism to your vehicles and provide evidence in case of an incident. |
| Backyards and Gardens | These areas are often targets for burglaries or property damage. Install cameras to keep a close eye on any suspicious activity. |
| Stairways and Hallways | Placing cameras in these areas ensures that you have a clear view of anyone moving around inside your home. |
| Garage | Garages often contain valuable items, such as vehicles and tools. Cameras in this location can help deter theft and provide evidence if necessary. |
| Windows | Installing cameras near windows can help capture any potential break-ins or vandalism attempts. |
Remember to position cameras at a suitable angle to cover the desired area effectively and consider any applicable privacy laws or regulations when installing security cameras.
Gathering the Necessary Equipment
Before you begin installing security cameras at your home, it’s important to gather all the necessary equipment to ensure a smooth and successful installation process. Here are some items you’ll need to have on hand:
1. Security Cameras
The most crucial piece of equipment for installing security cameras is, of course, the cameras themselves. Depending on your needs and preferences, you can choose between wired or wireless cameras. Make sure to consider factors such as resolution, field of view, and night vision capabilities when selecting your cameras.
2. Mounting Hardware
To securely install your cameras, you’ll need mounting hardware such as brackets or clamps. This will allow you to attach the cameras to walls, ceilings, or other desired locations. Make sure to select hardware that is compatible with your chosen cameras and provides a stable and secure installation.
3. Cables and Connectors
If you opt for wired cameras, you’ll need cables to connect the cameras to your recording device. Typically, this involves using coaxial or Ethernet cables. Additionally, you’ll require connectors to properly terminate and extend the cables. Ensure you have enough cable length to reach from your cameras to your recording device.
4. Power Supply
Security cameras require a power source to operate. Depending on the type of cameras you choose, you may need to have power supply units, power adapters, or power over Ethernet (PoE) switches. Make sure to have the necessary power supply equipment to keep your cameras running consistently.
By gathering all the necessary equipment before starting the installation process, you can save time and avoid any interruptions in the setup. Having everything in place will allow you to focus on the installation steps and ensure a seamless integration of security cameras into your home.
Security Cameras and Mounting Accessories
When it comes to installing security cameras at home, it is essential to have the right mounting accessories. These specialized accessories not only help you position your security cameras in the perfect angle but also ensure that they are securely attached to your home, providing reliable surveillance for your property.
Here are some common mounting accessories that you may need:
| Accessory | Description |
|---|---|
| Mounting Brackets | Mounting brackets are used to attach the security cameras to walls, ceilings, or poles. They provide stability and allow you to adjust the camera’s position for optimal coverage. |
| Weatherproof Housing | Weatherproof housing protects the security cameras from harsh environmental conditions. It is particularly important if you plan to install cameras outdoors, as it shields them from rain, snow, dust, and extreme temperatures. |
| Cable Management | Cable management accessories help in hiding and organizing the cables that connect your security cameras to the power source or recording device. They keep the installation neat and prevent any potential tampering or damage. |
| Pole Mounts | Pole mounts are designed specifically for mounting security cameras on poles or posts. They provide a secure and stable base for the cameras and allow you to easily adjust the camera view. |
| Power Adapters | Power adapters are necessary to supply electricity to your security cameras. They ensure a reliable power source and come in different types, such as plug-in adapters or PoE (Power over Ethernet) injectors. |
| Extension Cables | Extension cables may be needed if the provided cables with your security cameras are not long enough to reach the desired location. These cables maintain the signal integrity and allow you to extend the camera’s reach. |
By selecting the appropriate mounting accessories, you can install your security cameras effectively and ensure they are properly secured. It is important to follow the manufacturer’s instructions and guidelines while using these accessories to ensure optimal performance and longevity of your security system.
Additional Equipment for Installation
When installing security cameras at home, there are certain additional equipment that you may need to ensure proper functionality and effectiveness of your system. These tools and accessories can help in enhancing the performance, convenience, and overall security of your surveillance setup. Here are some of the essential additional equipment you should consider:
- Cables and Connectors: Depending on the type of security cameras you are installing, you may need various cables and connectors such as BNC cables, Ethernet cables, and power connectors. These cables and connectors are necessary to establish connections between the cameras, DVR/NVR, and power sources.
- Power Supply: To ensure continuous power supply to your security cameras, you may need a power supply unit (PSU) or individual power adapters for each camera. Make sure you have enough power outlets near the camera locations or consider using a UPS (Uninterruptible Power Supply) for backup power.
- Mounting Brackets and Hardware: Proper mounting of the cameras is important to achieve the desired viewing angles and coverage. Mounting brackets and hardware are used to securely attach the cameras to walls, ceilings, or other surfaces. Make sure to choose the appropriate brackets and hardware based on the camera model and installation location.
- Network Switches or PoE Injectors: If you are using IP cameras, you may need network switches or PoE (Power over Ethernet) injectors. These devices allow you to connect multiple cameras to your network and provide power over the Ethernet cables, eliminating the need for separate power cables.
- Video Baluns: If you are using analog cameras and need to transmit video signals over long distances, video baluns can be used. These devices convert the analog video signals into digital signals, allowing you to transmit them over CAT5/CAT6 cables.
- Storage Devices: To store the captured footage from your security cameras, you will need storage devices such as hard drives or network-attached storage (NAS) devices. Make sure to choose reliable and high-capacity storage options based on your requirements.
- Monitor or Display: A monitor or display unit is required to view the live video feed or playback the recorded footage from your security cameras. Depending on your preference, you can choose a dedicated monitor, a computer monitor, or even connect your cameras to a smart TV.
- Remote Access Devices: If you want to access your security camera system remotely, you may need additional devices or software. This can include a smartphone, tablet, or computer with compatible apps or software that allows you to view the cameras and manage the system remotely.
By considering these additional equipment during the installation process, you can ensure that your security camera system is properly equipped and ready to provide enhanced security and peace of mind for your home.
Mounting and Installing the Cameras
Mounting and installing the security cameras properly is crucial for ensuring effective surveillance of your home. Here are the steps to mount and install your security cameras:
Step 1: Determine the best locations for your cameras. Consider areas where there is high traffic, points of entry, and blind spots. Ensure that the cameras have a clear view of these areas.
Step 2: Use a pencil to mark the spots where you will mount the cameras. Measure the distance between the mounting holes on the back of the camera and mark corresponding spots on the wall.
Step 3: Drill holes into the marked spots on the wall using a power drill. Use a level to make sure the holes are perfectly horizontal or vertical, depending on the camera’s orientation.
Step 4: Insert wall anchors into the drilled holes. These anchors provide stability and ensure that the screws stay in place.
Step 5: Align the mounting holes on the camera with the wall anchors and secure the camera in place using screws that came with the camera. Ensure that the camera is tightly attached to the wall and doesn’t wobble.
Step 6: Connect the camera to a power source. If you are using wired cameras, run the cables through the walls to the nearest power outlet. For wireless cameras, simply plug them into a nearby power outlet.
Step 7: Configure the camera settings according to the manufacturer’s instructions. Connect the camera to your Wi-Fi network if applicable and adjust the viewing angle to optimize the camera’s field of view.
Step 8: Test the camera to ensure it’s functioning correctly. Monitor the footage and make any necessary adjustments to the camera’s position or settings.
Step 9: Repeat the above steps for each additional camera you want to install, making sure to position them to cover all desired areas.
By following these steps, you can successfully mount and install security cameras at your home. Always refer to the manufacturer’s instructions for specific installation guidelines and consult a professional if needed.
FAQ,
What are the benefits of installing security cameras at home?
Installing security cameras at home can provide several benefits. Firstly, they act as a deterrent and can prevent burglaries and other criminal activities. Secondly, they provide evidence in case of any crime or incident, which can be helpful for the police investigation and insurance claims. Additionally, security cameras allow you to monitor your home remotely and keep an eye on your property while you’re away.
What are the different types of security cameras available for home installation?
There are various types of security cameras available for home installation. Some common types include dome cameras, bullet cameras, and wireless cameras. Dome cameras have a dome-shaped design and provide wide coverage. Bullet cameras are long and cylindrical, making them suitable for outdoor use. Wireless cameras don’t require any wires for connection and can be easily installed and moved around. Other types include PTZ cameras, which can pan, tilt, and zoom, and hidden cameras, which can be disguised as everyday objects.


