
Ensuring the safety and security of your home or workplace is of utmost importance. One effective way to achieve this peace of mind is by installing a Brinks security camera system. Brinks offers a wide range of high-quality security cameras that are easy to set up and provide excellent surveillance coverage.
Before starting the installation process, it is crucial to determine the best locations for your security cameras. Consider areas that are vulnerable to theft or intrusion, such as entrances, driveways, and backyards. Additionally, ensure that the cameras have a clear line of sight and are protected from harsh weather conditions.
Once you have decided on the locations, it is time to begin the installation process. Start by gathering all the necessary tools and equipment, including the Brinks security camera system, a power drill, cables, and mounting brackets. Follow the step-by-step instructions provided with your specific camera model to ensure a smooth installation process.
When installing the Brinks security camera, it is essential to pay attention to the wiring and connection process. Make sure to securely connect the camera to the power source and any relevant network or recording devices. Additionally, ensure that the camera is properly mounted, providing a stable and secure position for optimal surveillance coverage.
Once the installation is complete, test the camera to ensure it is functioning correctly. Adjust the camera angles and settings as needed to capture the desired surveillance areas. Familiarize yourself with the camera’s features, such as motion detection and night vision, to enhance the effectiveness of your security system.
With a Brinks security camera system installed, you can enjoy the peace of mind that comes from knowing your property is protected. Regularly maintain and monitor your security cameras to ensure they continue to operate at their full potential. Remember to follow any additional safety guidelines provided by Brinks to maximize the effectiveness and longevity of your security system.
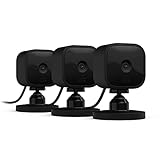
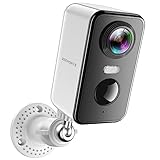
Overview of Brinks Security Cameras
Brinks Security Cameras are a popular choice for home and business owners looking to enhance their security measures. These cameras offer advanced features and technology to provide reliable surveillance and peace of mind.
Brinks Security Cameras are known for their high-quality video resolution, allowing users to capture clear and detailed images. Whether it’s day or night, these cameras offer excellent visibility and can record footage in both well-lit and low-light conditions.
One of the standout features of Brinks Security Cameras is their wide viewing angle. With a wide-angle lens, these cameras can cover a larger area, reducing the need for multiple cameras. This feature is especially useful for large properties or spaces that require extensive coverage.
Brinks Security Cameras also come equipped with motion detection technology. This means that the cameras can detect any movement within their range and instantly send notifications to the user’s smartphone or email. This feature allows users to stay informed about any potential threats, whether they are at home or away.

Installing a Brinks Security Camera is a straightforward process. These cameras can be mounted on walls, ceilings, or any other desired location. Most models come with everything you need to complete the installation, including mounting brackets and screws. Additionally, Brinks provides detailed instructions and online resources to assist users in setting up their cameras.
Overall, Brinks Security Cameras offer a reliable and efficient solution for enhancing security. With their advanced features, easy installation, and high-quality video resolution, these cameras provide comprehensive surveillance for both residential and commercial properties.
Choosing the Right Brinks Security Camera
When it comes to protecting your home or business, choosing the right security camera is essential. Brinks offers a range of high-quality security cameras to meet your specific needs and requirements. Here are some factors to consider when selecting a Brinks security camera:
1. Indoor or Outdoor Use
First, determine where you plan to install the security camera. Brinks offers both indoor and outdoor cameras, so you can choose the one that suits your intended location. Outdoor cameras are designed to withstand harsh weather conditions, while indoor cameras focus on capturing clear footage in controlled environments.
2. Resolution and Clarity
The resolution and clarity of the camera’s footage are important for identifying potential threats and capturing accurate details. Brinks security cameras are available in various resolutions, including high-definition options. Consider your specific requirements and the level of detail you need when choosing the camera.

Additionally, look for features like digital zoom and night vision, which can enhance the clarity and visibility of the footage, especially in low-light conditions.
3. Wired or Wireless Connection
Brinks offers both wired and wireless security cameras. Wired cameras require a physical connection to a power source and a DVR or monitor, while wireless cameras operate on Wi-Fi or cellular networks. Consider your installation preferences and the availability of power and network connections when making your decision.
4. Additional Features and Integration
Brinks security cameras often come with additional features, such as motion detection, two-way audio, and remote access through a mobile app. Consider these features and how they align with your specific requirements. If you already have a Brinks security system, you may also want to choose a camera that integrates seamlessly with your existing setup.
By considering these factors and evaluating your specific needs, you can choose the right Brinks security camera to help protect your property and provide peace of mind.
Essential Tools for Installation
Before you begin installing your Brinks security camera, it is important to have the right tools on hand. These tools will make the installation process easier and ensure that you can complete the job effectively. Here are some essential tools you will need:

1. Screwdriver: A screwdriver is necessary for attaching the camera mount to the wall or ceiling. Make sure you have a screwdriver that is the right size for the screws provided with your camera.
2. Drill: Depending on the type of surface you are mounting the camera on, you may need a drill to create holes for the screws. A drill can also be useful for running any necessary wiring for your camera system.
3. Level: To ensure that your camera is properly aligned, a level is essential. This will help you achieve a straight and balanced installation.
4. Stud Finder: If you are mounting your camera on a wall, a stud finder can help you locate the studs behind the wall. Attaching your camera to a stud will provide a more secure installation.
5. Power Drill: If your camera requires a power source, you may need a power drill to create a hole for the power cable to pass through. Make sure to use a drill bit that is the appropriate size for your cable.
6. Ethernet Crimping Tool: If your camera connects to your network using an Ethernet cable, you will need an Ethernet crimping tool to properly attach the cable’s connectors.
7. Ladder: If your camera is being installed at a high location such as on the exterior of a building, a ladder will be necessary to safely reach the installation area.
8. Cable Tester: If you are running any wiring for your camera system, a cable tester can be helpful to ensure that all connections are properly made and functioning.
Having these essential tools on hand will help ensure a smooth and successful installation of your Brinks security camera. Make sure to double-check that you have all the necessary tools before you begin installation.
Preparing for Installation
Before installing your Brinks security camera, it is important to properly prepare your home or business for the installation process. This will ensure that you have everything you need to complete the installation successfully. Here are some steps to follow:

1. Choose the ideal location: Select a suitable location for your security camera, keeping in mind the areas you want to monitor. Look for areas with a clear line of sight and good lighting conditions. It is also important to consider the power source and internet connectivity in that area.
2. Gather necessary tools: Make sure you have all the tools required for the installation, such as a ladder, drill, screws, and a screwdriver. Having these tools handy will help make the installation process easier and more efficient.
3. Check your internet connection: Ensure that you have a reliable internet connection in the area where you plan to install the camera. A stable connection is crucial for the camera to transmit the video footage and receive updates.
4. Verify power source availability: Make sure there is a power source nearby or install an outlet if needed. Surveillance cameras may require a constant power supply, so ensure that the location you have chosen has easy access to electricity.
5. Determine the mounting method: Choose the appropriate mounting method for your security camera, such as wall mounting or ceiling mounting. Refer to the camera’s instruction manual to understand the recommended mounting options and hardware requirements.

By following these steps and properly preparing for the installation, you can ensure a smooth and successful setup of your Brinks security camera. Taking the time to plan ahead will save you time and effort during the installation process.
Mounting the Brinks Security Camera
Mounting the Brinks security camera is an essential step to ensure optimal performance and coverage of your property. Follow the steps below for a successful installation:
- Choose the location: Before mounting the camera, select a strategic location that offers a clear view of the area you want to monitor. Make sure it is within range of your Wi-Fi network.
- Prepare the mounting surface: Clean the mounting surface and ensure it is sturdy enough to support the weight of the camera. Use a level to ensure it is installed straight.
- Attach the mounting bracket: Use the provided screws and anchors to securely attach the mounting bracket to the chosen location. Make sure it is tightly fastened to prevent any movement.
- Adjust the camera angle: Once the mounting bracket is in place, adjust the camera angle to face the desired area. Tighten any screws or brackets to hold the camera in position.
- Connect the camera: Carefully connect the camera to the power source and to your Wi-Fi network according to the manufacturer’s instructions. Make sure all connections are secure.
- Test the camera: Complete the installation by testing the camera’s functionality. Use your smartphone or computer to access the camera’s live feed and ensure the image is clear and the motion detection is working correctly.
Following these steps will help you mount your Brinks security camera with ease. Remember to consult the user manual for specific instructions regarding your model. Once properly mounted, you can enjoy enhanced security and peace of mind knowing that your property is being monitored.
Running Wires for Power and Video
When installing a Brinks security camera, it is important to plan and determine the best route for running wires to provide power and video connectivity. Here are some steps to guide you through the process:
- Start by identifying the optimal camera placement. Consider the area you want to monitor and choose a location that provides the best viewing angle.
- Measure the distance from the camera to the power source and the recording device, ensuring you have enough wire to reach both locations.
- If the camera is located outdoors, you may need to drill a hole through the wall to run the wires. Make sure to seal any openings to prevent water leakage.
- For a clean and professional look, consider running the wires through walls, ceilings, or conduit pipes. This will help hide the wires and protect them from potential damage.
- Use wire clips or staples to secure the wires along the chosen route. This will prevent them from hanging or getting tangled, ensuring a neat installation.
- Separate the power and video cables. Bundle the power cables together and the video cables together, using cable ties or Velcro straps. This will help keep them organized and minimize interference.
- Connect the power cables to a power supply or outlet, making sure to follow the manufacturer’s instructions. It is important to use the correct voltage and amperage to avoid any electrical issues.
- Connect the video cables to the recording device or monitor. Again, refer to the product manual for specific instructions on how to do this properly.
- Test the camera installation to ensure that both power and video signals are working correctly. Make any necessary adjustments or troubleshoot as needed.
By following these steps, you can effectively run wires for power and video while installing a Brinks security camera. Remember to prioritize safety and consult professional help if needed.

Connecting the Camera to a Monitor or DVR
Once you have successfully installed your Brinks security camera, the next step is to connect it to a monitor or a digital video recorder (DVR) to view and record the camera feed. Follow these steps to properly connect your camera:
- Locate the video output port on the camera. It is usually a BNC or RCA connector.
- Identify the corresponding video input port on your monitor or DVR. It should also be a BNC or RCA connector.
- Insert one end of the video cable into the camera’s video output port.
- Connect the other end of the video cable to the video input port on your monitor or DVR.
- If you are using a BNC connector, twist it clockwise to lock it in place. If you are using an RCA connector, simply push it in until it fits securely.
- Next, find the power input port on the camera. It is typically a DC barrel connector.
- Connect one end of the power cable to the camera’s power input port.
- Plug the other end of the power cable into a nearby power outlet.
- Ensure that the camera is receiving power by checking for any LED lights or indicators on the camera.
- Finally, turn on your monitor or DVR to view the camera feed. Follow the manufacturer’s instructions to access the camera’s live video and recording features.
By following these steps, you will be able to connect your Brinks security camera to a monitor or DVR easily. Make sure to double-check all connections and consult the user manuals of your specific camera and monitor or DVR for any additional instructions or troubleshooting tips.
Setting up the Brinks Security Camera System
The Brinks Security Camera System is an effective and reliable way to protect your home or business. Here are the steps to follow for setting up your Brinks Security Camera System:
1. Determine the placement of the cameras
Decide on the areas you want to monitor and choose the ideal locations to place your cameras. Consider areas such as entrances, garages, and windows that could be potential points of entry for intruders.
2. Mount the cameras
Using the provided mounting brackets, securely attach the cameras to the chosen locations. Ensure that the cameras are positioned to capture a wide-angle view and are protected from harsh weather conditions.
3. Connect the cameras to the DVR
Run the provided cables from each camera to the DVR. Make sure to connect each camera to the corresponding channel on the DVR. This will allow the DVR to record and store the footage captured by the cameras.
4. Power the cameras

Connect the power adapter to each camera and plug it into a nearby power outlet. Ensure that the cameras receive a stable power supply to function properly.
5. Set up the DVR
Connect the DVR to a monitor or TV using the provided HDMI or VGA cable. Follow the on-screen instructions to complete the initial setup process. This may involve selecting language preferences, setting the date and time, and creating a password.
6. Configure the camera settings
Access the DVR’s settings menu and adjust the camera settings as desired. This may include adjusting the resolution, enabling motion detection, configuring recording schedules, and setting up email notifications.
7. Test the system
Ensure that each camera is properly capturing and recording footage by checking the live feed on the connected monitor or TV. Test the motion detection functionality and verify that you receive email notifications when movement is detected.
8. Install the remote viewing software
Download and install the Brinks Security Camera System’s remote viewing software on your smartphone, tablet, or computer. Follow the provided instructions to set up remote access to your security camera system.
By following these steps, you can successfully set up your Brinks Security Camera System and enhance the security of your property.
Troubleshooting and Maintenance Tips
Once you have successfully installed your Brinks security camera, it is important to ensure that it is working properly to provide the utmost security for your home or business. Here are some troubleshooting and maintenance tips to help you keep your camera in optimal condition:
1. Check the Wi-Fi Connection
Make sure that your camera is connected to a stable Wi-Fi network. If you are experiencing connectivity issues, try moving the camera closer to the router or resetting your router. Ensure that your internet connection is strong and reliable, as a weak connection can affect the camera’s performance.
2. Verify Power Source
Ensure that your camera is receiving power from a reliable source. Check the power cable and make sure it is securely connected to the camera and the power outlet. If your camera is battery-powered, ensure that the battery is fully charged or replace it with a fresh one.
3. Clean the Lens
Over time, dust, dirt, and smudges can accumulate on the camera lens, affecting the image quality. Regularly clean the lens using a microfiber cloth or lens cleaning solution to ensure clear and sharp video footage.
4. Adjust Camera Position
If you are experiencing issues with the camera’s field of view or angle, try adjusting its position. Experiment with different angles and heights to find the optimal position for maximum coverage.
5. Update Firmware
Check for firmware updates for your Brinks security camera regularly. Manufacturers often release firmware updates to address bugs, improve performance, and add new features. Follow the manufacturer’s instructions to update the camera’s firmware.
6. Test the Camera’s Motion Detection
Ensure that the camera’s motion detection feature is working properly by conducting regular tests. Walk around the camera’s coverage area to trigger motion detection and verify that you receive timely notifications and video recordings.
By following these troubleshooting and maintenance tips, you can ensure the optimal performance of your Brinks security camera and enjoy the peace of mind that comes with enhanced security for your property.


