Having a home security camera system is essential for protecting your property and ensuring the safety of your loved ones. While there are many different types of security cameras available, a wired outdoor system offers reliable and high-quality surveillance. In this article, we will guide you through the installation process, providing you with the necessary steps and tips to set up your own wired outdoor home security camera system.
Step 1: Planning and Preparation
Before you begin the installation process, it is important to plan and prepare accordingly. Start by assessing the areas that require surveillance and determine the number of cameras you need. Make sure to choose a location for the main control unit that is secure and easily accessible. Additionally, you should verify if your chosen camera system requires additional power outlets or Ethernet cables for connectivity.
Step 2: Mounting the Cameras
Once you have decided on the placement of your cameras, it’s time to mount them. Begin by attaching the camera brackets or housings securely to the desired locations, ensuring that they are close to power outlets or Ethernet access points. Use screws and anchors to mount the brackets firmly onto the walls or ceilings. It is crucial to position the cameras in a way that offers the best view and coverage of the areas you want to monitor.

Step 3: Running Wires and Connectors
After mounting the cameras, you will need to run the necessary wires and connectors to connect them to the main control unit. This might involve drilling holes, passing wires through walls or ceilings, and using cable clips to keep everything organized and hidden. Make sure to measure the required lengths of cables carefully and leave some slack for future adjustments or maintenance. Connect each camera to the control unit using the appropriate connectors and cables, following the manufacturer’s instructions.
By following these steps, you can successfully install a wired outdoor home security camera system. Remember to test each camera after installation and adjust the angles as needed to ensure optimal performance. With your new surveillance system in place, you can enjoy the peace of mind that comes with knowing that your home is protected.
Choosing the right outdoor home security camera system
When it comes to protecting your home, installing an outdoor security camera system is an important investment. However, choosing the right camera system can seem overwhelming with all the options available on the market. Here are a few factors to consider when selecting the perfect system for your needs:
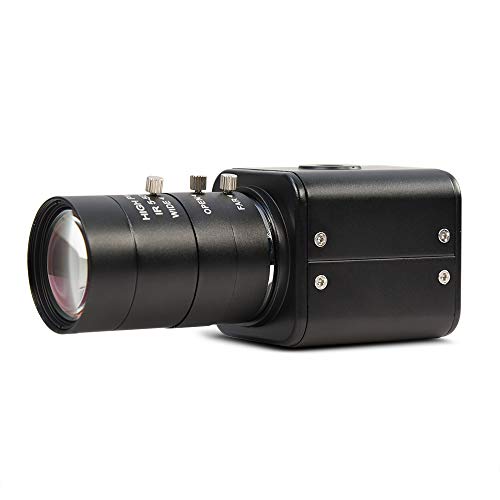
1. Outdoor-rated cameras with weatherproofing
Since the cameras will be installed outside, it is crucial to choose cameras that are specifically designed for outdoor use and can withstand different weather conditions. Look for cameras with an IP rating indicating their weather resistance.

2. Resolution and image quality
The resolution of the cameras determines the clarity of the footage. Higher resolution cameras provide more detailed images, making it easier to identify faces or other important details. Consider cameras with at least 1080p resolution for optimal image quality.
3. Night vision capabilities
Having night vision capabilities is essential for round-the-clock surveillance. Look for cameras with infrared LEDs that can illuminate the area in low light or complete darkness. The range of the night vision should also be taken into consideration.
4. Wide viewing angle
Ensure that the cameras have a wide viewing angle to cover a larger area. A wider angle allows you to monitor more of your property with fewer cameras. Look for cameras with a viewing angle of at least 100 degrees for comprehensive coverage.
5. Motion detection and alerts
Choose a system that includes motion detection technology. This feature allows the cameras to detect any movement and send alerts to your phone or email. It ensures that you are immediately aware of any suspicious activity around your home.
6. Remote viewing and accessibility
Consider a camera system that allows for remote viewing through a mobile app or web browser. This feature enables you to monitor your property from anywhere at any time, giving you peace of mind even when you are not at home.

By considering these factors, you can select an outdoor home security camera system that meets your specific needs and provides you with the best level of protection for your home and family.
Preparing the installation site for the wired outdoor home security camera system
Before installing your wired outdoor home security camera system, it is important to properly prepare the installation site to ensure optimal functionality and coverage. Here are some steps to help you get started:
- Identify the areas you want to monitor: Take a walk around your property and identify the key areas that require surveillance. This could include entry points, driveways, and vulnerable areas.
- Determine camera placement: Once you have identified the areas for surveillance, determine the most suitable locations for mounting the cameras. Consider factors such as visibility, coverage angle, and potential obstructions.
- Check for power availability: Ensure that there is a nearby power source for each camera location. If not, plan for a power supply solution, such as electrical wiring or the use of power-over-Ethernet (PoE) technology.
- Assess the accessibility of your site: Consider the accessibility of the installation site and ensure that the camera cables can be easily routed from the cameras to the recording device without any obstacles or interference. This may involve drilling holes or using conduits.
- Ensure proper positioning: Position the cameras at the appropriate height and angle to capture the desired field of view. Aim to install the cameras at a height that is out of reach and provides a clear view of the area.
- Prepare the mounting surface: Clean and prepare the mounting surface to ensure a secure installation. Remove any debris or loose materials that could interfere with the camera’s stability.
- Consider weatherproofing: If your cameras are not already weatherproof, make sure to weatherproof them or purchase weatherproof housing to protect them from the elements.
- Test the camera system: Before finalizing the installation, test the camera system to ensure that all cameras are properly connected and functioning correctly. This will help you identify any potential issues ahead of time.
By following these steps and preparing the installation site properly, you can ensure a successful installation of your wired outdoor home security camera system. This will help maximize the system’s effectiveness in protecting your property and providing valuable surveillance footage.
Installing the camera mounts and brackets
Before installing the cameras, you need to properly mount and secure the camera brackets and mounts. This will ensure that your cameras are positioned correctly and will stay in place even in harsh weather conditions.
1. Begin by selecting the desired location for each camera. This should be a strategic spot that provides maximum coverage of the area you wish to monitor.

2. Use a pencil or marker to mark the position of the camera bracket on the wall or surface where you will be mounting it. Make sure the marking is level and aligned with the area you want to monitor.
3. Drill holes in the marked spots using a drill and appropriate drill bit size for the mounting screws included with the camera system.
4. Insert wall anchors into the drilled holes. This will provide additional stability and support for the camera bracket.
5. Align the camera bracket with the drilled holes and secure it using the mounting screws provided with the camera system. Make sure the bracket is tightly secured to the wall or surface.
6. Once the camera brackets are securely mounted, attach the cameras to the brackets using the mounting screws provided. Make sure the cameras are properly aligned and tightened onto the brackets.

7. Adjust the position of the cameras as needed to ensure they are pointing in the desired direction and provide optimal coverage of the area.
8. Use a level to ensure that the cameras are mounted straight and level. This will prevent any distortion in the camera footage and ensure accurate monitoring.
9. Double-check the tightness of all screws and brackets to ensure that the cameras are securely mounted and will not move or shift over time.
10. Repeat the above steps for each camera in your wired outdoor home security camera system.
By properly installing the camera mounts and brackets, you will ensure that your wired outdoor home security camera system is reliable and provides effective surveillance of your property.

Running the cables for the wired outdoor home security camera system
Installing a wired outdoor home security camera system involves running the necessary cables to connect the cameras to the recording device. Here is a step-by-step guide on how to run the cables properly:
1. Plan the cable routing:
Before starting the installation process, carefully plan the cable routing to ensure optimal placement of your security cameras. Consider the shortest and most direct routes, taking into account any obstacles such as walls, fences, or other structures.
2. Gather the necessary tools and materials:
Make sure you have all the tools and materials you will need for running the cables, including a power drill, a fish tape or wire snake, cable clips, a ladder, and of course, the cables themselves.
3. Drill holes and run the cables:
Using the power drill, carefully drill holes through any walls or other obstacles in order to run the cables from the camera locations to the recording device. Be mindful of any electrical wiring or plumbing that may be present.
Once the holes are drilled, use the fish tape or wire snake to guide the cables through the walls or other tight spaces. Secure the cables using cable clips as necessary to prevent them from hanging loosely.

4. Connect the cables:
At the camera locations, connect the cables to the corresponding ports or terminals on the cameras. Ensure that the connections are secure to avoid any signal loss or interference.
At the recording device, connect the other end of the cables to the appropriate input ports. This may involve connecting the cables to a power supply as well, depending on the camera system.
5. Test the connections:
After running and connecting all the cables, it is crucial to test the connections to ensure that the cameras are properly transmitting video footage to the recording device. Check each camera’s feed to verify that the cables are functioning as intended.
By following these steps, you can successfully run the cables for a wired outdoor home security camera system. Remember to prioritize safety and consult professional help if needed.
Connecting the cameras to the central monitoring unit
Once you have properly installed and positioned your wired outdoor home security cameras, the next step is to connect them to the central monitoring unit. This unit will allow you to view and monitor the camera feeds from a single location.
Step 1: Determine the camera connections
Check the documentation or user manual that came with your security camera system to identify the type of connections the cameras use. Common connection types include BNC, RCA, or Ethernet cables.
If your cameras use BNC or RCA connections, you will need to run coaxial cables from each camera to the central monitoring unit. For Ethernet connections, you will need to connect Ethernet cables from each camera to a network switch or router that is connected to the monitoring unit.
Step 2: Run the cables
Using appropriate cables for your camera connections, carefully run the cables from each camera to the central monitoring unit. Make sure to secure the cables to prevent them from being damaged or disconnected.
For outdoor installations, you may need to protect the cables with conduit or use weatherproof cables designed for outdoor use. Be sure to follow proper electrical and safety guidelines when installing the cables.
Step 3: Connect the cables
Once the cables are in place, connect each camera’s cable to the corresponding input port on the central monitoring unit. Double-check that each connection is secure to ensure a reliable connection.
If you are using BNC or RCA connections, plug the cables into the appropriate input ports on the unit. For Ethernet connections, connect the cables to the network switch or router.
Note: Some security camera systems may require additional configurations or settings to enable proper communication between the cameras and the monitoring unit. Consult the user manual or manufacturer’s instructions for any specific requirements.
Finally, plug in the power cables for each camera into a nearby power outlet or use a power supply box if provided with your system. This will provide the necessary power to the cameras for operation.
With the cameras properly connected to the central monitoring unit, you can now proceed to set up the system, configure any necessary settings, and start monitoring your outdoor areas for enhanced security and peace of mind.
Configuring the settings for the wired outdoor home security camera system
Once you have installed your wired outdoor home security camera system, you will need to configure its settings in order to ensure optimal performance. Follow the steps below to configure the settings for your system:
- Access the camera’s web interface: To configure the settings for your security camera, you will need to access its web interface. This can typically be done by entering the camera’s IP address into a web browser on a connected device.
- Login to the camera’s web interface: Once you have accessed the camera’s web interface, you will need to login using the default username and password provided by the manufacturer. It is highly recommended to change the default credentials for security reasons.
- Set the date and time: It is important to ensure that the date and time settings on your camera are accurate. This information is often used for recording purposes and can be useful for reviewing footage later.
- Configure the network settings: Depending on your network setup, you may need to configure the network settings for your camera. This includes setting a static IP address, subnet mask, gateway, and DNS server addresses. Consult the camera’s user manual for specific instructions on how to configure these settings.
- Adjust video quality and resolution: Most cameras allow you to adjust the video quality and resolution settings. Higher-quality settings will result in better image clarity but may require more storage space. Find the balance that works best for your needs.
- Enable motion detection: If your camera supports motion detection, it is recommended to enable this feature. Motion detection can trigger the camera to start recording when it detects movement, helping to conserve storage space and make it easier to review important events.
- Set up remote access: To be able to monitor your camera remotely, you will need to set up remote access. This typically involves enabling port forwarding on your router and configuring the necessary settings on the camera. Consult the camera’s user manual for detailed instructions on how to set up remote access.
- Configure other settings: Depending on the specific camera model, there may be additional settings that you can configure, such as adjusting the field of view, setting up scheduled recording, or configuring notifications. Explore the camera’s web interface to access and configure these additional settings as needed.
By following these steps and configuring the settings for your wired outdoor home security camera system, you can ensure that it is optimized for your specific needs and provides reliable surveillance for your property.
Testing the wired outdoor home security camera system
Once you have completed the installation of your wired outdoor home security camera system, it is important to thoroughly test the system to ensure it is functioning properly. Proper testing will give you peace of mind knowing that your home is properly monitored and protected.
1. Camera positioning and angle
Before starting the testing process, make sure that all the cameras are positioned correctly and at the desired angles. Ensure that they cover the intended areas and have a clear line of sight. Adjust the camera positioning if necessary.
Note: Proper camera positioning is crucial for capturing clear footage and maximizing the effectiveness of your security system.
2. Camera connectivity
Check the connectivity of each camera by accessing the camera feed from your smartphone, computer, or dedicated monitor. Ensure that each camera is displaying the live feed properly and that there are no connectivity issues.
Tip: Take a few moments to verify that the camera feed is accessible from both your local network and remotely.
3. Motion detection and recording
Test the motion detection feature of your cameras by walking around the areas being monitored. Verify that the cameras detect motion and begin recording when movement is detected.
Note: Adjust the sensitivity settings of the motion detection feature if necessary to avoid false alarms or ensure no movement goes unnoticed.
4. Night vision
Test the night vision capabilities of your cameras by checking the quality of the footage in low light or pitch-black conditions. Ensure that the night vision mode is activated and that the captured images or videos are clear and detailed.
5. Remote monitoring
Test the remote monitoring feature of your system by accessing the camera feed and recorded footage from a different location, such as your workplace or a friend’s house. Verify that you can easily log in to the system and view the live feed or recorded footage remotely.
Tip: Make sure your home network allows for remote access and consider setting up secure access to protect your footage from unauthorized access.
By following these testing procedures, you can ensure that your wired outdoor home security camera system is functioning optimally and providing the necessary protection for your property.
Maintaining and troubleshooting the wired outdoor home security camera system
Once you have installed your wired outdoor home security camera system, it is important to regularly maintain and troubleshoot it to ensure effective and continuous surveillance of your property. Here are some tips to help you with this:
- Regularly clean the cameras: Dirt, dust, and debris can accumulate on the camera lenses, affecting the quality of the footage. Use a soft, dry cloth to gently clean the lenses and remove any dirt or smudges.
- Check the camera cables: Inspect the cables that connect your cameras to the recording device or monitor. Look for any signs of damage, such as fraying or cuts. If you notice any issues, replace the cables as soon as possible to maintain a strong connection.
- Ensure proper power supply: Make sure that each camera is receiving a steady power supply. Check the connected power cables and confirm that they are securely plugged in. If a camera is not receiving power, troubleshoot the issue by checking the power source and any related switches or breakers.
- Monitor camera angles and views: Over time, the camera angle or view may shift due to weather conditions or accidental movements. Regularly check the camera angles and adjust them if necessary to ensure optimal coverage of your property.
- Test the recording system: Periodically test the recording system to ensure that it is capturing and storing footage correctly. Review the recorded footage to confirm its clarity and quality. If any issues arise, consult the system’s manual or contact the manufacturer for troubleshooting assistance.
- Check for firmware updates: Manufacturers often release firmware updates for security cameras to fix bugs and improve functionality. Check the manufacturer’s website regularly for any available updates and follow their instructions to install them.
- Secure your system: Regularly update passwords, enable two-factor authentication, and keep your system’s firmware up to date to ensure maximum security against potential hacks or unauthorized access.
- Be aware of weather conditions: Extreme weather conditions, such as heavy rain or temperature fluctuations, can impact the performance of outdoor cameras. Monitor the system closely during such conditions and take necessary precautions to protect your cameras from damage.
- Keep a log: Maintain a log of any maintenance or troubleshooting tasks performed on the system. This will help you track the history of your system and identify any recurring issues that require further attention.
By following these tips and performing regular maintenance and troubleshooting tasks, you can ensure that your wired outdoor home security camera system operates effectively and provides reliable surveillance for your property.
Enhancing the security of your wired outdoor home security camera system
Installing a wired outdoor home security camera system is a great first step in protecting your property. However, there are a few additional measures you can take to enhance the security of your system and ensure greater peace of mind.
1. Place cameras strategically
When positioning your cameras, take into consideration the vulnerable areas of your property such as entrances, walkways, and windows. Ensure that the cameras have a clear line of sight and cover all angles. Additionally, consider using a combination of wide-angle and narrow-angle cameras to capture a larger field of view.
2. Install motion-activated floodlights
Incorporating motion-activated floodlights into your wired outdoor camera system can act as a deterrent to potential intruders. When the camera detects motion, the floodlights will activate, illuminating the area and capturing clearer footage. This will enhance the visibility of any suspicious activity and provide better surveillance.
3. Secure the camera wiring
Make sure to secure the wiring of your camera system to prevent tampering or sabotage. Conceal the wires within protected conduits or use wall-mount covers to prevent easy access. This will reduce the risk of the wires being cut, disconnected or damaged.
Remember to periodically check the wiring and connections to ensure everything is intact and functioning properly.
4. Enable remote monitoring and alerts
Many wired outdoor camera systems have the option for remote monitoring and alerts. By enabling this feature, you can receive real-time notifications on your smartphone or computer whenever motion is detected or an event occurs. This allows you to immediately access the live feed and take necessary action if required.
5. Consider additional security measures
While a wired outdoor camera system provides valuable surveillance, it’s important to consider additional security measures such as installing robust locks, reinforcing doors and windows, and having an alarm system in place. These additional measures work in conjunction with your camera system to provide a comprehensive security solution.
In conclusion, by strategically placing your cameras, incorporating motion-activated floodlights, securing the wiring, enabling remote monitoring, and considering additional security measures, you can enhance the overall security of your wired outdoor home security camera system. By taking these steps, you will have a more robust and effective surveillance system to protect your property.
FAQ,
What is a wired outdoor home security camera system?
A wired outdoor home security camera system is a surveillance system that uses wired connections to transmit video footage from the cameras to a central recording device. These systems are typically more reliable and offer higher quality video compared to wireless systems.
What are the advantages of installing a wired outdoor home security camera system?
There are several advantages to installing a wired outdoor home security camera system. Firstly, wired systems offer a more stable and reliable connection compared to wireless systems, ensuring that you have continuous access to live video feeds. Additionally, wired systems typically provide higher quality video footage due to the absence of signal interference. Lastly, wired systems are generally more secure as they are not susceptible to hacking or signal jamming.
How can I install a wired outdoor home security camera system?
Installing a wired outdoor home security camera system involves several steps. Firstly, you need to plan the camera placements and determine the optimal locations for capturing the desired areas. Next, you will need to run the video cables from the cameras to the central recording device, making sure to conceal the wires as much as possible. Then, you will need to mount the cameras securely in their designated locations. Finally, you will need to connect the cameras to the recording device and configure the system settings. It’s recommended to refer to the specific instructions provided by the manufacturer of your camera system for detailed installation steps.
Can I install a wired outdoor home security camera system myself?
Yes, it is possible to install a wired outdoor home security camera system yourself if you have some basic DIY skills. However, it is important to note that the installation process can be quite involved and may require running cables through walls or ceilings. It’s recommended to carefully read the instructions provided by the manufacturer of your camera system and consider seeking professional help if you are unsure about any aspect of the installation.