
If you are looking to enhance the security of your home or office, installing security cameras can be a great solution. Aldi offers a wide range of affordable and reliable security cameras that are easy to install and use. In this guide, we will walk you through the step-by-step process of installing Aldi security cameras, ensuring that you can protect your property and loved ones.
Step 1: Planning and Preparation
Before you begin the installation process, it’s essential to plan and prepare. Determine the areas of your property that require surveillance and ensure that you have the necessary equipment. Aldi security cameras usually come with all the required parts, including cameras, cables, and power supplies. Ensure that you have a suitable location for mounting the cameras and access to power outlets.
Note: It’s crucial to familiarize yourself with the user manual that comes with your Aldi security camera. It will provide specific instructions and guidelines for your particular model.
Benefits of Installing Aldi Security Cameras
Installing Aldi security cameras in your home or business can provide numerous benefits. Here are some of the advantages you can enjoy:

1. Deter Crime: The presence of security cameras can deter criminals from targeting your property. Knowing that they are being recorded increases the risk of getting caught, making your property less attractive to thieves and vandals.
2. Evidence Collection: In the unfortunate event of a break-in or any other criminal activity, Aldi security cameras can provide important evidence. The footage captured can be used by law enforcement agencies to identify suspects and can even be admissible in court.
3. Remote Monitoring: Aldi security cameras often come with remote access capabilities, allowing you to monitor your property from anywhere using your smartphone or computer. This feature gives you peace of mind knowing that you can check on your property even when you are away.
4. Employee Surveillance: For business owners, security cameras can help monitor employees and ensure workplace safety. The presence of cameras discourages employee misconduct and promotes a safer work environment.
5. Insurance Benefits: Installing Aldi security cameras may even qualify you for insurance discounts. Many insurance companies offer lower premiums to properties equipped with surveillance systems as they are considered less risky.

6. Remote Alerts: Modern Aldi security cameras can send notifications to your smartphone in case of any suspicious activity or motion detection. This instant alert system allows you to take immediate action, such as contacting the authorities or checking the live feed to assess the situation.
7. Peace of Mind: One of the biggest benefits of installing Aldi security cameras is the peace of mind they provide. Knowing that your property is being monitored and protected can reduce stress and make you feel more secure in your own home or business.
Overall, investing in Aldi security cameras offers a range of advantages, from deterring crime to providing evidence and peace of mind. Consider installing a surveillance system to enhance the security of your property today.
Choosing the Right Aldi Security Camera
When it comes to installing security cameras, Aldi offers a range of options to meet your needs. However, with so many choices available, it can be difficult to determine which camera is right for you. In this section, we will explore some factors to consider in order to choose the right Aldi security camera for your home or business.
1. Camera Type: Aldi offers both wired and wireless security cameras. Wired cameras are more reliable and provide a stable connection, but they require professional installation. Wireless cameras are easier to install but may experience signal interference.

2. Resolution: The resolution of the camera determines the image quality. Aldi offers cameras with different resolutions, from standard definition to high definition. Higher resolution cameras provide clearer and more detailed images.
3. Field of View: Consider the field of view you need for your security camera. A wider field of view will cover more area, but may sacrifice image quality. Narrower fields of view provide more detailed images, but cover a smaller area.
4. Night Vision: If you need your security camera to capture footage in low light or at night, look for a camera with built-in night vision capabilities. Aldi offers cameras with infrared LEDs for clear night vision.
5. Storage Options: Different Aldi security cameras offer different storage options. Some cameras come with built-in storage, while others require external storage devices such as SD cards or cloud storage. Consider your storage needs when choosing a camera.
6. Motion Detection: Look for cameras that offer motion detection capabilities. These cameras will only start recording when motion is detected, saving storage space and making it easier to review important events.

| Camera Type | Resolution | Field of View | Night Vision | Storage Options | Motion Detection |
|---|---|---|---|---|---|
| Wired | High definition | Wide | Yes | Built-in | Yes |
| Wireless | Standard definition | Narrow | No | External (SD card, cloud) | Yes |
Preparing for Installation
Before you start installing your Aldi security cameras, it is important to properly prepare for the installation process. The following steps will help ensure a smooth and successful installation:
1. Determine the optimal camera locations: Take some time to assess your property and identify the best locations for your security cameras. Consider areas that require maximum coverage, such as entry points, driveways, and high-value assets.
2. Check for power sources: Ensure that there are nearby power sources available for each camera. This is important as most Aldi security cameras require a direct power connection.
3. Measure camera range: Determine the range of each camera and make sure it is sufficient for your needs. This will help you choose the right camera models for different areas of your property.
4. Check network connectivity: If you are installing IP cameras, ensure that you have a strong and reliable network connection in the areas where you plan to install them. This will ensure seamless remote access and monitoring.

5. Gather necessary tools: Before you begin the installation, gather all the necessary tools such as a ladder, drill, screws, and cables. Having these tools readily available will help streamline the process.
6. Read the user manual: Familiarize yourself with the user manual of your Aldi security cameras. This will provide essential information on the installation process, specifications, and troubleshooting steps.
7. Plan cable routing: Plan how the cables will be routed from the cameras to the recording device or monitor. This will help prevent any cable clutter and ensure a neat installation.
8. Test the cameras: Before mounting the cameras, it is recommended to test them by connecting them temporarily. This will allow you to verify the camera functionality and make any necessary adjustments before the final installation.
9. Secure the cameras: Once everything is in order, mount the cameras securely in their designated locations. Ensure that they are properly aligned and pointed in the desired direction.
By following these steps, you will be well-prepared to install your Aldi security cameras and maximize their effectiveness in protecting your property.
Mounting the Aldi Security Camera
Mounting the Aldi Security Camera is an essential step in ensuring effective surveillance of your property. Before you begin the installation process, make sure you have all the necessary tools, including a power drill, screws, and a level.
1. Choose the Location
Start by selecting the optimal location for your Aldi Security Camera. Look for areas where the camera will have a clear view of the area you want to monitor. Make sure the location is within range of your Wi-Fi network and has a power source nearby.
2. Prepare the Mounting Surface
Clean the mounting surface to ensure a secure installation. Remove any dirt, dust, or debris that may hinder the adherence of the camera mount. Use a level to ensure the mounting surface is straight and leveled.
3. Mount the Camera
Using a power drill, create pilot holes in the mounting surface according to the dimensions specified in the Aldi Security Camera’s installation manual. Align the camera mount with the pilot holes and secure it into place using screws. Make sure the camera is securely attached to the mount.

4. Adjust the Camera Position
Once the camera is mounted, you can adjust its position to achieve the desired angle and field of view. Most Aldi Security Cameras allow for rotation and tilt adjustments. Use a level to ensure the camera is straight.
Note: It is recommended to test the camera before finalizing the installation to ensure it is capturing the desired area and functioning properly.
By following these steps, you can confidently mount your Aldi Security Camera and enhance the security of your property.
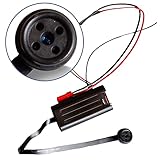
Connecting the Aldi Security Camera to Power
Before you can start using your Aldi security camera, you need to connect it to a power source. Follow these steps to ensure a successful power connection:
Step 1: Gather the Necessary Equipment
Before you begin, make sure you have all the required equipment:
| 1 | Aldi security camera |
| 2 | Power adapter |
| 3 | Power cable |
| 4 | Electrical outlet |
Step 2: Mount the Camera
Choose a suitable location to mount your Aldi security camera. Ensure that the camera is positioned at the desired angle and offers a clear view of the area you want to monitor.
Step 3: Connect the Power Adapter
Connect the power adapter to the camera’s power input port. Make sure the power adapter is securely plugged in.
Step 4: Connect the Power Cable
Connect one end of the power cable to the power adapter and the other end to a nearby electrical outlet. Ensure a secure connection on both ends.
Step 5: Power On the Camera
After completing all the connections, turn on the power to the electrical outlet. Wait for the camera to power up, which may take a few seconds or minutes depending on the model.
Once the camera is powered on, you can proceed with the setup and configuration process, which may vary depending on the specific Aldi security camera model you have purchased. Refer to the camera’s user manual for further instructions on setting up the camera for use.
Now that your Aldi security camera is properly connected to power, you can enjoy the peace of mind that comes with having a surveillance system in place to protect your property.
Setting Up the Aldi Security Camera System
Installing a security camera system from Aldi is a straightforward process. By following these simple steps, you can have your cameras up and running in no time.
Step 1: Unpacking the Box
Start by unpacking the box containing your Aldi security camera system. Ensure that all the components are included and in good condition. The typical components of the system include:
| Component | Quantity |
|---|---|
| Cameras | 4 |
| Power Adapter | 1 |
| Camera Mounts | 4 |
| Ethernet Cable | 1 |
| Mouse | 1 |
| Manual and Software CD | 1 |
Step 2: Connecting the Cameras
Next, connect the cameras to the power source using the power adapter included in the package. Position the cameras in the desired locations and make sure they are securely mounted using the camera mounts.
Step 3: Connecting the Recorder
Connect the Aldi security camera system recorder to a power source and connect it to your network using the provided Ethernet cable. Ensure that the recorder is positioned in a secure place.
Step 4: Configuring the System
Turn on the Aldi security camera system and connect the mouse to the recorder. Use the mouse to navigate through the system settings and configure the cameras according to your preferences. Adjust parameters such as motion sensitivity, recording schedules, and video resolution.
Step 5: Viewing the Camera Feeds
After configuring the system, you can view the camera feeds on your computer or mobile device. Connect to the same network as the Aldi security camera system and use the provided software CD to install the necessary software for viewing the camera feeds. Follow the instructions in the manual to set up remote viewing.
With these steps, you can easily set up your Aldi security camera system and ensure the safety and security of your property.
Configuring Mobile Access for Aldi Security Cameras
If you want to access your Aldi security cameras remotely from your mobile device, you’ll need to configure the mobile access settings for your cameras. Here’s how:
1. Open the Aldi security camera app on your mobile device.
2. Tap on the settings icon in the top right corner of the app.
3. Select the “Mobile Access” option from the settings menu.
4. Enable mobile access by toggling the switch to the ON position.
5. You will be prompted to create a username and password for mobile access. Enter a strong and unique combination of characters.
6. Once you have set up your username and password, tap on the “Save” button to confirm your settings.
7. Now, you can exit the settings menu and go back to the app’s main screen.
8. To access your Aldi security cameras from your mobile device, launch the app and enter your username and password.
9. Tap on the “Login” button to access the live feed from your cameras.
10. You should now be able to view and control your Aldi security cameras from your mobile device.
Note: Please ensure that your mobile device has a stable internet connection for optimal performance.
| Term | Description |
|---|---|
| Aldi security camera app | An application developed by Aldi for accessing and managing their security cameras. |
| Mobile Access | An option in the app’s settings that allows users to access their security cameras remotely from their mobile devices. |
| Username and password | A unique combination of characters that provides secure access to the Aldi security cameras. |
| Live feed | The real-time video stream from the security cameras that can be viewed on the mobile device. |
Troubleshooting Aldi Security Camera Installation
If you are having trouble installing your Aldi security cameras, there are a few common issues that you can troubleshoot to help get your system up and running smoothly.
1. Poor Connection Quality
If you are experiencing a poor connection quality between your security cameras and the monitor or recording device, there are a few things you can check:
– Check the distance between the cameras and the monitor. Make sure that the cameras are within the recommended range for optimal signal strength. If the cameras are too far away, you may need to move them closer or consider using a signal booster or range extender.
– Check for any physical or wireless interference. Interference from other electronic devices or large obstructions can weaken the signal strength. Try moving any potential sources of interference away from the cameras or consider using shielded cables to minimize interferences.
2. Camera Not Powering On
If your camera is not powering on or is experiencing intermittent power issues, try these troubleshooting steps:
– Check the power source and connections. Ensure that the camera is properly plugged into a power outlet and that the power cable is securely connected to both the camera and the power source. Check for any loose connections or damaged cables.
– Verify the power supply. Make sure that the power supply unit is functioning correctly. Try connecting the camera to a different power supply to see if the issue persists. If it does, you may need to replace the power supply unit.
3. Camera Image Quality
If you are experiencing poor image quality from your Aldi security cameras, consider the following:
– Adjust the camera focus and position. Make sure that the cameras are properly focused and positioned to capture the desired area. Refocusing or repositioning the cameras may improve the image quality.
– Check the camera resolution settings. Ensure that the camera resolution settings are appropriately configured. A higher resolution setting will provide a clearer image, but may require more storage space.
If you have tried these troubleshooting steps and are still experiencing issues with your Aldi security camera installation, it may be helpful to consult the user manual or contact Aldi customer support for further assistance.
FAQ,
What are the steps to install Aldi security cameras?
Installing Aldi security cameras involves several steps. First, mount the camera in the desired location using the included mounting hardware. Then, connect the camera to a power source using the provided power adapter. Next, connect the camera to your home’s Wi-Fi network by following the instructions in the user manual. Finally, set up the camera using the Aldi security camera app on your smartphone to customize settings and view live footage.
Can Aldi security cameras be installed outdoors?
Yes, Aldi security cameras can be installed outdoors. However, it is essential to choose a model that is specifically designed for outdoor use and can withstand various weather conditions. These outdoor cameras are usually weatherproof and have features such as night vision and motion detection to enhance surveillance capabilities. It is also important to install the cameras in a location that provides a clear view of the area and protects them from vandalism or theft.


