
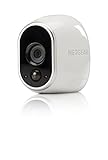
Arlo wire-free smart home security cameras provide a convenient and reliable way to protect your home and loved ones. Whether you’re looking to monitor your front door, back yard, or even inside your house, Arlo cameras offer a range of features that make installation and setup a breeze.
Before you begin, it’s important to familiarize yourself with the components of the Arlo system. Each camera comes with a base station that connects to your home’s Wi-Fi network, allowing you to livestream and record footage from anywhere using the Arlo mobile app. The wire-free design means you can place the cameras wherever you need them without worrying about cords or outlets.
To start the installation process, first choose the best location for your Arlo cameras. Consider areas of your home that are vulnerable to break-ins or that you simply want to keep an eye on. Once you’ve selected the ideal spots, mount the cameras using the included magnetic mounting brackets or screws. The cameras are weatherproof, so you can place them indoors or outdoors without worry.
Next, connect the base station to your Wi-Fi network and ensure it’s positioned within range of all your cameras. Follow the instructions provided with your Arlo system to sync the cameras with the base station. Once everything is connected, you’ll be ready to customize your camera settings and start monitoring your home.
In conclusion, installing Arlo wire-free smart home security cameras is a straightforward process that can be easily completed by anyone. The convenience and flexibility of these cameras make them a popular choice for homeowners and renters alike. By following the steps outlined above, you’ll have a reliable and efficient security system up and running in no time.

Planning the installation
Before you start installing your Arlo wire-free smart home security cameras, it is important to plan out the placement and positioning of each camera. Consider the following factors:
- Camera coverage: Determine the areas you want to monitor and make sure each camera has a clear line of sight to cover those spots.
- Camera placement: Choose the optimal locations for each camera, such as high up on a wall or ceiling, to maximize the field of view and minimize the risk of tampering.
- Power source: Arlo wire-free cameras are battery-powered, so ensure that they are installed within reach of their respective base station to maintain a stable wireless connection and provide easy access for battery charging and replacement.
- Network coverage: Check the Wi-Fi signal strength in the areas where you plan to install the cameras to ensure a reliable connection to the Arlo base station.
- Weather resistance: Consider whether the cameras need to withstand outdoor elements. Arlo wire-free cameras are designed for both indoor and outdoor use, but you may want to consider additional weatherproofing measures for optimal performance.
- Camera angle: Adjust the camera angle to capture the desired view, taking into account any potential obstructions like trees or walls that may interfere with the field of view.
By carefully planning the installation of your Arlo wire-free smart home security cameras, you can ensure optimal coverage and effectiveness of your security system.
Choosing the best location
When installing your Arlo wire-free smart home security cameras, it is important to choose the best location for optimal performance and coverage. Here are some factors to consider:
1. Range and connectivity
The first thing to consider is the range and connectivity of the camera to your base station. Ensure that the camera is within the recommended range specified by the manufacturer and that there are no obstructions such as walls or other objects that may interfere with the signal.
2. Field of view
Consider the field of view of the camera and the area you want to monitor. Make sure the camera is positioned in a way that covers the desired area effectively. You may need to adjust the angle and position of the camera to achieve the best coverage.

Additionally, consider any blind spots or areas that may be obstructed by objects such as trees or bushes. It is important to have a clear line of sight to the desired area to ensure accurate monitoring.
It is also worth noting that some Arlo cameras have a wide-angle lens which can capture a larger field of view, making them suitable for monitoring larger areas.
3. Weatherproofing
Arlo wire-free cameras are designed for both indoor and outdoor use. However, when choosing the location, consider the weather conditions in your area. Ensure that the camera is placed in a location that is protected from direct sunlight, rain, snow, or extreme temperatures, as these factors can affect the performance and longevity of the camera.
Using the above factors as a guideline, carefully assess the areas you wish to monitor and choose the best locations for your Arlo wire-free smart home security cameras. By selecting the optimal locations, you can ensure that your cameras perform at their best and provide you with the desired security and peace of mind.
Examining the area
Before installing your Arlo wire-free smart home security cameras, it’s important to thoroughly examine the area where you plan to place them. This will help you determine the best locations for optimal coverage and the most effective angles for capturing activity.

Start by identifying the specific areas you want to monitor, such as entry points, windows, or high-value items. Consider the potential blind spots and areas where the cameras can be easily tampered with or obstructed.
Look for potential sources of interference, such as bright lights or reflective surfaces, that may affect the camera’s performance. Additionally, take note of any weather conditions that might impact the camera’s visibility or durability, such as heavy rain or extreme temperatures.
When examining the area, take into account the camera’s field of view and range. Arlo cameras offer wide-angle views, but it’s important to ensure that the placement allows for optimal coverage of the desired areas. Consider the distance between the camera and the objects you want to monitor to ensure clear visibility.
If possible, test the camera’s positioning by temporarily placing it in different locations and checking the video feed. This will allow you to make any necessary adjustments before permanently installing the cameras.
By thoroughly examining the area and planning the camera placements in advance, you can maximize the effectiveness of your Arlo wire-free smart home security cameras and enhance the overall security of your property.

Gathering the necessary tools
Before you begin the installation process for your Arlo wire-free smart home security cameras, it is important to gather all the necessary tools to ensure a smooth and successful setup. Here is a list of tools you will need:
1. Phillips-head screwdriver
A Phillips-head screwdriver will be required to securely attach the camera mount to the desired location. Make sure you have a screwdriver that fits the screws provided with the camera.
2. Drill (optional)
If you plan to mount your Arlo cameras on a hard surface, such as concrete or brick, a drill may be necessary to create pilot holes before attaching the camera mount. This will help prevent any damage to the surface during installation.
By ensuring you have these tools on hand before starting the installation process, you can avoid any delays or interruptions and complete the setup smoothly.
Checking the package contents
Before proceeding with the installation of your Arlo wire-free smart home security cameras, it is essential to ensure that you have received all the necessary items in the package. This will allow you to set up the cameras correctly and make the most of their features for ensuring the safety of your home.
Package Contents:
| Item | Quantity |
|---|---|
| Arlo wire-free smart home security cameras | Varies, depending on the package |
| Camera mounts and magnetic wall mounts | Varies, depending on the package |
| Batteries | Varies, depending on the package |
| Base station | 1 |
| Ethernet cable | 1 |
| Power adapter | 1 |
| Quick start guide | 1 |
Please ensure that all the items mentioned above are present in the package. If any item is missing, please contact the Arlo customer support for assistance. Having all the necessary components will make the installation process smoother and more successful.
Preparing the tools
Before you begin installing your Arlo wire-free smart home security cameras, it’s important to gather all the necessary tools and equipment. Having everything you need prepared beforehand will make the installation process much smoother and more efficient.
Here are the tools you will need:
- A ladder or step stool – Depending on the height at which you plan to install your cameras, you may need a ladder or step stool to reach the desired location.
- A power drill – You will need a power drill to create holes for mounting your camera brackets. Make sure you have the appropriate drill bits for the surface you’ll be drilling into, such as wood or concrete.
- Screwdriver – Depending on the type of screws included with your camera kit, you may need a Phillips or flat-head screwdriver to secure the camera brackets in place.
- Level – To ensure that your cameras are properly aligned and positioned, a level will come in handy. This tool will help you achieve a straight and level camera placement.
- Tape measure – It’s important to measure the distance and angles accurately for precise camera placement. A tape measure will help you determine the appropriate distances and positions.
- Pencil or marker – You will need a pencil or marker to mark the drilling points on the surface where you’ll be mounting your camera brackets.
- Power cable extension – In case you need to extend the length of the power cables for your cameras, having a power cable extension on hand will be useful.
By gathering these tools before you start the installation process, you’ll be well-prepared and ready to set up your Arlo wire-free smart home security cameras with ease.
Installing the base station
Before you begin installing your Arlo wire-free smart home security cameras, you’ll need to set up the base station. The base station acts as the central hub for your Arlo system, allowing you to connect and control your cameras.
To install the base station, follow these steps:

Step 1: Find a suitable location for the base station. It should be placed in a central area of your home, near a power outlet and your internet router. Make sure the location provides a strong Wi-Fi signal for optimal performance.
Step 2: Connect the supplied Ethernet cable to the internet port on the base station and the other end to an available port on your router.
Step 3: Plug the power adapter into the base station’s power port and connect it to a power outlet.
Step 4: Wait for the power LED on the front of the base station to turn green. This indicates that the base station is powered on and connected to the internet.
Step 5: If necessary, insert the provided batteries into the base station, ensuring the correct polarity.
Step 6: Download the Arlo mobile app and create an account if you haven’t already done so.
Step 7: Follow the on-screen instructions in the app to connect the base station to your account and complete the setup process.
Once your base station is set up and connected, you’ll be ready to add and configure your Arlo wire-free smart home security cameras. Refer to the camera installation guide for further instructions on how to do this.
Note: Make sure to keep your base station connected to the internet at all times to ensure proper functioning of your Arlo system.
Connecting the base station to the router
Before you can start using your Arlo wire-free smart home security cameras, you need to connect the base station to your router. This step is crucial as it allows the base station to communicate with the internet and perform its essential functions.
Here’s how you can connect the base station to the router:
Step 1: Locate the Ethernet port on the back of your base station. It should be labeled as “Internet” or “Ethernet”.
Step 2: Take one end of the Ethernet cable and insert it into the Ethernet port on the back of the base station.
Step 3: Take the other end of the Ethernet cable and insert it into one of the available Ethernet ports on your router. Ensure that the port you choose is not labeled as “WAN” or “Internet”.
Step 4: Ensure that the base station is powered on and connected to a power source. Wait for a few minutes for the base station to establish a connection with the router.
Step 5: Once the connection is established, the LED lights on the front of the base station should turn solid green, indicating a successful connection.
That’s it! You have successfully connected the base station to your router. Now you can proceed with the next steps in setting up your Arlo wire-free smart home security cameras.
FAQ,
What is Arlo wire free smart home security camera?
Arlo wire free smart home security cameras are wireless cameras that are used to monitor and protect your home. They can be placed anywhere around your house and provide live streaming and recording capabilities.
Can Arlo wire free smart home security cameras be used outdoors?
Yes, Arlo wire free smart home security cameras are designed to be used both indoors and outdoors. They are weatherproof and can withstand various weather conditions.


