Welcome to our comprehensive guide on how to install Blink Home Security Cameras! If you’re concerned about protecting your home and loved ones, installing a reliable and effective security system is crucial. Blink Home Security Cameras offer an innovative and user-friendly solution for monitoring your property.
With their sleek and compact design, Blink Home Security Cameras are easy to install and can be placed both indoors and outdoors. In this article, we will walk you through the step-by-step process of setting up your Blink cameras, from unboxing to connecting them to your home Wi-Fi network.
Whether you’re a DIY enthusiast or a newbie to home security installations, don’t worry – we’ve got you covered. By following our simple instructions, you’ll be able to set up your Blink Home Security Cameras in no time, achieving peace of mind and enhanced security for your home.
What is blink home security cameras
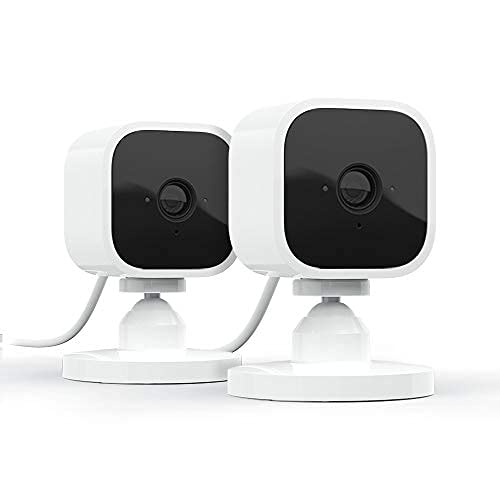
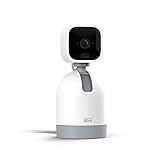
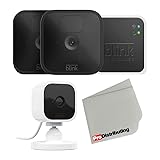
Blink home security cameras are a popular choice for homeowners looking to enhance their home security system. These cameras are designed to provide peace of mind by allowing you to monitor your property both indoors and outdoors. They come with a variety of features that make them easy to install and operate, making them a convenient option for DIY enthusiasts.
These cameras are wireless, which means you don’t have to worry about running cables or dealing with complicated wiring. They are powered by batteries, making them easy to install without the need for professional assistance. The wireless design also allows for flexible camera placement, giving you the ability to position them in optimal locations to capture potential security threats.

One of the key features of Blink home security cameras is their motion detection capability. When the cameras detect any motion within their field of view, they automatically start recording and send you an alert through the Blink smartphone app. This helps you stay aware of any potential security risks and allows you to take immediate action if necessary.
The Blink home security cameras also offer night vision capabilities, allowing you to monitor your property in low-light conditions. This feature ensures that your home is protected even during the nighttime when most security threats occur.
In addition to their advanced features, Blink home security cameras are known for their user-friendly interface. The Blink smartphone app allows you to easily access and control your cameras from anywhere, providing you with remote monitoring capabilities. You can view live video feeds, review recorded footage, and customize settings to suit your specific needs.
Overall, blink home security cameras are a reliable and efficient solution for enhancing the safety of your home. With their easy installation process and user-friendly interface, they offer a convenient way to monitor your property and keep your loved ones safe.
Step-by-Step Guide
Installing Blink home security cameras is a straightforward process that can be completed in just a few simple steps. Follow this step-by-step guide to get your cameras up and running in no time.

Step 1: Unboxing and Preparing
Start by unboxing your Blink home security camera package. Make sure you have all the necessary components, including the camera, mount, batteries, and USB cable.
Once you have everything, find a suitable location to mount your camera. Consider the area you want to monitor and make sure there is a stable surface or wall to attach the camera mount to.
Step 2: Installing the Batteries
Next, open the battery compartment on the back of the camera. Insert the provided batteries, ensuring they are in the correct orientation. Close the battery compartment securely.
Step 3: Connecting to the Blink App
In order to connect and control your Blink home security cameras, you need to download and install the Blink app on your smartphone or tablet. Open the app and follow the on-screen instructions to create a new account or sign in to your existing account.
Once you have logged in, select the option to add a new device. The app will guide you through the process of connecting your camera to your home Wi-Fi network.

Step 4: Mounting the Camera
Now it’s time to mount your camera. Use the provided mount and screws to securely attach the camera to the desired location. Make sure the camera is positioned correctly and offers an optimal view of the area you want to monitor.
Step 5: Testing and Adjusting
After mounting the camera, wait for the LED light on the camera to turn solid blue, indicating that it is connected and working properly. Open the Blink app and check the live feed from the camera to ensure it is capturing the desired view.
If needed, you can adjust the camera’s position or the angle of its lens to get the perfect view. Use the app to make any necessary adjustments.
Step 6: Expanding Your System
If you have multiple Blink home security cameras, you can repeat the previous steps to install and connect them as well. The Blink app allows you to manage and control all your cameras from one central location.
Congratulations! You have successfully installed Blink home security cameras and are now ready to monitor your home or property. Enjoy the peace of mind that comes with knowing your belongings are protected.
Step 1: Determine the placement
Before you can install your Blink home security cameras, it’s important to determine the best placement for them. This will ensure optimal coverage and visibility of the areas you want to monitor.
1. Assess your security needs
Start by evaluating your home’s security needs. Identify the areas that require monitoring, such as entrances, backyards, or hallways. Consider any blind spots or vulnerable spots that may need extra attention.
2. Consider camera placement options
Based on your security needs, consider the best locations for installing your Blink cameras. Some common options include:
- Mounting the camera on a wall or ceiling: This provides a wide view of the area.
- Positioning the camera on a shelf or table: This offers flexibility in terms of placement.
- Using a camera mount or stand: This allows you to adjust the height and angle of the camera.
Take into account factors such as power source availability, Wi-Fi signal strength, and weather resistance when choosing the ideal placement options.
By carefully determining the placement of your Blink home security cameras in this step, you’ll be well-prepared to proceed with the installation process.
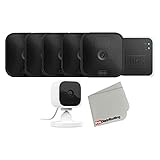
Step 2: Connect the sync module
Once you have received your Blink home security cameras, the next step is to set up the sync module, which acts as the central hub for your camera system. Here’s how to get started:
1. Find a convenient location for your sync module. It should be placed within range of your Wi-Fi router and close to a power outlet.
2. Connect one end of the provided USB cable to the back of the sync module and the other end to a power outlet.
3. Wait for the sync module’s LED indicator light to turn blue, indicating that it is ready for setup.
4. Download the Blink Home Monitor app on your smartphone or tablet from the App Store or Google Play Store.

5. Open the app and create a new account if you don’t already have one. Then, log in to your account.
6. Tap the “+” icon or select “Add a system” to begin the camera setup process.
7. Follow the on-screen instructions to connect your sync module to your Wi-Fi network. Make sure to enter the correct Wi-Fi credentials when prompted.
8. Once the sync module is successfully connected to your Wi-Fi network, the app will display a QR code on the screen. Position your camera’s QR code within the designated area on your smartphone or tablet to pair it with the sync module.
9. Repeat this process for each additional camera you want to connect to the sync module.

10. Once all your cameras are connected, you can adjust their settings and customize their locations within the app.
And that’s it! Now your Blink home security cameras are connected to the sync module and ready to help protect your home. Continue to the next step to learn how to mount and position your cameras for optimal coverage.
Step 3: Download the blink app
To get started with your Blink home security cameras, you will need to download the Blink app. The Blink app allows you to control and monitor your cameras from your smartphone or tablet, making it easy and convenient to keep an eye on your home even when you are away.
To download the Blink app, follow these steps:
- Open the App Store or Google Play Store on your device.
- Search for “Blink Home Monitor” or “Blink for Home” in the search bar.
- Tap on the app when it appears in the search results.
- Click on the “Install” or “Get” button to begin downloading the app.
Once the app has finished downloading, tap on the icon to open it. You will need to create a Blink account or log in to your existing account. Follow the on-screen instructions to set up your Blink home security cameras and connect them to your Wi-Fi network.
Pro tip: Make sure your smartphone or tablet is connected to the same Wi-Fi network that you want to connect your Blink cameras to. This will ensure a smooth and successful setup process.
Note: The Blink app is compatible with both iOS and Android devices. Ensure that your device meets the minimum system requirements before downloading the app.
Step 4: Create an account
Before you can start using your Blink Home Security Cameras, you’ll need to create an account. Follow these steps to create an account:
1. Open the Blink app on your smartphone or tablet.
2. Tap on the “Sign Up” button.
3. Enter your email address and create a password.
4. Confirm your password by re-entering it.
5. Tap on the “Create Account” button.
6. Check your email inbox for a verification email from Blink.
7. Open the email and click on the verification link.
8. You will be directed to the Blink website, where you can complete the account creation process.
9. Once your account is created, you can log in to the Blink app using your email and password.
10. Follow the on-screen instructions to set up your Blink Home Security Cameras.
Creating an account will allow you to access and control your Blink Home Security Cameras from anywhere using the Blink app on your smartphone or tablet.
Step 5: Add your cameras
Once you have successfully connected your Blink Sync Module to your home network, it is time to add your cameras to the system.
Follow these steps to add your cameras:
- Open the Blink smartphone app.
- Tap on the “Add a System” option.
- Choose the “Blink XT2 Outdoor/Indoor Camera” option.
- Scan the QR code located at the bottom of your camera using your smartphone’s camera.
- Wait for the app to detect and connect to your camera. This may take a few moments.
- Follow the on-screen instructions to name your camera, select its location, and set other preferences.
- Repeat these steps for each additional camera you want to add to your Blink system.
Important: Make sure that the Wi-Fi signal for your cameras is strong and stable. Weak Wi-Fi signal can cause connectivity issues and affect the performance of your cameras.
Note: You can have a maximum of 10 cameras connected to one Blink Sync Module.
Step 6: Customize your settings
Customizing your settings allows you to tailor the functionality of your Blink home security cameras to your specific needs and preferences. Follow these steps to customize your settings:
- Open the Blink app on your smartphone or tablet.
- Select the “Settings” tab at the bottom of the screen.
- Tap on “Camera Settings” to access the settings for your Blink cameras.
Here are some options you can customize:
| Setting | Description |
|---|---|
| Motion Detection | Adjust the sensitivity of the motion detection feature. Higher values mean that even small movements will trigger the camera, while lower values may require larger movements to activate the camera. |
| Video Quality | Select the video quality for your camera. Higher video quality will result in larger file sizes, while lower quality may have reduced image clarity. |
| Camera Name | Change the name of your camera to easily identify it in the app. |
| Notification Settings | Choose whether you want to receive push notifications when the camera detects motion. |
| Arming Schedule | Set up a schedule for when your camera should be armed or disarmed. This allows you to conserve battery life and only have the camera active when needed. |
Once you have customized your settings, make sure to save your changes. You can always revisit the settings to make further adjustments as needed.
Troubleshooting
If you are experiencing issues with your Blink home security cameras, try the following troubleshooting steps:
- Check the power source: Ensure that your Blink cameras are properly connected to a power source and that the power outlet is functioning correctly.
- Restart the camera: Sometimes, restarting the camera can resolve connectivity issues. To restart the camera, unplug it from the power source, wait for 10 seconds, and then plug it back in.
- Check your Wi-Fi connection: Make sure that your Wi-Fi network is working properly and that your cameras are within range of the router. If your Wi-Fi signal is weak, consider moving the cameras closer to the router or installing a Wi-Fi extender.
- Update the firmware: Ensure that your Blink cameras are running the latest firmware version. You can check for firmware updates in the Blink app or on the Blink website.
- Reset the camera: If none of the above steps work, you may need to reset the camera to its default settings. Refer to the Blink user manual for instructions on how to reset your specific camera model.
- Contact Blink support: If you have tried all of the above troubleshooting steps and are still experiencing issues, it may be necessary to contact Blink support for further assistance. They will be able to provide you with additional guidance and troubleshooting.
Remember to consult the Blink user manual or visit the Blink website for more detailed troubleshooting instructions specific to your camera model.
FAQ,
What is Blink home security camera?
Blink home security camera is a wireless home security system that allows you to monitor your home using indoor or outdoor cameras.
Do I need any special tools to install Blink home security cameras?
No, you do not need any special tools to install Blink home security cameras. The cameras are wireless and can be easily mounted using the included mounting hardware.
Can I install Blink home security cameras outdoors?
Yes, Blink home security cameras can be installed outdoors. However, it is recommended to place the cameras in a covered area to protect them from extreme weather conditions.


