
Welcome to the step-by-step guide on installing the Cooky Life Camera C1 by iPhone! Whether you’re a beginner or a tech-savvy user, this article will walk you through the process in a detailed manner. The Cooky Life Camera C1 is a popular choice among photography enthusiasts for its excellent features and user-friendly interface.
Step 1: Download the App
To begin, visit the App Store on your iPhone and search for the Cooky Life Camera C1 app. Once you find it, tap on the “Download” button to start the installation process. Make sure you have a stable internet connection to ensure a smooth download.
Step 2: Create an Account
After the app is successfully installed, open it on your iPhone. You will be prompted to create a new account. Fill in the required information, such as your email address and password, and follow the on-screen instructions to complete the account setup process. It is important to create a strong password to protect your account.
Step 3: Connect the Camera
Now it’s time to connect the Cooky Life Camera C1 to your iPhone. Turn on the camera and ensure that both devices are connected to the same Wi-Fi network. Open the Cooky Life Camera C1 app and tap on the “Connect” button. The app will search for available cameras in the network. Once your camera is detected, select it from the list.
Step 4: Follow the Setup Wizard
Once the camera is successfully connected, the app will guide you through the setup process. Follow the on-screen instructions to set up the camera settings, such as date and time, resolution, and recording preferences. You can also customize other settings according to your preferences. The app will provide detailed explanations for each setting, making it easy for you to make the right choices.
By following these simple steps, you’ll be able to install the Cooky Life Camera C1 by iPhone and start capturing amazing moments in no time. The Cooky Life Camera C1 offers a wide range of features and functionalities to enhance your photography experience. Enjoy your new camera and have fun exploring all its capabilities!
Step-by-step guide to installing cooky life camera c1 using iPhone
Step 1: Download the ‘cooky life camera c1’ app from the App Store on your iPhone.
Step 2: Once the app is downloaded, locate it on your home screen and tap on it to open it.
Step 3: After opening the app, create a new account if you don’t have one already. You can sign up using your email address and setting a password.
Step 4: Once you have signed in, tap on the ‘Add Device’ option in the app.
Step 5: Turn on your cooky life camera c1 and make sure it is connected to a power source.
Step 6: Press the reset button on the back of the camera for about 3-5 seconds until you hear a beep sound.
Step 7: After hearing the beep sound, tap on the ‘Next’ button in the app and select ‘Smart Configuration’ as the setup method.
Step 8: Connect your iPhone to the Wi-Fi network that you want the camera to be connected to.
Step 9: Go back to the app and enter your Wi-Fi network’s password. Tap on the ‘Next’ button.
Step 10: Hold your iPhone close to the camera and wait for the camera’s QR code to appear on the app screen. Once the QR code is displayed, align it with the camera’s lens.
Step 11: The camera will scan the QR code and establish a connection with your Wi-Fi network. Once the connection is established, you will see a success message on the app screen.
Step 12: You can now name your camera and customize its settings according to your preferences.
Step 13: Congratulations! You have successfully installed the cooky life camera c1 using your iPhone.
Note: Make sure to follow the instructions provided by the app during the installation process for the best results.
Gather the necessary equipment
Before you can install the Cooky Life Camera C1 using your iPhone, make sure you have the necessary equipment ready. Here’s what you’ll need:
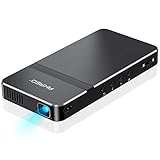
1. Cooky Life Camera C1
Make sure you have the Cooky Life Camera C1 device itself. This camera is specifically designed to work with the iPhone, so be sure to purchase the correct model.
2. iPhone
You will need an iPhone to connect and control the Cooky Life Camera C1. Ensure that your iPhone is compatible with the camera’s requirements. It’s recommended to use the latest iPhone model for the best performance.
3. Wi-Fi network
The Cooky Life Camera C1 requires a Wi-Fi network to connect to your iPhone and enable live streaming and other features. Make sure you have a stable Wi-Fi network available. Check the network settings on your iPhone to ensure it is connected to the correct Wi-Fi network.
With these essential items gathered and ready, you’ll be well-prepared to install the Cooky Life Camera C1 using your iPhone.
Download the cooky life camera c1 app
To install and use the cooky life camera c1 app on your iPhone, you need to follow the steps below:
- Open the App Store on your iPhone.
- Tap on the search icon at the bottom right corner of the screen.
- Type “cooky life camera c1” in the search bar.
- Tap on the search button.
- Look for the app icon with the name “cooky life camera c1” and tap on it.
- Tap on the “Get” button to start the download and installation process.
- If prompted, enter your Apple ID password or use Touch ID/Face ID to authorize the download.
- Wait for the app to download and install on your iPhone.
- Once the installation is complete, tap on the “Open” button to launch the app.
Congratulations! You have successfully downloaded and installed the cooky life camera c1 app on your iPhone. You can now use the app to connect and control your cooky life camera c1 device.
Note: Make sure your iPhone is connected to the internet during the download and installation process.
Connect the camera to your iPhone
To use the Cooky Life Camera C1 with your iPhone, you will need to establish a connection between the two devices. Here are the steps to follow:
Step 1: Download the Cooky Life Camera App
First, make sure you have the Cooky Life Camera App installed on your iPhone. This app is available for free on the App Store. Open the App Store, search for “Cooky Life Camera,” and tap the “Get” button to download and install the app.
Step 2: Power on the Camera
Next, power on your Cooky Life Camera C1 by pressing and holding the power button until the LED indicator lights up. It may take a few seconds for the camera to initialize.
Step 3: Connect the Camera to Wi-Fi
On your iPhone, go to the “Settings” app and tap on “Wi-Fi.” Look for the Wi-Fi network named “CookyCamera-XXXX” (XXXX represents the last four digits of your camera’s serial number) and tap on it to connect. Once connected, you will see a checkmark next to the Wi-Fi network.
Step 4: Launch the Cooky Life Camera App
Open the Cooky Life Camera App on your iPhone. You will be prompted to sign in or create a new account. Follow the on-screen instructions to complete the setup process.
Step 5: Add your Camera to the App
Once you are logged in, tap the “+” button on the top right corner of the app’s home screen to add a new device. Select “Cooky Life Camera C1” from the list of available devices and follow the prompts to complete the pairing process.
Congratulations! You have successfully connected your Cooky Life Camera C1 to your iPhone. You can now use the app to control and view the camera’s live feed, access recordings, and adjust settings.
Connect to your home’s wireless network
Before you can start using the Cooky Life Camera C1 with your iPhone, you need to connect the camera to your home’s wireless network. Follow the steps below to establish the connection:
- Make sure the camera is plugged into a power source and turned on.
- Using your iPhone, go to the “Settings” app.
- Tap on “Wi-Fi” to open the Wi-Fi settings.
- Wait for your iPhone to detect available networks.
- Select your home’s wireless network from the list.
- If prompted, enter the password for your wireless network.
- Wait for your iPhone to connect to the network.
- Once connected, open the Cooky Life Camera C1 app on your iPhone.
- Tap on the camera icon to start the camera setup process.
- Follow the on-screen instructions to complete the camera setup.
After following these steps, your Cooky Life Camera C1 will be connected to your home’s wireless network, allowing you to use your iPhone to view live video feed from the camera and manage its settings.
Access the camera on your iPhone
To access the camera on your iPhone, follow these steps:
- Unlock your iPhone by entering your passcode or using Touch ID/Face ID.
- Locate the Camera app on the home screen. The app icon looks like a camera and is usually found on the bottom row.
- Tap on the Camera app icon to open it.
- You can now use your iPhone’s camera to take photos and videos. Use the shutter button to capture photos, and the record button to start and stop video recording.
- Toggle between different camera modes, such as photo, video, square, or panoramic, by swiping left or right on the screen.
- Adjust the camera settings by tapping on the options at the top or bottom of the screen. You can change the flash settings, enable or disable HDR, adjust the exposure, and more.
Remember to grant the necessary permissions when prompted by the iPhone to access the camera. This includes allowing access to the camera itself, microphone (for video recording), and photos (for saving captured media).
Now you’re all set to use the camera on your iPhone and capture precious moments!
Configure camera settings
Once you have successfully installed the Cooky Life Camera C1 on your iPhone, you may want to configure its settings. It is essential to set up the camera to ensure optimal performance and customize its features according to your preferences. Follow the steps below to configure the camera settings:
- Open the Cooky Life Camera C1 app on your iPhone.
- Tap on the camera icon or select the camera device from the list.
- In the camera settings menu, you will find various options to adjust:
- Brightness: Adjust the brightness level to enhance the image quality.
- Contrast: Modify the contrast levels to enhance the visibility of details.
- Resolution: Set the desired resolution for capturing photos and videos.
- Video Quality: Choose the video quality (e.g., 720p or 1080p) for recording.
- Audio: Enable or disable audio recording while capturing videos.
- Date and Time Stamp: Enable or disable the date and time stamp on the media files.
- Tap on each option to adjust the settings according to your preferences.
- Once you have finished configuring the camera settings, tap on the “Save” or “Apply” button to save the changes.
By configuring the camera settings, you can optimize the performance of your Cooky Life Camera C1 and personalize its features to suit your needs. Experiment with different settings to find the perfect setup for your photography or videography requirements.
Mount the camera in your desired location
Once you have successfully connected your Cooky Life Camera C1 to your iPhone, it’s time to mount it in your desired location. Here are a few steps to guide you through the process:
1. Choose a suitable location: Select an ideal spot where you want to install your camera. Make sure it has a clear view of the area you want to monitor.
2. Find a sturdy surface: Identify a solid surface such as a wall, ceiling, or shelf to mount your camera. Ensure it can support the weight of the camera and remain stable.
3. Position the camera: Place the camera in the desired position. Use the adjustable mount to adjust the angle and aim it precisely at the area you want to monitor.
4. Mark the holes: If necessary, mark the mounting holes on the surface using a pencil or marker. This will help you align the camera properly when you start drilling.
5. Drill pilot holes: Using a suitable drill bit, carefully drill pilot holes on the marked spots. Be cautious not to damage any electrical wires or other hidden elements behind the wall.
6. Mount the camera: Attach the camera to the wall, ceiling, or shelf using the provided screws and anchors. Ensure it is securely fastened and does not wobble.
7. Adjust the camera position: After mounting, make final adjustments to the camera’s position and angle. Ensure it covers the desired area and captures the necessary footage.
8. Test the camera: Once everything is in place, test the camera to ensure it is functioning properly. Use your iPhone to view the live feed and check if the camera captures the desired footage.
By following these steps, you can successfully mount your Cooky Life Camera C1 in your desired location and start monitoring the area using your iPhone.
Test the camera and make adjustments if necessary
After successfully installing the Cooky Life Camera C1 on your iPhone, it’s time to test the camera and make any necessary adjustments to ensure optimal performance. Here are the steps to test the camera:
1. Connect the Camera
Make sure the camera is properly connected to your iPhone. Check if the Wi-Fi or Bluetooth connection is active and the camera is paired with your iPhone.
2. Launch the App
Open the Cooky Life Camera C1 app on your iPhone. This app is specifically designed to work with this camera model.
3. Access Camera Settings
Tap on the settings icon within the app to access the camera settings. This allows you to adjust various parameters such as brightness, resolution, frame rate, and more.
4. Capture Test Shots
Use the app’s interface to capture test photos and videos. This will help you assess the camera’s image and video quality. Consider taking shots in different lighting conditions and angles to get a comprehensive understanding of the camera’s capabilities.
5. Playback and Review
After capturing test shots, it’s time to review the results. Use the app’s playback function to view the photos and videos you have taken. Pay attention to details like clarity, color accuracy, and overall image quality. If necessary, make adjustments to the camera settings to achieve the desired results.
6. Consult the User Manual
If you encounter any difficulties or have specific questions about the camera, consult the user manual that came with it. The manual provides detailed information on troubleshooting and advanced camera settings.
7. Seek Customer Support
If you still have issues with the camera or need further assistance, don’t hesitate to reach out to the Cooky Life customer support team. They will be able to provide guidance and resolve any concerns you may have.
By following these steps, you can ensure that your Cooky Life Camera C1 is properly tested and adjusted for optimal performance on your iPhone.
FAQ
What is Cooky Life Camera C1?
Cooky Life Camera C1 is a type of camera that can be installed in your home to enhance the security and monitoring.
Can I install Cooky Life Camera C1 using my iPhone?
Yes, you can install Cooky Life Camera C1 using your iPhone. There is a dedicated app available on the App Store that allows you to easily set up and connect the camera to your iPhone.
Is the installation process difficult?
No, the installation process of Cooky Life Camera C1 is quite simple and straightforward. The app provides step-by-step instructions on how to connect the camera to your home Wi-Fi network and set up the necessary settings.
What features does Cooky Life Camera C1 have?
Cooky Life Camera C1 has various features including live video streaming, motion detection, night vision, two-way audio communication, and cloud storage for recorded footage. It also supports remote access, so you can monitor your home from anywhere using your iPhone.


