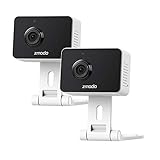
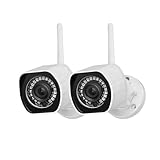
Security cameras have become an essential tool in keeping our homes and businesses safe. Funlux security cameras offer a reliable and user-friendly option for protecting your property. Whether you’re a tech-savvy individual or a beginner, installing a Funlux security camera is a straightforward process that can be done in a few simple steps.
Step 1: Choose the Location
Before starting the installation process, carefully select the location where you want to install your Funlux security camera. Consider areas that require monitoring, such as entrances, driveways, or valuable possessions. Make sure there is a power source nearby for the camera to function properly.
Step 2: Mount the Camera
Using the provided mounting bracket or adhesive, attach the camera to the desired location. Ensure that the camera is positioned at the right angle to capture the intended area. Make sure the camera is placed out of reach to prevent tampering or damage.
Step 3: Connect the Camera
Locate the power adapter and plug it into a nearby power outlet. Connect the power cable to the camera and ensure it is securely fastened. If your Funlux security camera supports Wi-Fi connectivity, follow the manufacturer’s instructions to connect it to your home network.
Step 4: Set Up the Camera
After connecting the camera, download the Funlux app on your smartphone. Follow the app’s on-screen instructions to set up your camera. This usually involves creating an account, scanning the QR code on the camera, and configuring the camera’s settings. Make sure to choose a strong password for added security.
Step 5: Enjoy Peace of Mind

Once the camera is installed and set up, you can now enjoy the benefits of your Funlux security camera. Check the live feed from your smartphone anytime, anywhere, and receive real-time alerts if any motion is detected. Rest easy knowing that your property is under constant surveillance.
By following these simple steps, you can easily install your Funlux security camera and enhance the security of your home or business. Remember to carefully read the manufacturer’s instructions for any specific requirements or additional steps. With Funlux, peace of mind is just a few steps away!
Step-by-step Guide to Install Funlux Security Camera
If you have recently purchased a Funlux security camera, you may be wondering how to install it properly. This step-by-step guide will walk you through the installation process to ensure that your camera is set up correctly and ready to protect your home or business.
Before You Begin
Before you start the installation process, make sure you have the following items:
- Funlux security camera
- Power adapter
- Ethernet cable (optional)
- Wi-Fi network name and password
- Smartphone or tablet with the Funlux app installed
Installation Steps
| Step | Description |
|---|---|
| Step 1 | Choose the location for your camera. It is recommended to place it near the entry points of your property, such as doors and windows. |
| Step 2 | Connect the power adapter to the camera and plug it into a power outlet. Ensure that the camera is receiving power. |
| Step 3 | If you are using an Ethernet cable to connect the camera to your router, plug one end into the camera and the other end into an available port on your router. Skip this step if you are using Wi-Fi. |
| Step 4 | Download and install the Funlux app on your smartphone or tablet from the App Store or Google Play Store. |
| Step 5 | Open the app and create an account if you don’t already have one. Log in to the app using your account credentials. |
| Step 6 | Tap on the “+” icon in the app to add a camera. Follow the on-screen instructions to connect your camera to the app. If prompted, enter your Wi-Fi network name and password. |
| Step 7 | Wait for the camera to connect to your Wi-Fi network. This may take a few minutes. Once connected, you should see the live feed from your camera on the app. |
| Step 8 | Position your camera as desired and make any necessary adjustments to the camera angle. |
| Step 9 | Test the camera by viewing the live feed on your smartphone or tablet. Ensure that you can see the desired area and that the camera is working properly. |
| Step 10 | Customize your camera settings using the app, such as motion detection sensitivity and recording options. |
Once you have completed these installation steps, your Funlux security camera should be successfully installed and ready to use. You can now enjoy the peace of mind that comes with having a reliable security camera system.

Prepare Your Setup
Before installing your Funlux security camera, it is important to properly prepare your setup to ensure a smooth installation process. Follow these steps to get started:
1. Choose the Right Location
Selecting the ideal location for your security camera is crucial for optimal performance. Consider the following factors when choosing a spot:
- Viewing Angle: Determine the areas you want to monitor and select a location that provides maximum visibility.
- Accessibility to Power: Ensure the camera can be conveniently connected to a power source.
- Protection from Weather: If placing the camera outdoors, make sure it is adequately sheltered from harsh weather conditions.
2. Test Your Wi-Fi Connection
To ensure a reliable connection between the camera and your smartphone or computer, it is necessary to have a stable Wi-Fi network. Test your Wi-Fi connection strength in the area where you plan to install the camera. If the signal is weak, consider using a Wi-Fi extender to improve coverage.
3. Gather the Necessary Tools
Before beginning the installation process, gather the tools and equipment you will need. These may include:
- Drill and drill bits for mounting the camera
- Screws and anchors for secure attachment
- Power adapter and cable for camera power supply
- Smartphone or computer to connect and configure the camera
Having the right tools readily available will save you time and make the installation process more efficient.

Select the Ideal Location
Before installing your Funlux security camera, it is important to carefully choose the location where you will place it. The ideal location will have a clear line of sight to the area you want to monitor, while also being out of reach of potential tampering or damage.
You should also consider factors such as lighting conditions and potential obstructions. The camera should be positioned in a way that minimizes glare from sunlight or harsh artificial lighting, as this could affect the quality of the recorded footage.
In addition, make sure there are no obstructions in the camera’s field of view. Objects like trees, bushes, or walls can block or partially block the camera’s view, limiting its effectiveness. You want to ensure that the camera has a clear and unobstructed view of the area you want to monitor.
Once you have selected the ideal location, you can proceed with the installation process and connect your Funlux security camera to your network. This will allow you to start monitoring your desired area and ensure the safety and security of your home or business.
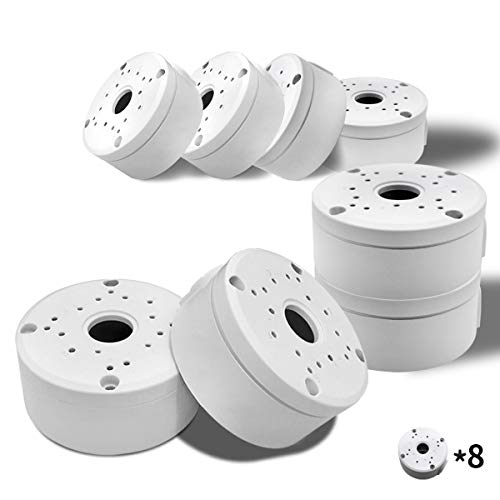
Mount the Camera
To install your Funlux security camera, you will need to mount it in the desired location. Follow these steps to mount the camera:

1. Choose a suitable location to mount the camera. It should provide a clear view of the area you want to monitor.
2. Ensure that the mounting surface is sturdy and can support the weight of the camera.
3. Using the provided screws and anchors, mark the spots for the screw holes on the mounting surface.
4. Drill holes at the marked spots, making sure they are the appropriate size for the screws and anchors.
5. Insert the anchors into the drilled holes to secure them in place.
6. Hold the camera against the mounting surface, aligning the screw holes on the camera with the anchors.
7. Insert the screws through the holes on the camera and tighten them into the anchors using a screwdriver.
8. Adjust the camera’s position as needed to ensure the desired view angle.
9. Secure any cables or wires running from the camera to prevent them from being tampered with or damaged.
10. Once the camera is securely mounted, connect it to a power source and follow the manufacturer’s instructions for setting up and configuring the camera.

Following these steps will ensure that your Funlux security camera is properly mounted and ready to use.
Connect the Power Source
Before installing your Funlux security camera, make sure you have a power source nearby to connect the camera to. The power source must be easily accessible and located within a reasonable distance from the camera.
The Funlux security camera comes with a power adapter that you will need to connect to the camera and the power source. Ensure that the power adapter is compatible with the voltage in your area.
Here are the steps to connect the power source:
- Locate the power input port on the back of the camera.
- Insert one end of the power adapter into the power input port.
- Connect the other end of the power adapter to the power source.
- Ensure that the power connection is secure.
Once you have connected the power source, you can move on to the next step of the installation process.
Connect to Wi-Fi
Before you can start using your Funlux security camera, you need to connect it to your Wi-Fi network. Follow the steps below to establish a connection:
- Make sure your Wi-Fi network is functioning properly.
- Power on your Funlux security camera by plugging it into a power source using the included power adapter.
- Download and install the Funlux app on your smartphone or tablet from the App Store or Google Play Store.
- Open the Funlux app and sign in with your account credentials.
- Select “Add Device” or the plus sign icon in the app to begin the setup process.
- Follow the on-screen instructions to put your camera in the correct setup mode, usually by scanning a QR code on your device.
- Enter your Wi-Fi network name (SSID) and password when prompted by the app.
- Wait for the app to connect your camera to your Wi-Fi network. This may take a few minutes.
- Once the connection is established, you will be able to access your camera’s live feed and other available features through the Funlux app.
Note: It is important to ensure that your Wi-Fi network is stable and has a strong signal in the area where you plan to install your Funlux security camera. This will help to ensure reliable connectivity and optimal performance.
Install the Funlux App
To get started with your Funlux security camera, you will need to install the Funlux app on your smartphone or tablet. The Funlux app allows you to easily view and manage your camera’s video feed and settings.
Step 1: Download the App
First, open the app store on your device. For iOS devices, this is the App Store, while for Android devices, it is the Google Play Store. Search for “Funlux” in the search bar of the app store and select the Funlux app from the search results.
Step 2: Install the App
Once you have located the Funlux app, tap on the “Install” button to begin the installation process. The app will automatically start downloading and installing onto your device. Make sure you have a stable internet connection to ensure a smooth installation.
After the installation is complete, you will find the Funlux app icon on your device’s home screen or app drawer.
Step 3: Launch the App
Tap on the Funlux app icon to launch the app. You will need to create a Funlux account if you do not already have one. Follow the on-screen prompts to set up your account. This will include providing your email address, creating a password, and agreeing to the terms and conditions.
Once you have successfully created a Funlux account, you can log in to the app using your credentials. The app will guide you through the process of adding your security camera to your account.
Ensure that your camera is powered on and connected to the same Wi-Fi network as your smartphone or tablet. Follow the in-app instructions to connect and pair your camera with the Funlux app.
Note:
Some Funlux security cameras may require additional steps or processes for installation. Please refer to the user manual or the official Funlux website for specific instructions related to your camera model.
With the Funlux app installed and your camera successfully added, you can now access live video feeds, view recorded footage, and customize your camera’s settings from the convenience of your smartphone or tablet.
Configure Camera Settings
Once you have successfully installed your Funlux security camera, it is important to configure the camera settings to ensure optimal performance and security. Follow these steps to configure the camera settings:
- Launch the Funlux app on your smartphone or tablet.
- Log in to your Funlux account using your registered email address and password.
- Tap on the camera icon to view the live feed from your security camera.
- Tap on the settings icon (usually represented by a gear or wrench symbol) to access the camera settings.
- In the camera settings menu, you may find various options to customize your camera settings. Some common settings include:
- Video Quality: Adjust the video quality to optimize the camera’s performance based on your network bandwidth. Choose from options like High, Medium, Low, or Auto.
- Motion Detection: Enable or disable motion detection feature. This feature can trigger the camera to start recording when it detects any movement within its field of view.
- Push Notifications: Enable push notifications to receive alerts on your smartphone or tablet when motion is detected by the camera.
- Recording Schedule: Set a recording schedule for your camera. You can define specific time slots during which the camera will automatically start recording.
- Storage: Configure the storage settings for your camera. Choose between cloud storage options or local storage using a microSD card.
- Password Protection: Set a strong password to prevent unauthorized access to your camera’s settings and live feed.
- Depending on the specific model and features of your Funlux camera, there may be additional settings available for configuration. Refer to the user manual or online documentation for detailed instructions.
- Once you have configured the desired camera settings, tap on the save or apply button to save the changes.
- Verify that the changes have been successfully applied by checking the live feed and testing the configured settings.
By configuring the camera settings, you can ensure that your Funlux security camera is tailored to your specific needs and preferences, providing you with enhanced security and peace of mind.
Test and Troubleshoot
After installing your Funlux security camera, it is important to test and troubleshoot to ensure that it functions properly. Here are some steps you can follow:
- Check the camera power: Make sure that the camera is receiving power. Check if the power cable is securely connected and if the power source is working.
- Verify the network connection: Ensure that the camera is connected to your network correctly. Double-check the network cable and make sure it is securely connected to the camera and your router.
- Monitor the camera status: Use the Funlux mobile app or software to monitor the camera’s status. Check if the camera is online and if the signal strength is sufficient.
- Adjust camera position: If the camera’s view is not as expected, try adjusting its position. Ensure that there are no obstructions blocking the camera’s field of view.
- Check the image quality: Verify that the camera is capturing clear and sharp images. If the image quality is poor, try adjusting the camera settings or cleaning the lens if necessary.
- Test the motion detection feature: Activate the motion detection feature and test if the camera accurately detects and records motion. Adjust the sensitivity settings if needed.
- Test the night vision feature: Check if the camera’s night vision feature is working correctly by testing it in low-light conditions. Ensure that the infrared LEDs are functioning properly.
- Test remote access: If you plan to access the camera remotely, test the remote viewing feature. Ensure that you can access the camera’s live feed and recorded footage from your smartphone or computer.
If you encounter any issues during the testing process, refer to the Funlux user manual or contact Funlux customer support for further assistance.
FAQ,
What is Funlux security camera?
Funlux security camera is a type of surveillance camera that is used to monitor and protect areas such as homes, offices, and businesses. It is known for its easy installation process and high-quality video footage.