
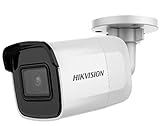
If you’re concerned about the security of your home or business, installing a surveillance camera system can provide you with peace of mind. Hikvision is a trusted brand known for its high-quality security cameras. Setting up a Hikvision security camera is a relatively straightforward process that doesn’t require advanced technical skills.
Step 1: Planning and Preparation
Before you begin the installation process, it’s essential to determine the strategic locations where you want to install the Hikvision security cameras. Consider areas that require surveillance, such as entrances, driveways, and critical access points.
Step 2: Mounting the Camera
Once you have identified the ideal locations for your Hikvision security cameras, use the included mounting brackets to secure them. Ensure the camera is at the correct angle and position for optimal coverage.

Step 3: Power and Network Connection
To power the Hikvision security camera, connect it to a reliable power source using the provided power adapter. For network connectivity, you can use either an Ethernet cable or a wireless connection, depending on your setup.
Step 4: Configuring the Camera
After connecting the camera to power and the network, access the camera’s settings interface. Use the user manual or Hikvision’s software to set up the camera’s parameters, such as video quality, motion detection, and recording settings.
By following these installation steps, you can successfully set up your Hikvision security camera system. Remember to test the cameras regularly and keep the firmware updated for optimal performance and security.

Importance of installing Hikvision security camera
Protecting your property and loved ones is a top priority for any homeowner or business owner. With the rise in crime rates and security threats, it has become crucial to invest in a reliable security system.
Hikvision security cameras are known for their advanced features and high-quality performance. They offer a range of benefits that make them an ideal choice for both residential and commercial properties.
Here are some reasons why installing Hikvision security cameras is important:
- Deter criminals: The presence of security cameras acts as a deterrent for potential criminals. Knowing that their actions are being monitored and recorded can prevent them from targeting your property.
- Video evidence: In the unfortunate event of a crime or security breach, having video evidence can be crucial for investigations and legal proceedings. Hikvision cameras provide clear footage that can help identify suspects and provide accurate documentation of events.
- Remote monitoring: Hikvision cameras can be accessed and controlled remotely through a smartphone or computer. This allows you to keep an eye on your property even when you are not physically present.
- Improved safety: Installing security cameras can enhance the safety of your property and the people inside it. You can monitor areas prone to accidents or hazards, ensuring a safer environment for everyone.
- Peace of mind: Knowing that your property is under surveillance provides a sense of security and peace of mind. Whether you are at home or away, you can have confidence that your premises are protected.
By installing Hikvision security cameras, you are investing in the safety and security of your property and loved ones. With their advanced features and reliable performance, they provide a comprehensive security solution that can give you peace of mind.
Planning the installation
Installing a Hikvision security camera requires careful planning and consideration. Before you begin the installation process, it’s important to determine the best locations for your cameras and ensure you have all the necessary equipment and tools. Here are some steps to help you plan your installation:
1. Assess your security needs
Start by evaluating your security needs and determining the areas you want to monitor. Consider the entrances, windows, and high-risk areas of your property that require surveillance. This will help you decide the number and type of cameras you need.
2. Survey the installation site
Walk around your property to identify potential camera locations. Look for areas with optimal coverage and minimal obstructions such as trees or buildings. Consider the field of view, lighting conditions, and the distance between the camera and the target area.
3. Map out camera placements
Create a camera placement plan to visualize where each camera will be installed. Use a map or floor plan of your property and mark the locations for each camera. This will help you determine the number of cameras you need and ensure comprehensive coverage.
4. Check for power and network access
Make sure there is a power source nearby for each camera. Consider whether you will be using a wired or wireless connection and ensure there is network access for the cameras if required. If using a wired connection, plan the routes for the cables to avoid obstructions.
5. Consider camera mounting methods
Decide on the mounting method for each camera, such as wall or ceiling mounts. Consider the viewing angles and adjustability of the mounts to ensure optimal camera positioning. Take into account any regulations or restrictions for camera placement in your area.

By carefully planning your Hikvision security camera installation, you can ensure effective surveillance coverage and a smooth installation process.
Determining the ideal camera locations
Installing a Hikvision security camera requires careful consideration of the placement of the cameras to ensure efficient monitoring and maximum coverage of the areas you want to protect. Here are some factors to consider when determining the ideal camera locations:
1. Overview of the area
Take a moment to survey the area and identify the key entry points, vulnerable areas, and high-traffic zones. This will help you determine the number of cameras you need and their placement.
2. Line of sight
Ensure that each camera has a clear line of sight to the area you want to monitor. Avoid obstructions such as walls, trees, or other objects that may obstruct the camera’s view and compromise its effectiveness.
3. Camera placement height
Install the cameras at an appropriate height to capture the necessary details. A higher placement may provide a broader view but may sacrifice specific details, while a lower placement may provide more detailed images but cover a smaller area. Strike a balance based on your specific security needs.

Consider placing the cameras out of reach to prevent tampering or vandalism.
When determining the height, also take into account the camera’s focal length and field of view. This will help ensure the camera can capture the desired area effectively.
4. Lighting conditions
Consider the lighting conditions in the area and choose cameras accordingly. If the area is poorly lit, consider installing cameras with infrared (IR) capabilities for enhanced night vision.
Additionally, ensure that the cameras are not directly facing bright light sources such as the sun or streetlights, as this can cause glare or overexposure, affecting the visibility of the captured footage.
By carefully considering these factors, you can effectively determine the ideal camera locations to maximize the security coverage provided by your Hikvision security camera system.

Assessing the wiring and power requirements
Before installing a Hikvision security camera, it is important to assess the wiring and power requirements. This will ensure that the camera is properly connected and powered, allowing for optimal performance and functionality.
Here are some steps to help you assess the wiring and power requirements:
| Step | Description |
|---|---|
| 1 | Identify the location for camera installation. Consider factors such as the area to be monitored, proximity to power sources, and accessibility for wiring. |
| 2 | Determine the wiring method. There are two common options: Ethernet (PoE) or coaxial cable. |
| 3 | Check the distance between the camera and the recording device or network switch. This will help you determine the appropriate cable length. |
| 4 | Calculate the power requirements. This involves determining the power consumption of the camera and selecting the appropriate power supply or PoE switch. |
| 5 | Consider any additional equipment that may be required, such as connectors, adapters, or surge protectors. |
| 6 | Plan the cable routing. This includes deciding how the cables will be concealed or protected, and ensuring they are positioned to minimize interference. |
By assessing the wiring and power requirements beforehand, you can ensure a smooth and successful installation of your Hikvision security camera system.
Gathering the necessary equipment
Before installing a Hikvision security camera, it is important to gather all the necessary equipment. This will ensure a smooth and successful installation process. Here are the essential items you will need:
- Hikvision security camera: Choose the model that suits your specific needs and requirements.
- Power supply: Make sure you have a compatible power supply for your camera. It may require a 12VDC or 24VAC power supply.
- Network cable: Select a high-quality Ethernet cable of the appropriate length to connect your camera to the NVR or router.
- Mounting hardware: Depending on your installation requirements, you may need brackets, screws, and other mounting accessories.
- Drill and screwdriver: These tools will be necessary for mounting the camera and any additional equipment.
- Monitor or display: Prepare a monitor or display device to view the camera feed during installation and for future monitoring.
- Network video recorder (NVR): If you plan to record and store footage, ensure you have an NVR with sufficient storage capacity.
- Network cables and connectors: If you are connecting multiple cameras, you’ll need network cables and connectors to establish connections between the cameras and the NVR or router.
By gathering all the necessary equipment beforehand, you can ensure a hassle-free installation process and a well-functioning Hikvision security camera system.

Purchasing the right Hikvision security camera model
When it comes to ensuring the safety and security of your property, installing a Hikvision security camera system is a wise choice. However, with so many different camera models available on the market, it can be overwhelming to choose the right one for your specific needs. To make an informed decision, it’s important to consider several factors.
1. Determine your surveillance requirements
Begin by assessing the unique security needs of your property. Consider factors such as the size of the area you want to monitor, whether you need indoor or outdoor cameras, and the level of clarity and detail required for your surveillance footage. This will help you narrow down the type of camera you need.
2. Consider the camera features
Each Hikvision security camera model comes with different features to cater to various surveillance needs. Some important features to consider include:
- Resolution: Higher resolution cameras provide clearer and more detailed images.
- Field of view: Determine how wide of an area you want the camera to cover.
- Weather resistance: If you plan to install outdoor cameras, ensure they are weatherproof.
- Infrared technology: Cameras with infrared capability can capture clear footage even in low light or no light conditions.
- Remote access: Decide if you need the ability to view your surveillance footage remotely using a smartphone or computer.
- Storage capacity: Consider whether you will need built-in storage or if you prefer to use a separate recording device.
Each of these features will affect the overall functioning and performance of your security camera system.
3. Consult with a security professional
If you are unsure about which Hikvision security camera model is right for you, it is advisable to consult with a security professional. They can assess your property’s unique requirements and recommend the best camera model and installation strategy for your specific needs.
By considering your surveillance requirements, camera features, and seeking expert advice if needed, you can confidently select and purchase the right Hikvision security camera model for your property.
Acquiring the required installation tools
Before starting the installation process of your Hikvision security camera, it’s important to gather all the necessary tools and equipment. Having the right tools at hand will make the installation process smoother and more efficient. Here are the essential tools you will need:
1. Power drill
A power drill is necessary for creating holes in walls or other surfaces where the camera will be mounted. Make sure you have the appropriate drill bits for the specific material you will be working with.
2. Screwdriver
A screwdriver is needed to secure the camera and other components in place. Depending on the camera model, you may need different types of screwdrivers, such as Phillips or flathead.
3. Ethernet cable
An Ethernet cable is required to connect the camera to your network or video recorder. Make sure the length of the cable is sufficient to reach from the camera’s location to the desired connection point.
4. PoE switch or injector
If your camera supports Power over Ethernet (PoE) functionality, you will need a PoE switch or injector. This device supplies both power and data to the camera through a single Ethernet cable, eliminating the need for separate power cables.
5. Mounting brackets or accessories
Depending on how you plan to install the camera, you may need mounting brackets or other accessories to secure it in the desired location. Refer to the camera’s user manual or consult with a professional for the appropriate accessories.
6. Network video recorder (NVR)
If you want to record and store the camera’s footage, you will need a network video recorder (NVR). Make sure the NVR supports the number of cameras you plan to install and has sufficient storage capacity for your needs.
7. Additional tools
Other tools that may come in handy during the installation process include a measuring tape, level, cable tester, and a ladder or scaffolding if the camera needs to be installed at a height.
Having all these tools ready will ensure a smooth and successful installation of your Hikvision security camera.
| Tool | Description |
|---|---|
| Power drill | Used for creating holes for mounting |
| Screwdriver | Used for securing the camera and components |
| Ethernet cable | Required for camera network connection |
| PoE switch or injector | Needed for PoE functionality |
| Mounting brackets or accessories | Used to secure the camera in place |
| Network video recorder (NVR) | For recording and storing camera footage |
| Additional tools | Measuring tape, level, cable tester, ladder |
Preparing the installation area
Before installing a Hikvision security camera, it is important to properly prepare the installation area. This will ensure that the camera is mounted securely and functions optimally.
Here are some steps to follow when preparing the installation area:
1. Determine the ideal location: Take some time to assess the area where you want to install the camera. Look for a spot that provides a clear view of the area you want to monitor. Avoid placing the camera too high or too low, as this can affect the camera’s field of view.
2. Clear the area: Remove any obstacles or debris that may obstruct the camera’s view. Clear away branches, leaves, or any other objects that could potentially block the camera’s line of sight.
3. Check the mounting surface: Ensure that the mounting surface is sturdy and capable of supporting the weight of the camera. If necessary, reinforce the area with additional support to prevent the camera from falling or becoming loose over time.
4. Consider the environmental conditions: Take into account the environmental conditions in the area where the camera will be installed. If the camera will be exposed to extreme temperatures, moisture, or other potentially damaging elements, consider using a weatherproof housing or enclosure to protect the camera.
5. Plan the cable route: Determine the optimal route for the camera’s cables. Ideally, the cables should be hidden or protected to prevent tampering or damage. Consider using conduit or other cable management solutions to ensure a clean and professional installation.
By following these steps, you can ensure that the installation area is properly prepared for your Hikvision security camera. This will help to maximize the camera’s performance and longevity.
Cleaning and securing the installation surface
Before installing your Hikvision security camera, it is important to prepare the installation surface properly. Follow these steps to clean and secure the area:
1. Clear the area: Remove any debris, dirt, or dust from the surface where the camera will be installed. This will ensure a clean and stable installation.
2. Check for obstructions: Look for any obstacles or objects that may interfere with the camera’s field of view. Clear away any branches, wires, or other objects that may obstruct the camera’s line of sight.
3. Secure the mounting surface: Make sure the surface where the camera will be installed is stable and secure. If necessary, use screws, anchors, or other appropriate mounting hardware to ensure a strong and reliable installation.
4. Consider weatherproofing: If the camera will be installed outdoors, ensure that the installation surface is weatherproof. This may involve sealing any cracks or gaps in the surface or using an outdoor-rated enclosure for added protection.
5. Test the camera’s placement: Before finalizing the installation, temporarily position the camera and test its field of view. Make any necessary adjustments to ensure the camera captures the desired area effectively.
By properly cleaning and securing the installation surface, you can ensure a reliable and effective installation of your Hikvision security camera.
Positioning the mounting brackets
Before installing your Hikvision security camera, it is important to correctly position the mounting brackets. This will ensure optimal surveillance coverage and maximize the camera’s effectiveness.
First, identify the area where you want to install the camera. Consider factors such as line of sight, coverage area, and potential blind spots. It is recommended to choose a location that provides a clear view of the desired surveillance area.
Once you have identified the installation spot, mark it with a pencil or marker. Next, take the mounting bracket and align it with the marked spot. Make sure it is level and aligns with the desired viewing angle.
If you are mounting the camera on a wall, use screws appropriate for the surface material to secure the bracket in place. Ensure that the bracket is firmly attached and can support the weight of the camera.
If you are mounting the camera on a ceiling, use appropriate screws to secure the bracket in place. Make sure the bracket is perpendicular to the ceiling and tightly secured to prevent any movement or vibration.
Once the mounting bracket is securely installed, attach the camera to it using the provided screws. Make sure the camera is properly aligned and can capture the desired surveillance area.
It is important to ensure that the camera is positioned at the correct height and angle for optimal performance. Avoid installing the camera too high or too low, as this may limit its field of view or capture unnecessary footage.
Note: Before drilling any holes or making permanent installations, double-check the positioning of the mounting brackets to ensure they are correctly aligned with your surveillance needs.
Adjusting the camera angle
After mounting the camera, it is important to adjust the camera angle for optimal coverage. Use the adjustable joint in the mounting bracket to set the desired viewing angle. Make small adjustments and check the camera’s feed to ensure it is capturing the desired surveillance area.
Testing the camera’s visibility
Once the camera is installed and adjusted, test its visibility and coverage area. Ensure that there are no obstructions or blind spots. Adjust the angle if necessary. It is recommended to perform a test recording to verify the camera’s performance and adjust the settings if needed.
By properly positioning the mounting brackets and adjusting the camera angle, you can ensure that your Hikvision security camera provides optimal surveillance coverage and meets your security needs.
FAQ,
What is Hikvision security camera?
Hikvision security camera is a type of surveillance camera that is manufactured by Hikvision, a leading provider of video surveillance products and solutions. It is designed to provide high-quality video footage and advanced features for monitoring and protecting homes, businesses, and other premises.
How do I choose the right Hikvision security camera?
When choosing the right Hikvision security camera, it is important to consider factors such as the desired resolution, lens type, camera type (bullet or dome), infrared (IR) distance, weatherproof rating, and any special features you may require, such as PTZ (pan-tilt-zoom) capability or motion detection.
Can I install a Hikvision security camera myself?
Yes, it is possible to install a Hikvision security camera yourself. However, it is recommended to have some knowledge of basic electrical wiring and computer networking to ensure proper installation and setup. If you are unsure or uncomfortable with the process, it is best to consult a professional installer.


