Installing a security camera is an excellent way to increase the safety and security of your home or office. One common challenge many people face is installing an indoor security camera that is facing outdoors through a window. In this guide, we will walk you through the steps to successfully install an indoor security camera facing outdoors in a window.
Step 1: Choose the Right Camera
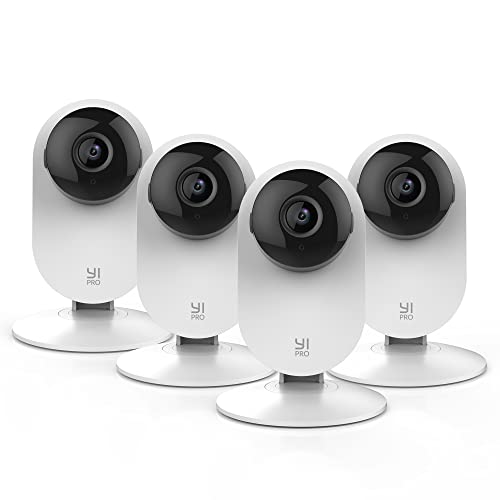
Before you begin the installation process, it’s crucial to choose a camera that is specifically designed for outdoor use. Look for a camera that is weatherproof and has night vision capabilities to ensure it can capture clear footage during any time of day or night. Additionally, consider a camera that has a wide field of view to cover a larger area.
Step 2: Positioning the Camera
Now that you have the right camera, it’s time to determine the best position for installation. Find a window that provides an unobstructed view of the outdoor area you want to monitor. Keep in mind that installing the camera higher up will provide a wider perspective. Make sure the camera is facing the desired area and adjust the camera angle as needed.
Step 3: Mounting the Camera
Once you’ve chosen the position, it’s time to mount the camera securely. Most security cameras come with mounting brackets and screws for easy installation. Use a screwdriver to attach the bracket to the wall near the window, making sure it is sturdy and level. Then, carefully attach the camera to the mounting bracket.
Step 4: Wiring and Connectivity
Next, you’ll need to connect the camera to a power source and your recording device or monitor. Use the provided wires or cables to make the necessary connections. If you want to access the camera remotely, consider connecting it to your home’s Wi-Fi network. Follow the manufacturer’s instructions to complete the setup process.
By following these steps, you can successfully install an indoor security camera facing outdoors in a window. Remember to regularly clean the window to ensure the camera captures clear footage. With a well-placed and correctly installed camera, you can enhance the security of your property and have peace of mind knowing you’re protected.

What is an indoor security camera?
An indoor security camera is a device designed to monitor and record the activities happening inside a building or room. It is commonly used for surveillance and security purposes, providing a visual record of events that can be reviewed later if needed. Unlike outdoor security cameras, which are specifically designed to withstand harsh weather conditions, indoor security cameras are typically not weatherproof and therefore should not be placed directly facing outdoors.
Indoor security cameras come in various types and models, including wired and wireless options. Some cameras are designed to be discreet and blend into the surroundings, while others are more noticeable and act as a deterrent to intruders. They can be connected to a network to enable remote viewing and monitoring, allowing users to check the camera feed from anywhere with an internet connection.
Benefits of indoor security cameras:
- Crime prevention and deterrence: The presence of security cameras can discourage potential intruders and criminals from targeting your property.
- Monitoring and recording: Indoor security cameras provide a visual record of activities inside your home or business, helping to identify any suspicious or unusual behavior.
- Remote access and monitoring: With a network-connected camera, you can access the live feed and recordings from your security camera using a smartphone, tablet, or computer, allowing you to keep an eye on your property even when you’re away.
- Peace of mind: Installing indoor security cameras can provide a sense of security and peace of mind, knowing that your property and loved ones are being monitored.
Overall, indoor security cameras are an effective tool for enhancing the security and safety of your home or business. However, it is important to position them correctly and consider the limitations of indoor cameras when planning your surveillance system.
Why install an indoor security camera facing outdoors in a window?
Installing an indoor security camera facing outdoors in a window is a smart choice for many reasons. Here are a few advantages of this setup:
Enhanced security and surveillance
By positioning an indoor security camera to face outdoors through a window, you can effectively monitor and safeguard your property. This setup allows you to keep a close eye on the activities happening outside without compromising the security of your camera.

With an indoor camera facing outdoors, you can easily detect any suspicious or illegal activities, such as trespassing, theft, or vandalism. This added level of security can provide peace of mind and help prevent potential threats before they escalate.
Avoiding weather damage
By installing a security camera indoors, you protect it from direct exposure to harsh weather conditions. Outdoor security cameras are built to withstand outdoor elements, but installing them in a window can add an extra layer of protection.
With an indoor setup, your camera can be shielded from rain, snow, extreme temperatures, and other environmental factors that may compromise its durability. This can help prolong the lifespan of your security camera and reduce the need for frequent maintenance or replacements.
Overall, installing an indoor security camera facing outdoors in a window provides an effective surveillance solution while offering protection against weather-related damages.
Step 1: Choose the right camera
When installing an indoor security camera to face outdoors through a window, it is crucial to select the right camera that is suitable for this specific setup. Here are some important factors to consider when choosing the camera:
1. Weather resistance
The camera should be weatherproof or have a housing that can protect it from outdoor elements such as rain, snow, and sunlight. This is important as the camera will be facing outdoors through the window and needs to withstand various weather conditions.
2. Day and night vision
For optimal surveillance, look for a camera that has both day and night vision capabilities. This will ensure that you can monitor your outdoors even in low light or nighttime conditions. The camera should have infrared LEDs or other similar technologies to provide clear images in the dark.
3. Wide-angle lens
Choose a camera with a wide-angle lens to capture a broader view of the outdoor area. This will allow you to monitor a larger area through the window and maximize your surveillance coverage.
4. Motion detection
A camera with motion detection capabilities is essential for outdoor surveillance. This feature will enable the camera to detect any movement or activity outside and send you alerts or notifications, ensuring you are aware of any potential security breaches.
5. Two-way audio
Consider a camera with two-way audio functionality so that you can not only see but also communicate with people outside. This can be useful for remote conversations or to deter potential intruders.

Once you have identified the camera that meets your requirements, proceed to the next step of the installation process.
| Previous Step: | Next Step: |
| Introduction | Step 2: Position the camera and mount |
Consider the camera’s features and specifications
When installing an indoor security camera to face outdoors through a window, it is important to consider the camera’s features and specifications to ensure optimal performance and effectiveness. Here are some key factors to consider:
| Resolution: | The camera should have a high resolution to capture clear and detailed images through the window. Look for cameras with at least 1080p resolution or higher. |
| Wide-angle lens: | A wide-angle lens allows for a broader field of view, enabling the camera to capture a larger area outside the window. Consider cameras with a lens angle of at least 120 degrees. |
| Day and night vision: | For round-the-clock surveillance, choose a camera with both day and night vision capabilities. This ensures that the camera can capture clear footage even in low-light conditions. |
| Weatherproof: | Since the camera will be placed indoors but facing outdoors, it is crucial to select a weatherproof camera that can withstand outdoor elements such as rain, heat, and cold temperatures. |
| Two-way audio: | If you want to communicate with people outside the window, consider a camera with two-way audio. This feature allows you to hear what’s happening outside and talk to individuals through a built-in speaker and microphone. |
| Power source: | Determine the power source required for the camera. Some cameras are battery-powered, while others require a constant power supply. Make sure to choose the option that best suits your needs and camera placement. |
By considering these features and specifications, you can select the most suitable indoor security camera for installation facing outdoors through a window. Remember to consult the camera’s user manual for specific installation instructions and guidelines.
Check the camera’s compatibility with your window
Before installing an indoor security camera facing outdoors in a window, it is important to check if the camera is compatible with your window. Not all cameras are designed to work well when placed behind glass, as some cameras may have difficulty with reflections, glare, or infrared light interference. Here are a few considerations to keep in mind:
1. Reflections and Glare
When placing a camera behind a window, reflections and glare from the glass can interfere with image quality. Look for cameras that have features specifically designed to minimize reflections, such as anti-glare coatings or adjustable lens angles. It is also helpful to position the camera at an angle to reduce the chances of reflections.
2. Infrared Light Interference
Many security cameras use infrared (IR) technology to capture clear images in low-light or nighttime conditions. However, when placed behind a window, the IR light emitted by the camera can bounce off the glass and cause glare or interference. To avoid this, consider cameras that have adjustable IR settings or use different lighting options, such as visible light or a separate IR illuminator outside the window.
Checking the compatibility of the camera with your window will ensure that you get the best possible image quality and minimize any issues that may arise from placing the camera behind glass. It is also important to consider any potential legal restrictions or regulations regarding window-mounted cameras in your area and to position the camera in a way that respects privacy laws and doesn’t invade the privacy of others.
| Considerations | Recommendations |
|---|---|
| Reflections and Glare | – Look for cameras with anti-glare coatings – Position the camera at an angle to minimize reflections |
| Infrared Light Interference | – Choose cameras with adjustable IR settings – Consider using visible light or a separate IR illuminator |
| Legal Restrictions | – Check local regulations regarding window-mounted cameras – Respect privacy laws and avoid invading the privacy of others |
Step 2: Prepare the window
Before installing the indoor security camera facing outdoors in a window, it is important to properly prepare the window to ensure the best possible view and minimize any potential issues.
1. Clean the window
Start by thoroughly cleaning the window that you plan to use for installing the camera. Use a window cleaner and a lint-free cloth to remove any dirt, dust, or smudges from the glass. This will help to improve the clarity of the camera’s view and prevent any obstructions.
2. Remove any obstructions
Check the area surrounding the window both inside and outside to identify any potential obstructions that could hinder the camera’s view. Remove any objects such as curtains, blinds, or plants that may obstruct the camera’s line of sight. Clearing the field of view will ensure that the camera captures a clear and unobstructed image.

3. Measure the area
Measure the size of the window frame and the available space around it. This will be useful in determining the best location and angle to mount the camera. Consider factors such as the camera’s field of view and any potential obstructions, such as window frames or ledges, that may affect the placement of the camera.
4. Test the camera placement
Before permanently mounting the camera, it is a good idea to test the camera placement by temporarily positioning it in the desired location. Use a removable adhesive or suction cup to attach the camera to the window and adjust its angle as needed. This will allow you to determine if the chosen location provides an optimal view of the outdoor area.
By properly preparing the window, you can ensure that the indoor security camera has a clear and unobstructed view of the outdoors, enhancing its effectiveness and performance.
Clean the window thoroughly
Before installing the indoor security camera facing outdoors in a window, it is essential to clean the window thoroughly. A clean window ensures clear visibility and prevents any potential obstructions or distortions in the camera footage.
To clean the window, follow these steps:
| Step | Instructions |
| 1 | Gather the necessary cleaning supplies, such as a window cleaner, a microfiber cloth, and a squeegee. |
| 2 | Remove any curtains, blinds, or window coverings that might impede the cleaning process. |
| 3 | Spray the window cleaner evenly on the window surface. |
| 4 | Wipe the window vertically using the microfiber cloth, removing any dirt or grime. |
| 5 | Use the squeegee to remove any streaks or excess cleaner from the window. |
| 6 | Repeat steps 3-5 for the other side of the window, if necessary. |
| 7 | Inspect the window for any missed spots or streaks and re-clean if needed. |
| 8 | Allow the window to dry completely before proceeding with the installation of the security camera. |
By thoroughly cleaning the window, you can ensure optimal clarity for the camera and improve the overall effectiveness of the security system. Additionally, regular window cleaning is recommended to maintain the camera’s performance over time.
Ensure privacy and security
When installing an indoor security camera facing outdoors in a window, it’s important to take certain measures to ensure both privacy and security. Here are some tips:
1. Choose a camera with built-in privacy features
Look for a camera that offers built-in privacy features such as a physical shutter or a digital masking option. This will allow you to easily cover or block the camera lens when privacy is desired.
2. Position the camera strategically
Place the camera in a position that provides a clear view of the desired surveillance area while minimizing the risk of capturing private or sensitive information. Avoid pointing the camera towards areas where people may enter sensitive information, such as computer screens or keypad entries.
3. Use encryption and secure authentication
Ensure that your camera system utilizes encryption protocols and secure authentication methods to protect the privacy of the captured footage. This will help prevent unauthorized access to the camera and the recorded videos.
4. Secure your network
Make sure that your home network is properly secured with a strong and unique password. This will help prevent unauthorized access to the camera’s live feed and recorded footage.
5. Regularly update camera firmware
Keep the camera firmware up to date to ensure that any potential security vulnerabilities are patched. Regularly check for firmware updates on the manufacturer’s website and apply them as soon as they become available.
By following these steps, you can install your indoor security camera facing outdoors in a window with confidence, knowing that both your privacy and security are well-protected.
Step 3: Positioning the camera
Properly positioning the indoor security camera is crucial to ensure effective surveillance of your outdoor area and to capture clear footage. Here are the steps to position your camera:
- Choose an optimal location: Look for a window in a room that provides a good view of the area you want to monitor. Consider factors like camera range, angle, and obstructions like curtains or blinds.
- Mount the camera securely: Use a camera mount or suction cup to attach the camera to the window. Make sure it’s stable and won’t fall off or get knocked down easily.
- Angle the camera correctly: Position the camera lens towards the outdoor area you want to monitor. It’s important to adjust the angle to capture the desired view without any distortion or obstructions.
- Minimize reflections and glare: To minimize reflections and glare, ensure the camera is positioned parallel to the window and at a slight angle to avoid direct light sources.
- Adjust camera settings: Once the camera is mounted, configure its settings according to your preferences. This may include adjusting the resolution, video quality, night vision mode, motion detection, and other features specific to your model.
Remember to test the camera’s view after positioning it to ensure that it covers the desired area and captures clear footage. Additionally, periodically check the camera to ensure that it remains secure and hasn’t shifted or been accidentally moved.
FAQ,
Can I install an indoor security camera facing outdoors through a window?
Yes, you can install an indoor security camera facing outdoors through a window. This allows you to monitor the outdoor area without the need for an outdoor camera installation.
What type of indoor security camera is suitable for installation facing outdoors?
A wireless indoor security camera with a wide-angle lens is suitable for installation facing outdoors through a window. It will capture a wide field of view and transmit the footage wirelessly to your device.
What are the benefits of installing an indoor security camera facing outdoors through a window?
Installing an indoor security camera facing outdoors through a window has several benefits. It eliminates the need for drilling holes and running wires for an outdoor camera installation. It also protects the camera from outdoor elements and vandalism.
What should I consider when installing an indoor security camera facing outdoors through a window?
When installing an indoor security camera facing outdoors through a window, make sure the camera is positioned in a way that minimizes glare and reflections from the glass. You should also ensure that the camera has a clear line of sight to the outdoor area you want to monitor.
Can I use a regular indoor security camera for outdoor monitoring through a window?
While you can use a regular indoor security camera for outdoor monitoring through a window, it may not be as effective as a camera specifically designed for outdoor use. Outdoor cameras are typically weatherproof and have infrared capabilities for night vision, which can be beneficial for outdoor monitoring.


