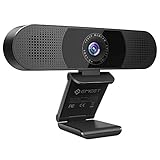
Installing a Logitech security camera in your home or office can provide you with peace of mind and added security. Logitech cameras are known for their high-quality video surveillance and user-friendly installation process. Whether you are a beginner or an experienced user, this guide will walk you through the steps needed to successfully install your Logitech security camera.
Before getting started, it is important to gather all the necessary tools and materials. You will need your Logitech security camera, an internet connection, a power source, and a device such as a smartphone or computer to access the camera’s settings. Additionally, make sure to read the manufacturer’s instructions and familiarize yourself with the camera’s features and functionalities.
The first step in the installation process is to choose the ideal location for your Logitech security camera. Consider areas that have a wide field of view, such as the entrance, driveway, or backyard. You should also ensure that the camera is mounted at a height that provides optimal coverage and is out of reach of potential intruders. Once you have chosen the location, use the provided mounting hardware to securely install the camera.
After mounting the camera, connect it to a power source using the included power cable. Make sure to use a reliable power outlet and avoid using extension cords or power strips, as they may cause interference or power fluctuations. Once the camera is connected to a power source, it should turn on and start initializing.
Step-by-step Guide to Install Logitech Security Camera
Logitech security cameras are a great way to monitor your home or office. Follow these steps to install your Logitech security camera:
Step 1: Unpack and Inspect
Start by unpacking the Logitech security camera and inspecting its components. Make sure you have all the necessary parts, including the camera, mounting hardware, power adapter, and cables.
Step 2: Choose a Location
Decide where you want to install the camera. Consider areas that need surveillance and choose a spot that provides a clear view. Make sure the location is within range of your Wi-Fi network.
Step 3: Mount the Camera
Use the mounting hardware provided to securely install the camera. This may involve attaching it to a wall or ceiling. Ensure the camera is positioned at the desired angle for optimal coverage.
Step 4: Connect to Power
Connect the power adapter to the camera and plug it into a nearby power outlet. Ensure the camera receives power to function properly.
Step 5: Connect to Wi-Fi
Access the camera’s settings and connect it to your Wi-Fi network. Follow the on-screen instructions to enter the network name and password. Once connected, the camera should join your home or office network.
Step 6: Install Software
Visit the Logitech website and download the appropriate software for your camera model. Follow the installation instructions to set up the software on your computer or mobile device.
Step 7: Configure Camera Settings
Launch the software and access the camera’s settings. Customize options such as motion detection, notifications, and recording preferences according to your needs. Test the camera to ensure it’s functioning as expected.
Step 8: Monitor and Manage
Once installed, you can now monitor and manage your Logitech security camera. Use the software to view live feeds, review recorded footage, and adjust settings as necessary.
Follow these steps carefully to install your Logitech security camera successfully. Enjoy the peace of mind that comes with having a reliable surveillance system in place.
Check Compatibility and Requirements
Before installing your Logitech security camera, it is important to ensure that your system meets the necessary compatibility and requirements. This will ensure that the camera functions properly and provides optimal performance.
-
Check the camera compatibility with your operating system. Logitech security cameras are typically compatible with Windows and macOS systems. Ensure that your system meets the minimum operating system version required for the camera.
-
Ensure that your computer or device has an available USB port or a supported wireless connection for connecting the camera. Some Logitech security cameras use a USB connection, while others are wireless.
-
If your camera requires software installation, check the system requirements for the camera software. Verify that your computer meets these requirements in terms of processor, memory, and disk space.
-
Ensure that your network meets the requirements for the camera’s wireless connectivity, if applicable. This includes having a compatible wireless router and a stable internet connection.
-
Check if any additional accessories or components are needed for the installation of your Logitech security camera. For example, some cameras may require a power adapter or mounting brackets.
By verifying compatibility and requirements beforehand, you can ensure a smooth installation process and maximize the functionality of your Logitech security camera.
Unboxing and Assembling the Camera
Before installing your Logitech security camera, it is important to unbox and assemble it properly. Follow the steps below to ensure a successful setup:
- Start by finding a clean and well-lit area to unbox your Logitech security camera.
- Open the package carefully to avoid damaging any components.
- Inside the package, you will find the camera itself, a mounting bracket, screws, and a power adapter.
- Take out the camera and remove any protective plastic covering.
- Inspect the camera for any visible damage or defects.
- Next, take the mounting bracket and attach it securely to the chosen installation surface using the provided screws.
- Align the camera with the mounting bracket and firmly attach it.
- Make sure the camera is securely fastened to the bracket to prevent any accidents or damage.
- Locate a nearby power source and connect the power adapter to the camera.
- Plug the power adapter into a power outlet.
- Verify that the camera is receiving power by checking for a status light or indicator.
- Once the camera is powered on, you’re ready to proceed with the installation process.
Following these steps will help ensure that your Logitech security camera is properly unboxed and assembled, setting you on the path to a successful installation.
Connecting the Camera to Power
To install your Logitech security camera, you will need to connect it to a power source. Follow the steps below to make sure your camera is properly powered:
Step 1: Gather the Necessary Components
Before starting, ensure that you have all the components needed for the installation:

- The Logitech security camera
- The AC power adapter
- The camera’s power cable
Step 2: Plug in the Camera
Next, locate an available power outlet near the area where you want to install the camera. Plug one end of the AC power adapter into the power outlet, and then connect the other end to the power cable.
Step 3: Connect the Camera
Take the other end of the power cable and connect it to the power input on the back of the camera. Make sure the connection is secure.
Note: It is important to follow the manufacturer’s instructions and use only the provided power adapter and cable. Using incompatible power sources may damage the camera and void the warranty.
Once the camera is connected to power, it should start to boot up and initialize. You can now proceed with the next steps of the installation process.
Download and Install Logitech Security Camera App
To get started with your Logitech security camera, you will need to download and install the Logitech Security Camera App on your device. Follow the steps below to do so:

Step 1: Check Compatibility
Before you proceed, make sure that your device meets the compatibility requirements for the Logitech Security Camera App. Check the Logitech website or the app store for more information.
Step 2: Find the App
Open the app store on your device and search for “Logitech Security Camera App”. Look for the official app developed by Logitech and tap on it to open the app page.
Step 3: Download and Install
On the app page, tap the “Download” or “Get” button to start the download. Once the download is complete, the app will automatically install on your device.
Step 4: Launch the App
After the installation is finished, locate the Logitech Security Camera App icon on your device’s home screen or app drawer. Tap on the icon to launch the app.
Note: Some devices may require you to grant certain permissions during the installation process. Make sure to read and accept any prompts related to app permissions.

Congratulations! You have successfully downloaded and installed the Logitech Security Camera App. You can now proceed with setting up your Logitech security camera.
Connecting the Camera to Wi-Fi Network
Before you can start using your Logitech security camera, you need to connect it to your Wi-Fi network. Follow these steps:
|
Step 1: |
Ensure your camera is plugged in and turned on. The power LED indicator should be lit. |
|
Step 2: |
Download and install the Logitech security camera app on your smartphone or tablet from the App Store or Google Play. |
|
Step 3: |
Open the app and create an account if you don’t have one already. Sign in with your account credentials. |
|
Step 4: |
Follow the on-screen instructions to add a new device. Make sure your smartphone or tablet is connected to the same Wi-Fi network you want to connect the camera to. |
|
Step 5: |
Choose the camera model you have and select “Add a device”. The app will search for nearby cameras. |
|
Step 6: |
Once your camera is found, select it and enter the Wi-Fi network password when prompted. The camera will then connect to your Wi-Fi network. |
|
Step 7: |
Wait for the camera to finish connecting to the Wi-Fi network. The app will display a confirmation message when the connection is successful. |
|
Step 8: |
Once connected, you can access and control your Logitech security camera through the app on your smartphone or tablet. |
Configuring Camera Settings
After installing your Logitech security camera, it is important to configure its settings to ensure optimal performance and customized surveillance experience. To configure the camera settings, follow these steps:
- Access the camera’s web interface by entering its IP address into your web browser.
- Once logged in, navigate to the settings page.
- Adjust the camera’s resolution settings to specify the image quality you want. Higher resolutions result in clearer images but may require more storage space.
- Set the frame rate for the camera. Higher frame rates result in smoother footage but may also require more bandwidth.
- Configure the camera’s motion detection settings to enable or disable this feature. Adjust the sensitivity threshold to ensure it accurately detects movement without triggering false alarms.
- Choose the recording mode that suits your needs. Options typically include continuous recording, scheduled recording, or motion-triggered recording.
- Configure the camera’s network settings to connect it to your Wi-Fi network or Ethernet cable.
- Set up remote access to view your camera’s live feed from anywhere using a computer or mobile device. Ensure you set up a secure username and password for access.
- Explore advanced settings such as video compression, audio configuration, and storage management to further customize your camera’s performance.
- Once you have finished configuring the settings, save and apply the changes.
By following these steps, you can configure your Logitech security camera to meet your specific surveillance needs and preferences. Ensure you carefully review each setting to make the most out of your camera’s capabilities.
Mounting and Positioning the Camera
Before installing your Logitech security camera, it’s important to consider the optimal location and positioning for maximum monitoring coverage. Here are some key steps to follow:
- Choose a suitable location: Look for an area that provides a clear view of the desired monitoring area, such as a front door or backyard. Ensure there are no obstructions that could block the camera’s view.
- Check for power source: Make sure there is a power outlet nearby for the camera’s power adapter. This will ensure a continuous power supply for uninterrupted monitoring.
- Mount the camera: Use the included mounting bracket and screws to securely attach the camera to a wall or ceiling. Ensure the camera is mounted at an appropriate height and angle for the best viewing angle.
- Adjust the camera angle: Once mounted, adjust the camera’s angle to capture the desired monitoring area. Use the camera’s pan and tilt features, if available, to fine-tune the viewing angle.
- Test the coverage: After mounting and adjusting the camera, test the monitoring coverage by viewing the camera’s live feed on your connected device. Make any necessary adjustments to ensure optimal coverage.
By carefully following these steps, you can ensure that your Logitech security camera is properly mounted and positioned for effective monitoring of your desired area.
FAQ,
Do I need any special tools to install a Logitech security camera?
No, you do not need any special tools to install a Logitech security camera. The necessary components and basic tools are usually included in the camera package. However, you may need a screwdriver or drill if you choose to mount the camera on a wall or ceiling. It is always a good idea to carefully read the instructions provided by Logitech and ensure you have the necessary tools and equipment before starting the installation process.


