
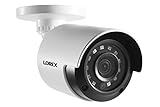
If you want to enhance the security of your property, Lorex wireless security cameras are an excellent option. One of the popular models is the Lorex LHB926T1. With its advanced features and easy installation process, it provides reliable surveillance for your home or business.
Before installing the Lorex LHB926T1 wireless security camera, it’s essential to gather all the necessary tools and materials. These may include a drill, screwdriver, ladder, power drill, Ethernet cable, and the camera itself. Once you have everything in place, you can proceed with the installation process.
Start by finding an ideal location for your camera. It should be placed strategically to cover the desired area while minimizing any potential obstructions. Ensure that the camera is protected from direct sunlight and harsh weather conditions to prolong its lifespan.
Next, mount the camera base onto the wall using the provided screws. Make sure it is fixed securely to avoid any accidental falling or misalignment. Once the base is properly mounted, attach the camera and adjust its angle for capturing the desired view.

Overview of Lorex Wireless Security Camera LHB926T1
The Lorex LHB926T1 is a wireless security camera system that offers a comprehensive solution for monitoring your property. With its advanced features and easy installation process, it provides peace of mind and reliable surveillance for both residential and commercial applications. Whether you want to keep an eye on your home, office, or any other location, this camera is a great choice.
One of the key features of the LHB926T1 is its wireless connectivity, eliminating the need for complicated wiring and reducing installation time. The camera uses Wi-Fi technology to transmit the video feed to the included receiver, which can be connected to your TV or computer for viewing. This wireless setup allows you to place the camera in any desired location without the constraints of wires.
The LHB926T1 offers high-definition video quality, capturing clear and crisp images day and night. The camera is equipped with infrared night vision, allowing it to see up to a certain distance in complete darkness. This ensures that your property is protected around the clock, even in low-light conditions.
Another notable feature of the LHB926T1 is its weatherproof design, making it suitable for outdoor use. The camera is built to withstand various weather conditions, including rain, snow, and extreme temperatures. This durability ensures that your surveillance system remains operational in any environment.
In addition to its robust hardware, the LHB926T1 also offers a range of advanced features. It has motion detection technology, which can send you notifications whenever motion is detected in the camera’s field of view. This proactive alert system allows you to quickly respond to any potential threats or suspicious activity.
![Lorex Indoor/Outdoor 4K IP Security Camera - Add-On Metal Bullet Camera for Wired Surveillance System - Smart Motion Detection, 2-Way Talk, and Color Night Vision [Requires Recorder]](https://m.media-amazon.com/images/I/21HCOcfG-8S._SL160_.jpg)
The Lorex LHB926T1 also comes with remote viewing capabilities, allowing you to monitor your property from anywhere using your smartphone or tablet. By downloading the Lorex app, you can access the camera’s live feed, playback recorded videos, and adjust settings remotely. This convenience ensures that you can keep an eye on your property even when you’re away.
In conclusion, the Lorex LHB926T1 wireless security camera system is a reliable and feature-rich solution for all your surveillance needs. With its easy installation process, high-definition video quality, weatherproof design, and advanced features, it offers comprehensive protection for your property. Enjoy peace of mind and stay connected with your security system wherever you are.
Benefits of Lorex Wireless Security Camera
A Lorex wireless security camera system, such as the LHB926T1 model, offers several benefits that make it a popular choice among homeowners and business owners alike.
1. Easy Installation and Setup
One of the main benefits of Lorex wireless security cameras is their easy installation and setup. With a wireless camera system, you don’t have to worry about running messy wires throughout your property. Simply mount the cameras in the desired locations and connect them to the wireless network. This makes it convenient for both indoor and outdoor surveillance.
2. Flexibility
Wireless security cameras from Lorex offer flexibility in terms of camera placement. You can easily move or reposition the cameras as your surveillance needs change. This flexibility allows you to monitor different areas of your property or expand your surveillance coverage without the need for additional wiring.
3. Remote Viewing and Monitoring
Another advantage of Lorex wireless security cameras is the ability to view and monitor your property remotely. Using a smartphone, tablet, or computer, you can access your camera feed from anywhere with an internet connection. This allows you to keep an eye on your property while you’re away and receive real-time notifications of any suspicious activity.
Additionally, Lorex wireless security cameras often come with an app or software that makes it easy to manage and control your surveillance system. Features like scheduled recording, motion detection, and two-way audio further enhance the monitoring experience.
4. Enhanced Security
Wireless security cameras provide an added layer of security to your property. Visible cameras can act as a deterrent to potential intruders, reducing the risk of break-ins. In the unfortunate event of a security breach, the recorded footage from a wireless camera system can be invaluable in identifying suspects and providing evidence to law enforcement.
Moreover, Lorex wireless security cameras often come with advanced features like night vision, high-resolution video recording, and weatherproof housing, ensuring optimal performance in various conditions.
In conclusion, Lorex wireless security cameras offer easy installation, flexibility, remote viewing capabilities, and enhanced security. Investing in a wireless camera system can provide peace of mind and help protect your property and loved ones.
Step-by-Step Guide
Installing the Lorex wireless security camera LHB926T1 is a straightforward process if you follow the steps below:
- Begin by unpackaging the camera and its accessories, making sure you have everything you need.
- Locate a suitable location for the camera, taking into consideration the area you want to monitor and the range of the wireless signal.
- Mount the camera using the included brackets or stands. Ensure that it is securely attached to the wall or ceiling.
- Connect the camera’s power adapter to a nearby electrical outlet. Make sure the power source is reliable and provides a stable electrical supply.
- Find the ideal position for the camera’s antennas to ensure a strong wireless connection. Adjust the antennas accordingly.
- Next, connect the camera to the Lorex wireless receiver. Follow the instructions provided with the receiver to establish a stable connection.
- Once the camera is connected to the receiver, power on the receiver and any associated devices, such as a monitor or DVR.
- Check the camera and receiver to ensure that they are communicating successfully. Adjust the wireless signal or relocate the camera if needed.
- If you plan to access the camera remotely, configure any necessary network settings on your router or DVR to enable remote viewing.
- Finally, test the camera’s functionality by monitoring the desired area and adjusting any settings to suit your preferences.
Following these steps will ensure a proper installation of the Lorex wireless security camera LHB926T1, allowing you to monitor your property or premises with ease.
Step 1: Unboxing the Lorex Wireless Security Camera LHB926T1
Before you can start installing your Lorex wireless security camera LHB926T1, you need to unbox it and familiarize yourself with its components. Here is a step-by-step guide to unboxing the Lorex wireless security camera LHB926T1:
- Locate the packaging box and carefully open it.
- Remove the contents from the box.
- You should find the following items:
- Lorex wireless security camera LHB926T1
- Power adapter
- Mounting brackets and screws
- Quick start guide
- Ethernet cable
- Antenna for the wireless camera
- Inspect the camera and its accessories for any physical damage.
- Make sure all the necessary components are included.
Now that you have unboxed your Lorex wireless security camera LHB926T1 and checked its components, you can proceed with the installation process.
Step 2: Mounting the Camera
Before mounting the Lorex wireless security camera LHB926T1, make sure you have a clear idea of where you want to install it. Consider the area’s view, accessibility, and the camera’s field of vision.
![Lorex 4K 32GB Wired Smart Video Doorbell Camera w/No Subscription Fee - Night Vision (White) [Requires 16-24VAC]](https://m.media-amazon.com/images/I/41i11Gayq5L._SL160_.jpg)
Tools and materials needed:
- Drill
- Screwdriver
- Mounting brackets
- Screws and anchors
1. Choose the mounting location:
Find a suitable location that provides an optimal view of the area you want to monitor. Ensure that the camera is positioned high enough to avoid tampering or damage. It should also be mounted in a way that prevents the camera from being easily tampered with or rotated.
Important considerations:
- Avoid mounting the camera near any potential obstructions such as trees or buildings that may limit the camera’s field of view.
- Make sure the camera is not facing directly into the sun or any other bright light sources, as this may affect the image quality.
2. Attach the mounting brackets:
Using the provided mounting brackets, attach them securely to the chosen location using screws and anchors. Ensure that the brackets are level and properly aligned.
3. Connect the camera:
![Lorex 4K Ultra HD PoE Outdoor Metal Dome Add-On Security Camera – 8MP, 2.8mm Fixed Lens, Smart Deterrence, Smart Motion Detection Plus, Siren Warning [Requires Recorder]](https://m.media-amazon.com/images/I/41MxNJ+3kmL._SL160_.jpg)
Once the brackets are secure, carefully attach the Lorex wireless security camera to the brackets. Make sure the camera is properly aligned and facing the desired direction.
4. Test the camera position:
Before finalizing the installation, test the camera position and adjust it as necessary to achieve the desired view. Make sure the camera provides clear coverage of the intended area.
Note: It may be helpful to have a second person assist you during this step to ensure the camera is accurately positioned.
5. Secure the camera:

Tighten any screws or locking mechanisms to securely hold the camera in place. Double-check that the camera is stable and cannot be easily moved or tampered with.
6. Repeat for additional cameras:
If you have multiple Lorex wireless security cameras to install, repeat steps 1-5 for each camera until all cameras are properly mounted and secured.
By following these steps, you’ll be able to correctly mount your Lorex wireless security camera LHB926T1 and ensure effective surveillance of your desired area.
Step 3: Connecting the Camera to Power
After mounting the wireless security camera in your desired location, you will need to connect it to a power source. Follow the steps below to complete this process:

- Locate the power cable: The lorex wireless security camera should come with a power cable. Find it and make sure it is untangled and ready to use.
- Connect the power cable to the camera: Locate the power input port on the back of the camera. Insert the power cable’s connector into the port until it is snugly fitted.
- Prepare the power source: Determine where you will be plugging in the camera’s power cable. Ensure that the power source is easily accessible and within reach of the cable.
- Plug in the power cable: Insert the power cable’s plug into the power source. You should hear a click sound, indicating that it is properly connected.
- Check the power indicator: Look for a power indicator light on the camera. It should illuminate, confirming that the camera is receiving power.
- Secure the power cable: Use cable clips or other appropriate means to secure the power cable against the wall or surface to prevent it from hanging loosely or being accidentally pulled out.
Once the camera is connected to power, you can proceed to the next step of the installation process.
Step 4: Pairing the Camera with the Receiver
After you have successfully connected the receiver to the monitor or TV, it’s time to pair the camera with the receiver. Here’s how you can do it:
- Power on both the camera and the receiver. Make sure they are within range of each other, typically within 300 feet.
- On the receiver, press the “Pair” button. This will put the receiver into pairing mode.
- On the camera, locate the “Pair” button, usually on the side or the bottom of the camera. Press and hold this button until the receiver confirms successful pairing. This process may take a few seconds.
- Once the camera and the receiver are successfully paired, you should see the camera’s live video feed on the monitor or TV connected to the receiver.
- Test the camera’s motion detection and other features to ensure everything is working correctly.
Note: If you are using multiple cameras, repeat the pairing process for each camera. Most wireless security camera systems support multiple camera connections.
Step 5: Installing the Lorex Mobile App
To monitor and control your Lorex wireless security camera system remotely, you will need to install the Lorex Mobile App on your smartphone or tablet. Follow these steps to download and install the app:
- Open the app store on your mobile device. This could be the Google Play Store for Android devices or the App Store for iOS devices.
- Search for “Lorex Mobile App” in the app store search bar.
- Find the official Lorex Mobile App and tap on it to open the app description page.
- Click on the “Install” or “Get” button to start downloading the app.
- Wait for the app to download and install on your device. The installation time may vary depending on your internet connection speed.
- Once the installation is complete, locate the Lorex Mobile App on your device’s home screen or app drawer and tap on it to launch the app.
- Follow the on-screen prompts to set up the app and connect it to your Lorex wireless security camera system. This usually involves logging in with your Lorex account credentials and pairing the app with your camera system.
- Once the setup is complete, you will be able to view live video feeds, playback recorded footage, receive motion detection alerts, and control your cameras remotely through the Lorex Mobile App.
Make sure to allow the app to access the necessary permissions, such as camera and microphone access, to fully utilize all the features of the Lorex Mobile App.
By installing the Lorex Mobile App, you can stay connected to your security cameras no matter where you are, enhancing the overall security and peace of mind provided by your Lorex wireless security camera system.
Step 6: Connecting the Camera to the App
Once the camera is installed and powered on, you need to connect it to the Lorex app on your smartphone or tablet. Follow the steps below to complete the process:
1. Download the Lorex app:
Go to your device’s app store and search for the Lorex app. Download and install it on your device.
2. Create an account:

Open the app and create a new account by providing your email address and choosing a password. You will need this account to log in and view your camera’s feed.
3. Log in to your account:
After creating an account, log in to the Lorex app using your credentials.
4. Add a device:
In the app’s main menu, tap on “Add a Device” or a similar option. Select “IP camera” as the device type.
5. Scan the QR code:
Locate the QR code on the camera’s packaging or the camera itself. Use the app’s scanning function to scan the QR code. This will automatically detect the camera and add it to your device list.
6. Connect to the camera:
Select the camera from your device list and follow the on-screen instructions to connect it to your Wi-Fi network. Make sure to enter the correct Wi-Fi password when prompted.
7. Customize settings:
Once the camera is connected, you can customize its settings through the app. This includes configuring motion detection, enabling notifications, and adjusting image quality.
Note: It is recommended to set a strong password for your camera to ensure its security.
After completing these steps, you should be able to view the camera’s live feed and access its recorded footage through the Lorex app on your device.
Troubleshooting
If you are experiencing any issues with the installation or functionality of your Lorex wireless security camera lhb926t1, try the troubleshooting steps below:
1. Check the Power Connection
Make sure that the camera is properly plugged into a power outlet and that the power adapter is securely connected to the camera. Also, check if the power outlet is working by plugging in a different device.
2. Verify the Network Connection
Ensure that your camera is connected to a stable Wi-Fi network. Check the Wi-Fi settings on the camera and make sure it is connected to the correct network name and password.
3. Check the Signal Strength
If the camera’s signal strength is weak, it may cause connection issues or poor video quality. Move the camera and the router closer together to improve the signal strength. Avoid placing the camera near electronic devices that may interfere with the Wi-Fi signal.
4. Reboot the Camera
Try rebooting the camera by unplugging it from the power outlet and plugging it back in after a few seconds. This can help refresh the camera’s settings and resolve any temporary issues.
5. Update Firmware
Ensure that your camera’s firmware is up to date. Visit the Lorex website and download the latest firmware for your specific camera model. Follow the provided instructions to update the firmware.
6. Reset Camera Settings
If none of the above steps work, you can try resetting the camera to its factory settings. Locate the reset button on the camera or refer to the user manual for the specific reset process. Note that resetting the camera will remove any customized settings or configurations.
If the troubleshooting steps above do not resolve your issue, it is recommended to contact Lorex customer support for further assistance.
Troubleshooting Common Issues with Lorex Wireless Security Camera LHB926T1
If you are experiencing issues with your Lorex wireless security camera LHB926T1, you may be able to troubleshoot and resolve the problem on your own. Here are some common issues and their possible solutions:
- No power or camera not turning on: Make sure the camera is plugged in and the power source is working. Check if the power adapter and cables are properly connected. Try using a different power outlet or power adapter to see if that resolves the issue.
- Poor or no video quality: If you are experiencing issues with the video quality, first check the camera lens for any dirt or smudges that may be obstructing the view. Clean the lens gently with a soft cloth if necessary. Make sure the camera is positioned correctly and not obstructed by any objects. If the issue persists, try adjusting the camera’s settings or contact Lorex customer support for further assistance.
- Interference or signal loss: If your camera is experiencing frequent signal loss or interference, make sure it is placed within the recommended range of the receiver. Keep the camera away from other electronic devices that may cause interference. Check if there are any obstacles or walls blocking the signal. You may also try changing the channel or frequency settings on the camera and receiver to minimize interference.
- Connection issues: If you are unable to connect the camera to your wireless network, ensure that you are using the correct Wi-Fi password and that your network is working properly. Check the camera’s Wi-Fi settings and make sure it is within range of your router. If the problem persists, try resetting the camera’s Wi-Fi settings or contact Lorex technical support for assistance.
- Camera not detecting motion or recording: If your camera is not detecting motion or recording, ensure that the motion detection settings are properly configured. Check the camera’s sensitivity levels and detection zones. Make sure that the camera is not obstructed by any objects. If the issue continues, try resetting the camera’s settings or contacting Lorex support for further assistance.
If you have tried all the troubleshooting steps and are still experiencing issues with your Lorex wireless security camera LHB926T1, it may be necessary to contact Lorex customer support for further assistance or to explore possible hardware or firmware-related issues.
FAQ,
What is the Lorex LHB926T1 wireless security camera?
The Lorex LHB926T1 is a wireless security camera system that allows you to monitor your home or business remotely.
Can I install the Lorex LHB926T1 wireless security camera myself?
Yes, you can install the Lorex LHB926T1 wireless security camera system yourself. It comes with a detailed installation guide and all the necessary mounting brackets and hardware.
What is included in the Lorex LHB926T1 wireless security camera system?
The Lorex LHB926T1 wireless security camera system includes four wireless cameras, a digital video recorder (DVR), cables, power adapters, and mounting hardware. It also comes with a remote control and a USB mouse for easy navigation.
How do I set up the Lorex LHB926T1 wireless security camera system?
To set up the Lorex LHB926T1 wireless security camera system, you need to first connect the DVR to your router using an Ethernet cable. Then, you need to power on the DVR and connect the wireless cameras to it. Finally, you need to download the Lorex Home app on your mobile device and follow the on-screen instructions to complete the setup process.
What are the features of the Lorex LHB926T1 wireless security camera system?
The Lorex LHB926T1 wireless security camera system has several features, including motion detection, night vision, remote viewing, and video playback. It also has a built-in hard drive for storing recorded footage and supports up to 8 wireless cameras.


