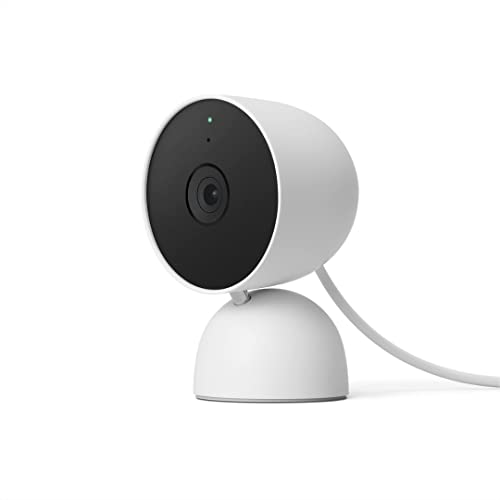
The Nest Cam Indoor is a popular home security camera that allows you to keep an eye on your property and loved ones from anywhere. Whether you’re looking to deter burglars, monitor your pets, or simply check in on your home while you’re away, installing a Nest Cam Indoor is a great investment in your peace of mind.
Installing the Nest Cam Indoor is a simple process that can be completed in just a few steps. Before you begin, ensure that you have a stable Wi-Fi connection and a power outlet near the desired installation location. Additionally, make sure you have downloaded and installed the Nest app on your smartphone or tablet. With these preparations in place, you’re ready to get started.
To begin the installation process, plug the power adapter into the back of the camera and then into a nearby power outlet. Once plugged in, the camera will power on and the indicator light will begin to flash blue. This indicates that the camera is ready to be set up.
Next, open the Nest app on your smartphone or tablet and sign in to your Nest account. If you don’t have an account, you can easily create one through the app. Once signed in, the app will guide you through the setup process, which includes connecting the camera to your Wi-Fi network and naming the camera for easy identification. Follow the on-screen prompts and provide the necessary information to complete the setup.
How to Install Nest Cam Indoor Security Camera
Installing a Nest Cam Indoor Security Camera is quick and easy. By following a few simple steps, you’ll have your camera up and running in no time.
Step 1: Download the Nest App
Before you begin, download the Nest app on your smartphone or tablet. The app will guide you through the installation process.
Step 2: Create a Nest Account
If you don’t already have a Nest account, create one within the app. This account will allow you to control and monitor your Nest Cam Indoor Camera.
Step 3: Connect the Camera
Plug in the Nest Cam Indoor Camera and wait for it to power on. After a few moments, the camera’s light should turn on, indicating that it’s ready to be set up.
Step 4: Scan the QR Code
Using the Nest app, scan the QR code located on the back of the camera. This will help the app identify and connect to your device. Make sure you have your smartphone or tablet’s camera enabled.
Step 5: Connect to Wi-Fi
Choose your Wi-Fi network from the list provided in the app and enter the password. The app will establish a connection between the camera and your home network.
Step 6: Position the Camera
Find the ideal location to place your Nest Cam Indoor Camera. Make sure it has a good view of the area you want to monitor. Use the included stand or mount to secure it in place.
Step 7: Test and Adjust
Once the camera is positioned, ensure that the live video feed is visible on your smartphone or tablet. Adjust the camera angle if necessary to get the best view.
That’s it! Your Nest Cam Indoor Security Camera is now installed and ready to protect your home.
Step-by-Step Guide
Installing the Nest Cam Indoor security camera is a simple process that can be completed in just a few steps. Follow this guide to set up your camera and start monitoring your home.
Step 1: Gather the necessary tools and materials
Before starting the installation process, make sure you have the following tools and materials:
- Nest Cam Indoor security camera
- Power cable
- Power adapter
- Micro USB cable
- Stable Wi-Fi connection
- Smartphone or tablet with Nest app installed
Step 2: Choose the location
Decide where you want to place your Nest Cam Indoor. Consider the areas you want to monitor and ensure the camera has a clear view. It is recommended to place the camera at a height of about 6 to 7 feet above the floor.
Step 3: Connect the camera
Connect the power cable to the camera and the power adapter. Plug the power adapter into a nearby electrical outlet. The camera will power on and the light on the front will turn on momentarily. Wait for the camera to fully start up.
Step 4: Download the Nest app
On your smartphone or tablet, download and install the Nest app from the App Store or Google Play Store. Create an account or log in if you already have one.
Step 5: Add the camera to the app
Open the Nest app and tap on the “+” button to add a new device. Select “Nest Cam Indoor” from the list of available devices. Follow the on-screen instructions to connect the camera to your Wi-Fi network.
Step 6: Position and test the camera
Place the camera in its desired location and adjust the angle to get the best view. Open the Nest app and tap on the camera’s icon to see the live video feed. Make sure the camera is capturing the intended area and adjust if necessary.

Congratulations! You have successfully installed your Nest Cam Indoor security camera. You can now use the Nest app to monitor your home and receive notifications for any activity detected by the camera.
Preparation
Before installing your Nest Cam Indoor security camera, make sure you have the following items on hand:
- A stable internet connection and Wi-Fi network
- A compatible device with the Nest app installed (such as a smartphone or tablet)
- A power outlet near the desired camera location
- A Nest account
- The camera’s power cable and adapter
- A flat surface or wall where you want to mount the camera (optional)
- Any additional mounting tools or accessories you may need
It’s also a good idea to familiarize yourself with the camera’s features and specifications, as well as any specific installation instructions provided by Nest. This will ensure a smooth and successful installation process.
Camera Placement
Proper camera placement is essential to ensure effective security monitoring and coverage. Here are some tips to help you position your Nest Cam Indoor effectively:
- Choose a central location: Place the camera in a central area of the room or space you want to monitor. This will allow the camera to capture a wider field of view and provide better coverage.
- Mount the camera at eye level: Position the camera at eye level to get the best angle for capturing clear images and videos. Mounting the camera too high or too low can result in less effective monitoring.
- Avoid obstructions: Ensure that there are no obstructions in the camera’s line of sight, such as furniture, curtains, or other objects. Clear the area around the camera to get the best view of the room.
- Consider the lighting conditions: Take into account the lighting conditions in the room when placing the camera. Avoid positioning it directly facing a bright light source, as this can cause glare and affect the image quality. Adjust the camera angle to minimize the impact of direct light.
- Experiment with different angles: Try out different angles and positions to find the one that provides the best coverage and view of the room. Tilt and rotate the camera as needed to achieve the desired monitoring perspective.
Following these guidelines will help you optimize the placement of your Nest Cam Indoor for effective security monitoring and peace of mind.
Wi-Fi Connection
Before setting up your Nest Cam Indoor, make sure you have a stable Wi-Fi connection in the area where you want to install the camera. Here are some important points to consider:
| Wi-Fi Network | Requirements |
|---|---|
| Network Name (SSID) | Your Wi-Fi network should have a unique name (SSID) that isn’t shared with other nearby networks. Avoid using special characters or spaces in the network name. |
| Wi-Fi Frequency | Nest Cam Indoor supports both 2.4 GHz and 5 GHz Wi-Fi networks. Make sure your Wi-Fi router supports one of these frequencies. |
| Signal Strength | A strong Wi-Fi signal is essential for reliable camera performance. Check the signal strength in the area where you plan to install the camera. If the signal is weak, consider installing a Wi-Fi range extender or positioning your router closer to the camera. |
| Network Security | Make sure your Wi-Fi network is password protected to prevent unauthorized access. Use a strong password that includes a combination of letters, numbers, and symbols. |
Once your Wi-Fi network meets these requirements, you’ll be ready to connect your Nest Cam Indoor to the internet and start enjoying the benefits of a secure home surveillance system.
Power Source
The Nest Cam Indoor security camera requires a standard power outlet to operate. It cannot be powered by batteries or any other power source. Make sure you have a power outlet available near the location where you want to install the camera.
A power adapter is included with the camera. Connect the power adapter to the camera’s power port and plug it into the power outlet. Ensure that the power adapter is securely connected to both the camera and the power outlet.
In case of a power outage, the camera will not be able to function unless you have a backup power source such as a UPS (Uninterruptible Power Supply) connected to the power outlet. This is recommended to ensure continuous monitoring and recording.

It is important to note that the power cord provided with the camera is designed for indoor use only and should not be used outdoors or in wet conditions. Make sure to position the camera and power cord in a safe and dry location.
Regularly check the power cord for any signs of damage or wear. If you notice any frayed or exposed wires, discontinue use and contact Nest customer support for assistance.
By ensuring a proper power source for your Nest Cam Indoor security camera, you can enjoy its full functionality and peace of mind knowing that your home is being monitored effectively.
Camera Setup
Setting up your Nest Cam Indoor security camera is quick and easy. Just follow these steps:
Step 1: Unboxing
Start by unboxing your Nest Cam Indoor. Inside the box, you’ll find the camera, a USB power adapter, a USB cable, a magnetic stand, and mounting hardware.

Step 2: Choosing a Location
Select a suitable location for your camera. Ensure that it is within range of your Wi-Fi network and has a power outlet nearby. Consider areas with a wide view and minimal obstructions for the best coverage.
Step 3: Powering On
Plug the USB cable into the USB power adapter, and then connect it to a power outlet. Once connected, the camera will power on automatically.
Step 4: Installing the Nest App
Download and install the Nest app from the App Store or Google Play Store on your smartphone or tablet. Create a new account or log in if you already have one.
Step 5: Adding the Camera
Open the Nest app and tap on “Add Product” or the “+” icon. Follow the on-screen instructions to add your camera to the app. Make sure your smartphone or tablet is connected to the same Wi-Fi network as your camera.
Step 6: Connecting to Wi-Fi
Once your camera is added to the app, it will guide you through the process of connecting it to your Wi-Fi network. Follow the prompts and enter your Wi-Fi password when prompted.
Step 7: Positioning and Testing
Use the magnetic stand or mount the camera using the included hardware. Position it at the desired angle and test the camera’s view using the Nest app. Adjust as necessary to get the desired coverage.
Step 8: Additional Settings
Explore the settings in the Nest app to customize your camera’s features, such as motion detection, alerts, and video quality. You can also set up additional security features like two-factor authentication for added security.
With these steps, you’ll have your Nest Cam Indoor security camera up and running in no time, providing you with peace of mind and enhanced home security.
| What’s Included: | Requirements: |
|---|---|
| – Nest Cam Indoor camera | – Wi-Fi network |
| – USB power adapter | – Smartphone or tablet |
| – USB cable | – Nest app |
| – Magnetic stand | |
| – Mounting hardware |
Camera Testing
Once your Nest Cam Indoor is properly installed and connected, it’s important to test the camera to ensure that it’s functioning correctly. Here are some steps to follow when testing your camera:
- First, make sure that the camera is powered on and properly connected to your Wi-Fi network.
- Next, use the Nest app on your smartphone or tablet to access the live view of the camera. This will allow you to see what the camera is capturing in real-time.
- Observe the video feed from the camera to check for any issues such as poor image quality, distortion, or a lag in the video stream.
- Test the camera’s audio capabilities by listening for any sound or noises through the app.
- Check if the camera’s motion detection feature is working properly by moving in front of the camera and confirming that it detects your movement.
- If you have set up any specific camera settings or alerts, such as activity zones or notifications, make sure that they are functioning as intended.
- Consider testing the camera’s night vision feature in a low-light environment to ensure that it provides clear and reliable visibility in the dark.
- If you have multiple cameras, test each camera individually to ensure that they are all working properly.
By thoroughly testing your Nest Cam Indoor, you can ensure that it’s functioning correctly and providing the security and peace of mind you desire. If you encounter any issues during the testing process, refer to the troubleshooting section of the Nest app or the Nest support website for assistance.
Additional Features
In addition to its core security features, the Nest Cam Indoor offers a range of additional features that enhance its functionality and make it a versatile home surveillance device.
24/7 Live Video
The Nest Cam Indoor provides 24/7 live video streaming, allowing you to monitor your home in real-time from anywhere. Whether you’re at work, traveling, or just in another room, you can easily keep an eye on what’s happening at home using the Nest app on your smartphone or tablet.
Two-Way Audio
The built-in microphone and speaker on the Nest Cam Indoor enable two-way audio communication. This means you can not only hear what’s happening at home, but also talk back through the camera. Whether you need to tell your kids to finish their homework or communicate with a pet, the two-way audio feature comes in handy.
Intelligent Alerts
The Nest Cam Indoor uses advanced motion detection algorithms and artificial intelligence to send you intelligent alerts. You can receive notifications on your device when the camera detects activity, such as a person walking across the room or a door opening. Additionally, you can customize the alert settings to only receive notifications for specific types of events or zones in your home.
Nest Aware Subscription
To unlock the full potential of the Nest Cam Indoor, you have the option to subscribe to Nest Aware. This optional subscription service provides additional features, such as continuous video recording, advanced motion detection, and intelligent alerts based on recognized faces. With Nest Aware, you can also access your video history and create custom activity zones.
| Additional Features | Nest Aware Subscription |
|---|---|
| 24/7 Live Video Streaming | Continuous Video Recording |
| Two-Way Audio | Advanced Motion Detection |
| Intelligent Alerts | Intelligent Alerts Based on Recognized Faces |
| Video History Access | |
| Custom Activity Zones |
In conclusion, the Nest Cam Indoor offers not only top-notch security features but also a range of additional features that provide added convenience and peace of mind. With its 24/7 live video streaming, two-way audio, intelligent alerts, and optional Nest Aware subscription, the Nest Cam Indoor is a comprehensive home security solution.
Troubleshooting
If you encounter any issues during the installation process or while setting up your Nest Cam Indoor security camera, here are some troubleshooting steps you can follow:
1. Camera not powering on
Make sure that the power cable is securely connected to the camera and the power outlet. Try plugging the cable into a different outlet to see if the issue persists. If the camera still does not power on, try using a different power cable or contacting Nest support for further assistance.
2. Poor image quality
If the image quality of your Nest Cam Indoor is not satisfactory, there are a few factors you can check:
- Ensure that the camera lens is clean and free from any dirt or smudges. Use a soft, lint-free cloth to gently clean the lens.
- Verify that your internet connection is stable and has sufficient bandwidth to support high-quality video streaming.
- Position the camera in an area with optimal lighting conditions. Avoid placing it directly facing a bright light source or in areas with extreme contrast.
3. Connectivity issues
If your Nest Cam Indoor is experiencing connectivity issues, follow these steps:
- Check your Wi-Fi network to ensure that it is functioning properly. Restart your router if necessary.
- Bring the camera closer to the router to improve the signal strength. Alternatively, consider using a Wi-Fi extender or a mesh Wi-Fi system to enhance coverage.
- Try resetting the camera by holding down the reset button for 10 seconds.
If you are still encountering issues with your Nest Cam Indoor, consult the official Nest support documentation or contact their customer support for further assistance.
FAQ,
What is Nest Cam Indoor Security Camera?
Nest Cam Indoor Security Camera is a smart home security camera that allows you to monitor your home from anywhere with an internet connection. It has features like live streaming, motion detection, and two-way audio.


