
Night Owl security cameras are a popular choice for those looking to enhance their home or office security. With their advanced features and high-quality video footage, these systems provide users with peace of mind and a sense of security. However, many people may feel intimidated by the installation process. In this article, we will guide you on how to install your Night Owl security camera system.
Before you begin the installation process, it is important to gather all the necessary materials. You will need your Night Owl security camera system, a power adapter, an Ethernet cable, a monitor or TV, and a stable internet connection. Additionally, make sure you have a ladder and basic tools such as a screwdriver and drill.
Step 1: Plan the camera placement. The first step in installing your Night Owl security camera system is to plan where you want to place each camera. Consider areas that are vulnerable to break-ins or where you would like to monitor activity. It is crucial to choose locations that provide optimal angles and coverage.
Step 2: Mount the cameras. Once you have determined the camera locations, use the provided mounting brackets to securely attach the cameras to the wall or ceiling. Make sure the cameras are positioned correctly and tightened with the screws provided. Use a ladder if needed and take proper safety precautions.
Night Owl Security Camera System: Installation Guide
Installing a Night Owl security camera system is a simple process that can help protect your home or business. Follow these steps to properly install your Night Owl security camera system:

1. Plan your camera placement
Before starting the installation, carefully plan where you want to position your security cameras. Take into consideration areas that need monitoring and the best angle to capture the desired view. Make sure you have a clear line of sight and a power source close by.
2. Mount the cameras
Using the provided mounting brackets, attach the cameras to the desired locations. Ensure the mounting brackets are securely fastened and that the cameras are positioned at the correct angle. Use screws and wall anchors if needed to provide additional stability.
3. Connect the cameras
Connect the cameras to the DVR (Digital Video Recorder) using the provided cables. Match the appropriate connectors to the corresponding ports on both the cameras and the DVR. Once connected, ensure the cables are neatly organized and not exposed to any potential hazards.
4. Set up the DVR
Connect the DVR to a monitor or TV using the HDMI or VGA cable. Power on the DVR and follow the on-screen prompts to complete the initial setup. This may include setting the date and time, adjusting camera settings, and creating a password for security purposes.
5. Connect to the internet (optional)
If you want to remotely access your security system, connect the DVR to your internet router using an Ethernet cable. Follow the manufacturer’s instructions to configure the network settings on the DVR. Once connected, you can access your security system using a smartphone, tablet, or computer.
6. Test the system
After completing the installation, test each camera to ensure they are capturing the desired view and functioning properly. Check the video feed, adjust the camera settings if needed, and make any necessary adjustments to the camera placement.
By following these simple steps, you can successfully install your Night Owl security camera system and enhance the security of your property. Remember to consult the user manual for specific instructions related to your camera model.
Choosing the Right Location
When installing a Night Owl security camera system, choosing the right location for your cameras is crucial. The camera placement will determine the effectiveness and coverage of your surveillance system. Here are some key factors to consider:
1. Coverage Area
Determine the areas you want to monitor and make sure the cameras have a clear line of sight to those areas. Consider the range, angle, and zoom capabilities of the cameras to ensure they can provide adequate coverage.
2. Lighting Conditions
Take into account the lighting conditions in the chosen locations. Consider both daytime and nighttime lighting, as well as any potential glare or backlighting issues. Install additional lighting devices if needed to ensure optimal visibility.

3. Weather Protection
Choose camera locations that are protected from extreme weather conditions, such as rain, snow, or direct sunlight. Look for areas with overhangs, eaves, or other structures that can provide shelter and prevent damage to the cameras.
4. Accessibility
Ensure that the camera locations are easily accessible for installation, maintenance, and potential repairs. Consider the availability of power sources and network connections in the chosen locations.
5. Privacy Considerations
Respect privacy laws and guidelines when positioning your cameras. Avoid pointing cameras directly at private areas, such as windows, neighbors’ properties, or public places.
| Location | Advantages | Disadvantages |
|---|---|---|
| Front Door | Visible deterrence, captures faces of visitors. | Possible backlighting issues. |
| Backyard | Monitors outdoor activities, potential intruders. | May require additional lighting. |
| Driveway | Captures vehicles entering and exiting your property. | Needs proper angle and zoom for optimal coverage. |
| Garage | Protects vehicles, detects potential break-ins. | Possible obstruction with vehicles and objects. |
Take these factors into consideration when choosing the location for your Night Owl security cameras. Careful planning and placement will ensure that your surveillance system effectively protects your property.
Gathering the Necessary Tools
Before you start installing your Night Owl security camera system, it is important to gather all the necessary tools. Having the right tools ready will ensure a smooth installation process and prevent any delays or difficulties.

1. Power Drill
A power drill is essential for mounting the cameras and drilling holes for the cables. Make sure you have a drill with the appropriate drill bits for your installation needs.
2. Screwdriver
A screwdriver will be used to secure the mounting brackets and screws for the cameras. Depending on the specific camera model, you may need different types and sizes of screwdrivers.
3. Cable Clips
Cable clips are useful for neatly organizing and securing the cables along the installation path. They help to prevent any tripping hazards or damage to the cables.
4. Ethernet Cables
Ethernet cables are used to connect the cameras to the network video recorder (NVR) or the internet router. Make sure you have the appropriate length and type of cables for your installation.
5. Monitor or Display
To set up and configure your Night Owl security camera system, you will need a monitor or display. This can be a computer monitor, TV, or any other device with an HDMI or VGA input. Ensure it is compatible with your NVR.

6. Network Cable (Ethernet)
A network cable is required to connect your NVR to your internet router. This cable enables remote viewing and ensures a stable network connection for your system.
7. Ladder or Step Stool
Depending on the height and location of your installation, you may need a ladder or step stool to access certain areas. Ensure it is stable and secure before using it.
8. Power Extension Cord
Having a power extension cord can be helpful if there are limited power outlets near your camera installation locations. Make sure it is the appropriate length and has surge protection.
9. Level
A level can be used to ensure that your cameras are mounted straight and level. This will help provide accurate and clear video footage.
10. Fish Tape or Pull String
If you need to run cables through existing walls or conduit, a fish tape or pull string can be useful for guiding the cables through the tight spaces.

11. Cable Tester
A cable tester is optional but highly recommended. It can help verify the integrity of your Ethernet cables and prevent any connectivity issues.
Make sure you have all these tools ready before you begin the installation process. Having everything prepared will save you time and effort, ensuring a successful installation of your Night Owl security camera system.
Mounting the Camera
Mounting the cameras properly is crucial for effective surveillance. Follow these steps to ensure the cameras are securely installed:
1. Determine the Camera Placement
Prior to mounting the cameras, carefully select the locations where each camera will be installed. Consider the areas that require maximum coverage and ensure the cameras have a clear line of sight. Outdoor cameras should be placed in weather-proof locations.
2. Gather the Necessary Tools
Before you begin the installation process, gather all the necessary tools and equipment. You may need a power drill, screws, wall anchors, a ladder, and a Phillips screwdriver. Make sure you have everything ready beforehand.
3. Install the Mounting Bracket
Hold the mounting bracket against the wall or ceiling where you want to install the camera. Mark the screw holes with a pencil. Use a power drill to create pilot holes, then insert the wall anchors to provide a secure hold. Attach the mounting bracket using screws or bolts.
4. Connect the Camera
Once the mounting bracket is secured, connect the camera to the bracket using the provided screws or brackets. Ensure that the camera is firmly attached to the bracket and cannot be easily moved or tampered with.
5. Adjust the Camera Angle
After the camera is attached, adjust the camera angle to achieve the desired view. You may need to rotate or tilt the camera to cover the desired area. Make sure the camera is facing the correct direction and provides clear coverage.
6. Secure the Cables
To ensure a clean installation, secure the cables running from the camera to the recorder. Use cable clips or conduit to keep the cables organized and protected from damage. Avoid tight bends or sharp angles that may weaken the cables.
Following these steps will help you properly mount the Night Owl security camera system and ensure optimal surveillance coverage.
Running Cables
Running cables for your Night Owl security camera system is a crucial step in the installation process. Properly running and hiding the cables ensures a clean and professional-looking setup while also protecting them from potential damage.
Determine the Route:
Before running the cables, determine the route you want them to follow. Consider the locations of your cameras and the most efficient path to connect them to the DVR. Take into account any obstacles or potential interference.
Measure and Cut:
Using a measuring tape, measure the distance from the camera location to the DVR location. Add a few extra feet to account for any corners or unexpected obstacles along the way. Cut the cables to the appropriate length.
Prepare the Cables:
Strip the insulation off the ends of the cables, exposing the inner wires. Use a wire stripper tool to carefully remove the insulation without damaging the wires. This will ensure a secure connection.
Secure the Cables:
Secure the cables along the chosen route using clips or cable ties. Make sure they are firmly attached and won’t be easily dislodged. Consider using cable conduits or hiding the cables behind walls for a cleaner look.
Connect the Cables:
At the camera locations, connect the cables to the corresponding ports on the cameras. Use the appropriate connectors and follow the instructions provided by Night Owl. At the DVR location, connect the cables to the corresponding ports on the DVR.
Test the Connections:
After all the cables are connected, test the connections to ensure everything is functioning properly. Check the live feed from each camera on the DVR to confirm that the video signal is clear and stable.
Remember, running cables effectively requires careful planning and precision. Take your time to ensure a proper installation, and consult the Night Owl user manual or customer support if you encounter any issues.
Connecting the Camera to the DVR
Once you have positioned your Night Owl security cameras, you will need to connect them to the DVR for them to start recording and transmitting footage. Follow these steps to connect the cameras:
1. Locate the BNC connectors on the back of the DVR. These connectors are usually labeled with numbers corresponding to the camera channels on the DVR.
2. Take the BNC video cable and connect one end to the BNC connector on the back of the camera. Ensure the connection is tight and secure.
3. Take the other end of the BNC video cable and connect it to the corresponding BNC connector on the back of the DVR. Again, make sure the connection is tight and secure.
4. If your camera requires power, connect the camera’s power adapter to an electrical outlet, and connect the other end to the power jack on the camera. Make sure the power connection is secure.
5. Repeat these steps for each camera you wish to connect to the DVR.
Once all the cameras are connected to the DVR, you can power on the DVR, and it should automatically detect and start displaying the camera feeds. If you are facing any issues, refer to the Night Owl user manual for troubleshooting steps.
Configuring the DVR
Once you have successfully installed your Night Owl security camera system, the next step is to configure the DVR (Digital Video Recorder). The DVR is the central hub that allows you to record and view the footage captured by your cameras.
Step 1: Connecting the DVR
Start by connecting the DVR to your TV or monitor using the HDMI or VGA port. Use the included cables to ensure a secure and stable connection. Once connected, power on the DVR by plugging it into a power outlet.
Step 2: Initial Setup
After powering on the DVR, you will need to go through the initial setup process. This includes setting the date and time, choosing a language, creating a password, and adjusting any other settings that are specific to your needs. Follow the on-screen instructions to complete the setup.
Step 3: Configuring the Network Settings
In order to remotely access your security camera system, you will need to configure the network settings on your DVR. Connect the DVR to your router using an Ethernet cable. Access the network settings menu on the DVR and choose the option to connect to a network. Enter the necessary information, such as your network name (SSID) and password.
Step 4: Port Forwarding
If you want to access your security camera system remotely over the internet, you will also need to set up port forwarding on your router. Port forwarding allows incoming connections to pass through your router and reach your DVR. Consult your router’s manual or contact your internet service provider for specific instructions on how to set up port forwarding.
Step 5: Setting up Remote Viewing
After completing the network and port forwarding setup, you can now set up remote viewing. Install the Night Owl mobile app on your smartphone or tablet. Open the app and follow the instructions to create an account and connect to your DVR. Once connected, you can view your security camera footage from anywhere, as long as you have an internet connection.
| Troubleshooting Tip: | If you are experiencing any issues during the configuration process, refer to the user manual provided with your Night Owl security camera system. The manual contains detailed troubleshooting steps to help you resolve common problems. |
|---|
Testing and Adjusting the Cameras
Once you have successfully installed your Night Owl security camera system, it is important to test and adjust each camera to ensure optimal performance. Below are some steps you can take to test and adjust your cameras:
1. Verify Power Supply
Ensure that each camera is receiving power by checking the power supply connections. Make sure the power cables are securely plugged in and there are no loose connections.
2. Check Camera Field of View
Position each camera in the desired location and adjust the camera angle to ensure that it captures the intended field of view. Use the camera’s mounting hardware to securely position the camera and make any necessary adjustments.
3. Test Camera Image Quality
Access the Night Owl security camera system’s live view on a monitor or mobile device and test the image quality of each camera. Ensure that the picture is clear and shows appropriate detail. Adjust the camera settings, such as brightness, contrast, and saturation, if needed.
4. Check Camera Night Vision
Test the night vision functionality of each camera in low-light conditions or at night. Ensure that the cameras provide sufficient visibility in the dark and that the infrared LEDs are functioning correctly. Make any necessary adjustments to improve night vision performance.
5. Monitor Camera Triggering
Test the camera triggering function, such as motion detection or scheduled recording, to ensure that it captures events properly. Walk in front of each camera to determine if it triggers the recording correctly and captures the desired footage.
By following these steps, you can ensure that your Night Owl security camera system is functioning optimally and providing you with the desired surveillance coverage. Make any necessary adjustments along the way to achieve the best results.
Understanding the Night Owl Security Camera System Features
The Night Owl security camera system is equipped with a range of features that make it an ideal choice for protecting your property. Understanding these features will help you make the most of your security system:
- HD Quality: The Night Owl cameras capture crisp and clear high-definition video, ensuring that you never miss any important details.
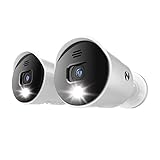
- Night Vision: With powerful infrared technology, these cameras are capable of capturing footage even in complete darkness, making them perfect for night-time surveillance.
- Motion Detection: The cameras are equipped with advanced motion detection sensors that can detect any movement within their field of view. They will send you real-time alerts to your smartphone or email, allowing you to take immediate action when necessary.
- Remote Viewing: The Night Owl system allows you to view the live or recorded footage from your cameras using your mobile device, computer, or tablet. This feature provides you with peace of mind, knowing that you can check on your property no matter where you are.
- Weather Resistance: Built to withstand various weather conditions, the Night Owl cameras are suitable for both indoor and outdoor use. They are designed to be rust-resistant and can operate in extreme temperatures.
- Wide-Angle Viewing: The cameras offer a wide-angle field of view, allowing you to monitor large areas with just one camera. This feature eliminates blind spots and provides you with comprehensive coverage.
- Expandability: The Night Owl system is expandable, meaning you can add additional cameras as your security needs grow. This flexibility allows you to customize and expand your security system to fit the size and layout of your property.
- Secure Storage: The Night Owl system comes with a pre-installed hard drive, providing you with ample storage space for your recorded footage. The hard drive is secure and accessible only to you, ensuring the privacy and integrity of your data.
With these features and more, the Night Owl security camera system offers reliable and effective surveillance for your home or business. Whether you need to monitor your property day or night, this system is designed to meet your security needs.
FAQ,
What is a night owl security camera system?
A Night Owl security camera system is a set of cameras that are designed to provide surveillance and monitoring of a specific area during the night. It is equipped with infrared technology that allows it to capture clear images even in low light conditions.
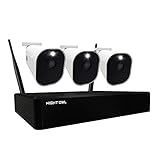
How many cameras are included in a night owl security camera system?
The number of cameras included in a Night Owl security camera system can vary depending on the specific package you choose. Generally, you can find systems that come with 2, 4, 8, or more cameras to cover different areas of your property.
Can I install a night owl security camera system myself or do I need professional help?
Installing a Night Owl security camera system can be done by yourself, especially if you have some knowledge of basic wiring and technical skills. The system usually comes with detailed installation instructions that guide you through the process. However, if you are not comfortable with the installation or if you want to ensure it is done correctly, you may consider hiring a professional installer.


