
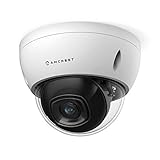
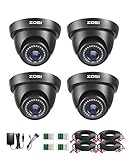
Adding a security camera to your outdoor space is an effective way to enhance the safety and security of your home or business. One popular choice for outdoor surveillance is the dome security camera. With its sleek design and wide-angle lens, it can capture high-quality footage of your property.
Installing an outdoor dome security camera may seem like a daunting task, but with the proper preparation and a few tools, you can easily complete the installation process. This guide will walk you through the step-by-step process of installing an outdoor dome security camera, ensuring that it is properly positioned and connected for optimal performance.
Before you begin, it’s important to choose the right camera for your needs. Consider factors such as resolution, night vision capabilities, and weather resistance. Once you have selected the perfect camera, gather the necessary tools, including a ladder, screwdriver, drill, and any additional mounting brackets or cables provided with your camera.
Now, let’s get started on the installation process. First, determine the ideal location for your dome security camera. Consider areas that provide a wide field of view and cover the most vulnerable areas of your property. Once you have chosen the location, use the mounting brackets provided to securely attach the camera to the wall or ceiling. Be sure to follow the manufacturer’s instructions for proper installation.
Step-by-step guide on installing outdoor dome security camera
Installing an outdoor dome security camera is an effective way to enhance the security of your property. By following a few simple steps, you can have a fully functioning camera system set up in no time.

Step 1: Choose the right location
The first step in installing an outdoor dome security camera is deciding where to place it. Look for areas that provide a wide field of view, such as entrances, driveway, or backyard. Make sure the camera is protected from the weather and out of reach from potential intruders.
Step 2: Mount the camera
Once you have selected the location, use the mounting bracket to secure the camera in place. Ensure that the bracket is firmly attached to a stable surface, such as a wall or ceiling. Use screws and anchors if necessary.
Step 3: Connect the camera
Next, connect the camera to a power source. Dome security cameras often require a power adapter or a PoE (Power over Ethernet) connection. Follow the manufacturer’s instructions on how to properly connect the camera.
Step 4: Adjust the camera settings
After the camera is connected, you will need to adjust its settings. This includes configuring network settings, setting up motion detection, and adjusting image quality. Refer to the camera’s user manual for detailed instructions on how to access and customize these settings.
Step 5: Test the camera
Before completing the installation, it is important to test the camera to ensure it is functioning correctly. Check the live feed on a monitor or using a mobile app to verify that the camera is capturing clear images. Make any necessary adjustments to the position or settings at this stage.
Step 6: Secure the camera
Finally, secure the camera to prevent tampering or theft. Many dome security cameras come with tamper-resistant features, such as lockable casings or anti-vandal mounts. Use these features to protect your investment and ensure the camera remains in place.
By following these step-by-step instructions, you can install an outdoor dome security camera and enjoy peace of mind knowing that your property is well protected.
Choosing the perfect location
When installing an outdoor dome security camera, choosing the right location is crucial to ensure optimal surveillance coverage. Here are some factors to consider when selecting the perfect spot for your camera:
1. Coverage Area
First, determine the specific area you want to monitor. Evaluate the field of view of your camera and identify the areas that need surveillance coverage. Consider the distance, angle, and height at which the camera is positioned to make sure it captures the desired areas effectively.
2. Height and Angle
Mounting the camera at an appropriate height and angle is important for getting clear and unobstructed footage. Aim for a height that allows the camera to cover a wide area while minimizing blind spots. Consider the angle at which the camera is mounted to ensure a clear view without any obstructions like walls or trees.
3. Accessibility
Make sure the camera is easily accessible for installation and maintenance purposes. Consider factors such as power supply, network connectivity, and cabling requirements. It should be easily reachable for cleaning, adjustment, and repairs if needed.
4. Protection from the Elements
Since the camera will be installed outdoors, it is vital to choose a location that provides protection from the elements. Look for areas that offer shelter from rain, direct sunlight, and extreme weather conditions. Consider using weatherproof housings or enclosures for added protection against moisture and dust.
5. Lighting Conditions
Consider the lighting conditions in the selected location. Ensure that there is adequate illumination during both day and night for clear visibility. Avoid installing the camera in areas with intense backlight, direct glare, or strong shadows, as these can affect the image quality.
By carefully considering these factors, you can choose a perfect location for your outdoor dome security camera, ensuring effective surveillance and peace of mind. Remember to consult the camera’s manual for any additional specifications or requirements specific to your model.
Gathering the necessary tools
Before you begin installing your outdoor dome security camera, it’s important to gather all the necessary tools to ensure a smooth and efficient installation process.

The following tools are commonly required when installing an outdoor dome security camera:
- Drill: You’ll need a drill to create holes for mounting the camera and running cables.
- Screwdriver: A screwdriver will be needed to secure the camera and any mounting brackets in place.
- Level: A level will help ensure that your camera is properly aligned and positioned straight.
- Measuring tape: Use a measuring tape to accurately measure distances and ensure proper placement of the camera.
- Cable management tools: Depending on the specific camera and installation requirements, you may need cable ties, cable clips, or other cable management tools.
- Power drill: If you’re mounting your camera on a brick or concrete wall, a power drill with masonry bits will be necessary.
- Ladder: If your camera is being installed at a height, a ladder or step stool will be needed to safely reach the installation area.
- Protective equipment: It’s important to wear protective gloves and safety goggles when handling tools and equipment, particularly when drilling or working at heights.
By gathering these tools before starting the installation process, you can save time and ensure that you have everything you need to complete the job.
Mounting the camera bracket
Before mounting the camera bracket, make sure you have chosen a suitable location for your outdoor dome security camera. Consider factors such as the field of view, accessibility, and visibility.
Follow the steps below to mount the camera bracket:
- Using a level, ensure that the mounting surface is straight and even. This will help in obtaining optimal camera angles.
- Position the camera bracket against the mounting surface and mark the position of the screw holes with a pencil or marker.
- Using a drill, carefully create holes at the marked positions. Make sure the holes are the appropriate size for the screws that came with the camera bracket.
- Attach the camera bracket to the mounting surface using the screws and a screwdriver. Ensure that the bracket is securely fastened.
- If necessary, adjust the tilt and rotation of the camera bracket to achieve the desired viewing angle. Most outdoor dome security cameras have adjustable brackets to accommodate different requirements.
- Double-check the stability and alignment of the camera bracket. Make any necessary adjustments before proceeding.
Once the camera bracket is securely mounted, you can proceed with the installation of the camera itself.

Wiring the camera
Once you have chosen the ideal location for your outdoor dome security camera, it’s time to wire it properly. Follow these steps to ensure a successful installation:
1. Determine the power source: Before starting the wiring process, check if there is a power source nearby. You will need to connect the camera to a power supply, either by using an outlet or by wiring it directly to an electrical circuit.
2. Plan the cable route: Identify the best route for the cables to reach the camera. It’s important to choose the most discreet and protected path, considering any obstructions such as walls or trees. Measure and cut the cable accordingly.
3. Drill holes: If necessary, drill holes to run the cables through walls or other surfaces. Make sure the holes are large enough to fit the cables securely without causing damage.
4. Connect the cables: Depending on the type of camera and power supply, you may need to use different connectors or adaptors. Follow the manufacturer’s instructions carefully to connect the power cable, video cable, and any other necessary cables.

5. Secure the connections: After connecting the cables, use electrical tape or zip ties to secure them in place. This will prevent them from getting loose or damaged due to weather conditions or other factors.
6. Test the setup: Once all the connections are secure, test the camera to ensure it is receiving power and transmitting video correctly. Adjust the wiring if necessary and double-check all the connections.
7. Conceal the cables: To maintain a clean and professional look, consider concealing the cables using cable covers or conduits. This will protect them from damage and make the installation more aesthetically pleasing.
Remember to always follow the manufacturer’s instructions and seek professional assistance if needed. Properly wiring your outdoor dome security camera is crucial for its functionality and longevity.
Adjusting the camera angle
After you have successfully installed your outdoor dome security camera, it is important to adjust the camera angle to ensure you are capturing the desired areas. Follow these steps to adjust the camera angle:

- Locate the adjustment screws or knobs on the camera. These are typically located on the base or sides of the camera.
- Loosen the screws or knobs to allow for adjustment.
- Position the camera in the desired direction. Consider factors such as the area you want to monitor, the optimum viewing angle, and potential obstacles.
- Tighten the adjustment screws or knobs to secure the camera in place.
It is important to test the camera angle once you have made adjustments. Make sure it is capturing the intended areas and that there are no blind spots.
If you find that the camera angle needs further adjustment, repeat the steps above until you are satisfied with the positioning.
Remember, the proper camera angle is critical for effective security monitoring, so take the time to ensure it is set correctly.
Testing the camera and final touches
Once the installation of the outdoor dome security camera is complete, it is important to thoroughly test the camera to ensure it is functioning properly. Follow these steps to test the camera:
1. Power on the camera: Connect the camera to a power source and ensure that it starts up without any issues.
2. Check the camera angle and view: Verify that the camera is positioned correctly and captures the desired area. Adjust the camera angle if necessary.
3. Test the camera’s recording function: Trigger any motion sensors or manually activate the camera to test its recording capabilities. Check if the camera is able to capture clear and high-quality video footage.
4. Assess the night vision capabilities: Test the camera’s night vision feature by turning off any surrounding lights and checking if the camera can capture clear images in low-light conditions.
5. Review the remote viewing option: Connect the camera to a compatible smartphone, tablet, or computer to check if the remote viewing feature works effectively. Ensure that you are able to access the camera’s live stream from anywhere.
6. Evaluate the camera’s weather resistance: If the camera is rated for outdoor use, it should be able to withstand various weather conditions. Check if the camera remains functional during rain, extreme heat, or cold temperatures.
7. Secure the camera’s cables: After testing the camera, make sure to secure and hide any exposed cables or wires to protect them from damage or tampering. Use cable clips, conduit, or other appropriate methods to achieve a clean and professional installation.
Once you have completed the testing phase, you can make any final adjustments to the camera’s settings and ensure that it is properly mounted. Remember to periodically check the camera’s functionality and perform maintenance as needed to ensure optimal performance.
FAQ,
What are the key factors to consider before installing an outdoor dome security camera?
Before installing an outdoor dome security camera, you should consider factors such as the locations for installation, the camera’s field of view, power source options, connectivity options, and the camera’s durability and weather resistance.
What tools and equipment are needed to install an outdoor dome security camera?
To install an outdoor dome security camera, you will need a ladder, power drill, screwdriver, cables, connectors, a power source, a monitor or DVR, and the camera itself. Additionally, you may need tools for mounting the camera, such as brackets or mounting screws.


