
Are you tired of your iPhone 4’s limited camera capabilities? Do you envy your friends with the newer iPhone models, which have a built-in panoramic camera feature? Don’t worry, there’s a solution for you! In this article, we will guide you through the process of installing a panoramic camera on your iPhone 4, so you can capture stunning wide-angle shots just like the latest iPhones.
Step 1: Choose the Right App
The first step is to find and download a suitable app that offers a panoramic camera feature. There are several apps available on the App Store that can provide this functionality, such as Panorama 360 and 360 Panorama. Make sure to read the reviews and choose a reliable app that is compatible with your iPhone 4’s operating system version.
Step 2: Install the App

Once you have chosen the app, click on the “Install” button on the App Store to download and install it on your iPhone 4. This process may take a few minutes, depending on your internet connection speed. Once the installation is complete, you will find the app’s icon on your home screen.
Step 3: Set Up the Panoramic Camera
Launch the app by tapping on its icon, and follow the on-screen instructions to set up the panoramic camera. Typically, this involves granting the necessary permissions for the app to access your iPhone’s camera and photo library. It is important to read and understand the app’s privacy policy and terms of use before proceeding.
Step 4: Capture Panoramic Photos
Now that the panoramic camera is set up, you can start capturing stunning wide-angle photos. Open the app and look for the option to activate the panoramic camera mode. This is usually represented by an icon of a mountain range or a wide-angle lens. Follow the on-screen instructions to align your shots and capture the panorama. Make sure to hold your iPhone steady and move it slowly to get the best results.

Congratulations! You have successfully installed a panoramic camera on your iPhone 4. Now, you can capture breathtaking wide-angle photos and share them with your friends and family. Remember to explore the app’s other features and settings to enhance your photography experience. Happy snapping!
Step-by-step guide: How to install panoramic camera on iPhone 4
Are you eager to capture stunning panoramic photos with your iPhone 4? We’ve got you covered! In this step-by-step guide, we’ll walk you through the process of installing a panoramic camera app on your iPhone 4. Follow the instructions below to get started:
Step 1: Open the App Store
Tap on the App Store icon on your iPhone 4’s home screen to launch the App Store.
Step 2: Search for a panoramic camera app
Using the search function located at the bottom of the screen, type in “panoramic camera” and select the desired app from the search results.
Step 3: Install the app
Tap on the app to open its information page. Then, tap on the “Get” or “Install” button to begin the installation process. You may be prompted to enter your Apple ID and password.

Step 4: Wait for the app to download and install
Once you’ve tapped the “Get” or “Install” button, the app will begin to download and install on your iPhone 4. Wait for the process to complete. The app’s icon will appear on your home screen when it’s ready.
Step 5: Launch the panoramic camera app
Locate the app’s icon on your home screen and tap on it to launch the panoramic camera app on your iPhone 4.
Step 6: Follow the app’s on-screen instructions
Once the app is launched, follow the on-screen instructions to set up and calibrate the panoramic camera feature. This may involve scanning your surroundings or aligning specific points for optimal functionality.
Step 7: Start capturing panoramic photos
After completing the setup process, you’re ready to start capturing beautiful panoramic photos with your iPhone 4. Follow the app’s instructions on how to move and capture the panorama.
Congratulations! You have successfully installed a panoramic camera app on your iPhone 4 and are now equipped to explore the world of panoramic photography. Have fun capturing stunning images!

Check compatibility
Before installing a panoramic camera on your iPhone 4, it’s important to check the compatibility of the camera with your device. Here are a few steps to help you determine whether your iPhone 4 is compatible:
Step 1: Check the iOS version
Make sure your iPhone 4 is running iOS 8 or later. To check your iOS version, follow these steps:
- Go to the “Settings” app on your iPhone 4.
- Scroll down and tap on “General”.
- Select “About”.
- Look for the “Software Version” section.
If your iOS version is 8 or later, your iPhone 4 is compatible.
Step 2: Check the camera requirements
Check the requirements of the panoramic camera you wish to install and ensure they align with the capabilities of your iPhone 4. Some panoramic cameras may require specific features or hardware that may not be available on older models like the iPhone 4.
Pay attention to any specific camera app recommendations or system requirements mentioned by the camera manufacturer. This information can usually be found on their website or in the product documentation.

If the panoramic camera requirements match the capabilities of your iPhone 4, you can proceed with the installation process.
Choose the right camera
Before installing a panoramic camera on your iPhone 4, it is important to choose the right camera that suits your needs. Here are some factors to consider:
1. Compatibility: Ensure that the camera you choose is compatible with the iPhone 4. Check if it supports the necessary iOS version and has a dedicated app available for download.
2. Image quality: Look for a camera that offers high-resolution images and videos. Check the megapixel count and the video resolution supported by the camera.
3. Field of view: Consider the field of view offered by the camera. A wider field of view will capture more of the surroundings in a single shot, allowing you to create stunning panoramic pictures.
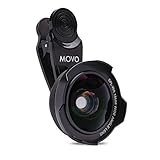
4. Ease of use: Look for a camera that is easy to set up and use. Consider the user interface and the available settings that allow you to customize the camera’s functionality.
5. Additional features: Some cameras come with extra features such as built-in filters, image stabilization, and time-lapse mode. Assess your needs and choose a camera that offers the features you desire.
By carefully considering these factors, you can choose the right panoramic camera for your iPhone 4 and enhance your photography experience.
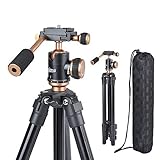
Purchase the camera
Before installing a panoramic camera on your iPhone 4, you’ll need to purchase the camera itself. There are various options available, both online and in physical stores.
When searching for a panoramic camera, consider the quality of the camera, the features it offers, and its compatibility with your iPhone 4. Look for cameras that are specifically designed for iPhone 4 and have positive customer reviews. Checking the specifications and customer ratings can help you make an informed decision.

Online Purchase
One convenient option is to purchase the panoramic camera online. There are several websites where you can find a wide range of panoramic cameras compatible with iPhone 4. Some popular online retailers include Amazon, eBay, and Best Buy.
When purchasing online, make sure to check the seller’s reputation and read customer reviews. Look for cameras that come with a warranty or return policy, in case you encounter any issues.
Physical Store
If you prefer to see the camera in person before buying, you can visit a physical store that sells electronics or specialized camera stores. Apple Stores may also carry panoramic cameras compatible with iPhone 4.
At the physical store, you can get a hands-on experience with the camera, ask questions to the staff, and compare different models. It is recommended to check the store’s return policy in case you need to make a return or exchange.
Remember to consider your budget and needs when purchasing the panoramic camera. It’s important to choose a camera that suits your requirements and offers the features you desire.

Prepare your iPhone 4
Before installing a panoramic camera on your iPhone 4, it’s important to make sure your device is ready for the process. Follow these steps to ensure a smooth installation:
1. Check your iOS version:
Make sure your iPhone 4 is running on iOS 7 or later. To check your version, go to Settings > General > About > Software Version. If you have an older version, update it by going to Settings > General > Software Update.
2. Backup your data:
It’s always recommended to back up your device before making any changes. Connect your iPhone 4 to your computer and use iTunes to create a backup of your important data such as photos, videos, contacts, and more.
3. Clear storage space:
Installing a panoramic camera app can take up additional storage space on your iPhone 4. To free up space, remove unwanted apps, photos, and videos from your device. You can also transfer files to your computer or iCloud to create more room for the panoramic camera app.
4. Disable Find My iPhone:
If you have Find My iPhone enabled, make sure to disable it before installing the panoramic camera. Go to Settings > iCloud > Find My iPhone and toggle off the feature.
5. Charge your iPhone:
Ensure that your iPhone 4 is fully charged or connected to a power source throughout the installation process. This will prevent any interruptions or potential data loss during the installation.
By following these preparation steps, you can ensure that your iPhone 4 is ready for the installation of the panoramic camera app. Once you’ve completed these steps, you’re ready to proceed with the installation process.
Install the necessary apps
To use a panoramic camera on your iPhone 4, you will need to install specific apps that allow you to take panoramic photos. Here are some recommended apps that you can find on the App Store:
1. Panorama 360 Camera
One popular app for panoramic photography is Panorama 360 Camera. This app allows you to easily capture and view 360-degree panoramic photos. Simply follow the instructions on the app to take stunning panoramic shots with your iPhone 4.
2. Cycloramic
Cycloramic is another great app that helps you capture stunning panoramic photos. It uses the iPhone’s built-in vibration motor to rotate the device while capturing images, resulting in a seamless panoramic photo. Install the app, place your iPhone 4 in a stable position, and let Cycloramic do the work for you.
Once you have chosen and installed the app that suits your needs, make sure to follow the instructions provided by the app to properly set it up and start taking panoramic photos with your iPhone 4.
Attach the camera to your iPhone 4
Installing a panoramic camera on your iPhone 4 is a simple process that can greatly enhance your photography experience. Here are the steps to attach the camera to your device:
- Start by ensuring that your iPhone 4 is turned off to prevent any accidental damage.
- Locate the camera attachment port on your iPhone 4. It is usually located at the top of the device.
- Take the panoramic camera and align it with the attachment port on your iPhone 4.
- Gently insert the camera into the attachment port, making sure it is securely connected. Be careful not to force it in or use excessive pressure.
- Once attached, turn on your iPhone 4 to activate the camera. It should automatically recognize the new device.
- To ensure a proper connection, open the camera app on your iPhone 4 and check if the panoramic camera is functioning correctly.
Note: If you encounter any difficulties attaching the camera or if it is not recognized by your iPhone 4, refer to the camera’s user manual or contact the manufacturer for further assistance.
By following these simple steps, you can successfully attach a panoramic camera to your iPhone 4 and start capturing amazing panoramic photos!
Connect the camera to your iPhone 4
To start using the panoramic camera on your iPhone 4, you will need to connect it to your device. Follow the steps below to get started:
Step 1: First, ensure that your iPhone 4 is powered off before connecting any external devices.
Step 2: Locate the charging port on your iPhone 4. This is the port typically used to charge your device.
Step 3: Take the panoramic camera and locate the corresponding connector. It should be a small plug that fits into the charging port on your iPhone 4.
Step 4: Gently insert the camera connector into the charging port on your iPhone 4. Make sure it is securely connected and properly aligned.
Step 5: Once the camera is connected, turn on your iPhone 4 by pressing the power button. You may need to enter your passcode or use Touch ID, depending on your device’s settings.
Step 6: After turning on your iPhone 4, you should see a notification indicating that a new device has been connected. Follow any prompts or instructions displayed on your screen to complete the camera setup process.
Step 7: Once the camera is successfully connected and set up, you can open the camera app on your iPhone 4 and start enjoying panoramic photography.
Note: If you are experiencing any difficulties connecting the panoramic camera to your iPhone 4, refer to the camera’s user manual or contact technical support for further assistance.
Adjust camera settings
Once you have successfully installed the panoramic camera on your iPhone 4, you will need to adjust the camera settings to optimize your panoramic photography experience. Follow the steps below to adjust the camera settings:
| Step 1: | Open the camera app on your iPhone 4. |
| Step 2: | Tap on the “Options” or “Settings” icon in the camera app. |
| Step 3: | Locate the panoramic camera settings. |
| Step 4: | Adjust the settings according to your preferences. |
| Step 5: | Some common camera settings to consider adjusting include: |
|
|
| Step 6: | Once you have adjusted the camera settings to your liking, you are ready to start capturing stunning panoramic photos with your iPhone 4! |
Remember to experiment with different settings to find the best configuration for your specific photography needs. Have fun exploring the panoramic capabilities of your iPhone 4!
Start capturing panoramic photos
Once you have successfully installed the panoramic camera app on your iPhone 4, you can begin capturing stunning panoramic photos. Follow these simple steps to get started:
Step 1: Launch the app
Locate the panoramic camera app on your iPhone 4’s home screen and tap on its icon to launch it. Wait for the app to load completely before proceeding to the next step.
Step 2: Choose the panoramic mode
Within the app, you will find different shooting modes. Look for the panoramic mode and select it by tapping on it. This mode is specifically designed for capturing panoramic images.
Step 3: Position your iPhone
To capture a panoramic photo, you will need to move your iPhone in a specific direction while keeping it steady. Hold your iPhone in landscape orientation and position it according to the guidance provided by the app. This will ensure that your panoramic photo turns out well-aligned and seamless.
Step 4: Start capturing
Once you have positioned your iPhone correctly, start the capturing process by tapping on the designated capture button within the app. Move your iPhone slowly and steadily in the indicated direction to capture the desired scene. Keep an eye on the app’s instructions to ensure a smooth capture.
Step 5: Complete the capture
When you have reached the end of the panoramic scene, the app will automatically stop capturing. You will then be able to review your panoramic photo within the app. If you are satisfied with the result, you can save or share it using the options provided by the app.
With these simple steps, you can now start capturing stunning panoramic photos on your iPhone 4 using the installed panoramic camera app. Enjoy exploring the possibilities of panoramic photography!
Share and enjoy your panoramic shots
After installing a panoramic camera on your iPhone 4 and capturing stunning wide-angle photos, you will undoubtedly want to share and enjoy your panoramic shots. Here are a few ways you can make the most of your panoramic photography:
1. Social Media: Share your panoramic shots directly on popular social media platforms such as Facebook, Instagram, and Twitter. This allows you to showcase your photography skills and lets your friends and followers enjoy the beautiful scenery captured in your panoramas.
2. Photo Sharing Platforms: Upload your panoramic photos to specialized photo sharing platforms like Flickr or 500px. These platforms are specifically designed for photographers to share their work, and you can find a community of fellow enthusiasts who will appreciate and provide feedback on your panoramic shots.
3. Create an Online Portfolio: If photography is your passion, consider creating a personal website or online portfolio to showcase your panoramic shots. This allows you to have complete control over how your work is presented and provides a professional platform to exhibit your talent.
4. Print and Display: Don’t forget the joy of viewing your panoramic shots in physical form! Print your favorite panoramas and display them in frames or create a photo album dedicated to showcasing your panoramic photography. This way, you can appreciate the beauty of your shots offline and share them with friends and family in a tangible way.
By sharing and enjoying your panoramic shots, you can not only inspire others with your photography skills but also constantly motivate yourself to push the boundaries of what’s possible with your panoramic camera on the iPhone 4.
FAQ
Can I install a panoramic camera on my iPhone 4?
Yes, you can install a panoramic camera on iPhone 4. There are several third-party apps available on the App Store that offer panoramic camera functionality for iPhone 4.
What are some popular panoramic camera apps for iPhone 4?
Some popular panoramic camera apps for iPhone 4 are Cycloramic, 360 Panorama, and Photosynth. These apps allow you to capture stunning panoramic photos with your iPhone 4.
Is it difficult to install a panoramic camera app on iPhone 4?
No, it is not difficult to install a panoramic camera app on iPhone 4. You can simply search for the desired app on the App Store, download it, and follow the on-screen instructions to install and set it up on your iPhone 4.


