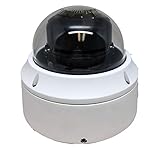
If you are looking to enhance the security of your premises, installing a high-quality security camera is a wise investment. The Pelco Spectra BB53-PG-E is a high-speed dome security camera that offers advanced features and exceptional performance. In this guide, we will walk you through the step-by-step process of installing the Pelco Spectra camera to ensure you get the most out of its capabilities.
Step 1: Preparation
Before you begin the installation process, it is crucial to gather all the necessary tools and equipment. You will need a ladder, power drill, screwdriver, Ethernet cable, and a PoE switch or power supply. Additionally, make sure to read the camera’s installation manual thoroughly to familiarize yourself with its specifications and requirements.
Step 2: Mounting the Camera

The first step is to choose the ideal location for mounting the camera. It should provide a wide field of view and cover the areas that require surveillance. Once the location is determined, use the ladder and carefully mount the camera base using the appropriate screws and anchors. Ensure that the camera is securely fixed to prevent any accidental displacement.
Step 3: Wiring
Next, connect the Ethernet cable to the camera’s network port and route it to the designated PoE switch or power supply. Make sure to keep the cable neatly organized and secured to prevent any damage. Connect the other end of the cable to the PoE switch or power supply, ensuring a stable and reliable connection.
Step 4: Powering On
Once the camera is mounted and wired, power on the PoE switch or power supply. The camera should start initializing, and you may hear a slight mechanical noise as it calibrates its position. Allow the camera a few minutes to complete the initialization process.

Step 5: Configuration
With the camera powered on, access its configuration settings via the Pelco Spectra’s web interface or dedicated software. Configure the camera’s network settings, including the IP address, subnet mask, and gateway, to ensure it can communicate with your network. Additionally, customize the camera’s advanced features, such as motion detection, pan/tilt speeds, and recording options, according to your specific needs.
By following these simple steps, you can successfully install the Pelco Spectra High-Speed Dome Security Camera BB53-PG-E and enjoy its top-notch surveillance capabilities. Remember to consult the camera’s manual for detailed instructions and troubleshoot any issues that may arise during the installation process. With proper installation and configuration, the Pelco Spectra camera will provide reliable security and peace of mind.
What is Pelco Spectra High-Speed Dome Security Camera?
Pelco Spectra High-Speed Dome Security Camera is a highly advanced and versatile surveillance camera that is widely used for security purposes in various industries such as retail, transportation, and government facilities. It is known for its exceptional performance, durability, and ease of installation.
Key Features of Pelco Spectra High-Speed Dome Security Camera:
The Pelco Spectra High-Speed Dome Security Camera offers a range of features that make it an ideal choice for monitoring and securing large areas:

| 1. High-Speed Pan, Tilt, and Zoom | The camera is equipped with high-speed pan, tilt, and zoom capabilities, allowing for quick and precise monitoring of a wide area. It can rotate 360 degrees horizontally and tilt up to 180 degrees vertically, providing comprehensive coverage. |
| 2. High-Definition Imaging | The camera captures clear and detailed images with its high-definition imaging technology. It has a high-resolution sensor and autofocus capabilities, ensuring that every detail is captured with accuracy. |
| 3. Day/Night Functionality | The camera has a day/night functionality that automatically adjusts its settings to provide optimal image quality in different lighting conditions. It can switch between color and black and white mode, ensuring clear surveillance footage at all times. |
| 4. Wide Dynamic Range | With its wide dynamic range feature, the camera can capture images in challenging lighting conditions, such as glare or shadow. It ensures that both bright and dark areas are properly exposed, providing enhanced visibility. |
| 5. Event Management | The camera’s event management capabilities allow for intelligent video analytics and advanced monitoring. It can detect motion, tampering, and other predefined events, triggering alarms or notifications for immediate action. |
| 6. Remote Access and Control | The camera can be accessed and controlled remotely through a web browser or a dedicated software. Users can view live video feeds, adjust camera settings, and manage recordings from any location with an internet connection. |
Overall, Pelco Spectra High-Speed Dome Security Camera is a reliable and feature-rich surveillance solution that offers excellent image quality, extensive coverage, and advanced functionalities for effective security monitoring.
Benefits of Installing Pelco Spectra High-Speed Dome Security Camera
Installing a Pelco Spectra High-Speed Dome Security Camera, such as the bb53-pg-e model, offers numerous benefits for your security system. These advanced cameras are designed to provide comprehensive surveillance and reliable monitoring for a wide range of applications.
Here are some key benefits of installing a Pelco Spectra High-Speed Dome Security Camera:
1. Wide Coverage: The high-speed dome feature allows the camera to rotate and tilt quickly, covering a large area with just one camera. This provides you with a wider field of view and reduces the number of cameras needed for your surveillance system.
2. Superior Image Quality: Pelco Spectra cameras are equipped with advanced imaging technology, ensuring sharp and clear video footage. Whether it’s daylight or nighttime, these cameras deliver high-resolution images, allowing you to easily identify individuals and objects.

3. Powerful Zoom Capabilities: The Spectra High-Speed Dome cameras come with powerful optical zoom lenses, allowing you to zoom in on specific areas of interest without compromising image quality. This feature is particularly useful when you need to get a closer look at details or individuals in the surveillance footage.
4. Intelligent Tracking: These cameras are built with intelligent tracking capabilities, which can automatically detect and track moving objects. This is especially useful in scenarios where there is a need to monitor a specific target or area continuously.
5. Weather Resistance: The Pelco Spectra High-Speed Dome Security Cameras are designed to withstand harsh weather conditions. They are IP66-rated, meaning they are dustproof and can resist water splashes, making them suitable for both indoor and outdoor surveillance applications.
6. Remote Monitoring: With the Pelco Spectra series, you can access your security cameras remotely using a smartphone, tablet, or computer. This allows you to monitor your property or premises from anywhere at any time, giving you peace of mind and increasing the overall security of your space.
7. Integration with Other Systems: Pelco Spectra cameras can be easily integrated with other security systems, such as alarms and access control, creating a more comprehensive security solution. This integration ensures that you have real-time information and better control over the security of your space.
In conclusion, installing a Pelco Spectra High-Speed Dome Security Camera brings numerous benefits, including wide coverage, superior image quality, powerful zoom capabilities, intelligent tracking, weather resistance, remote monitoring, and integration with other security systems. Consider investing in these advanced cameras to enhance the security and surveillance capabilities of your property or premises.
Things to Consider Before Installing Pelco Spectra High-Speed Dome Security Camera
Installing a Pelco Spectra High-Speed Dome Security Camera requires careful planning and consideration of various factors to ensure optimal performance and functionality. Before proceeding with the installation, make sure to take the following into account:
- Location: Choose the ideal location for the camera, considering the field of view, coverage area, and potential obstructions. The camera should be installed at a height that provides a clear view of the area while minimizing vulnerability to tampering.
- Mounting: Ensure that the mounting surface is sturdy enough to support the camera’s weight and withstand environmental conditions. Use appropriate brackets or mounts for a secure installation.
- Power Source: Determine the power source for the camera and ensure it is easily accessible. Consider using a dedicated power supply or a power-over-ethernet (PoE) connection if applicable.
- Network Connectivity: If the camera is IP-based, ensure that there is a reliable network connection available. Check the network infrastructure for compatibility and sufficient bandwidth to handle the camera’s data transmission.
- Cabling: Plan the cabling layout, considering the distance between the camera and the recording device or network switch. Use high-quality cables and connectors to ensure optimal signal transmission.
- Lighting Conditions: Evaluate the lighting conditions at the installation site. Adjust camera settings or consider supplemental lighting options if necessary to ensure clear and detailed images in both daytime and nighttime situations.
- Environmental Factors: Take into account the environmental conditions, such as extreme temperatures, humidity, or exposure to dust and water. Ensure that the camera is rated for the specific conditions at the installation site.
- Access and Control: Determine the method of camera access and control, whether through a local network or remotely via the internet. Set up appropriate authentication and security measures to protect the camera’s feed and settings.
- Testing and Configuration: Perform thorough testing and configuration of the camera before finalizing the installation. Ensure that the camera is properly aligned, configured, and integrated with the recording system or video management software.
- Compliance: Familiarize yourself with any legal or regulatory requirements regarding the installation and use of surveillance cameras in your location. Ensure compliance with privacy laws and obtain any necessary permits or permissions.
Taking these considerations into account before installing a Pelco Spectra High-Speed Dome Security Camera will help ensure a successful and effective surveillance system implementation. It is recommended to consult the camera’s installation manual and seek professional assistance if needed to ensure proper installation and optimization.
Step-by-Step Guide to Installing Pelco Spectra High-Speed Dome Security Camera
Installing a Pelco Spectra high-speed dome security camera can greatly enhance the security of your property. This step-by-step guide will walk you through the installation process to ensure that your camera is properly set up and ready to use.
Tools and Materials Needed:
- Pelco Spectra high-speed dome security camera (model BB53-PG-E)
- Mounting bracket and screws
- Power supply and cables
- Ethernet cable
- Drill and drill bits
- Screwdriver
- Level
Step 1: Choose an Installation Location
Begin by selecting a suitable location for your Pelco Spectra camera. Consider factors such as optimal viewing angle, coverage area, and accessibility for maintenance. Ensure that the chosen location has a strong and stable surface to mount the camera.

Step 2: Mount the Camera
- Using a drill and appropriate drill bit, create holes in the mounting surface according to the dimensions provided in the camera’s installation manual.
- Align the mounting bracket with the drilled holes and secure it using the provided screws.
- Attach the camera to the mounting bracket by aligning the screw holes and using the included screws.
Step 3: Connect Power and Ethernet Cables
- Connect one end of the power supply cable to the power input port on the camera.
- Connect the other end of the power supply cable to a power source, such as a power outlet or power distribution unit.
- Connect one end of the Ethernet cable to the Ethernet port on the camera.
- Connect the other end of the Ethernet cable to a network switch or router.
Step 4: Adjust Camera Settings
Access the camera’s configuration interface using a computer or mobile device connected to the same network. Follow the instructions provided in the camera’s user manual to configure settings such as resolution, frame rate, and motion detection.
Step 5: Test the Camera
Once the camera is installed and configured, test its functionality by accessing the live video feed from a computer or mobile device. Ensure that the camera provides the desired viewing angle and captures clear, high-quality video.
Congratulations! You have successfully installed a Pelco Spectra high-speed dome security camera. Remember to regularly clean and maintain the camera to ensure optimal performance and longevity.
Common Issues and Troubleshooting Tips for Pelco Spectra High-Speed Dome Security Camera Installation
Installing a Pelco Spectra high-speed dome security camera can sometimes be a complex process. Here are some common issues that you may encounter during the installation process and troubleshooting tips to help you resolve them:
1. Connection Problems
If you are experiencing connection problems with your Pelco Spectra camera, there are a few steps you can take to troubleshoot the issue:
- Check the power supply and ensure that the camera is receiving adequate power.
- Inspect the Ethernet cables and connectors to ensure they are properly connected and not damaged.
- Verify that the network settings on the camera and your computer are correctly configured.
- If you are using a network switch, try connecting the camera directly to your computer to rule out any issues with the switch.
2. Poor Image Quality
If you are experiencing poor image quality from your Pelco Spectra camera, try the following troubleshooting steps:
- Check the camera lens for any smudges or dirt and clean it if necessary.
- Adjust the camera’s focus and zoom settings to ensure optimal image clarity.
- Inspect the lighting conditions in the camera’s field of view and make any necessary adjustments to improve visibility.
- Ensure that the camera’s video settings, such as resolution and frame rate, are properly configured.
3. Pan/Tilt/Zoom Control Issues
If you are having trouble controlling the pan, tilt, and zoom functions of your Pelco Spectra camera, try the following troubleshooting steps:
- Check the camera’s firmware version and update it if necessary.
- Verify that the PTZ controller or software you are using is compatible with the Pelco Spectra camera.
- Inspect the wiring and connections between the camera and the PTZ controller to ensure they are properly connected.
- Reset the camera’s PTZ settings to their default values and reconfigure them if needed.
By following these troubleshooting tips, you can overcome common issues that may arise during the installation of a Pelco Spectra high-speed dome security camera. If you continue to experience problems, it is recommended to consult the camera’s user manual or contact Pelco’s technical support for further assistance.
FAQ,
What is the Pelco Spectra high-speed dome security camera?
The Pelco Spectra high-speed dome security camera is a surveillance camera that is designed to provide high-quality video footage and advanced security features. It is capable of capturing high-resolution video, pan and tilt movements, and zooming in on specific areas of interest.
How do I install the Pelco Spectra high-speed dome security camera?
The installation process for the Pelco Spectra high-speed dome security camera involves several steps. First, you will need to mount the camera on a secure surface or pole using the provided mounting brackets. Then, you will need to connect the camera to a power source and to your network or recording device using Ethernet cables. Finally, you will need to configure the camera’s settings and adjust its position for optimal surveillance coverage.