
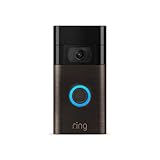
Installing a Ring outdoor security camera can provide you with peace of mind and an added layer of protection for your home. Ring cameras are easy to install and can be set up in just a few simple steps.
First, choose the best location for your camera. Make sure it is positioned to cover the area you want to monitor, such as your front door or driveway. It’s important to place the camera at a height and angle that will capture a clear view of any potential activity.
Next, gather the necessary tools and materials for installation. This may include a drill, screws, and a screwdriver. Ensure that you have a stable surface to mount the camera, such as a wall or eave.
Once you have selected the location and prepared the necessary tools, it’s time to mount the camera. Use the supplied mounting bracket to attach the camera securely to the surface. Make sure the camera is level and firmly attached.
After mounting the camera, connect it to a power source. Ring cameras can be powered by batteries, solar panels, or by wiring them directly to your home’s electrical system. Follow the manufacturer’s instructions to connect the camera to the power source of your choice.

Finally, complete the camera setup process. This typically involves downloading the Ring app, creating an account, and following the on-screen instructions to connect the camera to your Wi-Fi network. Once the setup is complete, you can customize the camera’s settings and start monitoring your property.
Installing a Ring outdoor security camera is a straightforward process that can be completed by most homeowners. By following these steps, you can enhance the security of your home and have peace of mind knowing that you have an extra set of eyes protecting your property.
Preparing for Installation
Before installing your Ring outdoor security camera, it is important to properly prepare and plan for the installation process. This will ensure that the camera is placed in the optimal location and is ready to provide effective security coverage. Follow the steps below to prepare for the installation:
1. Determine the Ideal Location
The first step in preparing for installation is to identify the ideal location for your Ring outdoor security camera. Consider areas in and around your property that require monitoring, such as front doors, driveways, and backyards. Take into account factors like line of sight, lighting conditions, and Wi-Fi signal strength. Choosing the right location will help maximize the camera’s effectiveness.
2. Check Wi-Fi Coverage
Ensure that you have a reliable Wi-Fi connection in the area where you plan to install the camera. Weak Wi-Fi signals can cause interruptions in the camera’s footage and connectivity. If needed, consider using a Wi-Fi range extender or upgrading your router to ensure a strong and stable connection.

3. Review Power Options
Determine the power source options for your camera. The Ring outdoor security camera can be powered through a wired connection or via a rechargeable battery pack. If you choose the wired option, ensure that there is an electrical outlet nearby or plan to use a weatherproof power cable. If you opt for the battery-powered option, make sure you have access to a charging station or spare battery packs.
4. Check Mounting Surface
Inspect the mounting surface where you plan to install the camera. Ensure that it is solid, level, and capable of supporting the camera’s weight. Remove any debris or obstacles that may interfere with the installation process. Additionally, consider using mounting brackets or accessories to enhance the camera’s stability and angle adjustability.
5. Gather Tools and Equipment
Make sure you have all the necessary tools and equipment for the installation. This may include a drill, screws, screwdriver, ladder, level, and any additional mounting hardware based on your specific installation requirements. Having these items ready beforehand will streamline the installation process.
By properly preparing for the installation, you can ensure that your Ring outdoor security camera is positioned correctly and ready to provide the desired protection and monitoring. Take the time to plan and gather the necessary tools to make the installation process smoother and hassle-free.
| Materials Needed: | Tools Required: |
|---|---|
| – Ring outdoor security camera | – Drill |
| – Wi-Fi range extender (if needed) | – Screws |
| – Weatherproof power cable (if needed) | – Screwdriver |
| – Charging station or spare battery packs(if needed) | – Ladder |
| – Mounting brackets or accessories (if needed) | – Level |
Choosing the Right Location
When installing your Ring Outdoor Security Camera, finding the right location plays a crucial role in ensuring optimal surveillance coverage. Here are some important factors to consider when choosing the perfect spot:
- Visibility: Look for an area with a clear line of sight that allows the camera to capture a wide field of view. Avoid obstructions like trees, plants, or walls that could limit the camera’s visibility.
- Height: Mount the camera at a suitable height to capture both people’s faces and any potential intruders. Ideally, the camera should be mounted at a height of 9-10 feet from the ground.
- Power Source: Ensure that the chosen location is near an electrical outlet or has easy access to a power source. This will prevent the need for long and potentially hazardous cable runs.
- Wi-Fi Signal: Check the Wi-Fi signal strength at the chosen location. A strong and stable Wi-Fi connection is essential for the camera to operate effectively.
- Weatherproofing: Consider the camera’s exposure to the elements. Look for a location that provides some natural protection from rain, snow, and extreme weather conditions.
- Accessibility: Choose a location that allows easy access for maintenance and adjustments. Ensure that the camera can be easily reached for cleaning, battery replacement, or firmware updates.
By carefully selecting the right location for your Ring Outdoor Security Camera, you can maximize its effectiveness and ensure the safety and security of your property.
Mounting the Camera
Before you begin mounting your Ring outdoor security camera, make sure you have the following tools:
- Drill
- Screwdriver
- Tape measure
- Pencil
Step 1: Choose a Mounting Location
First, select a suitable location for your camera. It should have a clear view of the area you want to monitor, and be within reach of a power source if your camera requires one.
Make sure the location is secure and will not be easily accessible to potential thieves or vandals. Consider mounting the camera at a higher elevation to help prevent tampering.
Step 2: Mark the Mounting Holes
Hold the mounting bracket against the wall or surface where you want to install the camera. Use a pencil to mark the locations of the mounting holes.

Ensure that the bracket is level and straight before marking the holes.
Step 3: Drill the Holes
Using a drill, carefully drill the holes at the marked locations. Be sure to select a drill bit that is appropriate for the surface you are drilling into.
When drilling into a brick or concrete surface, use a masonry bit. For wood or drywall surfaces, a standard drill bit will suffice.
Step 4: Attach the Mounting Bracket
Place the mounting bracket over the drilled holes and attach it to the wall or surface using the provided screws and a screwdriver.
Tighten the screws securely to ensure that the bracket is firmly attached and will support the weight of the camera.

Step 5: Attach the Camera
Once the mounting bracket is securely in place, attach the camera to the bracket using the included screws or fasteners.
Make sure the camera is level and facing the desired direction before tightening the screws.
| Tip: | Consider using a level or a smartphone app with a built-in level to ensure that your camera is perfectly straight. |
|---|
That’s it! Your Ring outdoor security camera is now successfully mounted and ready to use.
Connecting Power Source
Before installing your Ring Outdoor Security Camera, you need to make sure it is properly connected to a power source. Follow these steps:
- Locate a power outlet near the installation location of your camera. Ensure there is a stable power supply and no loose connections.
- Plug the provided power adapter into the camera’s power port located on the back of the device.
- Connect the other end of the power adapter to the power outlet you identified in step 1. Make sure the connection is secure.
- Check if the camera’s LED light is illuminated, indicating that it is receiving power.
Note: It is essential to ensure a stable power source, as interruptions or power fluctuations could affect the camera’s performance. Additionally, consider using a surge protector to protect the camera from voltage spikes.

If you encounter any issues or have questions regarding the power connection, consult the Ring product manual or contact Ring customer support for assistance.
Adjusting Camera Settings
Once you have installed your Ring outdoor security camera, it is important to adjust the camera settings to ensure optimal performance. Here are the steps to follow:
- Open the Ring app on your smartphone or tablet.
- Select the outdoor camera device you want to adjust.
- Tap on the “Settings” option in the app menu.
- In the settings menu, you will find various options to customize your camera settings.
- Adjust the motion detection settings to your preference. You can choose the areas where the camera should detect motion and set the sensitivity level.
- Enable or disable the night vision feature based on your needs.
- Customize the audio settings for two-way communication.
- Set up motion alerts to receive notifications whenever motion is detected.
- Configure privacy settings to control who can access your camera’s live feed.
- Save the changes and exit the settings menu.
By adjusting these camera settings, you can ensure that your Ring outdoor security camera meets your specific requirements and provides you with the utmost security and peace of mind.
Connecting to Wi-Fi
Before you can start using your Ring outdoor security camera, you need to connect it to your Wi-Fi network. Here’s how:
Step 1: Locate the Ring setup button
First, find the Ring setup button on the back of the camera. It is a small button with the word “Setup” written beside it.

Step 2: Open the Ring mobile app
Download and open the Ring mobile app on your smartphone or tablet.
Step 3: Follow the in-app instructions
Within the Ring app, select “Set Up a Device” and follow the in-app instructions to connect your camera to Wi-Fi. You may need to enter your Wi-Fi network name (SSID) and password.
Note: Make sure that your smartphone or tablet is connected to the same Wi-Fi network that you want to connect your camera to.
Step 4: Complete the setup process
Once you have entered your Wi-Fi network information, the app will guide you through the rest of the setup process. This may include creating an account, naming your camera, and enabling any additional features.
Tip: If you encounter any issues during the setup process, you can check the Ring website for troubleshooting guides or contact their customer support for further assistance.
Once your Ring outdoor security camera is successfully connected to Wi-Fi, you can start enjoying the added peace of mind and security it provides for your home.
Testing the Camera
Once you have successfully installed the Ring outdoor security camera, it is important to test its functionality to ensure it is working properly. Follow these steps to test the camera:
1. Power On
Make sure the camera is powered on and receiving power. Check that the LED light on the camera is illuminated.
2. Connect to Wi-Fi
Ensure that the camera is properly connected to your Wi-Fi network. Use the Ring app on your smartphone to check the Wi-Fi connection status.
3. Live View
Open the Ring app and select the camera from the list of devices. Tap on the Live View option to access the camera’s live feed. Check if you can see a clear image and hear audio from the camera.
4. Two-Way Talk
Test the two-way talk feature by speaking into the app and listening for the audio coming from the camera. Make sure the microphone and speaker are working properly.
5. Motion Detection
Move in front of the camera’s field of view to test the motion detection feature. Check if the camera detects the movement and sends you a push notification on your smartphone.
6. Recording and Cloud Storage
Verify that the camera is successfully recording and storing footage on the Ring cloud. Access the recorded footage through the app and ensure it is of good quality.
7. Night Vision
Test the camera’s night vision capabilities by turning off the lights in the area being monitored. Check if the camera can still capture clear images in low light conditions.
8. Adjustments
If any issues or limitations are identified during the testing process, make necessary adjustments to the camera’s position, settings, or network connectivity to resolve them.
By following these steps and thoroughly testing the camera, you can ensure that your Ring outdoor security camera is set up correctly and functioning properly to provide you with the desired level of security and peace of mind.
Setting up the Mobile App
Before you can start using your Ring outdoor security camera, you need to set up the mobile app on your smartphone or tablet. Follow these steps to get started:
- Open the app store on your device, such as the Apple App Store or the Google Play Store.
- Search for the Ring mobile app and download it.
- Once the app is downloaded, open it and sign in or create a new account.
- Follow the on-screen instructions to connect your Ring camera to your mobile device.
- Make sure your Ring camera is powered on and in setup mode.
- In the app, select “Add a Device” and choose the Ring outdoor security camera.
- Enter the required information, such as your Wi-Fi network and password.
- Wait for the app to detect your camera and complete the setup process.
- Once the setup is complete, you can access your camera’s live feed and customize its settings from the app.
Setting up the mobile app is an essential step in getting your Ring outdoor security camera up and running. Make sure to follow the instructions carefully to ensure a successful setup process.
Enabling Motion Detection
Once your Ring Outdoor Security Camera is installed, you can enable Motion Detection to receive alerts whenever the camera detects movement. Follow these steps to enable Motion Detection:
Step 1: Open the Ring App
To begin, open the Ring app on your smartphone or tablet. If you don’t have the app installed, you can download it from the App Store or Google Play Store.
Step 2: Select your Camera
In the app, select your Ring Outdoor Security Camera from the list of devices. Make sure your camera is connected to the internet and is powered on.
Step 3: Go to Device Settings
Once you’ve selected your camera, tap on the “Settings” icon located at the top right corner of the app. This will take you to the device settings page.
Step 4: Enable Motion Detection
In the device settings page, scroll down and find the “Motion Settings” option. Tap on it to access the motion detection settings.
Within the motion settings, you can adjust various parameters such as motion sensitivity and motion zones. The motion sensitivity determines how sensitive the camera is to motion, while the motion zones allow you to specify areas where you want the camera to detect motion.
To enable motion detection, simply toggle the switch next to “Motion Detection” to the ON position. Once enabled, you will start receiving motion alerts on your phone whenever the camera detects movement.
Step 5: Customize Motion Detection Notifications
If you want to customize the motion detection notifications further, you can do so by going to your phone’s settings. In the app, tap on “Alert Notifications” under the motion settings to access notification customization options.
| Notification Options | Description |
|---|---|
| Push Notifications | Receive push notifications on your phone when motion is detected. |
| Email Notifications | Get email notifications whenever motion is detected. |
| Text Message (SMS) Notifications | Receive text message notifications when motion is detected. |
| In-App Notifications | Receive in-app notifications within the Ring app when motion is detected. |
Customize these options according to your preference to ensure you receive motion detection alerts in the most convenient way for you.
By following these steps, you can easily enable motion detection on your Ring Outdoor Security Camera and start receiving alerts whenever there is any movement detected.
Troubleshooting Common Issues
If you are experiencing any problems with your Ring Outdoor Security Camera, here are some common issues and troubleshooting steps you can try:
1. Poor Wi-Fi signal
Check the signal strength of your Wi-Fi network. The camera requires a stable internet connection to function properly. Try moving your camera closer to your Wi-Fi router or use a Wi-Fi extender to boost the signal.
2. Camera not detecting motion
Ensure that the camera is mounted properly and facing the desired area. You can adjust the motion detection sensitivity settings in the Ring app to make sure it is not too high or too low. Also, check if there are any obstructions or objects blocking the camera’s view.
3. No video feed
If you are not receiving a video feed from your camera, check if it is powered on and connected to the internet. Restarting both the camera and your Wi-Fi router can sometimes resolve this issue. Make sure that the camera firmware and the Ring app are up to date.
4. False motion alerts
If you are receiving false motion alerts, adjust the motion detection zone and sensitivity settings in the Ring app. Consider disabling motion detection for certain areas that may be triggering false alerts, such as trees or moving shadows.
5. Poor image quality
If the video quality from your camera is poor, check the camera lens for any dirt or smudges that may be affecting the image. Clean the lens gently with a soft, lint-free cloth. If the issue persists, try adjusting the camera’s positioning or check your Wi-Fi signal strength.
6. Device offline
If your camera shows as offline in the Ring app, check if it is still connected to your Wi-Fi network. Restarting the camera and your Wi-Fi router can help resolve connectivity issues. Ensure that your internet connection is stable and consider moving the camera closer to your router.
If you continue to experience issues with your Ring Outdoor Security Camera, you can visit the Ring support website for further assistance or contact their customer support team.
Note: Troubleshooting steps may vary depending on your specific camera model and software version. Consult the Ring documentation for more detailed instructions.
FAQ,
What is a Ring Outdoor Security Camera?
A Ring Outdoor Security Camera is a device that is installed on the exterior of a building to monitor and record activity outside. It is designed to provide security and peace of mind to homeowners by allowing them to keep an eye on their property from anywhere using a smartphone or computer.
Why should I install a Ring Outdoor Security Camera?
Installing a Ring Outdoor Security Camera can provide several benefits. It can help deter potential criminals and vandals, as the presence of a visible camera can make them think twice before targeting your property. It can also provide evidence in the event of a crime or vandalism, which can be helpful for law enforcement and insurance purposes. Lastly, it can give you peace of mind knowing that you can monitor your property remotely and receive alerts if any suspicious activity is detected.
Can I install a Ring Outdoor Security Camera myself or do I need professional help?
Yes, you can install a Ring Outdoor Security Camera yourself. The installation process is designed to be user-friendly and can typically be completed by following the provided instructions. However, if you are not comfortable with DIY installations or if you have specific requirements, you may consider hiring a professional to assist you. Professional installation services may be available through Ring or authorized third-party providers.


