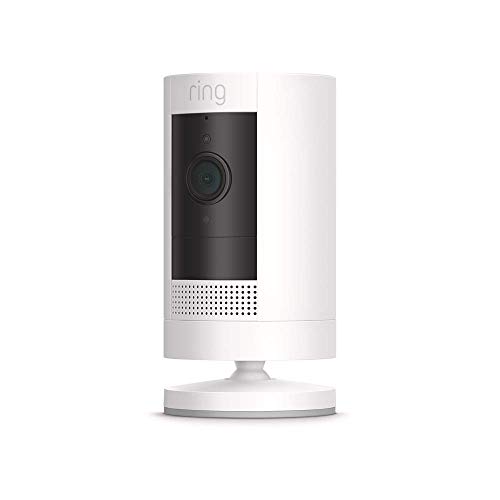
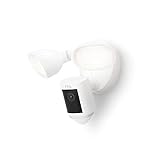
If you’re concerned about the security of your home or office, installing a wireless security camera can provide you with peace of mind. Ring is one of the leading brands in the market, offering a wide range of wireless security cameras that are easy to install and use. In this article, we will guide you through the steps to install a Ring wireless security camera, ensuring that your property is well-protected.
Step 1: Choose the Right Location
The first step in installing your Ring wireless security camera is to choose the right location for it. Consider the areas that require monitoring and select a spot where the camera can have a clear view of those areas. It’s important to ensure that the camera is positioned at a height that provides optimal coverage and reduces the risk of tampering.
Step 2: Install the Ring App
Before proceeding with the physical installation, make sure to download and install the Ring app on your smartphone or tablet. This app will be your primary means of accessing and controlling your wireless security camera. It allows you to view live video feed, receive motion alerts, and customize settings according to your preferences.

Step 3: Mount the Camera
Once you’ve chosen the location and installed the Ring app, it’s time to mount the camera. Follow the manufacturer’s instructions to securely attach the camera to the designated spot. Make sure that the camera is facing the desired area and is properly aligned for optimal coverage. Use the necessary tools and mounting hardware provided in the camera package.
Step 4: Connect to Wi-Fi
After mounting the camera, it’s essential to connect it to your Wi-Fi network. Launch the Ring app on your mobile device and follow the on-screen instructions to connect the camera to your Wi-Fi. Ensure that you have a stable internet connection and enter the correct Wi-Fi credentials to establish a successful connection. This will enable you to access the camera remotely and receive real-time notifications.
Step 5: Set Up Motion Detection and Alerts
To maximize the efficiency of your Ring wireless security camera, configure the motion detection and alerts settings according to your requirements. Use the Ring app to customize sensitivity levels, define motion zones, and set up notifications to receive alerts whenever motion is detected. This will help you stay informed about any potential security threats in real-time.
By following these simple steps, you can easily install a Ring wireless security camera and enhance the security of your premises. Remember to regularly update the firmware and maintain the camera’s position for optimal functionality. With a reliable wireless security camera in place, you can have peace of mind knowing that you are equipped to protect your home or office.
Choosing the Right Location
When installing your Ring wireless security camera, choosing the right location is crucial to ensure optimal functionality and coverage. Here are some factors to consider:
1. Coverage: Make sure the camera’s field of view covers the desired area. Consider the range and angle of the camera to ensure it captures the most important spaces.
2. Accessibility: Place the camera in a location that is easily accessible for maintenance and battery replacement. Avoid high or hard-to-reach areas that may require a ladder or special equipment.

3. Power Source: Ensure the camera is located near a power source or have a plan for its power supply. Some cameras are battery-powered, while others require a direct power connection.
4. Wi-Fi Signal Strength: Check the Wi-Fi signal strength in the chosen location to ensure a stable and reliable connection. Avoid areas with weak or fluctuating signals.
5. Weather Conditions: Consider the weather conditions in the selected area. Ensure the camera is installed in a proper weather-resistant enclosure or choose a camera that is specifically designed for outdoor use.
6. Privacy and Legal Considerations: Be mindful of privacy concerns and local laws. Avoid aiming the camera towards private property or areas where individuals may have a reasonable expectation of privacy.
By taking these factors into account, you can choose the right location for your Ring wireless security camera and enhance the overall security of your property.
Gathering the Required Tools
Before you begin installing your Ring Wireless Security Camera, you will need to gather a few essential tools. Having these tools ready beforehand will ensure a smooth and hassle-free installation process.
Here is a list of the tools you will need:
| Tool | Description |
|---|---|
| Screwdriver | A Phillips-head screwdriver is typically used for most Ring camera installations. Make sure you have the correct size for the screws provided with your camera. |
| Drill | If you plan to mount your camera on a wall or other surface, a drill will be necessary to create holes for the mounting hardware. |
| Level | To ensure that your camera is properly aligned, a level will help you make sure it is straight. |
| Tape Measure | Depending on where you plan to install your camera, a tape measure may be useful for measuring distances and ensuring proper placement. |
| Power Drill | If your camera requires a power source, you may need a power drill to create holes for the power cable. |
| Stud Finder | If you plan to mount your camera on a wall, a stud finder will help you locate the wooden studs behind the drywall for secure mounting. |
Safety First!
Before you begin working with any tools or installing your Ring Wireless Security Camera, it is important to prioritize safety. Ensure that you follow any safety guidelines provided by the manufacturer and use caution when working with power tools or ladders. Remember to wear appropriate personal protective equipment, such as gloves and safety glasses, if necessary.
Check the Camera Package
Prior to gathering your tools, make sure you have all the necessary components included in the Ring camera package. This could include things like the camera itself, mounting brackets, screws, the power cable, and any additional accessories.
Preparing the Ring Camera
Before installing your Ring wireless security camera, there are a few necessary steps to ensure a successful setup:
- Download the Ring app on your smartphone or tablet from the iOS App Store or Google Play Store.
- Create a Ring account using the app.
- Ensure your Wi-Fi network is working and that you have the network name (SSID) and password available.
- Make sure the Ring camera is fully charged or plug it into a power source using the provided cable.
- Place the mounting bracket in the desired location, ensuring it is securely attached to a wall or ceiling.
- Adjust the camera angle on the mounting bracket to achieve the desired field of view.
- Connect the Ring camera to the mounting bracket by aligning the slots on the back of the camera with the tabs on the bracket and sliding it into place.
- Secure the camera in the mounting bracket using the provided screw or other securing method.
By completing these steps, you will have prepared your Ring camera for installation and be ready to proceed with the setup process.
Mounting the Camera
Mounting the Ring wireless security camera is a crucial step in ensuring effective surveillance of your home or property. Here’s how you can mount the camera:
1. Choose an Optimal Location
Prior to mounting the camera, carefully choose the location where you want to install it. Consider factors such as coverage area, visibility, and accessibility. The camera should have a clear view of the area you want to monitor.
2. Gather the Necessary Tools
Before starting the installation process, make sure you have the following tools handy:
- A drill
- Screws and anchors
- A screwdriver
- A spirit level
3. Mount the Bracket
Using a drill, carefully attach the mounting bracket to the desired location. Ensure the bracket is secure and straight using a spirit level.

4. Attach the Camera
Once the bracket is securely mounted, you can now attach the Ring wireless security camera to it. Follow the manufacturer’s instructions for attaching the camera to the bracket.
5. Adjust the Camera
After attaching the camera, adjust its position to achieve the desired viewing angle. Make sure the camera is level and pointing towards the area you want to monitor.
Remember to test the camera’s view and functionality before finalizing the installation. This will help ensure that the camera is capturing the intended area effectively.
With these steps, you can successfully mount your Ring wireless security camera and enhance the security of your property.
Connecting to Power
Before you can start using your Ring wireless security camera, you need to connect it to a power source. Here are the steps to follow:
- Locate a suitable power outlet near the area where you want to install the camera.
- Plug the power adapter into the outlet.
- Insert the other end of the power adapter into the camera’s power port.
- Ensure that the power is securely connected and that there are no loose connections.
- Once the camera is connected to power, you should see a light indicator on the camera indicating that it is receiving power.
It is important to connect the camera to a reliable power source to ensure uninterrupted operation. Make sure to choose a power outlet that is easily accessible and protected from the elements.
Important Tips
Here are some important tips to consider when connecting your Ring wireless security camera:
- Use the provided power adapter and avoid using third-party adapters as they may not be compatible.
- Do not overload the power outlet by plugging in too many devices. Make sure the power outlet can handle the camera’s power requirements.
- If you are installing the camera outdoors, consider using a weatherproof outlet cover to protect the power connection from rain, snow, or other elements.
- Regularly check the power connection to ensure that it remains secure and free from any damage or wear.
Connecting to Wi-Fi
To begin the installation process of your Ring wireless security camera, you need to connect it to your Wi-Fi network. Follow these steps to ensure a successful connection:
- Make sure your Wi-Fi connection is stable and active.
- Install the Ring app on your smartphone or tablet, and create an account if you haven’t already.
- Open the Ring app and tap on the “+” icon to add a new device.
- Select “Set Up Device” and choose your Ring wireless security camera model.
- Follow the on-screen instructions to put your camera in setup mode (usually by pressing the setup button or scanning a QR code).
- Once the camera is in setup mode, the Ring app will prompt you to connect to its Wi-Fi network.
- Go to the Wi-Fi settings on your mobile device and look for the network named “Ring-XXXXXX” (the X’s represent a unique identifier for your camera).
- Select the “Ring-XXXXXX” network and return to the Ring app.
- The Ring app will guide you through the process of connecting your camera to your home Wi-Fi network.
- Enter the Wi-Fi password for your home network when prompted.
- Wait for the connection to be established. This may take a couple of minutes.
- Once connected, your Ring camera will appear in the Ring app, and you can start using it to monitor your home or property.
Note: If you are experiencing issues with the Wi-Fi connection, make sure you are within range of your Wi-Fi router and that there are no obstructions interfering with the signal.
Setting Up the Ring App
To start using your ring wireless security camera, you’ll need to set up the Ring app on your mobile device. The Ring app allows you to control and monitor your camera from anywhere with an internet connection. Follow the steps below to get your app up and running.
1. Download the Ring app from the App Store or Google Play Store. The app is available for both iOS and Android devices.
2. Open the Ring app and tap on the “Sign Up” button to create a new account. You’ll be prompted to enter your email address and create a password. Make sure to choose a strong password to keep your account secure.
3. Once you’ve created your account, follow the on-screen instructions to add your ring camera to the app. Make sure your camera is powered on and connected to Wi-Fi.
4. The app will guide you through the setup process, including connecting your camera to your Wi-Fi network and giving it a name. Follow the instructions carefully, and make sure to choose a secure Wi-Fi network and password.
5. Once your camera is connected to the app, you’ll be able to access its live feed, receive motion alerts, and customize your camera’s settings. The app also allows you to connect additional Ring devices and set up additional security features, such as two-factor authentication.
Congratulations! You have successfully set up the Ring app and connected your ring wireless security camera. Now you can enjoy the peace of mind that comes with having a reliable and convenient security system in place.
Testing the Camera
Once you have successfully installed the Ring wireless security camera, it’s important to test its functionality before relying on it for your home security. Follow these steps to test the camera:
- Power On the Camera: Ensure that the camera is properly powered on and connected to a stable Wi-Fi network. Check the camera’s LED indicator to confirm that it’s on and ready for operation.
- Live Video Feed: Open the Ring mobile app or log in to the Ring website to access the live video feed from the camera. Check if the feed is clear and automatically updating in real-time.
- Camera Controls: Test the camera’s pan, tilt, and zoom functionalities (if available) to ensure smooth movement and proper control. Verify if you can remotely adjust the camera’s angle and zoom level as desired.
- Two-Way Audio: Check if the camera’s built-in microphone and speaker are working properly. Try initiating a two-way audio communication and ensure that you can both hear and be heard clearly.
- Motion Detection: Trigger the camera’s motion detection feature by walking in front of it. Verify if the camera captures and records motion events accurately, sending alerts or notifications to your chosen device.
- Night Vision: If your camera has night vision capabilities, test it in a dark or low-light environment. Confirm if the camera can provide clear and detailed video footage even in the absence of visible light.
- Cloud Storage: If you have a cloud storage subscription, check if the camera is properly uploading and storing recorded videos in the cloud. Verify if you can easily access and download the footage whenever needed.
- Mobile Notifications: Ensure that you have enabled notifications for the Ring mobile app. Test if you receive timely alerts and notifications when motion is detected or other configured events occur.
- Camera Placement: Evaluate the camera’s positioning and adjust it if necessary. Check if the camera provides optimal coverage and visibility of the desired area.
By testing your camera thoroughly, you can ensure that it is functioning correctly and meeting your security needs. If you encounter any issues during the testing process, refer to the camera’s user manual or contact Ring support for assistance.
Configuring the Camera Settings
Once you have successfully installed your Ring wireless security camera, the next step is to configure its settings according to your preferences. Here is a step-by-step guide to help you with the configuration process:
1. Connect to the Camera
Make sure you are connected to the same Wi-Fi network as your Ring camera. Open the Ring mobile app on your smartphone and log in to your account.
2. Access Camera Settings
From the Ring app’s home screen, you will see a list of your connected cameras. Tap on the camera you want to configure to access its settings.
3. Customize Motion Detection
Under the camera settings, you will find options to customize the motion detection settings. You can adjust the motion sensitivity, set motion zones, and enable/disable motion alerts according to your needs.
4. Adjust Camera Preferences
Next, you can adjust various camera preferences such as camera recording quality, night vision settings, and audio settings. Make sure to select the options that suit your requirements.
5. Set Up Recording and Storage
You can choose to enable video recording when motion is detected or continuously. Additionally, you can select the video storage options like cloud storage or local storage depending on your subscription plan.
6. Enable Notifications
To receive real-time alerts and notifications on your smartphone, ensure that you have enabled camera notifications. This way, you will know when there is activity detected by the camera.
Once you have configured all the desired settings, your Ring wireless security camera is ready for use. Have peace of mind knowing that your property is being monitored and protected by a reliable security camera.
Additional Features and Troubleshooting
Along with its basic security camera functionality, the Ring wireless security camera also offers some additional features that can enhance your home security experience:
1. Two-Way Audio: The camera comes with built-in speakers and a microphone, allowing you to communicate with anyone near the camera. This feature is particularly useful for monitoring package deliveries or speaking to visitors at your doorstep.
2. Motion Detection: The camera is equipped with motion sensors that can detect movement within its field of view. You can customize the motion detection settings through the Ring app, choosing when and how you want to receive alerts on your smartphone.
3. Night Vision: The camera has infrared LEDs that enable night vision, allowing you to monitor your surroundings even in complete darkness. This is especially important for outdoor cameras that need to work around the clock.
If you encounter any issues during the installation or usage of your Ring wireless security camera, here are a few troubleshooting tips:
1. Check the Wi-Fi Connection: Ensure that your camera is connected to a stable Wi-Fi network with a strong signal. Weak Wi-Fi signals can cause connection issues and affect the camera’s performance.
2. Restart the Camera: Try restarting the camera by disconnecting its power source and reconnecting it after a few seconds. This can help resolve minor software or connectivity problems.
3. Reset the Camera: If restarting doesn’t solve the issue, you can also try resetting the camera to its factory settings. Refer to the user manual or the Ring website for instructions on how to perform a reset.
4. Contact Ring Support: If the problem persists, it’s best to reach out to the Ring customer support team for further assistance. They can provide you with specific troubleshooting steps or help you with any hardware or software-related issues.
By utilizing the additional features and following these troubleshooting tips, you can ensure optimal performance and functionality from your Ring wireless security camera.
FAQ,
What is the Ring wireless security camera and what are its features?
The Ring wireless security camera is a home security device that allows you to monitor your property remotely. It features HD video recording, motion detection, two-way audio, and night vision.
What is the process of installing the Ring wireless security camera?
To install the Ring wireless security camera, start by downloading the Ring app on your mobile device. Create an account and follow the on-screen instructions to set up the camera. Mount the camera in the desired location, connect it to your Wi-Fi network, and adjust the settings according to your preferences.
Can the Ring wireless security camera be installed outdoors?
Yes, the Ring wireless security camera is designed to be used both indoors and outdoors. It is weather-resistant and can withstand various weather conditions.
Is it possible to access the live video feed from the Ring wireless security camera remotely?
Yes, you can access the live video feed from the Ring wireless security camera remotely using the Ring app on your mobile device. This allows you to monitor your property from anywhere as long as you have an internet connection.


