Installing a security camera system in your home or workplace is a crucial step in ensuring the safety and security of your property. One of the most common types of security cameras used today is the Cat5 camera, which utilizes Cat5 Ethernet cable to transmit both power and data.
In this guide, we will walk you through the step-by-step process of installing a security camera using Cat5 cable. Whether you are a DIY enthusiast or a beginner, this guide will help you set up your security camera system with ease.
Before we begin, it is important to ensure that you have all the necessary equipment and tools. This includes the security camera, Cat5 cable, power adapter, Ethernet switch, and a drill for mounting the camera.
Once you have gathered all the materials, the first step is to choose the ideal location for your security camera. Consider factors such as the area you want to monitor, the distance from power outlets and internet connectivity, and the line of sight for capturing clear footage.
Choosing the Right Security Camera
Installing a security camera is an important step towards protecting your home or business. However, choosing the right camera can be a daunting task with so many options available on the market. Here are a few factors to consider before making your purchase:

1. Resolution: The resolution of the camera determines the clarity of the images it captures. A higher resolution camera will provide more detail, making it easier to identify individuals or objects. Consider opting for a camera with at least 1080p resolution for optimal results.
2. Indoor or Outdoor: Determine whether you need an indoor or outdoor camera. Outdoor cameras are specifically designed to withstand harsh weather conditions and may come with features like waterproof housing and night vision. Indoor cameras, on the other hand, are generally smaller and more discreet.
3. Field of View: The field of view refers to the angle at which the camera can capture images. A wider field of view will cover a larger area, but may sacrifice detail. Consider the layout of the area you want to monitor and choose a camera with an appropriate field of view.
4. Connectivity: Cameras can be wired or wireless. Wired cameras require a physical connection to a power source and a recording device, while wireless cameras rely on a Wi-Fi connection. Consider your specific requirements and the placement of the camera when deciding on the best connectivity option for you.
5. Additional Features: Some security cameras come with additional features like motion detection, two-way audio, or infrared night vision. These features can enhance the functionality of your camera and provide added security. Determine which features are important for your specific needs.
By considering these factors, you can choose the right security camera that meets your specific requirements. Remember, investing in a quality camera is essential for ensuring the safety and security of your premises. Happy shopping!
Benefits of Using Cat5 Cables
When it comes to installing security cameras, using Cat5 cables offers several advantages:
| 1. Cost-effective: | Cat5 cables are affordable and readily available, making them a cost-effective option for installing security cameras. Compared to other types of cables, Cat5 cables offer a great balance between price and performance. |
| 2. Easy Installation: | With their RJ45 connectors, Cat5 cables are easy to terminate and install. The plug-and-play design allows for quick and hassle-free setup. This means you can save time and effort during the installation process. |
| 3. Long Transmission Distance: | Cat5 cables can transmit signals at distances up to 100 meters without any loss in quality. This makes them suitable for installing security cameras in large areas or long-distance installations. |
| 4. High Bandwidth: | With their twisted pair design, Cat5 cables provide high bandwidth capabilities. This means they can support the transmission of high-quality video streams from your security cameras without any lag or interference. |
| 5. Versatility: | Cat5 cables can be used for various other purposes besides security camera installations. They are also commonly used for networking, telephone lines, and audio/video systems. This versatility makes them a great choice for any residential or commercial setup. |
Overall, using Cat5 cables for your security camera installation offers a cost-effective, easy-to-install, and reliable solution. Consider the benefits mentioned above when planning your next security camera project.
Types of Cat5 Cables
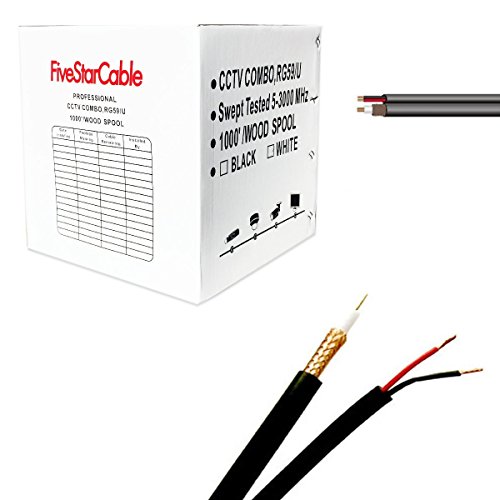
Cat5 cables, also known as Category 5 cables, are commonly used in the installation of security camera systems. These cables have four pairs of twisted copper wires, encased in a sturdy plastic sheath. While Cat5 cables may all look the same, there are actually different types that vary in terms of performance and capabilities.
The most basic type is Cat5e, which stands for Category 5 Enhanced. This type of cable can support data transfer speeds of up to 1000 Mbps (megabits per second) and is suitable for most residential and small business applications. Cat5e cables are affordable and widely available, making them a popular choice for security camera installations.

Another type is Cat5e STP (Shielded Twisted Pair), which provides additional protection against electromagnetic interference (EMI) and crosstalk. These cables have a metal foil or braid shielding wrapped around the twisted pairs, reducing the risk of signal degradation. Cat5e STP cables are recommended for environments with high EMI, such as industrial or commercial settings.
For more demanding applications, Cat5e STP Foiled Twisted Pair (FTP) cables are available. In addition to the shielding provided by STP cables, Cat5e STP FTP cables have an additional layer of foil shielding around all of the twisted pairs. This extra shielding helps to further minimize interference and improve performance in challenging environments.
Lastly, there is Cat5e Outdoor Ethernet cable, which is designed for outdoor use. These cables are rugged and weatherproof, with a UV-resistant outer sheath that protects against sunlight and moisture. Cat5e Outdoor Ethernet cables are typically buried or installed in conduit, making them suitable for security camera installations in outdoor areas.
| Type | Description | Best Use |
|---|---|---|
| Cat5e | Supports speeds up to 1000 Mbps | Residential and small business |
| Cat5e STP | Additional shielding against EMI and crosstalk | High EMI environments |
| Cat5e STP FTP | Extra foil shielding for improved performance | Challenging environments |
| Cat5e Outdoor Ethernet | Rugged and weatherproof for outdoor use | Outdoor security camera installations |
Tools Needed for Installation
Before you begin the installation process, it’s important to gather all the necessary tools and equipment. Here are the tools you’ll need for installing a security camera using Cat5:
1. Security Camera System
The first and most important tool you’ll need is a security camera system. This typically includes one or more cameras, a digital video recorder (DVR) or network video recorder (NVR), and all the necessary cables and connectors.

2. Cat5 Cables
Since we’re installing the security camera using Cat5, you’ll need Cat5 cables. These cables are twisted pair cables typically used for Ethernet connections. They consist of four pairs of wires and are capable of transmitting both video and power signals for the camera.
3. RJ45 Connectors
To connect the Cat5 cables to the camera and the DVR/NVR, you’ll need RJ45 connectors. These connectors have eight pins and provide a secure and reliable connection. Make sure you have enough connectors for all the cables you’ll be using.
4. Crimping Tool
A crimping tool is essential for attaching the RJ45 connectors to the Cat5 cables. This tool allows you to strip the cable, insert the wires into the connector, and crimp it securely. Make sure you have a high-quality crimping tool to ensure proper connections.
5. Power Supply
Depending on the camera system you’re using, you may need a separate power supply. Some cameras can be powered through PoE (Power over Ethernet), while others may require a dedicated power source. Check the specifications of your camera system to determine if you need a power supply.
6. Screwdriver
A screwdriver will be needed to mount the cameras and adjust their positions. You may also need it to secure the cables and connectors in place. Make sure you have a suitable screwdriver that fits the screws provided with your camera system.

7. Network Cable Tester
A network cable tester is a handy tool for verifying the connectivity and functionality of the Cat5 cables. It allows you to check for any faults or breaks in the cables before installing them. This tool can save you a lot of time and frustration during the installation process.
With these tools in hand, you’ll be well-prepared to install a security camera using Cat5. Make sure to read the manufacturer’s instructions and follow proper safety precautions throughout the installation process.
Steps to Install Security Camera
Installing a security camera in your home or office is a practical way to enhance your security measures. By following these steps, you can ensure that your security camera is properly installed and functioning:
Step 1: Plan the Camera Placement
Before beginning the installation process, it is important to plan the placement of your security camera. Consider the areas that require surveillance and ensure that there are no obstructions blocking the view.
Step 2: Gather the Necessary Tools and Equipment
Make sure you have all the necessary tools and equipment before starting the installation process. This may include a security camera, a power adapter, a drill, a screwdriver, a ladder, and a network cable (preferably Cat5 or Cat6).
Step 3: Mount the Camera
Using a ladder and the appropriate tools, mount the security camera in the desired location. Ensure that it is securely attached to the wall or ceiling, following the manufacturer’s instructions.
Step 4: Connect the Camera
Connect the security camera to the power adapter and plug it into a nearby electrical outlet. Then, connect the camera to the network cable, ensuring a secure connection.
Step 5: Test the Camera
Once the camera is connected, check its functionality by accessing the camera’s live feed on your computer or mobile device. Adjust the camera’s angle if necessary to achieve the desired viewing range.
Step 6: Securely Route the Wires
Securely route and conceal the wiring to prevent tampering or accidental disconnection. Use cable clips or adhesive tape to secure the wires against the walls or ceilings.
Step 7: Set Up Remote Access
If desired, set up remote access to your security camera system. This will enable you to monitor the camera feed from anywhere using your smartphone, tablet, or computer.

Following these steps will help ensure a successful installation of your security camera system. It is recommended to consult the manufacturer’s instructions for specific details and troubleshooting tips.
Mounting the Security Camera
Mounting the security camera properly is essential to ensure optimal coverage and functionality. Follow these steps to mount your security camera:
- Choose the location: Select a strategic location for your security camera, where it can capture a wide field of view and provide clear video footage.
- Prepare the mounting surface: Clean the mounting surface and ensure it is sturdy enough to support the weight of the camera.
- Mark the mounting holes: Hold the camera up to the mounting surface and use a pencil or marker to mark the locations of the mounting holes.
- Drill the holes: Use a suitable drill bit to drill the holes in the marked locations.
- Insert wall anchors: If needed, insert wall anchors into the drilled holes to provide extra support for the screws.
- Attach the mount: Align the mounting holes of the camera with the drilled holes and use screws or bolts to secure the mount to the wall.
- Adjust the camera angle: Adjust the camera angle as per your requirements. Ensure that the camera is level and pointed in the right direction.
- Secure the camera: Once you have set the desired angle, tighten the screws on the camera mount to securely hold the camera in place.
- Connect the cables: Connect the necessary cables from the camera to the NVR or DVR system, following the manufacturer’s instructions.
By carefully following these steps, you can successfully mount your security camera and enhance the safety and security of your premises.
Connecting the Cat5 Cable
The Cat5 cable is essential for the installation of your security camera system. It allows for the transmission of video signals and power, making it a crucial component in the setup process. Here’s how you can connect the Cat5 cable properly:
Tools You’ll Need
Before you start, gather the following tools:
- Wire stripper
- RJ45 connectors
- Crimping tool
Step-by-Step Guide
Follow these steps to connect the Cat5 cable:
- Strip the outer jacket of the cable about 2 inches from the end using a wire stripper. Be careful not to damage the inner wires.
- Straighten the four pairs of twisted wires and separate them.
- Arrange the wires according to the T568B standard. The correct order is: orange-white, orange, green-white, blue, blue-white, green, brown-white, brown.
- Trim the wires to the desired length, leaving about 1.5 inches exposed.
- Insert the wires into the RJ45 connector, making sure they reach the end.
- Use a crimping tool to secure the wires into the connector. Apply strong and even pressure to ensure a reliable connection.
- Repeat the process for the other end of the Cat5 cable.
- Once both ends are connected, connect one end of the Cat5 cable to the security camera and the other end to the network video recorder (NVR) or power supply box.
Testing the Connection
After connecting the Cat5 cable, it’s important to test the connection to ensure proper functionality. You can do this by checking the video feed on your monitor or accessing the camera through the NVR software. If the video feed is clear and stable, the connection is successful.
By following these steps, you can easily connect the Cat5 cable and ensure a reliable and secure installation of your security camera system.
Setting up the Security Camera System
When installing a security camera system using Cat5 cables, there are several steps to follow to ensure a successful setup.
1. Mounting the Cameras
The first step is to determine the optimal location for each camera and securely mount them. It is important to consider the camera’s field of view and make sure there are no obstructions that could affect the camera’s effectiveness.
2. Running the Cat5 Cables
Once the cameras are mounted, run the Cat5 cables from each camera to the location where the recorder will be installed. This usually involves drilling holes and using cable clips or conduits to keep the cables neat and organized.
3. Connecting the Cameras
After running the cables, connect each camera to the corresponding Cat5 cable using an RJ45 connector. Make sure to properly crimp the connector to ensure a secure connection.
4. Installing the Recorder
Next, install the recorder in a secure location near a power source. Connect each Cat5 cable to the recorder, ensuring that each camera is connected to the correct input.
5. Powering the Cameras
Connect the power adapters of each camera to a power source, either using a nearby outlet or a centralized power supply. Make sure to provide stable power to each camera for optimal performance.
6. Configuring the System
Once all the cameras are connected and powered, configure the security camera system according to the manufacturer’s instructions. This typically involves setting up a network connection, assigning IP addresses to the cameras, and configuring recording and notification settings.
| Camera | Cable | Recorder Input |
|---|---|---|
| Camera 1 | Cat5 Cable 1 | Input 1 |
| Camera 2 | Cat5 Cable 2 | Input 2 |
| Camera 3 | Cat5 Cable 3 | Input 3 |
Following these steps will ensure a proper installation of a security camera system using Cat5 cables. It is recommended to consult the user manual or contact technical support for any specific instructions related to the cameras or the recorder.
Testing and Troubleshooting
Once you have completed the installation of your security camera using cat5, it is important to test and troubleshoot the system to ensure that everything is functioning correctly.
Here are some steps you can follow to test and troubleshoot your security camera system:
1. Check the camera connections:
Make sure that all of the camera connections are secure. Check that the cat5 cable is plugged in properly and that there are no loose connections. If you have multiple cameras, test each one individually to identify any potential connection issues.
2. Verify power supply:
Check that the power supply for the camera is working correctly. Ensure that the camera is receiving power and that the power cable is securely plugged in. If the camera is not receiving power, you may need to check the power source or replace the power supply.
3. Test the video feed:
Connect the cat5 cable to the video recorder or monitor and check that the video feed is being displayed correctly. Make sure that the footage is clear and that there are no distortions or blackouts. If there are any issues with the video feed, check the camera settings and cables for any potential problems.
4. Check the network connection:
If you are using an IP camera, ensure that it is connected to the network correctly. Check the network settings and make sure that the camera is assigned an IP address. You may need to troubleshoot the network settings or consult the camera’s user manual for specific instructions.
5. Test the motion detection and recording:
If your security camera system has motion detection and recording capabilities, test these features to ensure they are working correctly. Walk in front of the camera and verify that it detects motion and starts recording. Check the recordings to make sure they are saved and can be accessed properly.
6. Check remote access:
If you want to access your security camera system remotely, ensure that the remote access settings are properly configured. Test accessing the camera feed from a different location using a smartphone or computer to verify that the remote access is working correctly.
By following these steps, you can ensure that your security camera system is installed correctly and functioning as expected. If you encounter any issues during the testing and troubleshooting process, consult the camera’s user manual or contact the manufacturer for further assistance.
Additional Security Camera Features
In addition to the basic functionality of a security camera, there are several additional features that can enhance the surveillance capabilities and overall security of your premises.
1. Night Vision
Many modern security cameras are equipped with infrared LEDs, allowing them to capture high-quality video footage even in low-light or complete darkness. This feature is especially useful for outdoor monitoring or areas with limited ambient light.
2. Motion Detection
Some security cameras have built-in motion sensors that can detect movement within their field of view. When motion is detected, these cameras can automatically start recording, send real-time alerts to your smartphone, or trigger a connected alarm system. This feature helps to minimize false alarms and ensure that you are immediately notified of any suspicious activity.
3. Two-Way Audio
Two-way audio allows you to not only see what is happening but also communicate with individuals in the camera’s vicinity. This can be useful for remotely greeting visitors, instructing delivery personnel, or warning off potential intruders. With this feature, you can have a more interactive and responsive security system.
These additional security camera features provide increased functionality and convenience, allowing you to have better control over the surveillance of your property. When choosing a security camera, consider which of these features are important to you and your specific security needs.
FAQ,
What tools do I need to install a security camera using Cat5?
To install a security camera using Cat5, you will need the following tools: a security camera, Cat5 cable, RJ45 connectors, a crimping tool, a power supply for the camera, a drill, screws and wall anchors, a monitor or a computer for viewing the camera feed.
Can I use a regular Ethernet cable instead of Cat5 for installing a security camera?
Yes, you can use a regular Ethernet cable (such as Cat6) instead of Cat5 for installing a security camera. Both Cat5 and Cat6 cables are capable of transmitting video and data signals for security cameras.
How do I connect the Cat5 cable to the security camera?
To connect the Cat5 cable to the security camera, you will need to strip the outer insulation of the cable and separate the four twisted pairs of wires inside. Then, match the wires to the corresponding colours on the camera’s wiring terminal, and use a crimping tool to attach RJ45 connectors to the ends of the wires.
Do I need to run the Cat5 cable through walls to install a security camera?
It depends on the specific installation requirements and preferences. Running the Cat5 cable through walls can help hide the cable and provide a neater installation. However, if you prefer a simpler installation, you can also run the cable along the surface of walls or ceilings and conceal it with cable management solutions.
Can I install multiple security cameras using a single Cat5 cable?
Yes, you can install multiple security cameras using a single Cat5 cable by utilizing a technique called power over Ethernet (PoE). PoE allows both power and data signals to be transmitted over the same Cat5 cable, eliminating the need for separate power cables for each camera.


