Security cameras have become an essential part of our lives, providing an extra layer of protection for our homes and properties. While most people install security cameras around their houses, one area that often gets overlooked is the mailbox.
Installing security cameras on your mailbox can help deter theft, vandalism, and provide evidence in case of a crime. Whether you live in a residential area with high foot traffic or a remote location, having a camera on your mailbox can give you peace of mind.
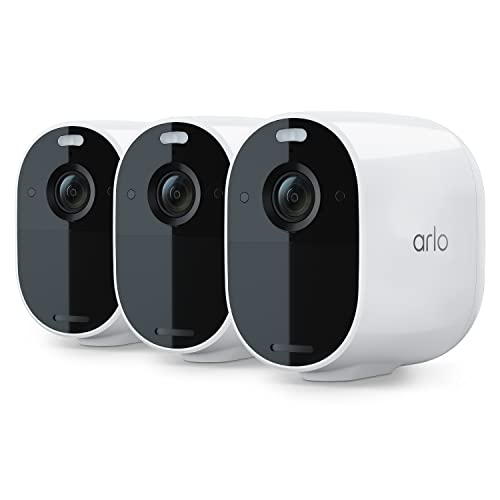
Before you get started, there are a few things to consider. First, you need to decide on the type of camera you want to install. There are various options available, including wired, wireless, and battery-operated cameras. Wired cameras offer a stable connection but require professional installation. Wireless cameras are easier to install but may have a weaker signal. Battery-operated cameras are portable but require frequent battery changes.
Once you have chosen your camera, you need to find the perfect spot to mount it. Make sure the camera is strategically positioned to capture the best possible footage. It should have a clear view of the mailbox and the surrounding area. Additionally, consider the weather conditions; if your mailbox is exposed to extreme temperatures or rain, make sure the camera is weatherproof.

Ensure mailbox security with camera installation
Installing security cameras on your mailbox can provide an extra layer of protection for your mail and packages. Whether you’re concerned about theft, vandalism, or simply want to keep an eye on who comes near your mailbox, a camera can help ensure the security of your mail.
Here are some steps to help you install security cameras on your mailbox:
1. Choose the right camera: Look for a camera that is specifically designed for outdoor use and has features like night vision and motion detection. Make sure it is weatherproof and can withstand extreme temperatures.
2. Determine the best location: Find a suitable spot to mount the camera that provides a clear view of your mailbox. Consider the angle and positioning to capture any potential threats or activities.
3. Mount the camera: Use the mounting brackets and screws provided with the camera to securely attach it to the chosen location. Make sure it is firmly fixed and will not be easily tampered with or moved.
4. Connect the camera: Follow the manufacturer’s instructions to connect the camera to your home’s Wi-Fi network or a dedicated surveillance system. Test the connection and adjust the settings according to your preferences.
5. Set up alerts: Configure the camera to send you alerts or notifications whenever motion is detected near your mailbox. This will allow you to quickly respond and take appropriate action if necessary.
6. Monitor and review footage: Regularly check the camera’s live feed or review recorded footage to stay updated on any activity near your mailbox. This will help you identify any suspicious individuals or incidents.
7. Maintain and secure the camera: Regularly clean the camera lens to ensure clear footage and optimal performance. Additionally, secure the camera and its wiring to prevent tampering or sabotage.
8. Inform local authorities if needed: In the event of theft, vandalism, or any criminal activity, report it to the appropriate authorities and provide them with any footage or evidence captured by your security camera.
Finding the right security camera and properly installing it on your mailbox can significantly enhance the security of your mail. Remember to follow any local regulations or guidelines regarding the use of security cameras and ensure you respect the privacy of others.
Choose the right security camera for your mailbox
When it comes to securing your mailbox, choosing the right security camera is essential. With so many options available on the market, it’s important to find a camera that meets your specific needs. Here are some key factors to consider:
1. Outdoor durability
Since your mailbox is located outside, it’s crucial to choose a security camera that is designed to withstand various weather conditions. Look for cameras with an IP65 or higher rating to ensure they are resistant to rain, snow, and other outdoor elements.
2. Wide viewing angle
To effectively monitor your mailbox area, select a security camera with a wide viewing angle. This will allow you to capture a larger area and reduce blind spots. Cameras with a viewing angle of 120 degrees or more are ideal for mailbox surveillance.
3. Night vision
Since mailbox incidents can occur at any time, having a camera with night vision capabilities is essential. Look for cameras equipped with infrared LEDs, as they provide clear visibility even in complete darkness. A camera with a night vision range of 30 feet or more is recommended.
4. Motion detection
To save storage space and capture only relevant footage, opt for a security camera with motion detection. This feature allows the camera to start recording when it detects movement, ensuring that you don’t miss any important events near your mailbox. Adjustable motion sensitivity and customizable alert settings are useful features to have.
Remember to also consider the camera’s video quality, storage options, and compatibility with your existing security system or mobile devices. By carefully selecting the right security camera for your mailbox, you can have peace of mind knowing that your mail and property are protected.
Determine the optimal location for camera placement
Choosing the right location for installing your security camera is crucial to ensure maximum coverage and effectiveness. Here are some factors to consider when determining the optimal placement:
- Angle of coverage: Assess the area around your mailbox and identify the potential blind spots that need to be monitored. Consider placing the camera in a position that provides a clear view of the entire mailbox and its surroundings.
- Height and distance: Install the camera at a height and distance that allows it to capture a wide-angle view of the area without compromising image quality. Avoid positioning the camera too high or too far away, as it might reduce visibility.
- Weather conditions: Take into account the potential impact of weather conditions on the camera’s performance. Ensure that the camera is protected from direct sunlight, rain, and snow by positioning it under a roof or using weatherproof housing.
- Lighting conditions: Consider the lighting conditions in the area where the camera will be installed. If the area is poorly lit, choose a camera with superior low-light capabilities or consider installing additional lighting sources to improve visibility.
- Coverage overlap: If you have multiple security cameras covering different angles, make sure there is enough overlapping coverage to eliminate any blind spots. This will provide a comprehensive view of the mailbox and its surroundings.
- Accessibility for maintenance: Mount the camera in a location that allows easy access for maintenance and adjustments. This will ensure that the camera can be cleaned, adjusted, or repaired as needed without any hassle.
- Legal considerations: Familiarize yourself with any local laws or regulations regarding the installation of surveillance cameras. Ensure you comply with all legal requirements to avoid any potential legal issues.
By carefully evaluating these factors and selecting the optimal location, you can maximize the effectiveness of your security camera system and enhance the protection of your mailbox.
Prepare the necessary tools and equipment for installation
Before you begin installing security cameras on your mailbox, you need to gather the necessary tools and equipment. Having everything ready beforehand will help ensure a smooth installation process. Here are the essential items you will need:
Necessary Tools:
- A power drill
- Screwdrivers (both flathead and Phillips-head)
- A ladder or step stool
- A measuring tape or ruler
- A pencil or marker for marking the spots
- A level to ensure the camera is properly aligned
- Wire cutters/strippers if needed for cable management
Required Equipment:
- A security camera kit with cameras, cables, and mounting brackets
- Screws and anchors for attaching the mounting brackets
- A power source for the camera(s) – either batteries or a nearby electrical outlet
- A Wi-Fi network, if you’re using wireless cameras
- A smartphone, computer, or other compatible device to set up and monitor the security cameras
It is essential to have all the tools and equipment ready before you start the installation process. This will save you time and effort and help ensure a successful installation of the security cameras on your mailbox.
Safely mount the camera on your mailbox
Before you begin the installation process, ensure that the mailbox is sturdy enough to support the weight of the camera. If needed, reinforce the mailbox or consult a professional for assistance.
Step 1: Positioning
Determine the ideal location for your camera. Make sure it has a clear view of the area you want to monitor. Consider the line of sight, any potential obstructions, and the range of the camera.
Step 2: Mounting
Choose a mounting bracket that suits your camera and mailbox. Attach the bracket securely to the mailbox using screws or adhesive, ensuring it is level and stable.
Next, attach the camera to the bracket following the manufacturer’s instructions. Make sure it is securely fastened and properly aligned.
Step 3: Wiring
If your camera requires wiring, carefully run the cables from the camera to the desired connection point. Conceal the wires as much as possible to prevent tampering and damage.
For wireless cameras, follow the manufacturer’s instructions to set up the connection between the camera and your chosen monitoring device or security system.
Remember to keep the camera’s power source in mind and ensure it has a reliable power supply.
Once the camera is mounted and wired, test its functionality and adjust the angle or position if necessary.
Finally, activate the camera and set up any desired additional features such as motion detection or remote monitoring.
By securely mounting your camera on your mailbox, you can enhance the security of your property and have peace of mind knowing that you have an extra set of eyes watching over your belongings.
Set up the camera’s power supply
Before installing the security camera on your mailbox, you will need to set up the camera’s power supply. Here are the steps to do so:
| Step 1: | Choose a power source for your camera. You can either use a battery-powered camera, which requires periodic recharging or replacement of batteries, or you can opt for a wired camera that needs to be connected to a power outlet. |
| Step 2: | If you choose a battery-powered camera, follow the manufacturer’s instructions to charge or insert the batteries into the camera. |
| Step 3: | If you opt for a wired camera, find a suitable power outlet near your mailbox. Ensure that the power outlet is weatherproof or protected by a waterproof cover. |
| Step 4: | Run the power cable from the camera to the power outlet. Make sure to conceal the cable as much as possible to prevent tampering or damage. |
| Step 5: | Plug the power cable into the camera and the power outlet. Double-check that the connection is secure. |
| Step 6: | If necessary, use cable clips or ties to secure the power cable along its path and prevent it from hanging loosely. |
| Step 7: | Test the camera’s power supply to ensure that it is functioning correctly. Check the camera’s indicator lights or use the camera’s mobile app to verify its power status. |
Once the camera’s power supply is set up, you can proceed to install the camera on your mailbox.
Configure your security camera settings
After successfully installing the security cameras on your mailbox, it is essential to configure the camera settings to ensure optimal functionality. Here are the steps to follow to configure your security cameras:
| Step | Description |
|---|---|
| 1 | Access the camera’s configuration menu. This can usually be done through a web browser by entering the camera’s IP address. |
| 2 | Set a secure username and password to protect your camera’s access. Choose a strong password that includes a combination of letters, numbers, and special characters. |
| 3 | Adjust the camera’s motion detection settings. This will allow your camera to start recording only when it detects any movement near your mailbox. |
| 4 | Configure the camera’s resolution and video quality settings. Higher resolution settings will provide clearer images, but it may also result in larger file sizes. |
| 5 | Set up email notifications to receive alerts whenever the camera detects any activity near your mailbox. Enter your email address and configure the desired notification settings. |
| 6 | Enable remote access to your camera’s live feed. This will allow you to monitor your mailbox remotely using a smartphone, tablet, or computer. |
| 7 | Test the camera’s functionality by recording a video and checking if the footage is being saved correctly. |
By following these steps, you can ensure that your security cameras are properly configured and provide effective surveillance for your mailbox. Regularly check and update the camera’s settings as needed to ensure optimal performance.
Connect the camera to your home network
Once you have positioned your security camera on the mailbox, it is important to connect it to your home network so you can access the footage remotely. Follow these steps to connect your camera to your home network:
1. Find the network settings on your camera. This may involve accessing the camera’s settings menu or using a smartphone app provided by the manufacturer.
2. Connect the camera to your Wi-Fi network. Choose your home network from the list of available networks and enter the password if prompted.
3. Wait for the camera to establish a connection. This may take a few moments, so be patient.
4. Check the camera’s status. Most cameras have an LED light that indicates when they are connected to the network. Make sure that the light is solid or steady, indicating a successful connection.
5. Verify the connection. Open the camera’s app or access the camera’s settings menu again to ensure that it is now connected to your home network.
Once the camera is connected to your home network, you can access the footage remotely through the camera’s app or through a web browser on your computer or smartphone. Make sure to test the connection by viewing the live feed or playing back recorded footage to ensure everything is working properly.
Test the camera’s functionality
Once you have successfully installed the security camera on your mailbox, it is important to test its functionality to ensure that it is working properly. Follow these steps to test the camera:
- Position the camera in the desired angle to capture the mailbox area.
- Connect the camera to a power source and make sure it is properly powered on.
- Access the camera’s settings or control panel to configure the necessary parameters, such as motion detection, recording settings, and video quality.
- Using a computer or smartphone, connect to the camera’s Wi-Fi network. Alternatively, you can connect the camera to your home’s Wi-Fi network.
- Open the camera’s live video feed through the corresponding mobile app or web interface.
- Check if the camera is displaying a clear and focused image of the mailbox area.
- Test the camera’s motion detection feature by making movements within the camera’s view. The camera should detect the motion and start recording or sending alerts to your device.
- If the camera has two-way audio, test the audio functionality by speaking through the camera and listening for sound on your device.
- Adjust the camera’s settings as needed to optimize its performance and ensure reliable surveillance of the mailbox area.
By thoroughly testing the camera’s functionality, you can have peace of mind knowing that your mailbox is under constant surveillance. Regularly check the camera’s recording and alert history to ensure that it is capturing any suspicious activity in the area.
Monitor and review footage from your mailbox camera
Once you have installed security cameras on your mailbox, it’s important to regularly monitor and review the footage they capture. This will ensure that you stay informed about any activities or incidents that occur near your mailbox.
Here are a few tips on how to effectively monitor and review the footage from your mailbox camera:
1. Set up a viewing schedule:
Depending on your needs and schedule, set up specific times during which you will review the footage. This could be daily, weekly, or even monthly. Consistency is key to staying updated on any suspicious activities.
2. Store footage securely:
Make sure to store the captured footage securely to avoid losing important evidence. You may consider using cloud storage or an external hard drive for this purpose. This will also enable you to access the footage from any device with an internet connection.
3. Review footage regularly:
Take the time to thoroughly review the footage captured by your mailbox camera. Look for any unusual activities or people approaching your mailbox. This will help you identify any potential threats or unauthorized access attempts.
4. Keep a record of important events:
If you notice any suspicious activities or incidents, create a detailed record of them. This can include the date, time, and a description of what occurred. Having this information readily available can be helpful for future reference or in case you need to report anything to the authorities.
5. Seek professional help if needed:
If you are unsure about any specific footage or if you notice any concerning patterns, don’t hesitate to seek professional help. Contact the manufacturer of your camera system or a security expert who can assist you in interpreting the footage and providing guidance.
By regularly monitoring and reviewing the footage from your mailbox camera, you can help ensure the safety and security of your mailbox and the surrounding area.
FAQ,
What are the benefits of installing security cameras on a mailbox?
Installing security cameras on a mailbox can provide several benefits. Firstly, it can help deter theft and vandalism by acting as a visual deterrent. Additionally, it can help in catching any perpetrators if any incidents do occur. Moreover, security cameras can provide peace of mind by allowing homeowners to monitor their mailbox remotely.
How much does it cost to install security cameras on a mailbox?
The cost of installing security cameras on a mailbox can vary depending on several factors. These factors include the type of security cameras you choose, the number of cameras you need, the installation method, and any additional features you require. On average, you can expect to spend between £100 and £500 for a basic installation.
What are the different types of security cameras available for mailbox installation?
There are several types of security cameras available for mailbox installation. Some popular options include wireless cameras, wired cameras, and battery-powered cameras. Each type has its pros and cons, so it’s important to consider factors such as power source, ease of installation, and the level of surveillance required when choosing the right type for your needs.
Can I install security cameras on a communal mailbox?
The ability to install security cameras on a communal mailbox may vary depending on local regulations and restrictions. In some cases, it may be possible to install cameras if you have permission from the relevant authorities or the managing body of the communal mailbox. However, it’s important to check with the appropriate parties before proceeding with the installation.