
Are you looking to enhance the security of your home or office? One great way to do so is by installing a Vivitar smart security camera. These cameras offer a wide range of features and can be easily integrated into your existing security system. In this article, we will walk you through the step-by-step process of installing a Vivitar smart security camera, so you can start enjoying the peace of mind that comes with having a reliable surveillance system.
Before you begin the installation process, there are a few things you will need:
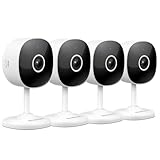
1. A Vivitar smart security camera: You can purchase a Vivitar smart security camera online or from a local electronics store. Make sure to choose a model that fits your specific needs and preferences.
2. A stable Wi-Fi connection: In order to connect and control your Vivitar smart security camera, you will need a stable Wi-Fi connection. If your current Wi-Fi setup is not reliable, consider getting a Wi-Fi extender to improve the signal strength in the area where the camera will be installed.
3. A smartphone or tablet: The Vivitar smart security cameras can be controlled through a mobile app. Make sure you have a compatible smartphone or tablet with the app installed and ready to use.

Now that you have everything you need, let’s get started with the installation process!
Overview of Vivitar Smart Security Camera
The Vivitar Smart Security Camera is a cutting-edge device designed to enhance the security of your home or office. With its advanced features and user-friendly interface, this camera provides you with peace of mind and a sense of security.
Equipped with high-definition video recording capabilities, the Vivitar Smart Security Camera captures crystal-clear footage that allows you to monitor your property remotely. Whether you are at work, on vacation, or simply away from home, you can access the camera’s live feed through the accompanying smartphone app.
In addition to its video capabilities, the Vivitar Smart Security Camera also features two-way audio functionality. This means that you can not only see what’s happening in your surroundings, but you can also communicate with anyone near the camera via the built-in speaker and microphone.
Setting up the Vivitar Smart Security Camera is a breeze. Simply plug the camera into a power source, connect it to your home Wi-Fi network, and follow the instructions in the app to complete the setup process. Once installed, you can customize the camera’s settings to suit your specific needs, such as adjusting motion detection sensitivity or setting up scheduled recordings.

With its sleek design, reliable performance, and advanced features, the Vivitar Smart Security Camera is a top choice for anyone looking to enhance their home or office security. Invest in this smart device and gain the peace of mind you deserve.
Benefits of Installing Vivitar Smart Security Camera
Installing a Vivitar smart security camera can provide numerous benefits for your home or business. Here are some of the advantages:
- Enhanced Security: With a Vivitar smart security camera, you can monitor your property 24/7. Whether you’re at home or away, you can keep an eye on your surroundings and ensure the safety of your loved ones and belongings.
- Deterrence: Visible security cameras can deter potential criminals from targeting your property. The presence of a Vivitar camera can act as a deterrent and reduce the risk of burglary or vandalism.
- Remote Access: Vivitar smart security cameras offer remote access, allowing you to view live footage and recordings from anywhere using your smartphone or computer. This feature provides convenience and peace of mind, especially when you’re on vacation or at work.
- Motion Detection: Many Vivitar smart security cameras come with motion detection technology. This feature can alert you instantly if any movement is detected in the camera’s field of view. It helps you respond promptly to any potential security threats.
- Monitoring for Children and Pets: If you have children or pets at home, a Vivitar smart security camera can help you keep an eye on them even when you’re not physically present. You can ensure their safety and well-being, making it a useful tool for parents and pet owners.
- Easy Installation and Setup: Vivitar smart security cameras are designed for easy installation and setup. You don’t need extensive technical knowledge or professional assistance to install and configure the camera. This makes it accessible to a wide range of users.
- Evidence and Documentation: In the unfortunate event of a break-in or other security incidents, the footage captured by your Vivitar smart security camera can serve as crucial evidence for law enforcement or insurance claims. It helps document the event and increases the chances of resolving the situation.
By installing a Vivitar smart security camera, you can enjoy improved security, convenient monitoring, and peace of mind knowing that your property and loved ones are protected. With their advanced features and easy installation, Vivitar cameras are an excellent choice for residential and commercial security needs.
Preparing for Installation
Before installing your Vivitar smart security camera, it is important to properly prepare for the installation process. By following these steps, you can ensure a smooth and successful installation.
1. Choose an optimal location: Determine the best location to install your security camera. It should have a clear view of the area you want to monitor without any obstructions.

2. Check your Wi-Fi connection: Make sure your Wi-Fi connection is stable and has a strong signal in the selected location. This is crucial for the camera to function properly.
3. Gather necessary supplies: Collect all the necessary supplies for the installation, including the security camera, mounting hardware, power adapter, and any additional accessories.
4. Ensure power source: Make sure there is a power source near the selected installation location. This can be an electrical outlet or an extension cord. Ensure that the power source is easily accessible.
5. Download the Vivitar Smart Home Security App: Before starting the installation, download the Vivitar Smart Home Security App from the App Store or Google Play Store. This app is essential for setting up and controlling your camera.
6. Familiarize yourself with the camera features: Take some time to familiarize yourself with the features and capabilities of your Vivitar smart security camera. This will make the installation and setup process easier.

By following these guidelines, you can ensure that you are well prepared for the installation of your Vivitar smart security camera. This will help you achieve the best results in terms of placement, functionality, and usability.
Checking Camera Compatibility
Before proceeding with the installation process, it is crucial to ensure that your Vivitar smart security camera is compatible with your device. This compatibility check will help guarantee a seamless setup and enable you to make the most of your camera’s features.
1. Device Compatibility: Verify that the Vivitar smart security camera is compatible with your smartphone, tablet, or computer. Check the product specifications or user manual to confirm the compatibility requirements.
2. Operating System: Make sure that your device’s operating system is compatible with the Vivitar smart security camera. Whether you are using Android, iOS, or Windows, ensure that it meets the minimum system requirements stated by Vivitar.
3. Internet Connection: A stable and reliable internet connection is vital for the functioning of your smart security camera. Ensure that your device is connected to a network with a suitable speed for streaming and transmitting video footage.

4. Power Source: Determine the power source options available for your Vivitar smart security camera. Check if it requires a wired connection or a battery-operated setup. Ensure that you have the necessary power source readily available to ensure uninterrupted surveillance.
5. Additional Requirements: Some Vivitar smart security cameras might have additional requirements such as cloud storage subscription or a specific mobile app. Read the product documentation carefully to understand any additional requirements for optimal performance.
By thoroughly checking the compatibility of your Vivitar smart security camera, you can avoid any potential issues during the installation process and ensure that you can effectively monitor your property.
Gathering Necessary Tools
Before you begin installing your Vivitar Smart Security Camera, it is important to gather all the necessary tools and materials. Having everything prepared ahead of time will ensure a smooth and efficient installation process. Here is a list of tools and materials you will need:
1. Vivitar Smart Security Camera: Make sure you have the Vivitar Smart Security Camera package, including the camera itself, power adapter, and any accompanying cables.

2. Smartphone or Tablet: You will need a compatible smartphone or tablet to connect to the Vivitar Smart Security Camera and access its features through the Vivitar Smart Home Security app.
3. High-Speed Internet Connection: To fully utilize the features of the Vivitar Smart Security Camera, such as live streaming and remote access, you will need a reliable high-speed internet connection.
4. Wi-Fi Network: Make sure you have a Wi-Fi network available. The Vivitar Smart Security Camera connects to your home network wirelessly, so you need to have a functioning Wi-Fi network in place.
5. Power Source: Identify a suitable power source near the location where you plan to install the Vivitar Smart Security Camera. It should be easily accessible to ensure a secure power connection.
6. Mounting Hardware: Depending on where you want to install the camera, you may need mounting hardware such as screws, anchors, or brackets to securely mount the camera.
7. Optional: MicroSD Card: If you want to record and store video footage locally, you may need a microSD card with sufficient storage capacity. Check the camera’s specifications for compatibility and recommended card size.
By gathering all the necessary tools and materials beforehand, you can streamline the installation process and ensure that you have everything you need to set up your Vivitar Smart Security Camera successfully.
Installing the Camera
To install your Vivitar smart security camera, follow these simple steps:
Step 1: Unboxing the Camera
Begin by unboxing the camera and carefully removing all the contents from the package. Ensure that all the necessary components are present, including the camera itself, mounting brackets, screws, and any cables or power adapters.
Step 2: Choosing the Installation Location
Select a suitable location to install your camera. It should be within wireless range and have a stable Wi-Fi signal. Additionally, ensure that the camera is positioned for optimal coverage and is protected from the elements.
Step 3: Connecting the Camera to Power
Plugin the power adapter into an available electrical outlet and connect the other end of the cable to the camera. Make sure the camera is getting power before proceeding to the next step.
Step 4: Downloading the Vivitar Smart Home Security App
On your mobile device, go to the App Store (for iOS) or Google Play Store (for Android) and search for the Vivitar Smart Home Security app. Download and install the app on your device.
Step 5: Setting Up the Camera
Launch the Vivitar Smart Home Security app and create an account if you don’t already have one. Once logged in, follow the on-screen instructions to set up your camera. This may include scanning a QR code or entering the camera’s unique identification number.
Step 6: Connecting the Camera to Wi-Fi
Using the app, connect the camera to your Wi-Fi network by selecting your network name and entering the password. Ensure that the camera is within range of your Wi-Fi router for a stable connection.
Step 7: Mounting the Camera
Use the provided mounting brackets and screws to secure the camera in the desired location. Make sure the camera is positioned correctly and tightened securely to prevent any movement.
Step 8: Finalizing the Installation
Once the camera is securely mounted, double-check all connections and settings. Test the camera by accessing the live video feed through the Vivitar Smart Home Security app to ensure it is functioning as expected.
Now that you have successfully installed your Vivitar smart security camera, you can start monitoring your home or property remotely through the app.
Choosing the Mounting Location
Before installing your Vivitar smart security camera, it is important to carefully consider the mounting location. Choosing the right location will ensure optimal coverage and effectiveness of the camera. Here are some tips to help you select the ideal mounting spot:
1. Determine the area you want to monitor: Identify the area or areas you want to keep an eye on with your security camera. This could include entrances, driveways, or any other vulnerable areas.
2. Consider the camera’s field of view: Vivitar smart security cameras come with a specific field of view range. Make sure the mounting location allows the camera to capture the desired area without any obstructions.
3. Check for access to power and Wi-Fi: The camera needs to be connected to a power source and Wi-Fi network. Ensure that the mounting location is within reach of an electrical outlet and has a strong Wi-Fi signal.
4. Assess potential obstructions: Look out for any potential obstructions that could block the camera’s field of view. This can include trees, large plants, or structural elements like pillars or walls.
5. Consider weather conditions: If your camera is designed for indoor use, make sure to mount it indoors away from direct sunlight and extreme weather conditions. If it is an outdoor camera, ensure the mounting location is sheltered from rain, snow, and other harsh elements.
6. Evaluate security and accessibility: Ensure that the mounting location is secure and not easily accessible to potential tampering or theft. Consider mounting the camera at a height that makes it difficult for unauthorized individuals to reach.
By carefully selecting the mounting location for your Vivitar smart security camera, you can maximize its functionality and ensure the safety and security of your property.
Mounting the Camera
To install the Vivitar smart security camera, you will need to find a suitable location and mount it securely. Follow these steps to ensure a successful installation:
1. Choose a location: Select a location where you want to mount the camera. Make sure it offers a clear view of the area you want to monitor.
2. Prepare the mounting bracket: Attach the mounting bracket to the desired location using screws or adhesive. Ensure that the bracket is stable and can support the weight of the camera.
3. Attach the camera: Once the mounting bracket is in place, attach the camera to the bracket. Align the mounting holes on the camera with the holes on the bracket and secure them together using the provided screws.
4. Adjust the angle: Adjust the angle of the camera to ensure proper surveillance coverage. You can tilt or rotate the camera as needed to achieve the desired view.
5. Connect the power cable: Plug the power cable into the camera and connect it to a power source. Make sure the camera is receiving power before proceeding.
6. Test the camera: Once the camera is securely mounted and powered on, test it to ensure that it is working correctly. Check the camera’s view on your smartphone or computer to confirm that it is capturing the desired area.
By following these steps, you will be able to mount the Vivitar smart security camera and start monitoring your property with ease.
Connecting the Camera to Power
Before starting the installation process, make sure you have all the necessary equipment and tools.
Step 1: Locate a Power Outlet
Start by finding a suitable power outlet near the area where you want to install the camera. It should be easily accessible and preferably close to a Wi-Fi router for a stable connection.
Step 2: Plug in the Power Adapter
Take the power adapter provided with your Vivitar smart security camera and plug one end into the designated slot on the camera. Then, connect the other end to the power outlet you located in the previous step.
Note: Ensure that the power adapter is securely connected to both the camera and the power outlet.
Step 3: Check the Power Indicator
Once the camera is connected to power, a power indicator light should turn on. This indicates that the camera is receiving power.
Tip: If the power indicator does not turn on, double-check the connections and try a different power outlet.
Now that your Vivitar smart security camera is connected to power, you are ready to proceed with the next steps of the installation process.
FAQ,
What is Vivitar smart security camera?
Vivitar smart security camera is a wireless security camera that allows you to monitor your home or office remotely. It has features like motion detection, HD video quality, and two-way audio communication.


