
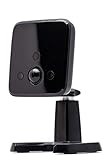
Ensuring the security of your home or office is crucial in today’s world. One effective way to do so is by installing a security camera system. Xfinity Security Camera provides reliable and advanced security solutions that can help protect your property and loved ones.
Installing an Xfinity security camera may seem like a daunting task, but with the right guidance, it can be a smooth and straightforward process. In this article, we will walk you through the step-by-step instructions on how to install an Xfinity security camera system.
Before diving into the installation process, it is essential to gather all the necessary equipment. You will need the Xfinity security camera system, a power source, such as an electrical outlet, a stable internet connection, and a smartphone or computer to access the Xfinity Home app, which allows you to control and monitor your security camera system.
Once you have all the required equipment, follow the instructions provided by Xfinity to connect the camera to the power source. Position the camera in a strategic location that covers the desired area with a clear view. Make sure the camera is securely mounted and protected from harsh weather conditions.
Choosing the Right Location
Choosing the right location for your Xfinity security camera is crucial to maximize its effectiveness. Follow these guidelines to ensure you select the optimal spot:
- Outdoor Surveillance: If you are installing a camera outside, ensure it is placed high enough to capture a wide field of view. Additionally, make sure it is protected from harsh weather conditions and potential vandalism.
- Indoor Surveillance: Place indoor cameras in areas where they can monitor high-traffic areas such as entrances and hallways. Avoid pointing them directly at windows to prevent glares and false alarms caused by moving shadows.
- Wireless Signal Strength: If your camera is wireless, ensure that it is close enough to your Wi-Fi router to maintain a strong and stable signal. This will prevent connectivity issues and ensure smooth video streaming.
- Power Source: Consider the proximity to a power source when choosing the camera’s location. If the camera needs to be connected to a power outlet, ensure that it is within reach or consider using extension cords or power adapters for flexibility.
- Privacy Considerations: Be mindful of privacy concerns and respect the privacy of others when positioning your cameras. Avoid placing them in areas where private spaces, such as bedrooms or bathrooms, are in view.
By carefully selecting the right location for your Xfinity security camera, you can enhance its performance and ensure optimal surveillance coverage for your property.
Mounting the Security Camera
Before you begin mounting the Xfinity security camera, make sure you have chosen a suitable location that provides optimal coverage of the area you want to monitor.
Step 1: Prepare the Mounting Area
Clear the area where you plan to mount the security camera. Remove any obstacles or debris that may obstruct the camera’s field of view. Also, make sure there is a power source nearby for convenient installation.
Step 2: Mark the Mounting Holes
Hold the camera mount against the surface where you plan to mount it and mark the locations of the mounting holes. Use a pencil or marker to make clear and visible marks.
Step 3: Drill the Mounting Holes
Using an appropriate drill bit, carefully drill the marked holes in the surface. Make sure to follow safety precautions while drilling. The size of the drill bit should match the screws provided with the camera.

Step 4: Attach the Mounting Bracket
Align the mounting bracket with the drilled holes and secure it to the surface using the screws provided. Ensure that the bracket is firmly attached and level.
Step 5: Install the Security Camera
Attach the camera to the mounting bracket and ensure that it is securely in place. Use the provided screws to fasten the camera to the bracket. Double-check that the camera is level and positioned correctly.
Step 6: Adjust the Camera’s Angle
After mounting the camera, adjust its angle to achieve the desired field of view. Use the camera’s pan and tilt capabilities or adjust the physical position of the camera to get the best view of the area you want to monitor.
By following these steps, you can easily mount your Xfinity security camera and start monitoring your property with confidence.
Connecting the Camera to Power
To install your Xfinity security camera, you will need to connect it to a power source. Here are the steps to connect the camera to power:

- Locate the camera’s power cable and plug.
- Ensure you have access to a power outlet near where you want to install the camera.
- Plug the camera’s power cable into the power adapter.
- Insert the power adapter into the power outlet.
- Verify that the camera has successfully powered on. You may see a light indicator or hear a sound to confirm this.
- If the camera does not power on, double-check the connections and try a different power outlet. Contact Xfinity support if the issue persists.
- Once the camera is powered on, you can proceed with the next steps of the installation process.
By following these steps, you will ensure that your Xfinity security camera is properly connected to power and ready to be set up for monitoring your home or business.
Connecting to a Network
Before you can start using your Xfinity security camera, you need to connect it to your home network. Follow the steps below to get connected:
Step 1: Power on the Camera
Plug the power adapter into an electrical outlet and ensure that the camera is receiving power.
Step 2: Download the Xfinity Security App
On your mobile device, go to the App Store or Google Play Store and search for the Xfinity Security app. Download and install the app on your device.
Step 3: Create an Account
Open the Xfinity Security app and create a new account. Follow the prompts to set up your account with your email address and password.

Step 4: Add Camera to Your Account
Once you have created an account, open the Xfinity Security app and select the option to add a camera. Follow the on-screen instructions to add your camera to your account.
Step 5: Connect Camera to Wi-Fi
In the app, select the option to connect your camera to your Wi-Fi network. Follow the prompts to enter your Wi-Fi network name and password. Wait for the camera to connect to your network.
Once your camera is successfully connected to the network, you can start monitoring your home from the Xfinity Security app.
Configuring the Camera Settings
Once you have successfully installed your Xfinity security camera, the next step is to configure the camera settings to match your preferences. Follow these steps to set up your camera settings:
Step 1: Connect to the Camera
Begin by connecting your computer or mobile device to the same Wi-Fi network as the camera. This step is crucial to communicate with the camera and access its settings.

Step 2: Access the Camera Settings
Open the Xfinity security camera app on your device. Login to your account and navigate to the camera you want to configure. Once you are on the camera’s live feed, look for the settings icon or menu option. Tap on it to access the camera settings.
Step 3: Configure Basic Settings
In the camera settings menu, you will find several options to configure. Start by adjusting the basic settings such as the camera’s name, time zone, and image resolution. Ensure that the camera name is meaningful to help you easily identify it from the app.
Step 4: Customize Motion Detection
Most Xfinity security cameras offer motion detection capabilities. In the camera settings, find the motion detection section and customize the sensitivity, detection zones, and push notifications. Adjust these settings according to your preferences to receive alerts for motion activities that matter to you.
Step 5: Set Up Recording Preferences
Determine how you want the camera to record and store the footage. In the camera settings, explore the options for continuous recording, scheduled recording, or event-triggered recording. Choose the option that suits your needs and allocate sufficient storage space for recording.
Step 6: Enable Remote Access
To remotely access your camera’s live feed and recordings, enable remote access in the camera settings. This feature allows you to monitor your camera from anywhere using your computer or mobile device, as long as you have an internet connection.

After completing these steps, your Xfinity security camera will be configured according to your preferences. You can always revisit the camera settings to make adjustments whenever needed.
Testing and Troubleshooting
Once you have successfully installed your Xfinity security camera, it is important to test and troubleshoot the system to ensure it is functioning properly. Here are some steps you can take:
1. Check the Camera Connection
Make sure the camera is properly connected to the power source and to your Wi-Fi network. Check the cables and ensure they are securely plugged in.
2. Verify the Camera Placement
Ensure that the camera is positioned correctly to capture the desired area. Adjust the camera angle if necessary and make sure there are no obstructions blocking the view.
3. Test the Live View
Access the camera’s live view on the Xfinity app or web portal. Check if the video feed is clear and if the camera is capturing the expected area. You can also test the PTZ (Pan-Tilt-Zoom) functions if your camera supports them.

4. Check the Night Vision
If your camera has night vision capabilities, test it in a low-light environment to ensure it provides clear images and adequate coverage.
5. Test the Motion Detection
Walk into the camera’s field of view to trigger the motion detection feature. Verify that you receive notifications and that the camera starts recording when motion is detected.
6. Review the Recording Playback
Access the recorded footage and review it to ensure that the camera is capturing and storing the video properly. Check the playback quality and ensure no important events are missed.
7. Troubleshoot Connectivity Issues
If you experience any connectivity problems, restart your camera and Wi-Fi router. Make sure your internet connection is stable and that there are no wireless signal interference issues.
If the above troubleshooting steps do not resolve the issue, consult the Xfinity support resources or contact customer support for further assistance.
FAQ,
Is it difficult to install Xfinity security camera?
No, it is not difficult to install Xfinity security camera. The installation process is simple and can be done by following the provided instructions.
Can I install multiple Xfinity security cameras?
Yes, you can install multiple Xfinity security cameras. You can set up multiple cameras in different locations and monitor them all from the Xfinity Home app. Each camera will need to be installed and configured individually.


