
If you’re looking for a reliable and easy-to-use security camera system, Zmodo wireless cameras are a great choice. With their advanced features and simple installation process, you can ensure the safety of your home or office in no time. In this guide, we’ll walk you through the step-by-step process of installing the Zmodo wireless security camera system 2 pack.
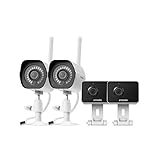
Firstly, it’s important to familiarize yourself with the contents of the Zmodo package. The 2 pack includes two wireless cameras, a wireless NVR (Network Video Recorder), power adapters for the cameras and NVR, an Ethernet cable, and mounting accessories. Make sure you have all the necessary components before you begin the installation process.
Next, find a suitable location for your wireless NVR. This is the central unit that receives video feeds from the cameras wirelessly. It’s recommended to place the NVR in a central location within your home or office, preferably near your Wi-Fi router for a strong and stable connection. Connect the NVR to your router using the supplied Ethernet cable.
Once the NVR is connected, plug the power adapter into an electrical outlet and connect it to the NVR. The NVR will start up and begin searching for the wireless cameras. Now, it’s time to install the cameras themselves.
Choose the locations where you want to install the cameras. It’s best to place them at the entrances/exits of your home or office, as well as areas that need extra surveillance. To mount the cameras, use the supplied mounting accessories such as brackets and screws. It’s important to ensure the cameras are installed securely to prevent tampering or theft.

After mounting the cameras, connect the power adapters to electrical outlets and plug them into the cameras. Once the cameras have power, they will automatically connect to the NVR wirelessly. You can monitor the live video feed from the cameras using the Zmodo app on your smartphone, tablet, or computer. You can also customize settings such as motion detection and recording schedules through the app.
That’s it! You’ve successfully installed the Zmodo wireless security camera system 2 pack. Now you can enjoy peace of mind knowing that your home or office is protected by reliable and high-quality surveillance cameras. If you have any questions or encounter any issues during the installation process, refer to the user manual or contact Zmodo customer support for assistance.
Overview of Zmodo Wireless Security Camera System 2 Pack
The Zmodo Wireless Security Camera System 2 Pack is a comprehensive security solution that allows you to monitor your home or office from anywhere at any time. This system includes two wireless cameras that can be easily installed and connected to your existing Wi-Fi network.
With the Zmodo app, you can access live video feeds, receive instant alerts, and control the cameras remotely. The cameras are equipped with motion detection technology, allowing them to automatically start recording when movement is detected. You can also set up customized motion detection zones to focus on specific areas of interest.
The cameras capture high-quality video in 720p resolution, ensuring clear and detailed footage. They have a wide viewing angle of 115 degrees, providing a broad coverage area. The built-in infrared night vision allows you to see up to 65 feet in complete darkness.
Setting up the Zmodo Wireless Security Camera System 2 Pack is quick and easy. Simply plug in the cameras, connect them to your Wi-Fi network, and download the Zmodo app. The app guides you through the setup process, helping you to connect the cameras and configure the settings.
The Zmodo app offers a range of features to enhance your security experience. You can view multiple camera feeds simultaneously, playback recorded footage, and capture snapshots or video clips. The app also allows you to share access to the cameras with family members or friends.
In conclusion, the Zmodo Wireless Security Camera System 2 Pack is a reliable and user-friendly solution for monitoring your property. With its advanced features and easy setup process, it provides peace of mind and convenience. Whether you want to keep an eye on your home or office, this system has you covered.
Benefits of Installing Zmodo Wireless Security Camera System 2 Pack
Enhanced Security: Installing a Zmodo wireless security camera system can greatly enhance the security of your property. By having a 2 pack system, you can cover multiple areas and angles, ensuring that every important spot is monitored and protected. This allows you to have a comprehensive view of your home or business, deterring potential intruders.
Easy Installation: The Zmodo wireless security camera system is designed for easy installation. With a wireless setup, you don’t need to worry about running wires throughout your property. Simply follow the provided instructions to set up the cameras and connect them to your Wi-Fi network. This makes it convenient and hassle-free to install, even for those who are not tech-savvy.
Remote Viewing: One of the major benefits of the Zmodo wireless security camera system is the ability to remotely view the footage. By connecting the cameras to the Zmodo app on your smartphone or tablet, you can monitor your property from anywhere at any time. This provides peace of mind, especially when you are away from home or on vacation.
High-Quality Video: The Zmodo wireless security camera system delivers high-quality video footage. With HD resolution, you can see clear and detailed images, allowing you to identify people and objects with ease. This is important when it comes to surveillance and providing evidence in the event of a break-in or other incidents.
Smart Alerts: The Zmodo wireless security camera system is equipped with smart alert features. It can detect motion and send real-time notifications to your mobile device. This allows you to respond quickly to any suspicious activity and take appropriate actions. The system also supports intelligent recording, which only records when motion is detected, saving storage space.
24/7 Monitoring: With the Zmodo wireless security camera system, you can enjoy 24/7 monitoring of your property. The cameras are equipped with night vision capabilities, providing clear visibility even in low-light conditions. This ensures that your property is protected day and night, keeping you and your loved ones safe.
Cost-Effective Solution: Installing a Zmodo wireless security camera system 2 pack is a cost-effective solution compared to hiring professional security services or installing traditional wired surveillance systems. It allows you to have a reliable security system without breaking the bank. Additionally, you can save money on monthly subscription fees by managing your own surveillance system.
In conclusion, installing a Zmodo wireless security camera system 2 pack provides enhanced security, easy installation, remote viewing, high-quality video, smart alerts, 24/7 monitoring, and a cost-effective solution for protecting your property.
Step-by-Step Installation Guide
Installing your Zmodo wireless security camera system is a straightforward process. Follow these steps to ensure a successful installation:
- Unbox the package and gather all the necessary components: cameras, power adapters, network cables, and the NVR (Network Video Recorder).
- Select the desired locations for mounting the cameras. Make sure they have a clear view of the areas you want to monitor.
- Using the provided screws and mounting brackets, securely attach the cameras to the chosen locations.
- Connect the cameras to the NVR using the network cables. Ensure each camera is properly connected and powered.
- Connect the NVR to your router using an Ethernet cable.
- Plug in the power adapters for both the NVR and the cameras. Ensure they are receiving power.
- Turn on the NVR and wait for it to fully boot up. This may take a few minutes.
- Using a computer or mobile device, download and install the Zmodo app from the App Store or Google Play Store.
- Launch the Zmodo app and create a new account.
- Follow the app’s on-screen instructions to add your camera system to your account.
- Once added, you will be able to view your camera feeds and configure additional settings through the app.
That’s it! You have successfully installed your Zmodo wireless security camera system.
Step 1: Unboxing the Zmodo Wireless Security Camera System
Before you can start installing your Zmodo wireless security camera system, you must first unbox the package and familiarize yourself with its contents. Follow these steps to ensure a smooth installation:
1. Open the package carefully, ensuring that you do not damage any of the components inside.
2. Remove the contents from the box and lay them out on a flat surface. You should find the following items:
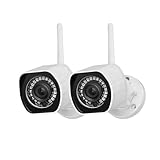
– Zmodo wireless security cameras (2 units)
– Camera mounting brackets (2 units)
– Power supply adapters (2 units)
– Network cables (2 units)

– Quick start guide
– Mounting screws and anchors
3. Inspect each component for any physical damage. If you notice any issues, contact Zmodo customer support immediately.
4. Read through the quick start guide thoroughly. This guide will provide you with important information on how to properly install and set up your Zmodo wireless security camera system.
5. If everything is in order, proceed to the next step in the installation process.

By carefully unboxing and inspecting the contents of your Zmodo wireless security camera system, you can ensure that all necessary components are present and in good condition for a successful installation.
Step 2: Mounting the Cameras
Before starting the installation process, it’s important to determine the best mounting locations for your Zmodo wireless security cameras. Here are the steps to mount the cameras:
- Choose the installation spots: Select the areas where you want to place the cameras. These spots should have a good view of the areas you want to monitor.
- Mount the cameras: Use the included screws and mounting brackets to securely attach the cameras to the chosen spots. Make sure the cameras are well-positioned and angled correctly for optimal coverage.
- Adjust the position: After mounting the cameras, adjust their position by tilting and swiveling them as needed. This will allow you to achieve the desired viewing angle and coverage.
- Screw on the antennas: Attach the antennas to the back of the cameras and tighten them securely. This will ensure proper wireless signal transmission.
- Secure the cables: Bundle the cables together and secure them using cable clips or ties. This will keep them tidy and prevent any accidental damage.
Once you have mounted the cameras and ensured their proper positioning, you can proceed to the next step of the installation process.
Step 3: Connecting the Cameras to Power
After positioning the cameras in the desired locations, you need to connect them to a power source for them to function properly. Here’s how you can do it:
1. Locate the Power Adapter
Find the power adapter that came with your Zmodo wireless security camera system. It should have multiple ports to support multiple camera connections.

2. Connect the Power Adapter to a Power Outlet
Plug the power adapter into a nearby power outlet. Make sure the outlet is easily accessible and not hidden behind furniture or other objects.
3. Connect the Cameras to the Power Adapter
Connect the cameras to the power adapter using the provided power cables. One end of the cable should have a small connector that fits into the camera’s power port, while the other end should have a larger connector that plugs into the power adapter’s port.
Note: Ensure that you connect the correct power cable to each camera to avoid any confusion later on.
4. Turn on the Power
Once the cameras are connected to the power adapter, turn on the power by pressing the power button on the adapter or simply plugging it in if it doesn’t have a power button.
Make sure to check that the indicator lights on the cameras turn on after the power is connected. This indicates that the cameras are receiving power.
With the cameras successfully connected to power, you are now ready to move on to the next step of the installation process.
Step 4: Connecting the Cameras to Wi-Fi
Once you have successfully installed the Zmodo wireless security cameras and positioned them in their desired locations, the next step is to connect them to your Wi-Fi network. This will allow you to remotely access and control the cameras using the Zmodo app on your smartphone or tablet.
- Launch the Zmodo app on your device and sign in or create a new account if you don’t have one already.
- Tap the “Add Device” or “+” button to start the camera setup process.
- Select “Wireless” as the connectivity method and follow the on-screen instructions to put your camera into Wi-Fi pairing mode.
- On your device, go to the Wi-Fi settings and connect to the network named “ZMD_SAP_XXXX” (XXXX represents the unique identifier of your camera).
- Return to the Zmodo app and wait for it to detect the camera. Once detected, tap on the camera’s name to continue the setup.
- Choose your preferred Wi-Fi network from the list and enter your Wi-Fi password when prompted. Tap “Next” to proceed.
- Wait for the camera to connect to your Wi-Fi network. This may take a few moments.
- Once the connection is established, you will see a confirmation message. Tap “Finish” to complete the setup.
Repeat these steps for each camera in your Zmodo wireless security camera system. Make sure to position the cameras within the range of your Wi-Fi network for optimal connectivity. Once all the cameras are connected to Wi-Fi, you can start monitoring and managing them remotely using the Zmodo app.
Step 5: Downloading and Setting Up the Zmodo App
Once you have successfully connected the Zmodo wireless security camera system to your home network, the next step is to download and set up the Zmodo app on your smartphone or tablet. Follow these instructions to get started:
- Open the App Store or Google Play Store on your device.
- Search for “Zmodo” in the search bar.
- Select the Zmodo app from the search results.
- Tap “Install” to begin the download process.
- Wait for the app to finish downloading and then tap “Open” to launch it.
- Sign in or create a new account if prompted. Use your email address and create a secure password.
- Follow the guided setup process within the app to connect your Zmodo wireless security camera system to the app.
- Make sure your smartphone or tablet is connected to the same Wi-Fi network that your Zmodo camera system is connected to.
- Once the setup is complete, you will be able to access the live video feed from your Zmodo wireless security cameras, receive motion alerts, and control other settings through the Zmodo app.
By following these steps, you will be able to successfully download and set up the Zmodo app, allowing you to conveniently monitor your home or property using your smartphone or tablet.

Step 6: Adding the Cameras to the Zmodo App
Once you have completed the previous steps and connected the NVR to your router, it’s time to add the cameras to the Zmodo app. Follow the instructions below to complete this step:
1. Download and Install the Zmodo App
Go to the Google Play Store or the Apple App Store and search for the Zmodo app. Download and install the app on your smartphone or tablet.
2. Create a Zmodo Account
If you don’t already have a Zmodo account, you will need to create one. Open the Zmodo app and tap on “Register”. Enter your email address and create a password for your account.
3. Log in to Your Zmodo Account
After creating your account, log in to the Zmodo app using your email address and password.
4. Add the NVR to the Zmodo App
Tap on the “Devices” tab at the bottom of the app’s main screen. Then, tap on the “+” icon in the top right corner. Select “Add NVR” from the menu that appears.
5. Scan the QR Code on the NVR
Use your smartphone or tablet’s camera to scan the QR code on the back of the NVR. Make sure the QR code is within the frame and wait for the app to detect the NVR.
6. Connect the NVR to your Zmodo Account
Enter the username and password for your NVR, which are by default “admin” and “admin”. Tap “Next” to proceed.
7. Add the Cameras
After successfully connecting the NVR to the Zmodo app, you can now add the cameras. Tap on the “Add Cameras” button and follow the on-screen instructions to add each camera to the app.
Once the cameras have been successfully added, you will be able to view the live video feed and configure the settings of your wireless security camera system through the Zmodo app.
Troubleshooting
If you encounter any issues while installing or setting up your Zmodo wireless security camera system, here are some troubleshooting steps you can try:
1. Check Power Connection
Make sure the cameras and the NVR (network video recorder) are properly connected to a power source. Check if the power cables are securely plugged in and if the outlets are working.
2. Verify Network Connection
Ensure that your NVR is connected to your home network router using an Ethernet cable. Verify that the router is functioning properly and that other devices can connect to the internet.
3. Check Camera Placement
Ensure that the cameras are positioned within the specified wireless range of the NVR. If the cameras are placed too far away, they may have difficulty establishing a stable connection.
4. Verify Camera Power
Ensure that the cameras are powered on. Check the camera power lights to confirm that they are receiving power. If a camera is not powering on, try connecting it to a different power source.
5. Reset Camera and NVR
If you are still experiencing issues, you can try resetting the cameras and the NVR. Locate the reset button on each camera and press it for a few seconds to reset the camera. Refer to the user manual for instructions on how to reset the NVR.
6. Contact Technical Support
If none of the above troubleshooting steps resolve the issue, it is recommended to contact Zmodo technical support for further assistance. They will be able to provide more specific troubleshooting steps or arrange for a repair or replacement if necessary.
Troubleshooting Common Installation Issues
Installing a wireless security camera system can be a straightforward process, but sometimes you may encounter some common issues. Below are some troubleshooting tips for solving these installation problems to ensure a successful setup of your Zmodo wireless security camera system 2 pack.
1. Poor Wi-Fi Signal Strength
A common issue during installation is a weak Wi-Fi signal, which can lead to connectivity problems for your security cameras. To solve this issue, consider the following:
- Ensure that the cameras are within range of the Wi-Fi router.
- Try relocating the router or the cameras to improve the signal strength.
- Consider using a Wi-Fi range extender to boost the signal.
2. Camera Not Powering On
If your camera is not powering on, try these troubleshooting steps:
- Check the power source and ensure that it is properly connected.
- Verify that the power adapter is functioning correctly.
- Try a different power outlet to rule out electrical issues.
3. Camera Connection Issues
If you are experiencing difficulty connecting your cameras to the network, try the following:
- Confirm that the Wi-Fi network name and password are entered correctly.
- Restart your router and wait for it to fully restart before attempting to connect the cameras.
- Ensure that the cameras and the router are using the same Wi-Fi frequency (2.4GHz or 5GHz).
4. Poor Image Quality
If the image quality from your cameras is not satisfactory, follow these troubleshooting steps:
- Ensure that the cameras are positioned correctly and not obstructed.
- Check if the cameras have a clear line of sight to the router.
- Test the cameras in different lighting conditions to determine if it affects the image quality.
5. Camera Recording Issues
If your cameras are not recording as expected, try these troubleshooting steps:
- Ensure that the cameras have sufficient storage space (check the memory card or cloud storage).
- Make sure that the cameras are set to record based on the desired schedule or trigger (motion detection, continuous recording, etc.).
- Check the camera settings to ensure that the recording feature is enabled.
By following these troubleshooting tips, you can resolve common installation issues and enjoy the functionality and security of your Zmodo wireless security camera system 2 pack.
FAQ,
What is a Zmodo wireless security camera system? How does it work?
A Zmodo wireless security camera system is a set of cameras that can be used to monitor and record activity in and around your home or business. The cameras are wirelessly connected to a central hub, which allows you to view the footage remotely using a smartphone or computer. The cameras are typically mounted in strategic locations to provide the best coverage of the area you want to monitor.
What comes in a Zmodo wireless security camera system 2 pack?
A Zmodo wireless security camera system 2 pack typically includes two wireless cameras, a central hub, power adapters for the cameras and hub, mounting hardware, and an Ethernet cable for connecting the hub to your home network.
Can I install a Zmodo wireless security camera system 2 pack myself?
Yes, you can install a Zmodo wireless security camera system 2 pack yourself. The cameras are designed for easy installation and come with all the necessary hardware and instructions. However, if you are not comfortable with DIY installation, you can also hire a professional to do it for you.


