
In today’s world of social media and content creation, livestreaming has become an incredibly popular way to share experiences with an audience in real time. While smartphones are often the go-to choice for livestreaming, many content creators are turning to DSLR cameras for their superior image quality and versatility. Canon DSLR cameras are especially popular among livestreamers due to their excellent video capabilities and user-friendly features. If you’re interested in livestreaming with a Canon DSLR camera, you’re in the right place! This article will guide you through the process, step by step.
First and foremost, you’ll need a Canon DSLR camera with video capabilities. While most modern Canon DSLR cameras have this feature, it’s important to make sure your specific camera model supports it. Check your camera’s user manual or the manufacturer’s website to confirm. Once you’ve confirmed that your camera supports video, you’ll need to set up your camera for livestreaming.
Connect your Canon DSLR camera to your computer or laptop using a USB cable. This will allow you to transfer the video feed from your camera to your computer, which is essential for livestreaming. Once your camera is connected, open your preferred livestreaming software on your computer. Popular options include OBS Studio, Streamlabs OBS, and XSplit Broadcaster. These software programs are free to download and offer a wide range of features to enhance your livestreaming experience.
Once you have your software set up, you’ll need to configure the livestream settings. This will vary depending on the software you’re using, but generally, you’ll need to select your Canon DSLR camera as the video source, choose the desired resolution and frame rate, and adjust any other settings according to your preferences. It’s a good idea to test your livestream settings before going live to ensure everything is working as expected.
Finally, it’s time to go live! Start your livestreaming software and hit the “Go Live” button. You should now see your Canon DSLR camera’s video feed on your computer screen. Position your camera accordingly and start engaging with your audience. Whether you’re livestreaming a concert, a cooking tutorial, or a gaming session, make sure to interact with your viewers by responding to comments and questions. This will help create a more immersive and enjoyable livestreaming experience for everyone.
In conclusion, livestreaming with a Canon DSLR camera can take your content creation to the next level. With their exceptional video quality and user-friendly features, Canon DSLR cameras are a great choice for livestreamers. By following the steps outlined in this article, you’ll be able to set up and start livestreaming with your Canon DSLR camera in no time. So grab your camera, get creative, and share your experiences with the world!
Choosing the Right Canon DSLR Camera for Livestreaming
When it comes to livestreaming, having the right camera can make all the difference. Canon DSLR cameras are a popular choice among livestreamers for their high-quality image sensors and extensive range of lenses. However, with so many models available, it’s important to choose the right Canon DSLR camera for your livestreaming needs.
Here are some factors to consider when selecting a Canon DSLR camera for livestreaming:
- Image Sensor: Look for a camera with a larger image sensor, as this will allow for better low-light performance and improved image quality.
- Resolution: Higher resolution cameras produce clearer and more detailed livestreams, so consider a camera that offers at least 1080p Full HD resolution.
- Autofocus: Livestreaming requires a camera with fast and accurate autofocus capabilities, so look for a camera with advanced autofocus features.
- Connectivity: A camera with built-in Wi-Fi or the ability to connect to a computer via USB will make livestreaming much easier.
- Battery Life: Livestreaming can drain a camera’s battery quickly, so choose a camera with a long battery life or consider purchasing additional batteries.
- Audio Input: If you plan to livestream with external audio sources, ensure the camera has a microphone input or the ability to connect an external audio recorder.
- Tilting Screen: A DSLR camera with a tilting screen can be helpful for livestreaming, allowing you to easily monitor your livestream while filming.
- Price: Consider your budget and choose a Canon DSLR camera that offers the best combination of features within your price range.
By considering these factors and carefully researching different Canon DSLR camera models, you can select the ideal camera for livestreaming that suits your specific needs and budget.

Setting Up Your Canon DSLR Camera for Livestreaming
Streaming your content live using a Canon DSLR camera can give you professional-quality video and a higher level of control over your broadcast. To get started, follow these steps:
Step 1: Choose a Compatible Canon DSLR Camera
Not all Canon DSLR cameras are designed for livestreaming. Check the specifications of your camera model to ensure it supports livestreaming capabilities. Some popular models that support livestreaming are the Canon EOS R5, EOS R6, and EOS 5D Mark IV.
Step 2: Install Livestreaming Software
While some Canon cameras have built-in livestreaming functionality, others require third-party software. Download and install the official Canon EOS Webcam Utility software or other compatible software specifically designed for livestreaming with Canon DSLR cameras.
Step 3: Connect Your Camera to Your Computer
Connect your Canon DSLR camera to your computer using a USB cable. Ensure that your camera is set to “Movie mode” or “Live View mode” for livestreaming purposes. Consult your camera’s user manual for specific instructions on setting the appropriate mode.
Step 4: Configure Livestream Settings
Open the livestreaming software on your computer and select your Canon DSLR camera as the video source. Adjust the resolution, frame rate, and other settings according to your livestreaming platform’s recommendations or your personal preferences.

Note: It’s advisable to use a wired internet connection with sufficient bandwidth for a stable livestreaming experience.
Step 5: Set up Audio and Lighting
For optimal livestreaming quality, ensure that your camera’s microphone is enabled and positioned properly. Consider using an external microphone for better audio. Additionally, set up your lighting to ensure sufficient illumination and enhance the visual appeal of your livestream.
Step 6: Test and Start Livestreaming
Before going live, conduct a test run to ensure everything is working correctly. Check the video and audio quality, framing, and streaming stability. When you’re satisfied, begin your livestream and interact with your viewers.
Remember: Engage with your audience, and create valuable and engaging content for an enjoyable livestreaming experience.
Livestreaming with a Canon DSLR camera can elevate the production value of your broadcasts. Follow these steps to set up your camera and start livestreaming like a pro.

Connecting Your Canon DSLR Camera to a Computer or Streaming Device
If you want to livestream using your Canon DSLR camera, you will need to connect it to a computer or streaming device. Here are the steps to get started:
1. Check camera compatibility
Before attempting to connect your Canon DSLR camera to a computer or streaming device, make sure that your camera is compatible with livestreaming. Some older models may not have this functionality. Check your camera’s manual or the manufacturer’s website for information on livestreaming capabilities.
2. USB or HDMI connection
There are two common ways to connect your Canon DSLR camera to a computer or streaming device: using a USB cable or an HDMI cable. The method you choose will depend on the ports available on your camera and computer or streaming device.
If your camera has a USB port, you can connect it to your computer using a USB cable. This will allow you to transfer the video feed from your camera to your computer for livestreaming. Make sure to use a high-speed USB cable for best results.
If your camera has an HDMI port, you can connect it to your streaming device using an HDMI cable. This will allow you to directly transfer the video feed from your camera to your streaming device for live broadcasting.

3. Set up live streaming software
Once your camera is connected to your computer or streaming device, you will need to set up live streaming software. There are several options available, such as OBS Studio, Streamlabs OBS, or XSplit, which can be downloaded for free.
Install the live streaming software on your computer and follow the instructions to configure it for livestreaming with your connected Canon DSLR camera. You may need to select the camera as the video source and adjust other settings, such as resolution and frame rate.
4. Configure audio settings
In addition to video, you will also need to configure the audio settings for your livestream. Most Canon DSLR cameras have a built-in microphone, but the quality may not be sufficient for livestreaming. You can connect an external microphone to your camera for better audio quality.
Ensure that the audio source is correctly selected in your live streaming software and adjust the volume levels as needed. You may also want to test the audio before going live to ensure everything is working properly.
With these steps, you should now be able to connect your Canon DSLR camera to a computer or streaming device for livestreaming. Remember to double-check all the connections and settings before starting your livestream to ensure a smooth and successful broadcasting experience.

Configuring the Camera Settings for Livestreaming
When setting up your Canon DSLR camera for livestreaming, it is important to ensure that the camera settings are configured correctly to enhance your livestreaming experience. Here are some key settings to consider:
1. Mode Selection
Choose the appropriate shooting mode for livestreaming, typically the Manual (M) mode. This allows you to have full control over the camera’s settings, such as aperture, shutter speed, and ISO, ensuring the best image quality.
2. Video Output Settings
Connect your camera to the computer or livestreaming device using an HDMI or USB cable. In the camera’s menu settings, navigate to the video output options and select the appropriate output resolution and frame rate for livestreaming. Common options include 1080p or 720p at 30 or 60 frames per second.
3. Exposure Settings
Adjust the exposure settings to ensure proper lighting for your livestream. Use the camera’s built-in light meter or histogram to check the exposure levels, and make adjustments accordingly. You can also set the white balance to ensure accurate color representation.
4. Audio Settings
Configure the audio settings to capture high-quality sound for your livestream. Use an external microphone if possible, as it provides better audio quality compared to the camera’s built-in microphone. Adjust the microphone levels to ensure optimal sound levels without clipping or distortion.

| Setting | Recommendation |
|---|---|
| Aperture | Use a wide aperture (low f-number) for a shallow depth of field and a blurred background. |
| Shutter Speed | Select a suitable shutter speed to avoid motion blur. It is generally recommended to use double the frame rate as the minimum shutter speed (e.g., 1/60 for 30fps). |
| ISO | Set the ISO to the lowest possible value to minimize noise and maintain image quality. |
By configuring these camera settings properly, you can ensure high-quality livestreaming with your Canon DSLR camera. Experiment with different settings and make adjustments based on your specific livestreaming environment and requirements.
Optimizing Your Lighting for a Professional Livestream
When it comes to livestreaming with your Canon DSLR camera, one of the most crucial aspects to consider is your lighting setup. Proper lighting can make a significant difference in the overall quality and professionalism of your livestream. Here are some tips to help you optimize your lighting for a professional livestream:
1. Choose the right location:
The first step in optimizing your lighting is to select the right location for your livestream. Look for a space with ample natural light or consider setting up additional lighting equipment to provide sufficient illumination.
2. Use a three-point lighting setup:

A three-point lighting setup is a standard lighting technique used in many professional livestreams. It consists of three main lights:
– Key light: This is the primary light source and should be positioned at a 45-degree angle from the subject.
– Fill light: This light is used to fill in the shadows created by the key light. It should be positioned on the opposite side of the subject from the key light.
– Backlight: Also known as a rim or hair light, the backlight is placed behind the subject to provide separation from the background.
3. Use diffusers and reflectors:
Diffusers and reflectors can help soften harsh lighting or redirect light to enhance the overall appearance of your livestream. Diffusers are used to scatter and soften the light, while reflectors can bounce light back onto the subject, minimizing shadows.
4. Adjust the white balance:
Properly adjusting the white balance on your camera can ensure accurate and natural colors in your livestream. You can manually adjust the white balance settings or use automatic settings, depending on your camera model.
5. Avoid mixed lighting sources:
Using multiple lighting sources with different color temperatures can result in unbalanced and unnatural-looking lighting. Stick to one consistent light source, whether it’s natural light or artificial lighting, to maintain a cohesive and professional appearance in your livestream.

By optimizing your lighting setup, you can greatly improve the quality and overall professionalism of your livestream using a Canon DSLR camera. Experiment with different lighting techniques to find the setup that works best for your specific livestreaming needs.
Selecting the Right Microphone for Clear Audio on Your Livestream
When livestreaming using a Canon DSLR camera, it is important to ensure that you have clear audio for your viewers. One of the key factors in achieving this is selecting the right microphone for your livestream setup. There are various types of microphones available, each with its own advantages and disadvantages. Here are some considerations to keep in mind when choosing a microphone:
1. External Shotgun Microphone
An external shotgun microphone can be mounted on top of your Canon DSLR camera and is a popular choice for livestreaming. This microphone is highly directional, meaning it captures audio primarily from the front and rejects sounds from other directions. It is useful for isolating the audio source and reducing unwanted background noise.
2. Lavalier Microphone
A lavalier microphone, also known as a lapel microphone, is a small microphone that can be clipped onto your clothing. This type of microphone is convenient as it allows for hands-free operation and is ideal for situations where you need to move around during your livestream. Lavalier microphones are commonly used in interviews and presentations.
3. USB Microphone
If you are livestreaming from a stationary location, a USB microphone can be a good option. These microphones connect directly to your computer via a USB port and offer high-quality audio. They are easy to set up and are compatible with most streaming platforms. USB microphones are available in various designs, such as desktop or condenser microphones.
Regardless of the type of microphone you choose, it is important to position it properly for optimal audio quality. Place the microphone close to your mouth to capture your voice clearly and reduce the pickup of background noise. It is also helpful to monitor your audio levels to ensure they are not too low or too high during your livestream.
In conclusion, selecting the right microphone for clear audio on your livestream is crucial for delivering a professional and engaging experience to your viewers. Consider your specific livestreaming needs and choose a microphone that best suits your requirements in terms of audio quality, convenience, and compatibility with your Canon DSLR camera.
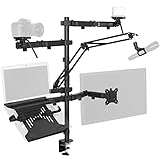
Using External Monitors to Ensure a High-Quality Livestream
Livestreaming with a Canon DSLR camera can take your online content to the next level, but to ensure a professional and high-quality result, using an external monitor is key. Having a larger display with accurate colors and focus tools can greatly assist you in creating a livestream that captivates your audience.
Why use an external monitor?
While the built-in LCD screen on your Canon DSLR may be sufficient for casual shooting, livestreaming demands a more precise and detailed preview. An external monitor allows you to accurately monitor the framing, exposure, focus, and color balance of your livestream in real-time.
Here are some key benefits of using an external monitor for your Canon DSLR livestream:
| 1. Enhanced Visibility: | An external monitor provides a larger screen size, allowing you to clearly see the details of your livestream even from a distance. This is especially useful if you’re using the camera in a studio setting or for professional productions. |
| 2. Accurate Colors: | The built-in LCD screen may not always depict accurate colors, making it difficult to adjust your livestream’s color balance. An external monitor offers better color representation, ensuring that your livestream appears as intended. |
| 3. Focus Tools: | Many external monitors come with features such as focus peaking, zebras, and histogram displays, which help you achieve precise focus and exposure. These tools can be incredibly valuable when livestreaming, where clarity and sharpness are crucial. |
| 4. Dual Monitoring: | By using an external monitor, you can have both your camera’s LCD screen and the larger monitor active simultaneously. This allows you to control and check the settings of your camera while still having a dedicated screen for monitoring and framing. |
Choosing the right external monitor
When selecting an external monitor for your Canon DSLR livestream, consider the following factors:
- Resolution: Look for a monitor with a high resolution to ensure clear and detailed livestream previews.
- Size: Opt for a monitor that is large enough for comfortable viewing, while remaining portable for your livestream setup.
- Connectivity: Ensure that the monitor is compatible with your camera’s HDMI or other supported connectivity options.
- Features: Consider additional features such as focus tools, color accuracy, and customizable settings that can enhance your livestreaming experience.
In conclusion, incorporating an external monitor into your Canon DSLR livestream setup can greatly improve the quality and professionalism of your broadcasts. The enhanced visibility, accurate colors, focus tools, and dual monitoring capabilities make it an invaluable tool for any livestreamer looking to elevate their content.
Creating Engaging Livestream Content with Canon DSLR Camera
Using a Canon DSLR camera to livestream can enable you to produce high-quality content that engages your audience and enhances their viewing experience. In this guide, we will explore some tips and techniques to help you create engaging livestream content using your Canon DSLR camera.
1. Choose the Right Settings
Before you start livestreaming, it’s important to ensure that your camera is set up correctly. Adjust the exposure, white balance, and focus settings to capture sharp and well-balanced footage. Experiment with different settings to find the ideal configuration for your livestream.
2. Use a Stable Tripod
Shaky footage can be distracting for viewers. Invest in a sturdy tripod to keep your camera stable throughout the livestream. This will help maintain a professional appearance and ensure your content looks polished.
3. Optimize Lighting
Proper lighting is crucial for creating engaging livestream content. Avoid harsh overhead lighting or backlighting that can cast shadows. Instead, use soft, diffused lighting to evenly illuminate your subject. Experiment with natural light or invest in professional lighting equipment for best results.
4. Create a Dynamic Composition
A well-composed shot can make your livestream content more visually appealing. Use the rule of thirds to position your subject off-center and create a sense of balance. Experiment with different angles and perspectives to add variety and keep your viewers engaged.
5. Use External Microphones
While DSLR cameras often have built-in microphones, using an external microphone can significantly improve the audio quality of your livestream. Invest in a high-quality microphone and position it close to the source of the sound to ensure clear and crisp audio.
6. Interact with Your Audience
Engage with your audience during the livestream to make them feel involved and connected. Respond to comments, answer questions, and acknowledge their presence. This will help create a sense of community and keep viewers coming back for more.
By following these tips and utilizing the capabilities of your Canon DSLR camera, you can create engaging livestream content that captivates your audience and sets you apart from the competition.
Streaming Platforms and Software for Canon DSLR Livestreaming
When it comes to livestreaming using a Canon DSLR camera, there are several streaming platforms and software options that you can use. These platforms and software can help you easily broadcast your livestream to a wide audience. Here are some popular choices:
- YouTube Live: YouTube Live is a popular streaming platform that allows you to livestream to your YouTube channel. You can use software such as OBS (Open Broadcaster Software) or vMix to connect your Canon DSLR camera to your computer and then stream directly to YouTube Live.
- Twitch: Twitch is a well-known platform for livestreaming video games, but it can also be used for other types of content, including DSLR livestreaming. Similar to YouTube Live, you can use OBS or vMix to connect your camera and stream to Twitch.
- Facebook Live: If you have a Facebook account or a Facebook page, you can use Facebook Live to broadcast your Canon DSLR livestream. You can use software like OBS or vMix to connect your camera and stream directly to Facebook Live.
- Periscope: Periscope is a live video streaming app that is integrated with Twitter. You can use it to livestream using your Canon DSLR camera by connecting it to your computer with OBS or vMix and then broadcasting to Periscope.
These are just a few of the many streaming platforms and software options available for livestreaming with a Canon DSLR camera.
Remember to check the compatibility of your camera and software before getting started. Happy livestreaming!
Tips and Techniques for a Successful Canon DSLR Livestream
1. Use a stable tripod
A stable tripod is essential to ensure steady shots throughout your livestream. Invest in a tripod that can securely hold your Canon DSLR camera and provide stability even if you need to move or adjust the camera during the stream.
2. Choose the right lens
Selecting the appropriate lens for your livestream can greatly impact the quality of your footage. Consider the type of content you’ll be streaming and choose a lens with the appropriate focal length and aperture to capture the desired shots.
3. Set up proper lighting
Good lighting is crucial for a successful livestream. Make sure you have enough light to illuminate your subject and eliminate any harsh shadows. Experiment with different lighting setups to create a well-lit and visually appealing livestream.
4. Use manual mode
Switching your Canon DSLR camera to manual mode gives you full control over exposure, focus, and other camera settings. This allows you to fine-tune your livestream and adjust settings based on the lighting conditions and subject matter.
5. Test your audio
Poor audio quality can ruin an otherwise great livestream. Test your audio setup in advance to ensure clear and crisp sound. Consider using an external microphone for better audio capture and minimize background noise as much as possible.
6. Check your internet connection
A stable and fast internet connection is essential for a smooth livestream. Check your internet speed in advance and ensure that you have a reliable connection. Consider using an ethernet cable rather than relying on Wi-Fi for a more consistent internet connection.
7. Engage with your audience
Interacting with your audience can make your livestream more engaging and enjoyable. Respond to comments and questions during the stream, and encourage viewers to engage with you through live chat. This helps to build a positive and interactive community around your livestream.
8. Practice and prepare
Before going live, practice your livestream setup and familiarize yourself with the camera controls. Rehearse your content and ensure that everything is working smoothly. Being well-prepared will help you feel more confident and comfortable during your livestream.
By following these tips and techniques, you can maximize the potential of your Canon DSLR camera and create a successful livestream experience for your viewers.
Common Troubleshooting Issues and Solutions for Canon DSLR Livestreaming
When livestreaming with a Canon DSLR camera, there may be some common troubleshooting issues that you could encounter. Here, we will discuss those issues and provide possible solutions.
1. Poor Image Quality
If you are experiencing poor image quality during your livestream, there are a few potential solutions you can try:
- Adjust camera settings: Ensure that your camera settings are optimized for livestreaming. Make sure the exposure, white balance, and ISO settings are appropriate for the environment.
- Use proper lighting: Insufficient lighting can result in grainy or blurry images. Use additional lighting sources or position the camera in a well-lit area.
- Check your internet connection: A slow or unstable internet connection can cause image quality issues. Make sure you have a stable and high-speed internet connection to ensure smooth streaming.
2. Audio Problems
If you are experiencing audio problems during your livestream, consider the following solutions:
- Check microphone settings: Ensure that the microphone is properly connected and the settings are configured correctly on both the camera and the streaming platform.
- Use an external microphone: Built-in camera microphones may not provide the best audio quality. Consider using an external microphone for better audio capture.
- Reduce background noise: Excessive background noise can negatively impact the audio quality. Try to minimize any background noise or use a noise-cancelling microphone if possible.
3. Overheating
Overheating is a common issue with DSLR cameras, especially during prolonged livestreaming sessions. Here are some solutions to prevent or mitigate overheating:
- Manage camera temperature: Keep an eye on the camera’s temperature indicator and avoid livestreaming in extremely hot conditions.
- Use an external cooling solution: Consider using an external cooling fan or heat sink to help regulate the camera’s temperature during extended livestreaming sessions.
- Take breaks: If you notice your camera becoming hot, take short breaks to allow it to cool down before resuming the livestream.
By following these troubleshooting tips, you can resolve common issues that may arise while livestreaming with your Canon DSLR camera. Remember to always keep your camera firmware and streaming software up to date for the best performance.
Question-answer:
Can I livestream directly from my Canon DSLR camera without any additional equipment?
No, you cannot livestream directly from your Canon DSLR camera without any additional equipment. DSLR cameras do not have built-in streaming capabilities. You will need a capture card or video interface to connect your camera to your computer for livestreaming.


