
Do you want to take your livestreams to the next level? Using a digital camera for livestreaming can greatly improve the quality of your broadcasts. Whether you’re a content creator, a business looking to connect with your audience, or simply someone who wants to share moments with friends and family, livestreaming with a digital camera can provide you with a professional and engaging experience.
With the advancements in technology, many digital cameras nowadays come equipped with features specifically designed for livestreaming. These features include high-definition video recording, built-in microphones, and connectivity options such as Wi-Fi or HDMI. By leveraging these capabilities, you can create livestreams with clear and crisp visuals, superior audio quality, and a greater level of control over your broadcast.
In this article, we will guide you through the process of livestreaming with a digital camera. We will cover topics such as camera selection, necessary equipment, setup and configuration, as well as tips and best practices to ensure a successful livestream. Whether you’re a beginner or have some experience with livestreaming, this article will provide you with the knowledge and tools you need to get started and create professional-looking livestreams.
Livestreaming: Harnessing the Power of a Digital Camera
With the rise of social media and online content creation, livestreaming has become an increasingly popular way to share experiences and engage with an audience. While many people rely on their smartphones to livestream, using a digital camera can provide a higher quality and more professional result. In this article, we will explore how to harness the power of a digital camera for livestreaming.
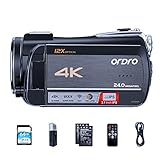
1. Choose the right camera: When selecting a digital camera for livestreaming, there are a few key features to consider. Look for a camera with an HDMI output, as this will allow for easy connectivity to a computer or streaming device. Additionally, consider the camera’s low-light performance and image stabilization capabilities, as these factors can greatly improve the quality of your livestream.
2. Set up your camera: Once you have chosen a camera, it’s time to set it up for livestreaming. Make sure you have a stable tripod or mount to keep the camera steady during your broadcast. Connect the camera’s HDMI output to your computer or streaming device using an HDMI cable. Set the camera to video mode and adjust the settings to your desired resolution and frame rate.
3. Connect to a streaming platform: To livestream with a digital camera, you will need to connect it to a streaming platform. There are many options available, such as OBS (Open Broadcaster Software) or YouTube Live. Create an account on your chosen platform and follow their instructions for connecting your camera. This typically involves selecting the camera as a video source and configuring the audio settings.
4. Test and adjust: Before going live, it’s important to test your livestream setup and make any necessary adjustments. Check the video and audio quality, as well as the framing and lighting of your shot. Ensure that your internet connection is stable and capable of handling the streaming requirements. It’s a good idea to do a trial run or a private test stream to iron out any technical issues before broadcasting to a larger audience.
5. Create engaging content: While the technical aspects of livestreaming with a digital camera are important, don’t forget about the content itself. Plan out your livestream in advance, considering the purpose, topic, and duration of your broadcast. Engage with your audience through interactive features, such as answering questions or conducting live polls. By creating compelling and interactive content, you can enhance the overall livestreaming experience.
In conclusion, livestreaming with a digital camera can elevate the quality and professionalism of your broadcasts. By choosing the right camera, setting it up correctly, connecting to a streaming platform, testing and adjusting, and creating engaging content, you can harness the power of a digital camera for livestreaming success.

Choosing the Right Equipment: Digital Camera Essentials
When it comes to livestreaming with a digital camera, choosing the right equipment is key. Here are some essentials to consider:
1. Resolution: Look for a camera with a high resolution, preferably 1080p or higher. This will ensure that your livestream is clear and sharp.
2. Low-light performance: Opt for a camera with good low-light performance. Livestreaming often involves varying lighting conditions, so a camera that can handle low-light situations well is essential for maintaining image quality.
3. Autofocus: Make sure your camera has reliable autofocus capabilities. Livestreams require continuous focus, and a camera that is able to quickly and accurately autofocus will ensure that your footage remains clear and sharp.
4. Audio quality: Don’t overlook audio quality. Look for a camera with built-in microphones or the ability to connect external microphones. Clear and crisp audio is just as important as video quality for a successful livestream.

5. Connectivity: Ensure that your camera has the necessary connectivity options for livestreaming. This includes an HDMI output or USB connection that allows you to connect to your computer or streaming device.
6. Battery life: Livestreams can be lengthy, so a camera with a long battery life is essential. Look for a camera that can handle extended periods of use without needing to be recharged.
7. Size and weight: Consider the size and weight of the camera, especially if you plan on using it for mobile livestreams. A lightweight and compact camera will be easier to handle and transport.
Remember, choosing the right equipment will ensure a smooth and professional livestreaming experience with your digital camera.
Setting the Stage: Optimal Livestreaming Environment
When it comes to livestreaming with a digital camera, creating the right environment is crucial for a successful and engaging broadcast. Here are some tips to set the stage for your livestream:

1. Lighting: Good lighting is essential for high-quality video. Make sure you have adequate lighting that highlights the subject and eliminates any shadows or dark spots. Natural light can work well, but if you’re indoors or streaming at night, consider using professional lighting equipment or positioning multiple lights strategically.
2. Background: Pay attention to what’s behind you in the frame. A cluttered or distracting background can detract from your livestream. Choose a backdrop that is visually appealing and relevant to your content. A simple, clean background can help your viewers focus on you and what you’re discussing.
3. Sound: Clear audio is just as important as high-quality video. Make sure your microphone is working properly and positioned correctly. Consider using a lavalier microphone for optimal sound quality. Additionally, close any windows or doors to minimize background noise and ensure that you are in a quiet environment.
4. Internet Connection: A stable internet connection is crucial for a smooth livestream. Use a wired connection if possible for a more reliable and faster internet speed. If you can’t use a wired connection, make sure you are in an area with strong Wi-Fi signal and limit the use of other devices that may consume bandwidth during your livestream.
5. Testing and Preparation: Before going live, test your camera, sound, lighting, and internet connection. Make any necessary adjustments and ensure everything is working properly. Prepare an outline or script for your livestream to stay organized and focused during the broadcast.

By setting the stage and optimizing your livestreaming environment, you’ll be able to deliver a professional and engaging experience for your viewers.
Connecting the Dots: Camera-to-Computer Setup
Once you have your digital camera ready, the next step is to connect it to your computer for livestreaming. Follow these steps to ensure a smooth camera-to-computer setup:
1. Check the Camera’s Output Options
Before connecting the camera to your computer, verify that your camera offers the necessary output options for livestreaming. Common output options include HDMI, USB, and Wi-Fi. Refer to your camera’s user manual or online documentation to determine the available output options.
2. Choose the Desired Output Option
Based on the output options provided by your camera, choose the one that best suits your livestreaming needs. HDMI provides high-quality video and audio output, while USB allows for easy connection and control. Wi-Fi is convenient for wireless streaming, but may have limitations in terms of quality and stability.
3. Connect the Camera to the Computer
Once you have identified the output option, connect your camera to the computer using the appropriate cable or wireless connection. If using HDMI, connect one end of the HDMI cable to the camera’s HDMI output and the other end to the computer’s HDMI input. For USB, use a USB cable to connect the camera to a USB port on the computer. If using Wi-Fi, follow your camera’s instructions to establish a wireless connection with the computer.

4. Adjust Camera Settings
After connecting the camera to the computer, adjust the camera settings to ensure optimal livestreaming performance. Set the camera to “video” mode and adjust the resolution and frame rate according to your livestreaming platform’s requirements. Make sure the camera is set to output the audio along with the video.
5. Test the Camera Connection
Before going live, test the camera connection to ensure everything is working as expected. Open your preferred livestreaming software or platform and check if the camera is recognized. Verify that the video and audio are being received correctly and adjust any settings if necessary.
By following these steps, you will be able to successfully connect your digital camera to your computer for livestreaming. Remember to double-check the camera’s output options, choose the appropriate connecting cable or wireless method, adjust camera settings, and test the connection before going live. Now you are ready to start livestreaming using your digital camera!
Unleashing Creativity: Camera Settings and Filters
When it comes to livestreaming with a digital camera, there are various camera settings and filters that can help enhance your creativity and make your livestreams more visually appealing. These settings and filters go beyond just adjusting exposure and focus, offering a range of artistic options.
Here are a few camera settings and filters that you can experiment with to unleash your creativity:

| Setting/Filter | Description |
|---|---|
| Aperture Priority Mode | Allows you to control the depth of field, giving you the ability to create a soft or blurred background. |
| Shutter Priority Mode | Allows you to freeze fast-moving subjects or create motion blur to add a dynamic feel to your livestream. |
| Manual Focus | Gives you full control over the focus point, allowing you to selectively focus on specific subjects or create artistic blurring effects. |
| White Balance | Adjusts the color temperature of your livestream, helping you achieve accurate colors under different lighting conditions or create artistic color shifts. |
| Picture Styles | Allows you to apply different color profiles or create custom styles to give your livestream a unique look. |
| Filters | Using physical filters or in-camera digital filters, you can experiment with various effects such as polarizing filters, neutral density filters, or adding vignettes and grain for a vintage look. |
Remember, these settings and filters can greatly enhance the visual appeal of your livestreams, but experimentation is key. Take the time to familiarize yourself with your camera and try different combinations to find the style that best suits your content and creative vision. Happy livestreaming!
Soundtrack for Success: Audio Solutions for Livestreaming
If you’re looking to take your livestreams to the next level, it’s important not to overlook the audio aspect of your broadcasts. Having clear and high-quality sound can make a significant difference in the overall viewer experience. Whether you’re a gamer, vlogger, or musician, here are some audio solutions to consider for livestreaming with a digital camera.
- External Microphone: One of the easiest ways to improve your livestream’s audio is by using an external microphone. Built-in camera microphones may pick up unwanted background noise or produce low-quality sound. Consider investing in a quality external microphone that can be attached to your digital camera or connected separately for better audio capture.
- Wireless Microphone: If you need freedom of movement during your livestream, a wireless microphone can be a game-changer. With a wireless microphone, you can easily move around while maintaining clear and consistent audio. This is especially useful for vloggers or musicians who want to engage with their audience in a more dynamic way.
- Audio Mixer: An audio mixer is a powerful tool for controlling and adjusting audio levels during your livestream. It allows you to fine-tune the sound output and balance different audio sources. If you’re streaming multiple audio sources, such as game audio and microphone audio, an audio mixer can help you achieve the perfect mix.
- Headphones: Wearing headphones during your livestream is essential for monitoring your audio in real-time. It allows you to hear any potential issues, such as background noise or distortion, and make adjustments accordingly. Choose a pair of headphones that are comfortable to wear for extended periods, and that provide accurate sound representation.
- Soundproofing: Livestreaming in a noisy environment can result in poor sound quality. Consider soundproofing your recording space to minimize external noise interference. This can be achieved by using acoustic panels, foam insulation, or even blankets to absorb and reduce unwanted echoes or reverberations.
By incorporating these audio solutions into your livestreaming setup, you can ensure that your audience enjoys a high-quality and immersive audio experience. Remember, clear and crisp audio is just as important as a crystal-clear video feed when it comes to creating engaging livestream content.
Lighting the Way: Illumination Techniques
When livestreaming with a digital camera, proper lighting is crucial to ensure high-quality video footage. Here are some illumination techniques to help you create a well-lit livestream:
- Three-Point Lighting: This classic lighting setup involves using three lights to illuminate the subject from three different angles. The key light is the primary light source, typically placed at a 45-degree angle to the subject. The fill light softens shadows created by the key light, while the backlight adds depth and separates the subject from the background.
- Natural Light: Utilizing natural light can create a soft and flattering look for your livestream. Position yourself near a window or in a well-lit room, and make sure the light source is not directly behind you to avoid harsh backlighting. If the sunlight is too harsh, you can use curtains, blinds, or diffusion material to soften and diffuse the light.
- LED Lighting Panels: LED lighting panels are a convenient and portable option for livestreaming. These panels provide adjustable brightness and color temperature, allowing you to customize the lighting to suit your needs. Place them at an angle to avoid harsh shadows or use diffusers to soften the light output.
- Ring Lights: Ring lights are circular lights that fit around the camera lens. They provide even and diffused lighting, eliminating harsh shadows on the subject’s face. Ring lights are especially popular among vloggers and beauty influencers due to their flattering and soft light output.
- Lighting Accessories: Consider using additional lighting accessories such as reflectors, diffusers, and gels to further enhance your livestream lighting. Reflectors can bounce light back onto the subject, diffusers help soften and spread the light, and gels can add a creative touch by altering the color temperature.
Experiment with different lighting setups to find the one that suits your livestreaming style and the desired mood of your content. Remember, well-lit videos can greatly enhance the visual appeal and professionalism of your livestreams.
Framing the Shot: Composing a Captivating Livestream
When it comes to livestreaming with a digital camera, framing the shot plays a crucial role in capturing and keeping your audience’s attention. Whether you’re streaming a live event, conducting an interview, or showcasing your skills, here are some tips to help you compose a captivating livestream.
1. Choose the Right Perspective
The perspective from which you shoot your livestream can greatly impact the viewer’s experience. Consider the purpose and content of your livestream to determine the best perspective. For example, if you’re demonstrating a process or showcasing a product, a close-up or overhead shot may be more suitable. On the other hand, if you’re capturing a live event or interview, a wider shot that includes the surroundings can provide a sense of context and immersion.
2. Follow the Rule of Thirds
The rule of thirds is a basic principle of composition that can help you create a balanced and visually pleasing shot. Imagine dividing your frame into nine equal parts by drawing two vertical and two horizontal lines. Position your main subject or points of interest along these lines or at the points where they intersect. This technique can add depth and interest to your livestream, making it more visually appealing.
| Pros | Cons |
|---|---|
| – Adds depth and interest to the shot | – May not work for all types of livestreams |
| – Provides a balanced composition | – Requires practice and experimentation to master |
| – Guides the viewer’s gaze | – Subject may become too isolated or dominant |
Remember, these guidelines are not set in stone, and you can always experiment with different techniques to find what works best for your livestream. The key is to create a visually engaging composition that helps you tell your story and keep your audience captivated throughout the broadcast.
Nurturing a Live Audience: Interacting with Viewers
Engaging with your audience is an essential part of livestreaming. It not only helps you build a loyal following, but also creates a sense of community and keeps viewers coming back for more. Here are some ways to nurture your live audience and interact with them during the livestream:
1. Respond to comments and questions
Monitor the comment section or chat box during your livestream and take the time to respond to comments and answer questions from your viewers. Engaging in conversations with your audience is a great way to make them feel valued and heard.
2. Conduct polls and surveys
Engage your viewers by conducting polls or surveys related to the content you are livestreaming. It not only encourages active participation but also gives you valuable insights into your audience’s interests and preferences.
3. Give shout outs
Show appreciation to your viewers by giving shout outs to individuals or groups who actively participate in your livestream. Recognizing their contributions can make them feel special and encourages others to engage as well.
4. Incorporate live Q&A sessions
Dedicate a portion of your livestream to a live Q&A session where viewers can submit their questions and you can answer them in real-time. This interactive format allows for direct interaction with your audience and creates a more personal connection.
5. Use interactive features
Take advantage of interactive features available on livestream platforms. These can include live polls, chat stickers, or applause buttons. These features not only make the livestream more interactive, but also allow viewers to express their opinions and emotions.
Nurturing and interacting with your live audience helps create a vibrant and engaging livestream experience. By valuing and involving your viewers, you can build a loyal community that frequently tunes in to your livestreams and eagerly awaits your next broadcast.
Above and Beyond: Advanced Techniques for Digital Camera Livestreaming
While livestreaming with a digital camera is a great way to share your content with an audience, there are a few advanced techniques you can use to take your streams to the next level. In this article, we will explore some of these techniques and how you can implement them to create a professional livestreaming experience.
| Technique | Description |
|---|---|
| Multiple Camera Setup | One way to add more visual interest to your livestream is by using multiple cameras. By switching between different camera angles or incorporating picture-in-picture shots, you can provide a more dynamic viewing experience for your audience. |
| Advanced Lighting | Proper lighting can make a significant difference in the quality of your livestream. Consider investing in professional lighting equipment or experimenting with different lighting techniques to create a visually appealing and well-lit stream. |
| Green Screen | A green screen setup allows you to replace the background of your livestream with any image or video you desire. This technique is commonly used in professional broadcasts and can help you create a unique and immersive streaming experience. |
| Graphic Overlays | Adding graphic overlays to your livestream can enhance the visual appeal and provide additional information to your viewers. Consider incorporating lower-thirds, logos, or on-screen graphics to elevate the production value of your stream. |
| Multi-Platform Streaming | Streaming to multiple platforms simultaneously can help you reach a wider audience and increase your stream’s exposure. Explore the use of streaming software or hardware encoders that support multi-platform streaming to expand your viewer base. |
| Interactive Elements | Engage your audience by incorporating interactive elements into your livestream. This can include features such as live chats, polls, or audience participation segments to create a more immersive and interactive experience for your viewers. |
By implementing these advanced techniques, you can elevate your digital camera livestreaming and create a professional and engaging experience for your audience. Experiment with different methods, and don’t be afraid to think outside the box to make your streams truly stand out.
Question-answer:
What is livestreaming and why is it popular?
Livestreaming is the act of broadcasting live video footage over the internet. It has become popular because it allows users to share their experiences and events in real-time with a global audience.
Can I livestream with a digital camera?
Yes, you can livestream with a digital camera. Many modern digital cameras have built-in Wi-Fi or HDMI connections that allow you to connect them to a computer or streaming device for broadcasting.
What equipment do I need to livestream with a digital camera?
To livestream with a digital camera, you will need a camera with Wi-Fi or HDMI capability, a stable internet connection, a computer or streaming device, and streaming software or platform.
Is livestreaming with a digital camera better than using a smartphone?
Livestreaming with a digital camera can offer higher quality video and audio compared to using a smartphone. However, smartphones are more portable and often have built-in streaming apps, making them more convenient for spontaneous livestreaming.
Are there any tips for a successful livestream with a digital camera?
Yes, here are a few tips for a successful livestream with a digital camera: make sure you have a stable internet connection, test your equipment before the stream, use a wired connection if possible, have a plan or script for your livestream, engage with your audience, and promote your livestream in advance to attract viewers.


