
Photography has come a long way from the days of film rolls and darkrooms. But even with the rise of digital cameras, there’s still something magical about shooting with a film camera. The process of loading film into a camera can be a bit daunting if you’ve never done it before, but once you get the hang of it, it becomes second nature.
Before you begin, make sure you have all the necessary materials. You’ll need a roll of film, a film camera, and a dark room or a changing bag to avoid exposing the film to light. It’s also a good idea to have a clean, dust-free environment to prevent dust from getting on the film.
Step 1: Start by locating the film door on your camera. This is usually on the back or the bottom of the camera. Some cameras have a small button or latch that you need to press or release to open the film door. Once the door is open, you’ll see the film chamber.
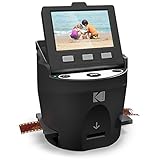
Step-by-Step Guide to Loading a Digital Film Camera
loading a digital film camera can be a straightforward process when you follow these simple steps:
Step 1: Gather your Equipment
Before you begin, ensure you have all the necessary equipment. You will need:

- A digital film camera
- A roll of film
- A clean, dust-free environment
Make sure your camera and film are compatible and that your film is not expired.
Step 2: Prepare the Camera
Carefully open the camera back and check for any dust or debris. Use a gentle brush or blower to remove any particles that may interfere with the film. Ensure the camera’s battery is fully charged.
Step 3: Load the Film
Take the roll of film and find the rewind knob or lever on the camera. Rotate it until you feel resistance and the rewind crank rotates freely.
Insert the film into the camera, making sure the film’s leader aligns with the camera’s take-up spool. Close the camera back securely, ensuring it latches or locks in place.
Step 4: Advance the Film
Turn on the camera and set it to the first frame. Follow the camera’s manual to advance the film to the first frame, usually by pressing the shutter release button a few times. This will ensure the film is properly loaded and ready for use.

Step 5: Test the Camera
Take a few test shots to verify that the camera is properly loaded and functioning. Check the film advance after each shot to ensure it is working correctly.
Remember to be mindful of light leaks and handle the film carefully to prevent damage. Congratulations, you have successfully loaded your digital film camera!
Unpack the camera
When you first receive your digital film camera, it’s essential to safely and carefully unpack it to avoid any damages. Here are the steps to unpack your camera:
- Find a flat and clean surface to unpack the camera.
- Remove the camera from its packaging box.
- Inspect the camera for any visible signs of damage or defects.
If you notice any damage, it’s crucial to contact the manufacturer or the seller immediately for assistance.
Once you’ve verified that the camera is in good condition, proceed with the following steps:
- Locate the camera manual and other accompanying documents in the box.
- Read the manual thoroughly to familiarise yourself with the camera’s features and functions.
- Keep the manual and all other documents in a safe place for future reference.
It’s essential to have a clear understanding of the camera’s capabilities and operating procedures before loading film and starting to shoot.
Insert the battery
Before loading a digital film camera, it’s important to ensure that the battery is properly inserted. Here are the steps to insert the battery:
- Locate the battery compartment on the camera. This is usually on the bottom or side of the camera, and there is often a latch or button to release the compartment.
- Open the battery compartment by sliding the latch or pressing the button.
- Take the battery and align it with the contacts inside the compartment. The contacts are typically marked with “+” and “-” symbols to indicate the correct orientation of the battery.
- Insert the battery into the compartment, making sure it fits snugly.
- Close the battery compartment by sliding the latch or pressing the button back into place. Ensure that it is securely closed.
Once the battery is inserted, you can proceed to load the film into the camera. It’s always a good idea to check the battery level before starting to ensure that you have enough power to capture your desired shots.
Open the film compartment
In order to load a digital film camera, the first step is to open the film compartment. This is where you will insert the digital film cartridge.

Start by locating the film compartment on your camera. It is typically located on the back or side of the camera body and is marked with an indicator or symbol.
Once you have located the film compartment, you may need to unlock it using a latch, button, or switch. This will vary depending on the camera model, so refer to your camera’s manual for specific instructions.
Once the compartment is unlocked, gently open it by pulling it towards you or sliding it to the side. Be careful not to force it open as this may damage the camera.
Inside the film compartment, you will see a space or slot where the digital film cartridge will be inserted. This space is typically marked with an indicator or symbol to help guide you.
Before inserting the film cartridge, make sure that your hands are clean and dry to prevent any dirt or moisture from getting inside the camera.

Important: Do not touch the internal components of the camera or the film sensor while loading the film. This can result in damage to the camera or affect the image quality.
Once the film compartment is open and ready, you can proceed to the next step of loading the digital film cartridge into the camera.
Load the film
Before loading the film into the digital film camera, ensure that you are in a clean and dust-free environment to prevent any particles from damaging the film or camera.
1. Begin by removing the film canister from its packaging. Make sure to handle the film canister with clean hands to avoid leaving any fingerprints or oils on the film.
2. Open the camera back by pressing the release button or flipping the latch, depending on the camera model.

3. Inside the camera, you will find the film chamber. Check the camera manual if you are not sure where it is located.
4. Take the film leader and insert it into the film chamber. Make sure the film is aligned properly with the film guide marks and that the sprocket holes are engaged with the gears.
5. Close the camera back securely to prevent any light leaks from ruining the film.
6. Advance the film by following the camera’s instructions. This may involve winding the film manually or using an automatic film advance feature.
7. Once the film is loaded, you may need to set the film speed on the camera. Refer to the camera’s manual for instructions on adjusting the ISO or ASA settings.

8. Lastly, power on the camera and check the film counter to ensure that the film is advancing correctly.
Remember to handle the camera and film with care throughout the loading process to avoid damaging the film or camera.
Close the film compartment
Once you have successfully loaded the film into the camera, it is important to close the film compartment securely. This will ensure that the film is protected from exposure to light and that it stays in place during the photography process.
Here are the steps to close the film compartment:
- Make sure that the film is properly aligned and positioned inside the camera.
- Gently press the film compartment door until it clicks or locks into place.
- Ensure that the door is securely closed and there are no gaps or openings.
- Check if there is a locking mechanism or latch to further secure the film compartment. If there is, engage it to provide additional protection.
- Inspect the film compartment to ensure that everything is properly closed and aligned.
By closing the film compartment correctly, you can prevent unwanted light leaks and maintain the integrity of the film throughout the entire photography process.
Turn on the camera
Before loading the film into the digital camera, it is essential to turn on the device. This step ensures that the camera is ready to receive and process the film.
To turn on the camera, locate the power button. The power button is typically found on the top or back of the camera body. It is usually labeled with a recognizable symbol such as a circle or a power symbol.
Press and hold the power button for a few seconds until the camera powers on. Some cameras may have a separate switch that needs to be flipped in addition to pressing the power button. Refer to the camera’s user manual for specific instructions if needed.
Once the camera is turned on, it may take a few moments for the device to fully initialize. It is important to be patient and wait for the camera to finish its startup process before proceeding to load the film.
Question-answer:
Is there a specific way to insert the film cartridge into the camera?
Yes, there is a specific way to insert the film cartridge into the camera. Most cameras have a slot or compartment where the film cartridge should be placed. Make sure to align the cartridge correctly with the markings or indicators inside the camera. Follow the instructions provided by the camera manufacturer to ensure proper insertion.
What should I do if the film does not advance correctly after loading?
If the film does not advance correctly after loading, there could be several potential issues. The first thing to check is if the film leader is properly threaded through the camera mechanism. Make sure it is securely in place and not loose. If the film is still not advancing, check if the camera has a manual advance lever or button, and try advancing the film manually. If the issue persists, consult the camera’s user manual or contact the manufacturer for further assistance.
Can I load a digital film camera in a brightly lit room?
No, you should not load a digital film camera in a brightly lit room. Film is sensitive to light, and exposing it to bright light can ruin the film and render it unusable. It is best to load the camera in a dark or dimly lit room, or in a room with a light-tight changing bag or changing tent. This will help protect the film from accidental exposure to light during the loading process.


