How to lower camera flash on iPhone
If you are a keen photographer and an iPhone user, you may have encountered situations where the built-in flash on your device can produce too much light, resulting in overexposed or washed-out photos. Fortunately, there are several ways you can lower the camera flash on your iPhone and take better photos in low-light conditions without sacrificing image quality.
One option is to use the flash settings within the built-in Camera app. To access these settings, simply open the Camera app and tap on the lightning bolt icon located in the top left corner of the screen. From there, you can choose between various flash modes, including Auto, On, Off, and Slow Sync. Using the “Off” mode will completely disable the flash, while the “Auto” mode will allow the camera to determine whether flash is needed based on the lighting conditions. The “On” mode will force the flash to be enabled for every photo, and the “Slow Sync” mode can be used to create more balanced and natural-looking exposures in low-light situations.
Another way to lower the camera flash is by adjusting the exposure settings manually. To do this, open the Camera app, frame your shot, and tap to focus on the subject. Then, swipe up or down on the screen to adjust the exposure level. Swiping down will decrease the exposure, which will result in a darker photo overall. This can help to reduce the intensity of the flash, especially when combined with other low-light photography techniques, such as using a tripod or increasing the ISO settings.
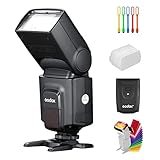
In addition to these built-in options, there are also third-party camera apps available on the App Store that offer more advanced flash control features. These apps often provide additional settings such as adjustable flash intensity, color temperature, and even the ability to use external flash accessories for more professional-level photography.

By exploring these various methods, you can lower the camera flash on your iPhone and improve your photography skills in low-light conditions. Whether you prefer using the built-in Camera app or experimenting with third-party alternatives, finding the right balance between flash and natural lighting can greatly enhance the quality of your iPhone photos.
Adjusting Camera Flash Settings on iPhone
The iPhone camera flash can be a helpful tool for capturing well-lit photos in low-light conditions. However, there may be situations where you want to lower the flash intensity or disable it altogether. Here are some steps to adjust the camera flash settings on your iPhone:
Step 1: Open the Camera App
To access the camera flash settings, open the Camera app on your iPhone. This can be done by tapping on the Camera icon on your home screen.
Step 2: Access the Flash Control Options
Once the Camera app is open, you will see a small lightning bolt icon at the top left corner of the screen. Tap on this icon to access the flash control options.
Step 3: Choose the Desired Flash Setting
After tapping on the lightning bolt icon, a menu will appear with different flash settings. The available options include:

- Auto: This is the default setting, which allows the iPhone to automatically determine whether to use the flash based on lighting conditions.
- On: Selecting this option will activate the flash for every photo you take.
- Off: Choosing this option will disable the flash completely, even in low-light situations.
- Slow Sync: This setting uses a slower shutter speed combined with the flash to capture more ambient light in the photo.
Step 4: Select the Desired Flash Setting
From the menu, choose the flash setting that best suits your needs. The selected flash setting will be saved and used for future photos until you change it again.
By adjusting the camera flash settings on your iPhone, you can ensure that your photos are well-lit without overpowering the subject or scene. Experiment with different flash settings to find the one that works best for your specific photography needs.
Lowering Camera Flash Intensity
The flash intensity on an iPhone camera can sometimes be too bright, causing overexposed photos or harsh lighting. However, there are several ways to lower the camera flash intensity and improve the overall quality of your pictures.
1. Adjust Flash Settings
One way to lower the camera flash intensity is by adjusting the flash settings on your iPhone. To do this, follow these steps:
- Open the Camera app on your iPhone.
- Tap on the flash icon, which appears as a lightning bolt.
- Select the desired flash setting, such as “Auto”, “On”, or “Off”.
By selecting “Auto” or “Off”, you can lower the flash intensity and allow the camera to adjust the lighting based on the surrounding conditions.
2. Use Third-Party Camera Apps
If the built-in Camera app on your iPhone does not provide enough control over the flash intensity, you can try using third-party camera apps. These apps often offer more advanced settings and features, including the ability to adjust the flash intensity manually.
Search for camera apps on the App Store, read reviews, and choose one that best suits your needs. Once installed, explore the app’s settings to find the flash intensity adjustment option.
3. Diffuse the Flash
Another method to lower the camera flash intensity is by diffusing the light. This can help to reduce the harshness of the flash and create a more natural lighting effect.
You can use a variety of materials to diffuse the flash, such as tissue paper, translucent plastic, or a diffuser attachment specifically designed for iPhone cameras. Place the diffusing material over the flash to soften the light and lower its intensity.
4. Adjust Exposure Manually
If you prefer more precise control over the flash intensity, you can adjust the exposure manually. This can be done by tapping on the part of the screen that you want to focus on and then sliding the exposure slider up or down to increase or decrease the brightness.
By adjusting the exposure settings, you can balance the amount of light coming from the flash and achieve a desired level of intensity for your photos.
5. Disable HDR
High Dynamic Range (HDR) is a feature on iPhones that captures a wider range of light and dark tones in a photo. However, when the flash is enabled, HDR can sometimes result in a brighter and more intense flash. To lower the flash intensity, you can try disabling HDR in the Camera app settings.
To disable HDR:
- Open the Settings app on your iPhone.
- Scroll down and tap on “Camera”.
- Toggle off the “Smart HDR” or “Keep Normal Photo” option.
Disabling HDR can help reduce the flash intensity and improve the overall lighting in your photos.
By following these methods, you can lower the camera flash intensity on your iPhone and capture well-balanced, beautifully lit photos.
Using the Auto Flash Option
If you want to lower the camera flash on your iPhone, you can take advantage of the auto flash option. This feature allows your iPhone to automatically determine whether or not to use the flash based on the lighting conditions.
To enable the auto flash option, you can follow these steps:
Step 1: Open the Camera App
Launch the Camera app on your iPhone by tapping on the camera icon on your home screen or swiping left from the lock screen.
Step 2: Access Flash Options
Once you have opened the Camera app, you will see a lightning bolt icon at the top left corner of the screen. Tap on this icon to access the flash options.
Step 3: Select Auto
When you tap on the lightning bolt icon, a menu will appear with different flash options. From this menu, select “Auto” to enable the auto flash option.
Now, your iPhone will automatically decide when to use the flash based on the lighting conditions in your current environment. This way, you can ensure that the flash is only used when necessary, helping to lower the overall flash impact and resulting in more natural-looking photographs.
Disabling Camera Flash Completely
If you find the camera flash on your iPhone to be too bright or distracting, you can disable it completely by following these steps:
Step 1: Access the Settings Menu
To disable the camera flash, start by accessing the Settings menu on your iPhone. This menu contains various options and settings that allow you to customize your device’s behavior.
Step 2: Find the Camera Settings
Once you are in the Settings menu, scroll down and look for the “Camera” option. Tap on it to access the camera settings panel.
Step 3: Disable the Flash
In the camera settings panel, you will find an option labeled “Flash”. Tap on it to open the flash settings.

From the flash settings, select the “Off” option to disable the camera flash completely. This will ensure that the flash does not activate when you take photos or videos with your iPhone.
Note: Disabling the camera flash will prevent it from automatically activating, but you can still manually enable it when needed by selecting the “On” option in the flash settings.
By following these steps, you can easily disable the camera flash on your iPhone and eliminate any unwanted brightness or distractions that it may cause.
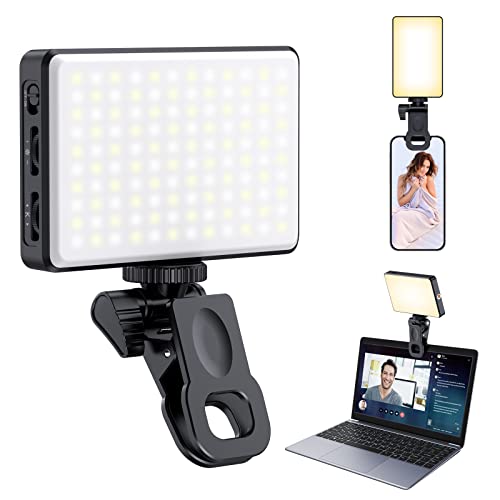
Utilizing External Lighting Tools
If you’re looking to lower the camera flash on your iPhone, utilizing external lighting tools can provide you with better control over the lighting conditions in your photos. Here are a few options to consider:
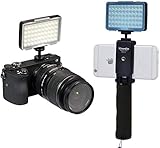
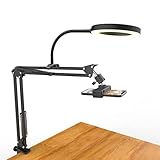
1. Studio Lights
If you’re capturing photos in a controlled environment, using studio lights can be a great option. These lights offer a wide range of adjustments and settings, allowing you to modify the intensity and direction of the light to suit your needs. By using studio lights, you can create a well-lit scene without relying on the built-in flash of your iPhone.
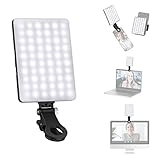
2. LED Panels
LED panels are portable lighting tools that provide a consistent and adjustable light source. They often come with different color temperature options, allowing you to match the lighting conditions of your surroundings. By positioning LED panels strategically, you can illuminate your subjects without the need for using the iPhone’s flash.
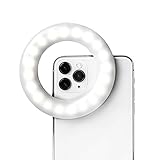
3. Diffusers and Reflectors
Diffusers and reflectors are accessories that can modify the lighting conditions in your photos. A diffuser scatters and softens the light, reducing harsh shadows and creating a more even illumination. Reflectors, on the other hand, bounce existing light onto your subject, filling in shadows and adding a touch of brightness. Using diffusers and reflectors can help you achieve a natural lighting effect without relying on the iPhone’s flash.
When using external lighting tools, it’s important to experiment with different positions, angles, and settings to achieve the desired effect. Additionally, consider the size, weight, and portability of these tools to ensure they align with your photography needs. With the right external lighting tools, you can lower the camera flash on your iPhone and capture stunning photos in any lighting condition.
Shooting in Low Light Conditions
Low light conditions can be challenging when it comes to photography, but with the right techniques, you can still capture great photos with your iPhone camera. Here are a few tips to help you shoot in low light:
1. Adjust Exposure
One way to compensate for low light is by adjusting the exposure settings on your iPhone camera. You can do this by tapping on the screen while in the Camera app. When you tap, a yellow box will appear, and you can slide your finger up or down to adjust the exposure level. Increasing the exposure will brighten the image, while decreasing it will darken the image.

2. Use Night Mode
If you have an iPhone with Night Mode capabilities, make sure to utilize this feature when shooting in low light. Night Mode takes a series of photos with different exposures and combines them to create a well-exposed image with reduced noise. It works best when the iPhone is stabilized, so consider using a tripod or placing your phone on a stable surface.
3. Avoid Using the Flash
While the flash can help illuminate your subject in low light, it often results in harsh lighting and washed-out colors. Instead, try using natural sources of light, such as street lamps or candles, to create a more atmospheric and flattering effect.
4. Use a Third-Party Camera App
If you’re looking for more control over your low light photos, consider using a third-party camera app that offers manual settings. These apps often allow you to adjust ISO, shutter speed, and other parameters to optimize your exposure in low light conditions.
By following these tips, you’ll be able to capture stunning photos even in low light conditions with your iPhone camera. Experiment with different settings and techniques to find what works best for you!
FAQ
How can I reduce the camera flash on my iPhone?
To lower the camera flash on your iPhone, you can simply swipe up from the bottom of the screen to open the Control Center. Then, tap on the flashlight icon to turn it off or adjust the flash intensity by pressing and holding the flashlight icon. Finally, you can choose the desired flash setting to reduce the flash intensity.
Is there a way to dim the camera flash on iPhone?
Absolutely! You can dim the camera flash on your iPhone by accessing the Control Center. Just swipe up from the bottom of the screen to open it. Then, tap on the flashlight icon to turn it off or adjust the flash intensity by pressing and holding the flashlight icon. You’ll be able to dim the flash to your preferred level using this method.
What are the steps to lower the flash brightness on my iPhone camera?
To lower the flash brightness on your iPhone camera, you need to go to the Control Center. Swipe up from the bottom of the screen to access it. Locate the flashlight icon in the Control Center and tap on it. This will turn off the flash. If you want to adjust the flash intensity, press and hold the flashlight icon. You’ll find different flash settings to choose from. By selecting a lower intensity setting, you can effectively lower the flash brightness on your iPhone camera.
Can I decrease the strength of the camera flash on my iPhone?
Yes, you can decrease the strength of the camera flash on your iPhone. All you need to do is open the Control Center by swiping up from the bottom of the screen. Look for the flashlight icon and tap on it to turn off the flash. If you want to decrease the flash’s intensity, press and hold the flashlight icon. You’ll see different flash settings, including a lower intensity option. Selecting this option will decrease the strength of the camera flash on your iPhone.
Are there any ways to adjust the flash intensity on an iPhone camera?
Definitely! You can easily adjust the flash intensity on an iPhone camera by accessing the Control Center. To do this, swipe up from the bottom of the screen. Once the Control Center is open, find the flashlight icon and tap on it to turn off the flash. If you want to adjust the flash intensity, press and hold the flashlight icon until you see different flash settings. From there, you can choose the desired flash intensity level to suit your needs.


