
Do you want to capture stunning wildlife photos without spending a fortune on expensive camera traps? Look no further! In this article, we will guide you step by step on how to make your very own camera trap for DSLR.
Camera trapping is an effective method used by wildlife photographers and researchers to capture candid shots of elusive animals in their natural habitat. By setting up a camera trap, you can capture breathtaking images of wildlife without disturbing their natural behavior.
First, you’ll need a few essential materials to build your camera trap. These include a DSLR camera, a motion sensor, a remote control, a tripod, and a sturdy housing to protect your equipment from the elements. You may also need additional tools such as a drill and screws to secure everything in place.
Once you have gathered all the necessary materials, you can start assembling your camera trap. Begin by attaching the motion sensor to the housing and connecting it to your DSLR camera. This sensor will detect any movement in its field of view, triggering the camera to take a photo.
Next, mount your camera trap on a stable tripod, ensuring that it is positioned at the desired angle and height. You may have to experiment with different positions to find the best vantage point for capturing wildlife activity. Additionally, make sure the camera is securely fastened to prevent any accidental falls or damage.

After setting up the physical components, you’ll need to program your camera to adjust the settings according to your desired outcome. This includes setting the ISO, shutter speed, and aperture to achieve the best exposure for various lighting conditions. You may also want to enable features such as burst mode or time-lapse to capture a series of images or record animal behavior over an extended period.
Finally, test your camera trap to ensure everything is functioning correctly. Walk in front of the motion sensor to check if the camera triggers and captures a photo. Adjust the sensitivity of the sensor if necessary to avoid false triggers from non-targeted movements.
With your homemade camera trap ready, it’s time to find the perfect location to set it up. Look for areas with evidence of wildlife activity, such as animal tracks, scat, or feeding sites. Place your camera trap at a safe distance from the animals to avoid human scent detection and potential damage.
So, why spend a fortune on pre-made camera traps when you can create your own? Follow the steps outlined in this article, and you’ll be well on your way to capturing stunning wildlife photos with your DIY camera trap!
Why Use a DSLR Camera
A DSLR camera, or digital single-lens reflex camera, provides several advantages over other types of cameras when it comes to capturing high-quality images in a camera trap setup.

1. Image Quality
DSLR cameras are known for their superior image quality, thanks to their large image sensors and interchangeable lenses. With a DSLR camera, you can capture detailed, sharp, and high-resolution images that are perfect for capturing wildlife or any other subject in a camera trap.
2. Flexibility
One of the main advantages of using a DSLR camera in a camera trap setup is the flexibility it offers. DSLR cameras allow you to use different lenses and adjust settings such as shutter speed, aperture, and ISO to cater to the specific needs of your subject and environment. This flexibility allows you to capture a wide range of shots and experiment with different creative techniques.
3. Durability
DSLR cameras are built to withstand various weather conditions and rough handling. Their robust build quality ensures that they can endure outdoor environments without compromising performance. This makes them ideal for camera trap setups, where the camera may need to be left unattended for extended periods.
4. Manual Controls
DSLR cameras provide extensive manual control options, allowing you to have complete control over your camera settings. This level of control is crucial in a camera trap setup, as it allows you to adjust the camera settings to meet the specific requirements of your subject and the surrounding environment.
In conclusion, a DSLR camera is an excellent choice for a camera trap setup due to its superior image quality, flexibility, durability, and manual controls. Investing in a DSLR camera will help you capture stunning images of wildlife or any other subject you wish to photograph in a camera trap.

Choosing the Right Equipment
When setting up a camera trap for a DSLR, it’s important to choose the right equipment to ensure the best results. Here are some factors to consider when selecting the necessary gear:
Camera
First and foremost, you’ll need a DSLR camera capable of capturing high-quality images. Look for a model with a high-resolution sensor and good low-light performance, as wildlife often moves during dawn and dusk. Additionally, consider the camera’s weather sealing to protect it from outdoor elements.
Lens
Choosing the right lens is crucial for capturing wildlife images. A telephoto lens with a focal length of 200mm or greater is recommended to capture distant subjects without disturbing them. Additionally, opt for a lens with image stabilization to minimize motion blur caused by camera shake.
Triggering Mechanism
To trigger the camera remotely, you’ll need a reliable triggering mechanism. One popular option is an infrared sensor that detects motion and captures images when an animal enters its range. Another option is a wireless shutter release that allows you to remotely trigger the camera at a distance.
It’s important to test and calibrate the triggering mechanism before setting up the camera trap to ensure it captures the desired shots. You want to find a balance between sensitivity and minimizing false triggers caused by non-animal movement.

Power Source
Since camera traps are typically left unattended for extended periods, it’s crucial to have a reliable power source. You can consider using rechargeable batteries that are specifically designed for your camera model. Another option is a power bank connected to the camera through a DC coupler, which provides a continuous power supply during the setup.
Avoid relying on regular alkaline batteries, as they may drain quickly and fail to power the camera throughout the intended duration. Always carry extra batteries or power supplies in case of unexpected battery drain.
| Equipment | Features |
|---|---|
| Camera | High-resolution sensor, good low-light performance, weather sealing |
| Lens | Telephoto lens (200mm or greater), image stabilization |
| Triggering Mechanism | Infrared sensor or wireless shutter release |
| Power Source | Rechargeable batteries or power bank with DC coupler |
By carefully choosing the right equipment for your camera trap, you can significantly increase your chances of capturing stunning wildlife images. Remember to always consider the specific requirements of your project and the environment in which you’ll be placing the camera to make the best equipment choices.
Building the Camera Trap
Building your own camera trap for a DSLR camera can be a fun and rewarding project. Not only will you have the satisfaction of creating something yourself, but you’ll also be able to capture incredible wildlife photos and videos without having to be present. Here’s a step-by-step guide on how to build your own camera trap.
Materials Needed
Before getting started, gather the following materials:

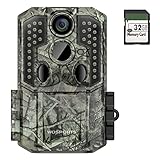
| 1 | DSLR camera |
| 1 | Camera housing or weatherproof casing |
| 1 | Camera trigger or motion sensor |
| 1 | Camera mounting bracket |
| 1 | Power source (battery or solar panel) |
| 1 | Memory card |
| 1 | Wireless transmission module (optional) |
Assembly Steps
Follow these steps to assemble your camera trap:
- Start by mounting the DSLR camera onto the camera mounting bracket. Ensure it is securely attached.
- Place the camera housing or weatherproof casing around the camera to protect it from the elements. Make sure it fits properly and allows access to the camera controls.
- Attach the camera trigger or motion sensor to the camera. This will be responsible for capturing the photos or videos when motion is detected.
- Connect the power source to the camera and make sure it has enough capacity to last for the desired duration.
- If you’re planning to remotely monitor the camera trap, add the wireless transmission module and ensure it’s connected to the camera.
- Insert the memory card into the camera to store the captured photos and videos.
Once you have assembled the camera trap, make sure to test it before deploying it in the field. Check that the camera trigger or motion sensor is working properly, and ensure the camera is set to the desired settings for capturing wildlife.
Remember to place the camera trap in an area with wildlife activity and to position it at the right height and angle for optimal results. Regularly check the camera to retrieve the captured media and to make any necessary adjustments.
Building a camera trap for your DSLR camera allows you to capture stunning wildlife photos and videos while minimizing disturbance to the animals. Have fun with your camera trap project and enjoy the amazing wildlife moments you’ll be able to capture!
Setting up the Trigger Mechanism
Once you have built the basic camera trap setup with your DSLR camera securely mounted, it’s time to set up the trigger mechanism. This component is essential in capturing images automatically when an animal triggers the trap. Here is a step-by-step guide on how to set it up:
Step 1: Connect the remote shutter release cable to your DSLR camera. This cable allows the camera to be triggered remotely, either by a motion sensor or other means.
Step 2: Position the motion sensor in a strategic location where you expect the animal activity. Make sure it has a clear line of sight to detect the movement.
Step 3: Adjust the sensitivity and range settings of the motion sensor according to your needs. Higher sensitivity means the sensor will detect even the slightest movement, while a longer range setting will cover a larger area.
Step 4: Test the motion sensor by walking in front of it. Verify if the camera triggers and captures an image when the sensor detects motion. Make adjustments as needed.
Step 5: Once you are satisfied with the motion sensor’s performance, secure it in place using a tripod or mounting bracket. Double-check that it remains in the desired position during harsh weather conditions.

Step 6: Connect the motion sensor to the remote shutter release cable. Ensure the connection is secure and properly aligned.
Step 7: Activate the camera’s timer or intervalometer function, if available. This feature allows you to set a delay between each photo capture, ensuring you don’t end up with a series of continuous shots.
Step 8: Finally, power up the camera and make any necessary adjustments to the camera settings such as aperture, ISO, and focus. Ensure the camera is set to auto mode or manual mode, depending on your preference.
With the trigger mechanism set up, your camera trap is now ready to capture stunning wildlife images. Remember to periodically check the setup, including battery levels and memory card space, to ensure uninterrupted operation.
Positioning the Camera
When setting up a camera trap for your DSLR, proper positioning is crucial to increase your chances of capturing the desired wildlife or activity. Here are some tips to help you position your camera effectively:
1. Choose the right location
Before setting up your camera, scout the area to find a suitable location. Look for signs of wildlife activity or areas where animals are likely to pass by. Pay attention to trails, tracks, or feeding areas. It’s also important to consider the lighting conditions and background of the scene you want to capture.
2. Set the correct height and angle
The height and angle of your camera can greatly affect the quality of your photos or videos. Position the camera at the animal’s eye level to achieve more engaging shots. Use a tripod or a sturdy tree branch to ensure stability and avoid blurry images. Experiment with different angles and perspectives to add variety to your captures.
Additionally, consider the motion detection angles of your camera trap and adjust the field of view accordingly. The camera should cover the desired area without capturing unnecessary movement from the surrounding environment.
3. Test and adjust
Before leaving your camera trap unattended, test its positioning and functionality. Take multiple test shots or record short videos to ensure the framing is adequate and the focus is sharp. Review the test images or footage to make any necessary adjustments to the camera placement. It’s better to make these adjustments beforehand rather than missing the opportunity to capture your desired subject.
Remember to respect wildlife and their habitats when setting up camera traps. Ensure your camera trap is not causing harm or distress to the animals. Consider removing your camera trap if it interferes with their natural behavior or poses any potential risks.
By following these positioning tips, your camera trap for a DSLR will be better positioned to capture stunning wildlife moments or other desired activities.
Tips for Successful Camera Trapping
Camera trapping is an effective method used by wildlife photographers and researchers to capture elusive animals in their natural habitats. Here are some useful tips to help you achieve successful camera trapping:
- Choose the Right Location: Research and identify the specific areas where your target animals are known to frequent. Look for signs such as tracks, scat, or feeding areas to determine the best location for setting up your camera trap.
- Camera Placement: Position your camera trap at the correct height and angle to capture the animal in the frame. Ensure that the camera is securely mounted and aimed in the right direction.
- Use Bait or Lure: To increase the chances of attracting your target animals to the camera trap, consider using bait or scent lure. This can help to entice the animals into the frame and increase the likelihood of capturing compelling images.
- Set up Multiple Traps: Increasing the number of camera traps in a given area can greatly enhance your chances of capturing the desired animal. By strategically placing multiple traps, you can cover a larger area and increase your chances of success.
- Check Your Equipment: Regularly inspect your camera trap to ensure that it is functioning correctly. Check the batteries, memory card, and any other accessories to ensure they are in working order. This will help you avoid missing any potential photo opportunities.
- Consider Weather Conditions: Take into account the weather conditions in the area where you are setting up your camera trap. Extreme temperatures, heavy rainfall, or snowfall can affect camera performance and potentially damage the equipment. Consider using weatherproof casing or shelters to protect your camera trap.
- Practice Patience: Camera trapping requires patience and persistence. It may take days or even weeks to capture the perfect shot. Be prepared to wait and invest time in monitoring your camera trap until you achieve the desired results.
- Learn from Failures: Not every attempt at camera trapping will be successful. Use each experience as a learning opportunity to improve your technique. Analyze unsuccessful attempts, adjust your camera settings, and try different approaches to increase your chances of success.
By following these tips and remaining dedicated to capturing stunning wildlife photographs, you can increase your chances of success with camera trapping. Remember, each experience is unique, and even a single successful capture can provide valuable insights about the behavior and habitat of the subject animal.
Question-answer:
What is a camera trap?
A camera trap is a device used to capture photos or videos of wildlife or other subjects without the need for a photographer to be present. It is often used for research, conservation, or simply to capture unique and candid images of animals in their natural habitat.
Can I make a camera trap using my DSLR camera?
Yes, you can make a camera trap using your DSLR camera. With the right equipment and setup, you can set up your DSLR camera to capture photos or videos remotely. This allows you to capture wildlife or other subjects without disturbing them or being present at the time of capture.
What equipment do I need to make a camera trap for my DSLR camera?
To make a camera trap for your DSLR camera, you will need a few essential pieces of equipment. These include a DSLR camera with a remote shutter release or intervalometer, a sturdy tripod, a motion sensor or infrared trigger, and a weatherproof housing or enclosure for your camera to protect it from the elements.
How do I set up a camera trap for my DSLR camera?
To set up a camera trap for your DSLR camera, start by choosing a suitable location where you expect wildlife or subjects to pass by. Set up your tripod and camera in a secure position, ensuring it is stable and well-positioned for capturing the desired view. Connect the remote shutter release or intervalometer to your camera, and then use the motion sensor or infrared trigger to activate the camera when movement is detected. Test the setup and make any necessary adjustments before leaving the camera trap unattended.


