Are you tired of holding your camera steady while trying to take a perfect shot? Look no further! In this article, we will show you how to make a digital camera mount to keep your camera stable and your hands free. Whether you’re a professional photographer or just an enthusiast, this DIY project is perfect for you.
What You’ll Need:
- An adjustable tripod
- A smartphone mount (optional)
- A small piece of plywood
- A ruler
- A pencil
- A drill and drill bits
- Screws
- A screwdriver
- Velcro strips
Step 1: Measure and Mark
Start by measuring the dimensions of your camera and smartphone. Use a ruler to mark the dimensions on the plywood. Make sure to leave enough space for the camera and smartphone mount if you’re using one.
Step 2: Drill Holes

Using a drill and the appropriate drill bit, carefully drill holes where you marked the dimensions. These holes will be used to attach the camera mount later.
Step 3: Attach the Camera Mount
If you have a smartphone mount, attach it to the plywood using screws. Then, secure your camera to the mount using screws as well. Make sure everything is tightly secured.
Step 4: Mount it to a Tripod
Place the piece of plywood with the camera mount onto your adjustable tripod. Align the holes on the plywood with the holes on the tripod and secure them using screws. This will ensure that your camera mount is stable and won’t move while taking photos.
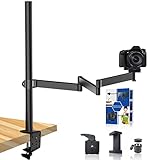
![Overhead Phone Mount,Overhead Camera Mount Tripod Stand[Anti-Shaking] with 10.5" Ring Light,Desk Tripod for iPhone with Ring Light for Video Recording,Zoom Meeting,YouTube,TikTok](https://m.media-amazon.com/images/I/41uC3EVEcZL._SL160_.jpg)
Step 5: Add Velcro Strips
To provide extra stability, add Velcro strips to the bottom of the plywood and the top of the tripod. This will prevent any accidental movement and add extra security to your camera mount.
And there you have it! You’ve successfully made your own DIY digital camera mount. Now you can take steady shots and capture those perfect moments without the hassle of shaky hands. Happy shooting!
Ten steps to create a digital camera mount at home
Creating your own digital camera mount can be a fun and rewarding DIY project. Whether you’re a photography enthusiast or just looking for a way to stabilize your camera for better shots, a homemade camera mount can come in handy. Follow these ten steps to create your own digital camera mount at home.
Step 1: Gather your materials
Before you start, make sure you have all the necessary materials. You will need a sturdy base, such as a piece of wood or a metal plate, a tripod head, a screw, a nut, a drill, and a saw.

Step 2: Measure and mark
Measure and mark the desired size for your camera mount on the base. Make sure to leave enough space for the tripod head and the camera to fit securely.
Step 3: Cut the base
Using a saw, carefully cut the base according to the measurements you marked in the previous step. Take your time to ensure smooth and precise cuts.
Step 4: Drill a hole
Drill a hole in the center of the base, large enough to fit the screw. This hole will be used to attach the tripod head to the mount.
Step 5: Attach the tripod head
Screw the tripod head onto the base using the hole you drilled. Make sure it is securely attached and can hold the weight of your camera.
Step 6: Secure the screw
Insert the screw into the tripod head and secure it with a nut. This will prevent the camera from accidentally detaching from the mount.

Step 7: Test stability
Before using your camera mount, test its stability. Make any necessary adjustments or reinforcements to ensure that your camera will be held securely in place.
Step 8: Attach your camera
Once you are satisfied with the stability of the mount, attach your camera to the tripod head. Make sure it is properly secured and aligned before use.
Step 9: Mount your camera
Find a suitable location to mount your camera and place the mount securely. A tripod or any other stable surface can be used to hold the mount in place.
Step 10: Adjust and capture
Finally, adjust the angle and position of your camera as desired, and start capturing stunning photos or videos with your homemade camera mount!
Creating your own digital camera mount is a rewarding process that allows you to customize and optimize your camera setup. Follow these steps, and you’ll have a functional and cost-effective mount in no time!

Gather necessary materials
Before you begin making a digital camera mount, make sure you have all the necessary materials ready. Here is a list of items you will need:
- A sturdy tripod: Look for a tripod that is compatible with your camera and can support its weight.
- A camera mount: This can be a standard camera mount or a smartphone mount if you plan to use your phone as a camera.
- A screwdriver: You will need this to attach the camera mount to the tripod.
- Optional accessories: Depending on your specific needs, you may also require additional accessories such as a remote shutter release, extension arms, or adapters.
Once you have gathered all the necessary materials, you will be ready to start assembling your camera mount.
Choose a suitable base
When making a digital camera mount, one of the most important aspects is choosing a suitable base to attach the camera to. The base should be sturdy enough to hold the weight of the camera and provide stability to prevent any shakes or movements while taking photos or videos.
There are a few options for a suitable base:
1. Tripod
A tripod is a commonly used base for camera mounts. It provides stability and allows for adjustable height and angles. Tripods often come with a universal mount which can be attached to most cameras, making it an easy and versatile option.
2. Clamp
A clamp base is another option for a mount. It can be attached to various surfaces such as tables, poles, or even tree branches. Clamps typically have adjustable arms that can securely hold the camera in place.
Whichever base you choose, make sure it has a secure attachment mechanism that can hold the camera firmly. You can also consider the weight and portability of the base, depending on your needs.
Additionally, it may be beneficial to invest in a base that has a quick-release plate or attachment system. This makes it easier to remove and reattach the camera without having to readjust the position each time.
Remember, the base is an essential component of a camera mount, so take the time to choose one that suits your specific requirements and preferences.
Measure and mark the attachment points
Before you start assembling your digital camera mount, it’s important to measure and mark the attachment points on the camera and the mounting platform. This will ensure that the camera is securely attached and positioned correctly.

Start by determining the location where you want to mount the camera. Consider factors such as the desired field of view, stability, and accessibility. Once you have chosen a suitable location, use a ruler or measuring tape to measure the distance between the attachment points on the camera and the mounting platform.
Next, use a fine-tipped marker or a pencil to mark the attachment points on both the camera and the mounting platform. Ensure that the marks are clear and visible, as they will serve as reference points during the assembly process.
It’s also a good idea to label the marks to indicate which attachment point corresponds to which component. This will help you avoid confusion later on when attaching the camera to the mounting platform.
Considerations for attachment points:
Size and weight: Take into account the size and weight of your camera when determining the attachment points. Ensure that the chosen points can adequately support the camera’s weight without compromising stability.
Balance and stability: The attachment points should be strategically placed to achieve a balanced and stable camera mount. Consider the distribution of weight and ensure that the mount will be able to support the camera without tipping or shaking during use.

By carefully measuring and marking the attachment points, you can ensure a secure and well-positioned camera mount for your digital camera.
Drill the holes
Once you have gathered all the necessary materials and measured the dimensions for your digital camera mount, it’s time to drill the holes.
Step 1: Mark the drill points
Using a pencil or a marker, mark the spots where you will be drilling the holes on your chosen mounting surface. Make sure to align them properly according to your measurements.
Step 2: Choose the right drill bit
Depending on the type of material you are drilling into, select the appropriate drill bit. For example, if you are using a wooden surface, a standard twist drill bit would be suitable. However, if you are drilling into metal, you may need a metal drill bit.
Pro tip: It’s always a good idea to start with a smaller drill bit and gradually increase the size if needed. This will help prevent any cracking or splitting of the material.
Step 3: Secure the mounting surface
If the mounting surface is not secured, it may move or vibrate while drilling, resulting in inaccurate holes. Use clamps or any other appropriate method to firmly secure the surface in place before drilling.
Step 4: Start drilling
Position the drill bit over the first marked spot and begin drilling slowly. Apply steady pressure and let the drill do the work. Avoid putting too much pressure, as it can cause the drill bit to slip or break.
Note: It’s important to wear protective eyewear and work gloves while drilling to prevent any possible injuries.
Step 5: Repeat for the remaining holes
Once you have drilled the first hole, move on to the remaining marked spots and repeat the drilling process. Take your time and ensure each hole is drilled straight and clean.
After you have completed drilling all the necessary holes, your mounting surface will be ready for the next step of the digital camera mount assembly.

Apply adhesive to secure the camera mount
Once you have attached the camera mount to the desired surface, it is important to apply adhesive to ensure that it stays in place. This will prevent the camera from falling or moving around during use.
Before applying the adhesive, make sure that the surface is clean and free of any dust or debris. Use a damp cloth or alcohol wipes to clean the area thoroughly.
Next, apply a small amount of adhesive to the back of the camera mount. Spread the adhesive evenly across the surface, making sure to cover all the edges and corners.
Once the adhesive is applied, press the camera mount firmly against the surface. Hold it in place for a few seconds to allow the adhesive to bond properly.
Leave the camera mount undisturbed for the recommended drying time, which is usually mentioned on the adhesive packaging. This will ensure that the adhesive fully cures and provides a strong bond.
After the adhesive has dried, test the camera mount by gently pushing and pulling on it. If it feels secure and does not move, then the adhesive has successfully bonded the camera mount to the surface.
Remember to follow the manufacturer’s instructions for the adhesive used, as different adhesives may have specific application and drying requirements.
Attach the mount to the base
Once you have gathered all the necessary materials and tools, you can proceed to attach the mount to the base of your digital camera. Follow these steps to ensure a secure and stable attachment:
Step 1: Position the base
Place the base of the mount on a flat surface, ensuring that it is stable and secure. This will provide a sturdy foundation for your camera.
Step 2: Align the screw holes
Align the screw holes on the base of the mount with those on the bottom of your digital camera. Ensure that they are perfectly aligned to avoid any difficulties in the next step.
Step 3: Insert the screws
Insert the screws into the aligned holes, making sure they are tight but not excessively so. This will hold the mount securely in place without damaging either the camera or the mount.
Note: Some camera models may require specific screws or adapters. Make sure to consult your camera’s user manual or contact the manufacturer for any specific instructions.
Step 4: Test the stability
After attaching the mount, gently test the stability by moving the camera in different directions. If there is any wobbling or instability, consider tightening the screws further or repositioning the mount.
Remember to always exercise caution when handling your camera and its accessories to avoid any damage or injuries.
With the mount securely attached to the base, you are now ready to use your digital camera and explore various photography techniques with ease and stability.
Adjust the angle and position of the camera mount
Once you have built your camera mount, you will want to adjust its angle and position to ensure that you capture the perfect shot. Here are some steps to help you make the necessary adjustments:
1. Loosen the screws
Start by loosening the screws or knobs that hold the camera mount in place. This will allow you to move the mount freely and make the necessary adjustments.
2. Rotate or tilt the mount
Depending on the type of camera mount you have built, you may be able to rotate it horizontally or tilt it vertically. Experiment with different angles to find the one that works best for your shot.
Use the guidance of the camera’s viewfinder or LCD screen to see how the angle affects the framing of your image.
3. Lock the mount in place
Once you have found the desired angle, tighten the screws or knobs to lock the camera mount in place. Make sure it is secure to prevent any unwanted movement during your photography session.
If necessary, use additional tools like pliers or a screwdriver to ensure a tight grip on the screws or knobs.
Remember that the stability of your camera mount is crucial for capturing clear and sharp images. Take the time to make fine adjustments and ensure that everything is secure before starting your photo shoot.
By following these steps, you will be able to adjust the angle and position of your camera mount to capture the perfect shot with ease.
Test the stability of the mount
Before using your digital camera mount, it is important to test its stability to ensure that your camera will be securely held in place. Here are a few steps you can take to test the stability:
- Attache your camera to the mount using the specified attachment mechanism.
- Adjust the mount to the desired position and angle.
- Apply gentle pressure to the mount to simulate external forces, such as movement or bumps.
- Observe if the mount holds the camera steady and if it remains in the desired position.
- If the mount feels loose or the camera moves easily, check the attachment mechanism for any issues.
- Make sure all screws and fasteners are securely tightened.
- Repeat the above steps to ensure the stability of the mount.
By thoroughly testing the stability of your digital camera mount, you can feel confident in using it to capture high-quality photos and videos without worrying about your camera falling or getting damaged. Remember to always check the stability of the mount before each use to ensure optimal performance.
Purchase additional accessories
Once you have built your own digital camera mount, you may find that there are some additional accessories you could purchase to enhance its functionality. These accessories can help you capture better photos and videos, and make using your camera mount even more convenient.
1. Tripod
A tripod is an essential accessory for any camera mount. It provides stability and allows you to capture steady shots and videos. Look for a tripod that is sturdy, adjustable, and compatible with your camera mount. It should also be lightweight and easy to carry around.
2. Remote shutter release
A remote shutter release allows you to capture photos and videos without touching your camera, minimizing the risk of camera shake. This accessory is especially useful when shooting long exposures or self-portraits. Look for a remote shutter release that is compatible with your camera model and offers a reliable connection.
Note: Some cameras have built-in Wi-Fi or Bluetooth capabilities that allow you to use your smartphone as a remote shutter release. Check if your camera supports this feature before purchasing a separate remote shutter release.
With these additional accessories, you can take your digital camera mount to the next level and capture stunning photos and videos. Whether you are a hobbyist or a professional photographer, investing in these accessories will greatly enhance your shooting capabilities.
Experiment with different mounting positions
When making a digital camera mount, it’s important to experiment with different mounting positions to capture the best shots. Here are some ideas to get you started:
1. Tripod Mount
One of the most common ways to mount a digital camera is by using a tripod. A tripod provides stability and allows you to adjust the height and angle of the camera. Try mounting your camera on a tripod and experiment with different heights and angles to find the best position for your photography needs.
2. Wall Mount
Another option is to mount your camera on a wall. This can be useful if you want to capture a specific area or if you don’t have a tripod available. You can attach the camera to a wall using a wall mount or a sturdy adhesive. Make sure to position the camera at a height and angle that gives you the desired view.
3. Ceiling Mount
If you want to capture shots from above, consider mounting your camera on the ceiling. This can be useful for overhead shots or if you want to monitor a space from above. You can use a ceiling mount or attach the camera securely to the ceiling using brackets or adhesive. Experiment with different positions to find the best angle for your needs.
4. Handlebar Mount
If you’re into outdoor sports or activities, consider mounting your camera on a handlebar. This can be useful for capturing action shots while cycling, skateboarding, or motorcycling. There are specific mounts available that can securely attach to handlebars or other similar equipment. Make sure to test different mounting positions to find the one that gives you the best view.
Remember, experimenting with different mounting positions will allow you to find the best angles and perspectives for your photography needs. Don’t be afraid to try different setups and get creative with your camera mount!
Question-answer:
What materials do I need to make a digital camera mount?
To make a digital camera mount, you will need a sturdy base, such as a tripod or a flat surface with adhesive, a camera mount adapter, a screwdriver, and screws or bolts to secure the mount adapter to the base.
Can I make a digital camera mount without a tripod?
Yes, you can make a digital camera mount without a tripod. Instead of a tripod, you can use a flat surface, such as a table or a wall, and secure the camera mount adapter to it using adhesive or screws. Just make sure the surface is stable and can support the weight of your camera.