
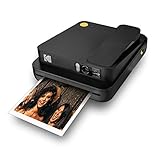
Do you love photography and want to try a fun DIY project?
If you’re looking for a creative way to combine your passion for photography with your love for crafts, why not try making a digital camera with paper?
In this article, we will guide you through the steps to create a functional camera using simple materials and basic electronics.
Building a digital camera with paper can be a great way to learn about the inner workings of a camera and gain a deeper understanding of how the technology behind photography functions.
Not only will you have a unique and handmade camera once you’re done, but you’ll also have the satisfaction of knowing that you built it yourself!

Gathering Materials for Your DIY Digital Camera
Before you start building your own digital camera with paper, it’s important to gather all the necessary materials. This will ensure that you have everything you need to complete the project successfully. Here are the essential materials you will need:
1. Cardboard or Thick Paper
You will need a sturdy material to create the body of your digital camera. Cardboard or thick paper works well for this purpose because it’s durable and can hold the weight of the components. Make sure to choose a material that is easy to work with and can be cut and folded as needed.
2. Image Sensor
The image sensor is the heart of your digital camera and is responsible for capturing the light and turning it into digital information. You can purchase an image sensor separately online or salvage one from an old digital camera. Make sure the image sensor is compatible with the camera you’re building.
3. Lens
The lens is another crucial component of a digital camera as it focuses the light onto the image sensor. You can either buy a small lens online or take one from an old disposable camera. Experiment with different lenses to achieve different effects in your photographs.
4. Battery and Power Switch
Your DIY digital camera will need a power source. Consider using a small battery pack and a power switch to control the flow of electricity. This will allow you to turn your camera on and off easily.

5. Memory Card
A memory card is necessary to store the digital information captured by your camera. Choose a memory card with enough storage capacity to meet your needs. Make sure it’s compatible with the camera’s storage slot.
6. Button and Control Mechanism
To take pictures and navigate through the camera’s menu, you will need a button and a control mechanism. A small push-button switch works well for this purpose. Attach it to your camera in a convenient location.
With these materials in hand, you’re ready to start building your own digital camera using paper. Remember to follow the instructions carefully and have fun experimenting with your new DIY project!
Building the Basic Structure with Paper
To start building your own digital camera with paper, you’ll need a few basic supplies:
Paper
Choose a sturdy and durable type of paper, such as cardstock or thick construction paper. This will provide the necessary support for your camera.
Cutting Tools
Use a pair of scissors or a craft knife to cut out the various parts of your camera from the paper. Be careful when handling sharp objects and ensure adult supervision if necessary.
Once you have gathered these supplies, follow these steps to construct the basic structure of your paper camera:
- Start by drawing a rectangle on the paper that will serve as the main body of the camera. This rectangle should be large enough to hold all the necessary components.
- Next, cut out the rectangle using your scissors or craft knife. This will be the base of your camera.
- Draw and cut out additional pieces of paper for the lens, viewfinder, and buttons. These details will give your camera a more realistic look.
- Attach the lens to the front of the camera body using glue or tape. Position it in the center to ensure proper focus.
- Attach the viewfinder above the lens, making sure it is aligned properly for easy viewing.
- Add buttons to the sides or bottom of the camera for various functions such as capturing photos or adjusting settings.
- Secure all the components together using glue or tape, ensuring that they are firmly attached.
Once you have completed these steps, you will have the basic structure of your paper camera. In the next sections, we will discuss how to add other components such as a cardboard shutter release and a digital display.
Creating the Lens for Your Homemade Camera
To create a lens for your homemade camera, you will need a few simple materials:
- A clear plastic container or a small glass jar with a lid
- A small piece of aluminum foil or wax paper
- A pin or a sharp object to poke a small hole in the lid
Once you have gathered these materials, follow these steps:

Step 1: Prepare the Container
Clean the container or glass jar thoroughly to ensure there are no smudges or dirt on the surface. This will help to improve the clarity of your lens.
Step 2: Create the Pinhole
Using a pin or a sharp object, carefully poke a small hole in the center of the lid. The size of the hole will determine the amount of light that enters your camera, so experiment with different sizes to achieve the desired effect.
Step 3: Attach the Lens
Cut a small piece of aluminum foil or wax paper and place it over the hole on the inside of the lid. Secure it in place using tape or glue. This will serve as the lens for your homemade camera.
Note: For better image quality, you can try shaping the aluminum foil or wax paper into a convex lens shape before attaching it.
With your homemade lens ready, you can now attach the lid to the container or glass jar. Make sure it is secured tightly to prevent any light leaks.

Now that you have created the lens for your homemade camera, you are one step closer to capturing unique images with an artistic touch. The lens will help focus the light onto the film or image sensor, allowing you to explore the world of photography in your own creative way.
Assembling the Camera Mechanism
Once you have all the necessary components ready, you can start assembling the camera mechanism. Follow these steps to ensure your camera functions properly:
1. Take the printed circuit board (PCB) and place it on a flat surface. This will serve as the base for the camera mechanism.
2. Carefully attach the lens to the front of the PCB using a small screwdriver. Make sure it is securely fastened.
3. Connect the image sensor module to the PCB by aligning the pins and gently pressing it down until it clicks into place.

4. Attach the shutter button to the PCB using the provided screws. Ensure that it is positioned correctly and functions properly when pressed.
5. Connect the LCD display to the PCB using the ribbon cable. Make sure it is securely connected and properly aligned.
6. Place the battery holder on the back of the PCB and connect the wires to the corresponding terminals. Ensure a tight and secure connection.
7. Carefully insert the SD card into the SD card slot on the PCB. Make sure it is inserted in the correct direction and locks into place.
8. Securely fasten the back cover onto the PCB, ensuring all the components are properly aligned and there are no loose connections inside.

9. Your camera mechanism is now assembled. Turn it on and check if all the components are functioning correctly. Adjust the settings as needed.
| Note: | Handle the camera mechanism with care to avoid damaging any of the delicate components. |
Adding the Image Sensor and LCD Display
Once you have constructed the basic structure of your paper camera, it’s time to add the image sensor and LCD display. These components are essential for capturing and displaying the images.
Image Sensor: The image sensor is responsible for capturing the light and converting it into digital data. It acts as the camera’s “eyes”. To add the image sensor, carefully peel off the protective backing on the back of the camera and attach the image sensor in the designated area. Make sure it is securely in place and the connections are properly aligned.
LCD Display: The LCD display is where you will be able to view the images you capture. It acts as the camera’s “screen”. To add the LCD display, locate the designated area on the front of the paper camera and carefully attach it. Take extra care to align the connections properly and ensure it is securely in place.
Tip: Before attaching the image sensor and LCD display, make sure to turn off the power to the camera to avoid any potential damage or short circuits.
Once both the image sensor and LCD display are securely in place, you can turn on the camera to test if they are working correctly. You should see the images you capture displayed on the LCD screen.
Note: The image sensor and LCD display are delicate components, so handle them with care during the installation process.
Congratulations! With the image sensor and LCD display successfully added, your paper camera is now equipped to capture and display images. The next step is to add other essential components, such as the lens and shutter mechanism.
Connecting the Camera Components
Once you have cut out and assembled the camera body and lens using the provided templates, it’s time to connect the various components together to complete your DIY digital camera. Follow these steps to ensure a smooth connection process:
- Begin by attaching the lens to the front of the camera body. Carefully align the lens with the opening on the front of the camera and secure it in place using glue or tape.
- Next, locate the image sensor module. This is the component responsible for capturing the digital images. Connect the image sensor module to the camera body using the provided cables or connectors.
- After connecting the image sensor module, connect the display module to the camera body. The display module will allow you to view the images you capture directly on the camera.
- Now, connect the control buttons to the camera body. These buttons will allow you to navigate through the camera’s settings and take photos. Make sure to align the buttons correctly with the corresponding openings on the camera body.
- Lastly, connect the power source to the camera. This could be a battery pack or a USB power source. Make sure the power source is compatible with the camera and provides sufficient voltage for its operation.
Once you have successfully connected all the camera components, make sure to double-check the connections and ensure everything is secure. Test the camera by turning it on and navigating through the settings using the control buttons. Congratulations, you have successfully connected the components of your DIY digital camera!
Programming the Digital Functions
Once you have constructed the physical body of your paper digital camera, it’s time to move on to programming its digital functions. This is where the paper camera truly comes to life and allows you to capture digital images.
1. Setting up the Microcontroller
The heart of your paper digital camera is the microcontroller. This small electronic component controls the various digital functions, such as capturing and storing images.
To begin programming the microcontroller, you will need to connect it to a computer using a USB cable. Once connected, you can use integrated development environments (IDEs) such as Arduino or Raspberry Pi to write and upload the necessary code.
In the code, you will define how the microcontroller interacts with the camera’s components, such as the image sensor and LCD screen. This includes configuring the image sensor resolution, adjusting exposure settings, and controlling the LCD screen display.
2. Capturing and Storing Images
With the microcontroller set up, you can now program the camera to capture and store digital images. This involves configuring the image sensor and implementing algorithms to process and save the captured images.
You will need to define the image resolution, image format (JPEG or RAW), and the desired compression level. Additionally, you can add features like autofocus, zooming, and white balance adjustments to enhance your digital camera’s functionality.
To store the captured images, you can either use external memory cards or internal storage. You will need to write code that handles the storage of images and organizes them in a logical file structure.
3. Displaying and Interacting with Images
Another important aspect of programming your paper digital camera is enabling image display and user interaction. This involves writing code to show the captured images on the LCD screen and adding buttons or controls to navigate through the image gallery.
You can also implement additional features, such as a digital zoom function or the ability to delete or edit images. These features require writing code to handle user inputs and update the display accordingly.
By programming these digital functions, you can transform your paper camera into a fully functional digital camera capable of capturing, storing, displaying, and interacting with images.
Testing and Adjusting Your DIY Digital Camera
Once you have finished assembling your homemade digital camera, it is important to test and adjust the camera to ensure optimal performance. Follow these steps to ensure your camera is working correctly:
- Insert batteries into your camera if required, and turn on the power.
- Check that the lens is clean and free from dust or debris.
- Make sure the camera is in focus by adjusting the focus ring or lens position.
- Take a test photo in a well-lit area to check the image quality and exposure.
- Transfer the test photo to a computer and review it on a larger screen for any issues such as blurriness or color distortion.
- If necessary, make adjustments to the camera settings, such as ISO, shutter speed, or aperture, to improve the image quality.
- Continue taking test photos in various lighting conditions to assess the camera’s performance.
During the testing phase, it is important to note any issues or adjustments needed for future reference. Keep a record of the settings used for each photo and any changes made to the camera.
By carefully testing and adjusting your DIY digital camera, you can ensure that it is functioning properly and producing high-quality images. Enjoy capturing moments with your homemade creation!
Enhancing the Camera Features with Additional Accessories
While it’s amazing to create a functional digital camera with paper, there are several additional accessories that can help enhance its features and capabilities. These accessories can take your photography to the next level and help you capture incredible images.
Lenses:
One way to enhance the camera’s capabilities is by using different lenses. Attachable lenses can change the focal length, zoom, and field of view of the camera, allowing you to capture wide-angle shots or zoom in on distant subjects. Macro lenses can help you capture stunning close-up shots with intricate details.
Filters:
Filters are another useful accessory to consider. Filters can be attached to the camera’s lens to alter the lighting conditions and add creative effects to your images. For example, a polarizing filter can reduce glare and enhance colors, while a neutral density filter can help control the amount of light entering the camera, allowing for longer exposures or capturing motion blur.
Filters are available in various types, such as UV filters for reducing haze or protecting the lens, graduated filters for balancing exposure in landscape photography, and even special effects filters for adding unique looks to your images.
To attach these accessories to the camera, you can create custom adapters using paper or other materials, ensuring a perfect fit.
Tripods:
To stabilize the camera and avoid blurry images, a tripod is a must-have accessory. Tripods provide a stable base for your camera, allowing you to take longer exposures or experiment with different camera settings. You can make a simple tripod using paper or other lightweight materials, ensuring your camera remains steady while capturing images.
| Accessory | Function |
|---|---|
| Lenses | Change focal length, zoom, and field of view |
| Filters | Altering lighting conditions and adding creative effects |
| Tripods | Stabilize the camera for sharp images |
Showcasing Your Homemade Digital Camera
Once you have completed the construction of your digital camera using paper, it’s time to showcase your creation and share it with others. Follow these steps to effectively present your homemade digital camera:
| Step 1: | Create a visually appealing backdrop to display your camera. You can use a plain colored background or get creative with patterns, textures, or even printed images related to photography. |
| Step 2: | Place your homemade digital camera in the center of the backdrop. Ensure that it is well-lit and positioned at a flattering angle to capture its details. |
| Step 3: | Consider adding props to enhance the overall presentation. You can include items like miniature tripods, photo frames, or even small prints of photographs you have taken. |
| Step 4: | Take high-quality photographs of your homemade digital camera from different angles. Use a tripod or stabilize your camera to avoid any blurriness or distortion. |
| Step 5: | Edit your photographs if necessary. Adjust the exposure, brightness, and contrast to make sure the details of your camera are clearly visible. |
| Step 6: | Write a brief description of your homemade digital camera, highlighting its features and the process of creating it. Be sure to include any unique modifications or added functionalities. |
| Step 7: | Share your homemade digital camera with others through various platforms such as social media, personal blogs, or photography forums. Don’t forget to include the photographs and the description you have written. |
| Step 8: | Engage with the audience by responding to comments, answering questions, and encouraging discussions about your homemade digital camera. This will help build a community around your creation. |
| Step 9: | Consider participating in local exhibitions, photography events, or maker fairs to showcase your homemade digital camera in person. This will allow people to see and interact with your creation firsthand. |
| Step 10: | Continuously document and share any improvements or modifications you make to your homemade digital camera. This will keep your audience engaged and interested in the evolution of your creation. |
By following these steps, you can effectively showcase and share your homemade digital camera with others, gaining recognition for your creativity and innovation.
Question-answer:
Can I use any kind of paper to make a digital camera?
While you can use any kind of paper to make a basic digital camera, it is recommended to use a thicker paper or cardboard for better stability and durability. Thicker paper will also provide better insulation for the electrical components and protect them from damage. In addition, using a matte or non-reflective paper can help reduce unwanted reflections that may affect the image quality.


