The Raspberry Pi is a powerful and versatile small computer that can be used for various projects. One of the most exciting projects you can do with a Raspberry Pi is turning it into a digital camera. In this article, we will guide you through the process of creating your own digital camera using a Raspberry Pi.
With a few simple components and some basic programming knowledge, you can build a camera that can capture and save images, as well as apply filters and effects to your photos. Whether you are a photography enthusiast or just want to learn more about electronics and programming, building a digital camera with a Raspberry Pi is a fun and educational project.
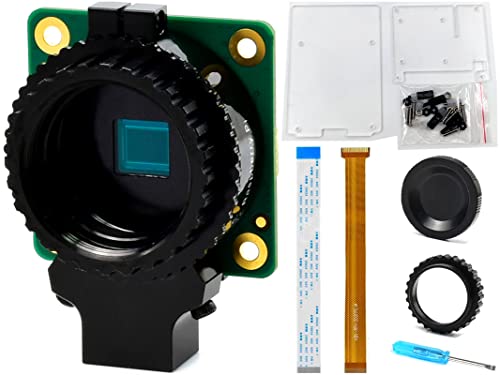
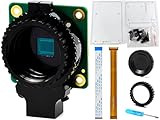
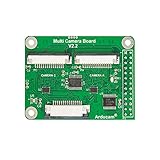
To make a digital camera with a Raspberry Pi, you will need a few components such as a Raspberry Pi board, a camera module, a power supply, and a memory card. The Raspberry Pi camera module is specifically designed to easily interface with the Raspberry Pi board and capture high-quality images. You can find camera modules with different resolutions and features, so choose the one that best suits your needs.
In addition to the hardware components, you will also need to install the necessary software on your Raspberry Pi. This includes the Raspbian operating system, which is a version of Linux specifically designed for the Raspberry Pi, as well as the Python programming language. Python is a beginner-friendly programming language that is widely used in the Raspberry Pi community.
Once you have gathered all the necessary components and installed the software, you can start building your digital camera. The first step is to connect the camera module to the Raspberry Pi board. Then, you will need to write a Python program that controls the camera module and captures images. You can also add additional features to your camera, such as a graphical user interface or the ability to upload images to the internet.
Building a digital camera with a Raspberry Pi allows you to explore the world of photography, electronics, and programming in a hands-on and creative way. Whether you are a beginner or an experienced enthusiast, this project offers endless possibilities for learning and experimentation. So grab your Raspberry Pi and start capturing stunning images with your very own homemade digital camera.
Step by Step Guide
In this step-by-step guide, we will show you how to create a digital camera using a Raspberry Pi. By following these instructions, you will be able to capture and save high-quality photos using your Raspberry Pi device.
Step 1: Set up your Raspberry Pi
Firstly, you need to set up your Raspberry Pi. Install the operating system, connect the necessary peripherals, and ensure that everything is running smoothly.
Step 2: Install the camera module
Next, you will need to install the camera module on your Raspberry Pi board. Carefully connect the camera module to the designated CSI port, making sure it is securely attached.
Step 3: Enable the camera interface
Once the camera module is connected, you need to enable the camera interface in the Raspberry Pi settings. Open the Raspberry Pi configuration tool, navigate to the “Interfaces” tab, and ensure that the camera is enabled.

Step 4: Install the camera software
Now it’s time to install the necessary software to control the camera module. Open the terminal on your Raspberry Pi and enter the following command to install the camera software:
sudo apt-get install python-picamera
Step 5: Write the camera program
With the software installed, you can now write a program to control the camera module. Open a text editor on your Raspberry Pi and create a new Python file. Write the necessary code to initialize the camera, capture photos, and save them to a file.
Step 6: Test the camera
Before using the camera in your project, it’s important to test it to ensure it is working correctly. Run your camera program and verify that it can capture photos and save them to the desired location.
Step 7: Integrate the camera into your project
Now that you have a working camera, you can integrate it into your project. Consider how you want the camera to be triggered and how you want to store and manage the captured photos. Modify your camera program as needed to meet the requirements of your project.

Step 8: Enjoy capturing photos with your Raspberry Pi camera!
Once you have completed all the steps, you are ready to start using your Raspberry Pi as a digital camera. Enjoy capturing high-quality photos and exploring the endless possibilities of your DIY camera project!
Required Materials
- Raspberry Pi (preferably Raspberry Pi 4)
- Raspberry Pi Camera Module
- Micro SD Card (at least 16GB)
- Power Supply for Raspberry Pi
- HDMI Cable (for connecting Raspberry Pi to a monitor)
- USB Keyboard and Mouse
- Monitor or TV with HDMI input
- Internet connection (for software installation and updates)
- Camera lens (optional)
- Camera tripod (optional)
- Camera case or enclosure (optional)
These are the essential materials you will need to create a digital camera using Raspberry Pi. Make sure you have all the required items before starting the project.
Setting up the Raspberry Pi
Step 1: Get the necessary equipment.
Before setting up your digital camera with Raspberry Pi, you will need to gather a few essential items. These include:
- A Raspberry Pi board
- A power supply for the Raspberry Pi
- A microSD card with Raspberry Pi OS installed
- A compatible camera module
- Optional: a display and keyboard for initial setup
Step 2: Connect the Raspberry Pi.

Start by connecting the camera module to the Raspberry Pi board. You should be able to find a specific slot for the camera module on the board. Ensure that it is connected securely.
Note: Make sure to power off the Raspberry Pi before connecting or disconnecting any hardware components.
Step 3: Prepare the Raspberry Pi OS.
If you haven’t already done so, download the latest version of Raspberry Pi OS and flash it onto the microSD card. Follow the official Raspberry Pi documentation for detailed instructions on how to do this.
Note: It is recommended to use the Raspberry Pi Imager tool to flash the operating system onto the microSD card.

Step 4: Power up and configure the Raspberry Pi.
Insert the microSD card into the Raspberry Pi and connect the power supply. Wait for the Raspberry Pi to boot up.
If you have a display and keyboard connected, you can follow the on-screen instructions to configure the Raspberry Pi. Otherwise, you can access the Raspberry Pi remotely using SSH or VNC.
During the setup process, make sure to enable the camera interface in the Raspberry Pi configuration menu. This will allow your digital camera project to access the camera module.
Step 5: Install the necessary software.

Once the Raspberry Pi is configured, you will need to install the software required for your digital camera project. This may include libraries and packages that enable camera functionality, along with any additional software you plan to use for capturing, storing, and processing images.
Step 6: Test and adjust your camera settings.
Before using your digital camera with Raspberry Pi, it is advisable to test the camera module and adjust any settings as needed. You can use command-line tools or Python scripts to capture images and videos, and fine-tune the camera’s resolution, exposure, and other parameters.
By following these steps, you can set up your Raspberry Pi to work as a digital camera.
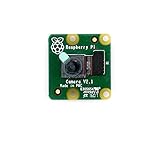
Connecting the Camera Module
The Raspberry Pi Camera Module is a small camera that can be connected to the Raspberry Pi board. Connecting the camera module to your Raspberry Pi is a straightforward process.
To connect the camera module:
- First, ensure that your Raspberry Pi is turned off.
- Locate the camera connector on the Raspberry Pi board. It is a small rectangular connector located near the HDMI port.
- Open the camera module connector on the Raspberry Pi board by gently pulling on the sides.
- Insert the camera module ribbon cable into the camera connector on the Raspberry Pi board. Make sure the cable is inserted correctly and fully seated in the connector. The metallic contacts on the cable should be facing towards the HDMI port.
- Once the cable is inserted, close the camera module connector by gently pushing on the sides.
- Turn on your Raspberry Pi and check if the camera is detected by running the raspistill -v command in the terminal. If the camera is connected properly, you should see some information about the camera module.
After connecting the camera module, you can start using it to capture images or record videos using the available Raspberry Pi camera software.
Camera Module Troubleshooting
If you’re experiencing issues with the camera module, here are a few troubleshooting steps you can try:
- Make sure the camera module is securely connected to the Raspberry Pi board.
- Check if the camera module is enabled in the Raspberry Pi configuration settings. You can access the configuration settings by running the sudo raspi-config command in the terminal and navigating to the “Interfacing Options” menu.
- Test the camera module with a different ribbon cable or on a different Raspberry Pi board to rule out any hardware issues.
- Update the Raspberry Pi firmware and camera software to the latest versions.
By following these steps, you should be able to successfully connect and use the Raspberry Pi Camera Module for your digital camera project.
Configuring the Camera Software
Once you have connected the camera module to your Raspberry Pi, the next step is to configure the camera software. The Raspberry Pi comes with a pre-installed camera module driver, so you won’t need to install any additional software. However, you will need to enable the camera interface in the Raspberry Pi configuration.
To configure the camera software, follow these steps:
- Boot up your Raspberry Pi and open the Raspberry Pi configuration tool. You can access this tool by typing
sudo raspi-configin the terminal. - In the configuration tool, navigate to the “Interfacing Options” menu.
- Select the “Camera” option and press Enter.
- In the next menu, select “Yes” to enable the camera interface.
- After enabling the camera interface, exit the configuration tool and reboot your Raspberry Pi.
Once your Raspberry Pi has rebooted, the camera software should be configured and ready to use. You can now start capturing images or recording videos using the camera module.
It’s important to note that the quality and resolution of the images/videos captured by the camera module can be adjusted using the appropriate software settings. You can explore the different settings available in the software documentation or online resources to optimize the camera output according to your requirements.
Installing the Camera Software
Before you can start using the camera module with your Raspberry Pi, you need to install the necessary software.
Step 1: Update your Raspberry Pi
It is recommended to always update your Raspberry Pi to the latest version of the operating system before installing any new software. To do this, open a terminal window and run the following commands:
sudo apt-get update
sudo apt-get upgrade

Step 2: Enable the Camera Module
The camera module is disabled by default. To enable it, use the following command:
sudo raspi-config
This will open the Raspberry Pi configuration tool. Navigate to the “Interfacing Options” menu and select “Camera”. Then, choose “Enable” and exit the configuration tool.
Note: You may need to reboot your Raspberry Pi for the changes to take effect.
Step 3: Install the Camera Software
Now, you need to install the camera software. Open a terminal window and run the following command:
sudo apt-get install python-picamera
This will install the Python library for controlling the Raspberry Pi camera module. You can now use the camera module with Python to take photos and record videos.
Note: If you are using a different programming language, make sure to check if there is a library available for your language of choice.
With the camera software installed, you are ready to start using your Raspberry Pi as a digital camera. Have fun capturing photos and exploring the possibilities of your camera module!
Taking Photos and Recording Videos
To take photos and record videos with your digital camera made using a Raspberry Pi, you can use the picamera Python library. This library provides an easy-to-use interface for controlling the camera module connected to the Raspberry Pi.
First, you’ll need to install the picamera library on your Raspberry Pi. Open a terminal and run the following command:
pip install picamera
Once the library is installed, you can start using it in your Python script. Here’s an example code snippet that demonstrates how to capture a photo:
import picamera
# Create a PiCamera object
camera = picamera.PiCamera()
# Capture a photo
camera.capture('photo.jpg')
This code creates a PiCamera object, which represents the camera connected to the Raspberry Pi. Then, it uses the capture() method to take a photo and save it as photo.jpg in the current directory.
If you want to record a video instead of taking a photo, you can use the start_recording() and stop_recording() methods. Here’s an example code snippet:
import picamera
import time
# Create a PiCamera object
camera = picamera.PiCamera()
# Start recording a video
camera.start_recording('video.h264')
# Wait for 5 seconds
time.sleep(5)
# Stop recording
camera.stop_recording()
This code uses the start_recording() method to start recording a video and saves it as video.h264 in the current directory. It then uses the stop_recording() method to stop recording.
With the picamera library, you can also control various camera settings such as resolution, framerate, and exposure. Check out the official documentation for more details on how to use the library and take full advantage of your digital camera made with a Raspberry Pi.
Question-answer:
What is a Raspberry Pi and how can it be used to make a digital camera?
A Raspberry Pi is a small, single-board computer that can be used for various projects. By connecting a camera module to the Raspberry Pi and utilizing its processing power, you can create a digital camera.
What camera module can I use with a Raspberry Pi to make a digital camera?
There are a few camera modules compatible with Raspberry Pi, such as the official Raspberry Pi Camera Module, which offers high-quality images and video recording. Other options include USB webcams that can be connected to the Raspberry Pi.
What software do I need to install on a Raspberry Pi to create a digital camera?
To create a digital camera with a Raspberry Pi, you will need to install the Raspbian operating system on the Pi. Additionally, you can use software like Python and OpenCV to control the camera module and process the captured images.