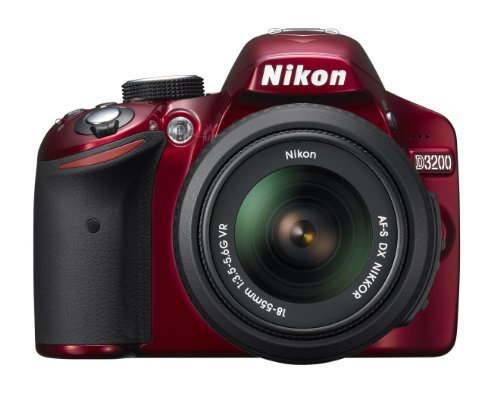
Are you a filmmaker or a photography enthusiast looking to add a touch of professionalism to your camera equipment? Red cameras are known for their high-quality image capture and are widely used in the film industry. However, they come with a hefty price tag that may not be within everyone’s budget. Luckily, with a few simple modifications, you can make your DSLR camera look like a Red camera, giving you that sleek and professional appearance without breaking the bank.
Step 1: Choose the right accessories
The first step in transforming your DSLR camera into a Red camera look-alike is to choose the right accessories. Red cameras are known for their distinctive design, so it’s important to select accessories that mimic their appearance. Look for accessories such as matte black camera straps, lens hoods, and body armor that are compatible with your DSLR model. These accessories will not only enhance the look of your camera but also provide extra protection.
Step 2: Customize the camera body
Another crucial aspect of making your DSLR camera look like a Red camera is customizing the camera body. Red cameras have a clean and minimalist design, typically with a matte black finish. You can achieve a similar look by applying a matte black vinyl wrap to your camera body. Make sure to clean the surface thoroughly before applying the wrap to ensure a smooth and seamless finish.

Step 3: Upgrade the lens
The lens is one of the most prominent features of a camera, so upgrading it can significantly contribute to achieving a Red camera-like appearance. Red cameras are often paired with high-quality cinema lenses that offer exceptional image quality. Consider investing in a cinema lens adapter or a lens with manual focus and aperture control to mimic the functionality of a cinema lens. This will not only enhance the professional look of your camera but also improve the overall image and video quality.
Step 4: Master the Red camera settings
To truly make your DSLR camera look like a Red camera, it’s essential to master the settings and features that are synonymous with Red cameras. Spend some time researching and experimenting with Red camera settings, such as resolution, frame rate, and color profiles. Familiarize yourself with the Red camera workflow and learn how to achieve the signature Red camera look during post-processing. This will help you capture footage that closely resembles the cinematic quality associated with Red cameras.
In conclusion, with the right accessories, customized camera body, lens upgrades, and mastering the settings, you can transform your DSLR camera into a Red camera look-alike, allowing you to capture professional-looking footage without the hefty price tag.

Transforming a DSLR into a Red Camera: The Ultimate Guide
Are you an aspiring filmmaker looking to achieve the iconic look of a Red Camera but on a budget? With a few clever tricks and accessories, you can transform your DSLR into a Red Camera and capture stunning footage.
1. Red Camera-Like Accessories
To achieve the Red Camera aesthetic, start by investing in accessories that give your DSLR a similar look. These can include a matte box, follow focus system, and an external monitor. These accessories not only make your camera look more professional but also enhance your filming experience.
2. Custom Camera Skin
Add a touch of authenticity to your DSLR by applying a custom camera skin that resembles the iconic Red Camera design. With various online stores offering skins specifically designed for popular DSLR models, you can easily find one that fits your camera and gives it the Red Camera appearance.
3. Color Grading
Color grading plays a crucial role in achieving the Red Camera look. Invest in video editing software that allows you to replicate the signature Red Camera color grading. Focus on enhancing the contrast, saturation, and color tones to give your footage that cinematic, high-end look.
4. Cinematic Lenses
Red Cameras are often known for their cinematic lenses. While DSLR lenses may not be as high-end, you can still achieve a similar effect by using prime lenses. Prime lenses have a wider aperture, allowing you to achieve that shallow depth of field and beautiful bokeh effect commonly associated with Red Camera footage.

5. Ergonomic Rig
A Red Camera is known for its ergonomic design, making it comfortable for long hours of filming. Invest in a shoulder rig or a stabilizer system that not only helps stabilize your shots but also makes your DSLR setup feel more professional. This will give you the Red Camera experience and make it easier to handle your camera on set.
By following these steps and using the right accessories and techniques, you can transform your DSLR into a Red Camera and achieve that high-quality, cinematic look without breaking the bank.
Unleashing the Power of Your DSLR: Tips and Tricks
Are you a photography enthusiast who recently bought a DSLR and want to maximize its potential? Look no further! In this article, we will explore some valuable tips and tricks that will help you unleash the true power of your DSLR camera.
1. Master the Manual Mode
One of the key advantages of a DSLR is the ability to have full control over your camera settings. Take your photography skills to the next level by learning how to shoot in manual mode. This allows you to adjust settings such as aperture, shutter speed, and ISO to achieve the perfect exposure. Experiment with different settings to understand their impact on your photos.
2. Understand Composition Techniques
Composition plays a vital role in creating visually appealing photographs. Familiarize yourself with various composition techniques such as the rule of thirds, leading lines, and symmetry. These techniques can elevate the overall aesthetics of your images and help you tell a more compelling visual story.

3. Invest in High-Quality Lenses
Your DSLR camera’s lens has a significant impact on image quality. Consider investing in high-quality lenses that suit your photography needs. Prime lenses are known for their superior image quality, while zoom lenses offer versatility in capturing different perspectives. Choose lenses with wide apertures for beautiful depth of field effects.
4. Experiment with Different Lighting Conditions
Lighting plays a crucial role in photography. Experiment with different lighting conditions, such as natural light, artificial light, and low light situations. Understand the impact of different types of lighting on your subjects and adjust your camera settings accordingly. Don’t be afraid to use light modifiers like reflectors and diffusers to control the light and create the desired mood.
5. Shoot in RAW Format
RAW format preserves all the data captured by your camera’s sensor, providing you with greater flexibility during post-processing. Shooting in RAW allows you to have more control over aspects like white balance, exposure, and color grading. Although RAW files take up more storage space, the image quality and editing possibilities they offer are worth it.
- Experiment with different camera angles and perspectives
- Learn to use different focusing techniques such as autofocus modes and manual focus
- Explore the various shooting modes offered by your camera, such as aperture priority or shutter priority
Remember, mastering any skill takes time and practice. Be patient with yourself and keep experimenting with your DSLR camera. The more you explore and try new techniques, the better you will become at capturing stunning photographs. So, grab your DSLR, follow these tips, and unleash the true power of your camera!
Beyond the Basics: Taking Your DSLR to the Next Level
So, you’ve mastered the basics of using your DSLR camera and now you’re ready to take it to the next level. Whether you want to capture professional-level photographs or simply step up your photography game, here are some tips and tricks to help you unleash the full potential of your DSLR.

1. Shoot in Manual Mode: While automatic modes are convenient, shooting in manual mode gives you full control over your camera settings. Experiment with different combinations of aperture, shutter speed, and ISO to achieve the desired effect in your photographs.
2. Understand Exposure: Proper exposure is crucial for stunning photographs. Learn the relationship between aperture, shutter speed, and ISO, and how they affect exposure. Mastering exposure will enable you to create well-balanced and properly lit images.
3. Experiment with Composition: Composition plays a significant role in creating visually appealing images. Explore different techniques such as the rule of thirds, leading lines, and symmetry. Don’t be afraid to break the rules and experiment with unconventional compositions for unique and intriguing shots.
4. Utilize Depth of Field: Understanding and controlling depth of field is essential for creating professional-looking images. Experiment with different aperture settings to achieve various levels of background blur and focus on your subject effectively.
5. Expand your Lens Collection: Invest in different lenses to broaden your creative possibilities. Wide-angle lenses are great for capturing landscapes, while telephoto lenses are perfect for wildlife and sports photography. Experiment with different lenses to discover their unique characteristics and use them to your advantage.

6. Shoot in RAW: RAW files retain all the data captured by your camera’s sensor, enabling you to have full control over post-processing. Shooting in RAW gives you more flexibility in editing and allows you to bring out the best in your images during the post-production stage.
7. Learn to Edit: Post-processing is an essential step in digital photography. Familiarize yourself with editing software like Adobe Lightroom or Photoshop, and learn to enhance your images by adjusting exposure, colors, and other important settings. Editing can transform a good photograph into a stunning masterpiece.
Remember, mastering photography takes time and practice. Continuously challenge yourself by trying new techniques and styles. Explore your creativity and push the boundaries of what you can achieve with your DSLR camera. With dedication and persistence, you’ll be capturing incredible photographs in no time!
Step-by-Step Guide: How to Make a DSLR Look Like a Red Camera
Are you a filmmaker or photographer looking to make your DSLR camera resemble a Red camera? While the two cameras may look similar at first glance, there are some key differences that give the Red camera its unique aesthetic. This step-by-step guide will show you how to transform your DSLR into a Red camera look-alike.
Step 1: Disassemble Your DSLR
The first step in transforming your DSLR into a Red camera is to disassemble it carefully. Remove the camera lens, battery, and memory card. Take extra caution while doing this to avoid any damage to your camera.
Step 2: Modify the Camera Body
Once you have disassembled your DSLR, you will need to modify the camera body to resemble a Red camera. Use stickers or adhesive film to cover the branding and labels on the camera body with a Red camera logo. You can find Red camera logos online or create your own using image editing software.
Additionally, consider painting the camera body with high-quality matte red paint. Ensure that you take proper precautions to protect the camera’s internal components from any paint residue. Seek professional help if you are unsure about painting the camera yourself.
Step 3: Customize the Accessories
To complete the Red camera look, customize the camera accessories. Replace the camera strap with a Red camera strap or wrap it with red fabric. Use Red camera-themed accessories like lens caps, camera grips, or camera bags to enhance the overall aesthetics.
Step 4: Update the Camera Display
Transforming the camera display is essential to mimic the Red camera’s interface. You can achieve this by applying a Red camera UI skin to the LCD screen. Look for third-party providers who offer Red camera-inspired UI skins specifically crafted for your DSLR model.
Note: Make sure the UI skin you choose is designed for your camera model to ensure compatibility and avoid any potential damage to your camera.
Now you have successfully transformed your DSLR into a Red camera look-alike. Remember that this modification is purely cosmetic and does not alter the capabilities or performance of your DSLR. Always exercise caution while working with your camera and seek professional help if needed.
Choosing the Right Gear: Essential Equipment for the Transformation
When it comes to transforming your DSLR camera to look like a Red camera, there are several essential pieces of equipment you’ll need to achieve the desired aesthetic. These tools and accessories not only enhance the appearance of your camera but also provide functional benefits that can enhance your photography experience:
- Camera Skins: To give your DSLR camera the distinctive Red camera look, consider investing in camera skins that match the iconic color and texture of Red cameras. These skins are typically made of high-quality materials and can be easily applied and removed from your camera.
- Camera Straps: Red cameras often feature unique and durable straps that not only provide extra security but also add to their overall aesthetic. Look for camera straps that are compatible with your DSLR camera and have a similar design to the Red camera straps.
- Lens Hood: Adding a lens hood to your DSLR camera can instantly make it look more professional and resemble the Red camera design. Lens hoods not only block stray light and reduce lens flare but also give your camera a more robust and cinematic appearance.
- External Monitor: Red cameras are often equipped with large and high-resolution external monitors that allow for better composition and monitoring of footage. To mimic this feature, consider investing in an external monitor that can be attached to your DSLR camera.
- Follow Focus System: A follow focus system is another essential tool for transforming your DSLR camera into a Red camera. This system allows for smooth and precise focusing adjustments, enhancing the professional look and feel of your footage.
- Cage or Rig: Red cameras are frequently used with cages or rigs for added stability and versatility. You can replicate this setup by purchasing a compatible cage or rig that fits your DSLR camera, allowing you to attach additional accessories like external microphones or lights.
- Battery Grip: Red cameras often feature extended battery grips that provide longer shooting sessions without having to change batteries frequently. Consider getting a battery grip for your DSLR camera to achieve a similar look and increase your shooting time.
By investing in these essential pieces of equipment, you can effectively transform your DSLR camera into a Red camera, both in terms of appearance and functionality. Remember to choose items that are compatible with your specific camera model and enjoy the enhanced shooting experience these tools can provide.
The Art of Color Grading: Achieving the Red Camera Look
Color grading is an essential part of the post-production process that helps create the desired look and feel of a film or a photograph. When it comes to achieving the iconic Red Camera look, proper color grading techniques can play a crucial role in transforming the footage captured by a DSLR camera.
Understanding the Red Camera Look
The Red Camera look is characterized by its distinct cinematic feel, with vibrant colors, high contrast, and a unique visual aesthetic. The color grading process aims to replicate this look by manipulating the colors, contrast, brightness, and saturation of the footage.
Steps to Achieve the Red Camera Look
To make a DSLR footage resemble the Red Camera look, follow these steps:
- Shoot in a Flat Picture Profile: Set your DSLR camera to shoot in a flat picture profile, such as CineStyle or LOG, which captures a wide dynamic range.
- Correct the White Balance: Ensure the white balance is properly calibrated to achieve accurate colors.
- Adjust the Exposure: Use the exposure settings to achieve the desired brightness level.
- Manipulate Contrast and Curves: Increase the contrast and adjust the curves to create a more cinematic look.
- Enhance Colors: Use color grading tools to boost the vibrancy and saturation of the footage.
- Add Film Grain: Applying film grain can add a touch of authenticity and further enhance the cinematic feel.
- Refine the Look: Fine-tune the color grading settings until you achieve the desired Red Camera look.
It is important to note that achieving the Red Camera look requires a combination of technical knowledge and artistic vision. Experimentation and practice will help you develop your own unique style and understand the nuances of color grading.
By mastering the art of color grading, you can bring your DSLR footage closer to the distinct visual aesthetic of the Red Camera, creating stunning and professional-looking videos and photographs.
The Importance of Lighting: Enhancing Your DSLR Footage
When it comes to creating professional-looking videos with your DSLR camera, lighting plays a crucial role in achieving the desired effect. Proper lighting can transform an ordinary scene into a captivating visual experience, enhancing the overall quality of your footage.
Importance of Lighting Techniques
Understanding various lighting techniques can significantly impact the final output of your DSLR footage. Here are a few key lighting techniques to consider:
| Technique | Description |
|---|---|
| Three-Point Lighting | This classic lighting setup involves using three light sources: the key light, fill light, and back light. The key light is the primary source and provides the main illumination, while the fill light fills in the shadows, and the back light adds depth and separation from the background. |
| Natural Lighting | Utilizing natural light can create a soft and warm ambiance in your footage. Taking advantage of sunlight during the golden hours (early morning or late afternoon) can result in a more cinematic and flattering look. |
| Hard Lighting | Using hard lighting techniques can create strong contrasts and sharp shadows, adding drama and intensity to your footage. This technique is often suitable for creating a gritty or high-energy atmosphere. |
Tips for Effective Lighting
Here are some tips to help you achieve effective lighting for your DSLR footage:
- Experiment with different lighting positions and angles to find the most flattering and visually appealing look for your subject.
- Use diffusers or reflectors to soften or redirect harsh light, achieving a more balanced and natural appearance.
- Consider the color temperature of your lighting sources, as it can greatly affect the mood and tone of your footage.
- Take advantage of lighting accessories such as gels or filters to add creative effects or correct color imbalances.
- Regularly monitor the lighting during your shoot to ensure consistency and make adjustments as needed.
By paying attention to lighting and employing various techniques, you can significantly enhance the overall quality and visual appeal of your DSLR footage. Whether you are shooting a documentary, short film, or promotional video, proper lighting can elevate your work to the next level.
Mastering Composition: Framing Shots Like a Pro
Composition is a crucial aspect of photography that can elevate your shots from ordinary to extraordinary. By mastering the art of framing, you can create visually compelling images that capture the viewer’s attention and tell a story. Whether you are shooting with a DSLR or a Red camera, the following tips will help you improve your composition skills.
1. Rule of Thirds
The rule of thirds is a fundamental guideline in composition. Imagine that your frame is divided into a 3×3 grid with imaginary lines. Instead of placing your subject in the center of the frame, aim to position it along one of these lines or the intersections. This will create a more balanced and visually appealing composition.
2. Leading Lines
Leading lines are elements in your frame that draw the viewer’s eye towards the subject. They can be straight lines, such as roads or fences, or curved lines, like rivers or tree branches. By incorporating leading lines into your composition, you can add depth and guide the viewer’s gaze to the focal point of the image.
Pro tip: Experiment with different angles and perspectives to find the most impactful leading lines for your composition.
3. Framing Within a Frame
Another effective technique for framing shots is to find natural or man-made elements within your scene to create a frame within the frame. This can be a window, a door, an archway, or even tree branches. By framing your subject within these elements, you can add depth and context to your image, as well as create a sense of intrigue.
4. Symmetry and Patterns
Harness the power of symmetry and patterns to create visually striking compositions. Symmetry is achieved when the elements in your frame are mirrored or balanced around a central point. Look for patterns in architecture, nature, or everyday objects, and use them as the focal point of your composition.
Expert tip: Breaking the symmetry or pattern can also create a sense of tension and add visual interest to your image.
By practicing these composition techniques and experimenting with different framing strategies, you can take your photography to the next level. Remember, photography is an art form, and composition plays a vital role in creating captivating and memorable images.
Transforming Your DSLR Videos into Cinematic Masterpieces
Turning your ordinary DSLR videos into cinematic masterpieces can be a rewarding and creative process. By using some simple techniques and tools, you can add a touch of professionalism to your video projects. Here are a few tips to help you achieve that cinematic look:
1. Use Manual Settings: Switch your camera to manual mode to have complete control over your video settings. Adjust the aperture, ISO, and shutter speed to create the desired depth of field and control the exposure.
2. Lighting Techniques: Pay attention to the lighting in your scenes. Experiment with natural light or use artificial lighting to create a specific mood or atmosphere. Soft lighting or dramatic lighting can add depth and dimension to your video.
3. Composition and Framing: Think about the composition of each shot. Use the rule of thirds to create a visually pleasing layout. Consider the placement of your subject and any leading lines or symmetry in the frame to guide the viewer’s eye.
4. Camera Movement: Utilize camera movement techniques, such as pans, tilts, and tracking shots, to add visual interest and dynamics to your videos. However, be sure to move the camera purposefully and smoothly to avoid shaky footage.
5. Post-Production Editing: Enhance your video in post-production. Use editing software to adjust the color grading, saturation, and contrast of your footage to achieve the desired cinematic look. Add slow-motion, transitions, and sound effects to enhance the overall cinematic experience.
6. Sound Design: Pay attention to the audio quality of your videos. Invest in a good microphone and consider using background music or sound effects to enhance the mood and atmosphere of your footage.
By following these tips, you can easily transform your DSLR videos into cinematic masterpieces that captivate your viewers and leave a lasting impression. Remember to experiment, be creative, and have fun with the process!
Showcasing Your Work: Promoting Your DSLR Red Camera Look
Once you have successfully transformed your DSLR camera to mimic the iconic look of a Red camera, it’s time to showcase your work and promote your unique style. Here are some tips to help you effectively showcase and market your DSLR Red camera:
1. Create a Portfolio: Build a visually appealing portfolio website that showcases your photography and videography work. Include a dedicated section showcasing your DSLR Red camera look to attract potential clients and collaborators.
2. Utilize Social Media: Leverage the power of social media platforms such as Instagram and YouTube to share your DSLR Red camera work. Regularly post high-quality images and videos to engage with your audience and gain visibility in the photography and videography community.
3. Collaborate with Influencers: Partner with influencers and content creators who align with your niche and style. Collaborative projects can help expose your DSLR Red camera work to a wider audience and attract potential clients or followers.
4. Participate in Photography/Videography Competitions: Submit your DSLR Red camera photographs and videos to relevant competitions and contests. Winning or being recognized in these competitions can significantly boost your credibility and visibility as a DSLR Red camera artist.
5. Network with Industry Professionals: Attend industry events, seminars, and workshops to connect with like-minded professionals and experts in the photography and videography field. Building strong relationships with industry leaders can lead to new opportunities and collaborations.
6. Offer Workshops and Tutorials: Share your knowledge and expertise with others by offering workshops or tutorials on DSLR Red camera techniques. This not only establishes you as an authority in your field but also helps you build a community of loyal followers and potential clients.
In conclusion, effectively promoting your DSLR Red camera look involves creating a strong online presence, engaging with your audience on social media, collaborating with influencers, participating in competitions, networking with industry professionals, and sharing your knowledge through workshops and tutorials. By following these strategies, you can successfully showcase your unique style and attract clients who appreciate the aesthetic of a Red camera.
Question-answer:
What is the difference between a DSLR camera and a RED camera?
A DSLR camera is a type of digital camera that uses a single lens reflex mechanism, while a RED camera is a professional digital cinema camera that is designed specifically for high-resolution recording and cinematic video production. RED cameras are known for their exceptional image quality and flexibility in post-production.
Can I make my DSLR camera look like a RED camera?
While you cannot completely transform your DSLR camera to look exactly like a RED camera, you can make some modifications to make it visually resemble a RED camera. This includes adding equipment like a cage or a matte box to your DSLR, using external monitors and viewfinders, and customizing the camera body with stickers or paint to achieve a similar aesthetic.


