Making a film is an art that requires creativity, planning, and technical skills. With the advent of DSLR cameras, aspiring filmmakers now have access to affordable and high-quality equipment that can help them bring their vision to life. In this article, we will explore the steps involved in making a film with a DSLR camera, from pre-production to post-production.
Pre-production
In the pre-production phase, it is important to plan your film and gather all the necessary resources. This includes writing a script or storyboard, scouting locations, assembling a cast and crew, and securing any additional equipment or props that may be needed. Pre-production is the foundation of your film, and careful planning will ensure a smooth production process.
Production
Once you have completed the pre-production phase, it is time to start filming. When using a DSLR camera, there are a few tips and tricks that can help you achieve professional-looking footage. It is important to understand the settings and features of your camera, such as aperture, ISO, and shutter speed, as these will affect the overall look and feel of your film. Additionally, using a tripod or stabilizer can help you capture smooth and steady shots.
Post-production
After filming is complete, it is time to edit and enhance your footage in post-production. Using software such as Adobe Premiere Pro or Final Cut Pro, you can import your footage, arrange it in the desired sequence, and make any necessary edits or adjustments. This includes adding special effects, color grading, and sound design to enhance the overall cinematic experience. The post-production phase allows you to bring your vision to life and create a polished final product.
With the accessibility of DSLR cameras, anyone with a passion for filmmaking can now create their own films. By following these steps, you can start making your film and unleash your creativity on the world!
Choosing the Right DSLR Camera
When it comes to making a film with a DSLR camera, one of the most important decisions you’ll have to make is choosing the right camera for your needs. With so many options on the market, it can be overwhelming to figure out which camera is the best fit for you. Here are a few factors to consider when making your decision:
Image Quality
One of the main advantages of using a DSLR camera for filmmaking is the ability to capture stunning, high-quality images. When choosing a camera, look for one that has a large image sensor and a high megapixel count. This will ensure that your film has sharp details and vibrant colors.

Video Capabilities
Not all DSLR cameras are created equal when it comes to video capabilities. Some cameras may only be able to shoot in HD, while others can capture 4K footage. Consider the type of projects you’ll be working on and choose a camera that can meet your needs.
Additionally, look for a camera that offers manual controls for settings such as ISO, aperture, and shutter speed. This will give you more control over the look and feel of your film.
Another important feature to consider is the camera’s autofocus system. Look for a camera that has fast and accurate autofocus, as this will make it easier to capture moving subjects.
Connectivity and Accessories
When making a film, it’s important to consider how the camera will integrate with your other equipment and accessories. Look for a camera that has a variety of connectivity options, such as HDMI and USB ports, as well as a microphone input for capturing high-quality audio.
Consider the type of lenses you’ll need for your projects, and check if the camera you’re interested in is compatible with those lenses. Additionally, look for cameras that have a durable construction and a good battery life, as these factors can greatly affect your filming experience.
By considering these factors and doing thorough research, you’ll be able to choose the right DSLR camera for your filmmaking needs and create stunning films that captivate your audience.
Considerations Before Filming
Before you start filming with your DSLR camera, there are several important considerations to keep in mind. These factors can greatly impact the outcome of your film and should be carefully thought through before you begin the production process. Here are some key points to consider:
1. Storytelling and Concept
Having a clear storytelling concept is crucial for creating a compelling film. Take the time to develop a strong story or concept that has a clear beginning, middle, and end. Consider the themes, characters, and overall message you want to convey through your film.
2. Planning and Pre-production
Proper planning and pre-production can help you avoid many issues during filming. Create a detailed shot list and storyboard to guide your shooting. Ensure you have all the necessary equipment and permits, and organize your shooting schedule efficiently. Additionally, consider the logistics of your locations, casting, and costumes.
3. Lighting and Composition
Lighting plays a vital role in creating the right mood and atmosphere for your film. Consider the natural lighting conditions at your shooting locations and plan accordingly. Experiment with different lighting techniques to achieve the desired visual effects. Pay attention to the composition of your shots and use framing techniques to enhance the storytelling.

4. Sound and Audio
The audio quality in your film is just as important as the visuals. Invest in a good external microphone to capture high-quality sound. Pay attention to noise levels, background sounds, and dialogue clarity. Consider using sound effects and music to enhance the overall audio experience.
5. Camera Settings and Techniques
Get familiar with your camera settings and understand how they can affect the look and feel of your footage. Experiment with different shooting techniques, such as adjusting the exposure, focus, and white balance. Consider using different lenses to achieve specific visual effects.
6. Post-production and Editing
The editing process can greatly impact the final outcome of your film. Take the time to carefully select and organize your footage. Use editing software to trim, arrange, and enhance your shots. Consider color correction and grading to achieve the desired visual style. Additionally, pay attention to the pacing, transitions, and sound design during the editing process.
By taking these considerations into account before filming, you can greatly increase your chances of creating a successful film with your DSLR camera. Remember to continuously improve your skills and experiment with different techniques to achieve the desired results.
Setting Up Your Camera for Filming
Setting up your DSLR camera properly is essential to ensure successful filming. Here are some important steps to follow:

1. Choose the Right Settings
First, adjust your camera settings for video mode. Set the frame rate to the desired value, usually 24 or 30 frames per second (FPS). Choose the appropriate resolution, such as 1080p or 4K, for your project. Make sure to set the white balance correctly to match the lighting conditions.
2. Adjust the Exposure
Proper exposure is crucial for capturing high-quality footage. Use the camera’s exposure controls, such as aperture, shutter speed, and ISO, to achieve the desired brightness and depth of field. Experiment with different settings to find the right balance between light and shadow.
3. Stabilize Your Shots
To avoid shaky footage, it’s important to stabilize your camera. Use a tripod or a stabilizing rig to keep the camera steady. This will help you maintain a professional look and prevent distractions from camera movements.
4. Set the Focus
Accurate focus is vital for sharp and clear images. Use manual focus to have full control over the focal point. Use the camera’s focus peaking feature or zoom in on the LCD screen to ensure your subject is in focus. Consider using a follow focus system for smoother focus adjustments during filming.
5. Adjust Audio Settings
Great audio is just as important as good video quality. Set the audio recording level to an appropriate level, avoiding distortion or background noise. Consider using an external microphone for better sound quality. Test the audio before filming to ensure everything sounds clear and balanced.
6. Use ND Filters
Neutral Density (ND) filters are useful when shooting in bright light conditions. They help reduce the amount of light entering the camera, allowing you to use wider apertures or slower shutter speeds without overexposing the footage. This can create more cinematic and professional-looking shots.
By properly setting up your DSLR camera, you can capture high-quality footage and create stunning films. Remember to practice and experiment with different settings to achieve your desired look.
Mastering Camera Settings
To make the most of your DSLR camera when filming, it is important to master the camera settings to achieve the desired results. Here are some essential camera settings to consider:
1. ISO
ISO refers to the sensitivity of the camera’s image sensor. A higher ISO setting makes the camera more sensitive to light, which is beneficial in low-light situations. However, a higher ISO setting can also introduce digital noise in the image. Experiment with different ISO settings to find the right balance between image quality and sensitivity.
2. Shutter Speed
Shutter speed determines the amount of time the camera’s shutter remains open. A slower shutter speed allows more light in, leading to a brighter exposure. On the other hand, a faster shutter speed captures motion with more clarity. Consider using a slower shutter speed for low-light situations and a faster shutter speed for capturing fast-moving objects.

3. Aperture
Aperture refers to the size of the camera’s lens opening. It controls the amount of light that enters the camera. A smaller aperture (larger f-number) results in a greater depth of field, keeping both the foreground and background in focus. Conversely, a larger aperture (smaller f-number) creates a shallow depth of field, blurring the background and highlighting the subject. Experimenting with different apertures can create various artistic effects.
4. White Balance
White balance adjusts the color temperature of the camera’s sensor to accurately reproduce colors in different lighting conditions. Choose the appropriate white balance preset, such as daylight, cloudy, or tungsten, depending on the environment you are filming in. You can also manually adjust the white balance to achieve a desired creative effect.
Remember, mastering camera settings is a continuous learning process. Take the time to experiment and practice with different settings to understand their impact on your film’s visual style and quality.
Understanding Lighting Techniques
When it comes to creating a film with a DSLR camera, understanding lighting techniques is crucial. The way you manipulate light can greatly impact the overall look and feel of your film. Here are some lighting techniques to consider:
| Technique | Description |
|---|---|
| Three-Point Lighting | This technique involves using three different light sources to control the lighting in your scene. The key light is the main light source, providing the primary illumination. The fill light helps to reduce any harsh shadows created by the key light, while the backlight adds depth and dimension to the subject. |
| Natural Lighting | Using natural light can create a realistic and organic look for your film. Position your subject in a way that utilizes the available natural light sources, such as windows or open doors. Be aware of the direction and quality of light to achieve the desired effect. |
| High Key Lighting | This technique involves using bright, evenly distributed light to create a well-lit scene. High key lighting is often used in comedies or light-hearted films to create a sense of happiness or positivity. |
| Low Key Lighting | Low key lighting uses minimal light to create dramatic and moody scenes. Shadows play a significant role in this technique, adding depth and mystery to the scene. |
| Backlighting | Placing the light source behind your subject creates a halo effect and separates the subject from the background. This technique can add a sense of depth and highlight the outline of your subject. |
Experimenting with different lighting techniques can help you achieve the desired look for your film. Don’t be afraid to try different setups and positions for your lights to create unique and visually appealing scenes.
Using External Accessories to Enhance Filming
When it comes to filming with a DSLR camera, utilizing external accessories can greatly enhance the quality and overall experience. These accessories can help you achieve professional-looking results and allow for more creative freedom. Here are some essential external accessories to consider:
1. Tripod
A tripod is a crucial accessory for any filmmaker. It provides stability and helps eliminate shaky footage, allowing you to capture smooth and professional shots. Look for a sturdy tripod that can support the weight of your camera and has adjustable height options.
2. External Microphone
Most DSLR cameras have built-in microphones, but their quality may not be sufficient for professional filmmaking. Investing in an external microphone can significantly improve the audio quality of your videos. Consider a shotgun microphone for capturing directional sound or a lavalier microphone for interviews or vlogs.
3. External Light Source
Proper lighting is essential for creating visually appealing footage. While natural light is ideal, it’s not always available or controllable. Adding an external light source like an LED panel or a softbox can help you adjust the lighting according to your needs, ensuring well-lit scenes even in challenging environments.
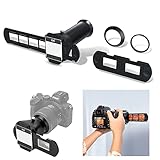
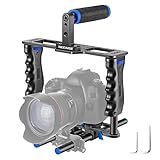
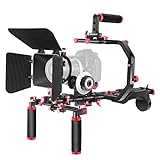
4. Camera Stabilizer
If you want to achieve smooth, cinematic shots that involve movement, a camera stabilizer is a must-have accessory. There are various options available, such as handheld gimbals or camera cages, which help minimize camera shake and allow for creative camera movement.
5. External Monitor
Although DSLR cameras come with built-in screens, they might not always provide the level of detail and accuracy you need for precise framing and focus. Adding an external monitor allows for better monitoring of your shots, giving you a larger and more accurate display to work with.
By investing in these external accessories, you can take your DSLR filmmaking to the next level. Each accessory serves a specific purpose and can help you overcome common challenges like shaky footage, poor audio quality, inadequate lighting, and more. Experiment with different combinations and find the setup that works best for your filming style and creative vision.
Post-production and Editing Tips
After shooting your film with a DSLR camera, the post-production and editing process is crucial in creating a polished final product that effectively communicates your vision. Here are some tips to enhance your post-production and editing workflow:
1. Organize your footage
Before you start editing, it’s important to organize your footage. Create folders for different scenes or shots and label them clearly. This helps you easily locate specific footage when you are in the editing phase.
2. Choose the right software
Invest in good video editing software that suits your needs. Popular options include Adobe Premiere Pro, Final Cut Pro, and DaVinci Resolve. Learn the basics of the software and explore its advanced features to maximize your editing capabilities.
3. Create a strong narrative
During the editing process, focus on creating a strong narrative flow. Arrange your shots in a way that effectively tells your story and engages the audience. Consider pacing, transitions, and the overall structure of your film.
4. Pay attention to audio
While DSLR cameras are known for their great image quality, the built-in microphones may not always capture the best audio. Use separate microphones or record audio separately and sync it with your footage during the editing process. Ensure that your audio levels are balanced and the dialogue is clear.
5. Color correction and grading
Enhance the look of your footage by performing color correction and grading. Adjust the color, brightness, and contrast to create the desired mood and tone for each scene. Experiment with different filters and effects to achieve the desired visual aesthetic.
6. Incorporate music and sound effects
Music and sound effects play a crucial role in enhancing the overall cinematic experience. Choose appropriate background music and sound effects that complement the mood and emotion of your film. Ensure that the music and sound effects are properly balanced with the dialogue and other audio elements.
7. Take breaks and get feedback
Editing can be a time-consuming process, so it’s important to take breaks to rest your eyes and regain focus. Additionally, seek feedback from trusted individuals who can provide constructive criticism and fresh perspectives. This can help you identify areas for improvement and make your film even better.
By following these post-production and editing tips, you can elevate the quality of your film and bring your creative vision to life. Enjoy the process and don’t be afraid to experiment!
Question-answer:
What is a DSLR camera and why is it popular for filmmaking?
A DSLR camera is a digital single-lens reflex camera, which is popular for filmmaking because it offers high-quality video capabilities, interchangeable lenses for creative control, and a compact size for portability. In addition, DSLR cameras often have larger sensors than traditional camcorders, allowing for better low-light performance and shallow depth of field.
What are some important settings to consider when filming with a DSLR camera?
When filming with a DSLR camera, it is important to consider settings such as frame rate, shutter speed, aperture, and ISO. The frame rate determines the smoothness of the motion in the video, while the shutter speed affects the amount of motion blur. Aperture controls the depth of field and the amount of light entering the camera, while ISO determines the camera’s sensitivity to light. Understanding and adjusting these settings will help you achieve the desired look and feel for your film.