
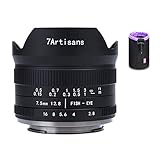
Are you a photography enthusiast looking to experiment with different camera lenses? Have you ever wanted to capture unique, distorted images with a fisheye lens? With a few simple steps, you can make your own fisheye lens for your digital camera!
Step 1: Gather the materials
To make your own fisheye lens, you will need a small glass or plastic spherical lens, preferably with a diameter of about 20-25mm. This can be found in old cameras, binoculars, or even cheap magnifying glasses. You will also need a lens cap or a black plastic ring to hold the lens in place.
Step 2: Preparing the lens cap
Take the lens cap or black plastic ring and carefully drill a hole in the center. Make sure the hole is just slightly smaller than the diameter of the lens you are using. This hole will be used to mount the lens onto your camera.

Step 3: Mounting the lens
Insert the lens into the hole of the lens cap or black plastic ring. Make sure the lens is securely fitted and does not move around. If necessary, you can use a small amount of adhesive to hold the lens in place.
Step 4: Attaching the lens to your camera
Now it’s time to attach your homemade fisheye lens to your digital camera. Place the lens cap or black plastic ring onto your camera’s lens mount, just like you would with any other lens. Make sure it is tightened securely to prevent any movement while shooting.
Step 5: Experiment and have fun!

With your newly created fisheye lens, you can now start experimenting and capturing unique, distorted images. Keep in mind that a fisheye lens produces a wide-angle view with strong distortion at the edges, creating a creative and artistic effect. Use this lens to add a different perspective to your photography and let your creativity run wild!
Remember, making your own fisheye lens is a fun and inexpensive way to explore new photography techniques. So go ahead, gather the materials and start creating your very own homemade fisheye lens for your digital camera!
A step-by-step guide on making a fisheye lens for your digital camera
If you love photography and want to experiment with unique and creative effects, making a fisheye lens for your digital camera can be a fun and rewarding DIY project. In this step-by-step guide, we will walk you through the process of creating your own fisheye lens using easily accessible materials.
Materials you will need:
- A small metal lens cap
- A drill with a small drill bit
- A convex lens (such as a magnifying glass)
- A strong adhesive
Step 1: Preparing the lens cap
Start by taking the metal lens cap and drilling a small hole in the center. This hole should be just the right size to fit the convex lens.
Step 2: Attaching the convex lens
Apply a strong adhesive around the edge of the convex lens and carefully place it over the hole in the lens cap. Press down gently to ensure a secure attachment. Let the adhesive dry completely before moving on to the next step.
Step 3: Testing your fisheye lens
Once the adhesive is dry and the lens is securely attached to the cap, it’s time to test your fisheye lens. Attach the lens cap to your digital camera and start shooting. Experiment with different angles and distances to achieve the desired fisheye effect.
Tips and tricks:
- Keep in mind that the extent of the fisheye effect will depend on the curvature of the convex lens you choose. Feel free to try out different lenses to achieve varying effects.
- Before attaching the convex lens, make sure it is clean and free of any dust or fingerprints. This will help ensure optimal image quality.
- Be cautious not to scratch or damage the lens during the attachment process. Handle it with care and avoid getting fingerprints on the lens surface.
- Experiment with different lighting conditions to further enhance the fisheye effect in your photographs.
By following these steps and using your creativity, you can create your own fisheye lens for your digital camera. Enjoy the process and have fun capturing unique and captivating photos!
Gather the necessary materials
Before you can start making a fisheye lens for your digital camera, you will need to gather the necessary materials. Here is a list of items you will need:
1. Peephole lens
You will need a small peephole lens to serve as the main component of your fisheye lens. You can find peephole lenses at hardware stores or online. Make sure to choose a lens with a wide field of view and good optical quality.
2. Lens mount
You will need a lens mount that is compatible with your digital camera. The lens mount will allow you to attach the fisheye lens to your camera’s body. You can purchase a lens mount online or from a camera store. Make sure to choose a lens mount that fits your camera model.

3. Lens adapter
In order to attach the peephole lens to the lens mount, you will need a lens adapter. The lens adapter should have threads that match the threads on both the peephole lens and the lens mount. You can purchase a lens adapter online or from a camera store.
Once you have gathered all the necessary materials, you can move on to the next steps of making your own fisheye lens for your digital camera.
Remove the existing lens from your digital camera
Before you can attach the fisheye lens to your digital camera, you will need to remove the existing lens. Follow these steps to safely remove the lens:
- Turn off your digital camera and locate the lens release button or switch. This is usually located near the lens mount.
- Press and hold the lens release button or switch. This will unlock the lens from the camera body.
- With your other hand, gently rotate the lens counterclockwise. You may need to apply a bit of pressure, but be careful not to force it.
- Once the lens is loose, carefully remove it from the camera body. Be mindful of the contacts and delicate components.
- If necessary, use a lens cleaning cloth to wipe the camera body and lens mount to remove any dust or debris.
Now that you have successfully removed the existing lens, you are ready to attach the fisheye lens to your digital camera. Make sure to follow the manufacturer’s instructions for attaching the lens correctly.
Choose the right type of lens for your fisheye modification
When it comes to creating a fisheye lens for your digital camera, choosing the right type of lens is crucial. There are several options available, each with its own characteristics and compatibility with different camera models. Here are some factors to consider when selecting a lens for your fisheye modification:

1. Focal Length
The focal length of the lens will determine the angle of view and the distortion effect of your fisheye lens. Typically, fisheye lenses have focal lengths ranging from 8mm to 16mm, with shorter focal lengths providing a wider angle of view and more pronounced distortion. Consider your specific needs and shooting style to determine the ideal focal length for your fisheye lens modification.
2. Compatibility
Ensure that the lens you choose is compatible with your digital camera. Different camera models have different lens mounts and communication protocols, so it is important to select a lens that can be easily attached and controlled by your camera. Consult the camera manufacturer’s website or documentation to find out the compatible lens options for your specific camera model.
Additionally, consider the compatibility of the lens with other camera features such as autofocus and image stabilization. Some lenses may require manual focus or lack image stabilization capabilities, which may affect your shooting experience and overall image quality.
By considering the focal length and compatibility of the lens, you can make an informed decision and choose the right lens for your fisheye modification. Remember to do thorough research and consult with experts if you are unsure about the compatibility and technical aspects of your chosen lens.
Prepare the lens for modification
Before you can modify your lens to create a fisheye effect, you will need to gather a few materials and prepare the lens for the necessary changes.

Here’s what you’ll need:
- A lens cap
- A small piece of tracing paper
- A pair of scissors
- A marker pen
Follow these steps to prepare the lens:
- Remove the lens from your digital camera by carefully twisting it counterclockwise.
- Place the lens cap on a flat surface and use the marker pen to trace the outer rim of the cap on the piece of tracing paper.
- Cut out the traced circle from the tracing paper using the scissors.
- Remove the lens cap and place the cut-out tracing paper circle on the inner side of the cap.
- Press the tracing paper firmly against the inner side of the cap to ensure it adheres properly.
- Trim any excess tracing paper that may be sticking out from the cap with the scissors.
- Reattach the lens cap onto the lens, ensuring that the tracing paper side is facing the lens.
By preparing the lens in this way, you are creating a makeshift fisheye lens that will alter the light entering your camera and produce the desired distortion effect.
Cut a hole in the lens cap
To create a fisheye lens for your digital camera, you will need to modify the lens cap by cutting a hole in it. This modification will allow for the fisheye effect to be achieved when taking photos.
Gather the necessary tools
Before you begin, gather all the necessary tools:

- Lens cap
- Marker or pen
- Scissors or utility knife
Mark the center of the lens cap
Using a marker or pen, mark the center of the lens cap. This mark will serve as a guide for cutting the hole.
Cut a hole in the lens cap
With the scissors or utility knife, carefully cut a hole in the center of the lens cap following the marked guide. Start with a small hole and gradually increase the size until you achieve the desired fisheye effect.
Be sure to take your time and make precise cuts to ensure the hole is clean and smooth. Avoid cutting too large of a hole initially, as you can always enlarge it later if needed.
Once the hole is cut, test the lens cap on your camera lens to ensure it fits properly. If necessary, make any additional adjustments to the size or shape of the hole.
Remember to handle the modified lens cap with care and protect it from any potential damage when not in use.
Attach the modified lens to your camera body
Once you have finished modifying the lens to create the fisheye effect, it is time to attach it to your camera body. Before doing so, make sure your camera is turned off to prevent any possible damage.
First, remove the original lens from your camera by pressing down on the lens release button and twisting the lens counterclockwise. Be gentle and take care not to force anything.
Take the modified lens and align it with the camera body’s lens mount. The lens mount is typically located at the front of the camera body and has a series of metal contacts. Align the lens’s white alignment dot with the corresponding dot or line on the camera body’s lens mount.
Once the lens is aligned, gently push it into the lens mount and rotate it clockwise until it locks into place. Ensure that the lens is securely attached and not loose.
After attaching the lens, turn on your camera and check that it recognizes the lens. Some cameras may display an error message or require you to manually input the lens information in the camera settings.
Once the lens is attached and recognized by your camera, you are ready to start capturing images with your fisheye lens. Experiment with different angles and distances to maximize the unique fisheye effect.
Remember that using a fisheye lens requires some practice to master, so don’t get discouraged if your initial shots don’t turn out as expected. With time and experience, you will be able to capture stunning fisheye photographs.
Test and adjust the focus of the fisheye lens
After successfully creating your fisheye lens for a digital camera, it is important to test and adjust the focus to ensure optimal image quality. Follow these steps to test and adjust the focus of your fisheye lens:
1. Find a well-lit area
Start by finding a well-lit area with plenty of details to focus on. This will make it easier to determine if the lens is properly focused.
2. Mount the fisheye lens on your camera
Attach the fisheye lens to your digital camera securely. Make sure it is properly aligned and centered before proceeding.
3. Set the camera to manual focus mode
Switch your camera to manual focus mode to have full control over the focus. This is crucial in adjusting the focus of the fisheye lens.
4. Select a focal point
Choose a specific subject or object within the frame that you want to focus on. This could be anything with clear details, such as a tree or a building.
5. Adjust the focus ring
Slowly rotate the focus ring on the fisheye lens while observing the subject through the camera’s viewfinder or LCD screen. Pay close attention to the details and ensure they are becoming sharper with each adjustment.
6. Take test shots
Take several test shots at different focus settings to determine the optimal focus for your fisheye lens. Review the test shots on your camera’s screen to evaluate the sharpness of the image.
7. Fine-tune as needed
If the focus is not satisfactory, continue adjusting the focus ring and taking test shots until you achieve the desired sharpness and clarity. Take your time during this process to ensure accurate focus.
By following these steps, you will be able to test and adjust the focus of your fisheye lens for your digital camera, resulting in stunning fisheye photographs with excellent image quality.
Experiment with different shooting techniques
Once you have built your fisheye lens for your digital camera, it’s time to start experimenting with different shooting techniques to achieve unique and creative results. Here are a few ideas to get you started:
1. Perspective and distortion
One of the most distinctive features of a fisheye lens is the exaggerated perspective and distortion it creates. Embrace this effect and experiment with different angles and compositions to emphasize the distortion and create visually striking images. Play with lines, curves, and patterns to see how the fisheye lens can transform ordinary scenes into something extraordinary.
2. Close-up shots
Because of its wide-angle nature, a fisheye lens can be used for incredibly close-up shots. Try getting as close as possible to your subject to capture intricate details and interesting textures. This can be particularly effective for shooting macro subjects such as flowers, insects, or small objects, as the fisheye lens will give a unique perspective and create a sense of depth.
3. Panoramas and landscapes
A fisheye lens is also great for capturing expansive scenes such as landscapes and cityscapes. Experiment with shooting panoramic images by moving the camera from left to right or vice versa while keeping a steady hand or using a tripod. The wide field of view of the fisheye lens will allow you to capture the entire scene in a single frame, creating a stunning and immersive panoramic image.
4. Creative compositions
Don’t be afraid to think outside the box and explore creative compositions with your fisheye lens. Play with reflections, symmetry, and unusual angles to create unique and visually engaging images. Look for interesting architectural structures, city streets, or even ordinary objects, and experiment with different compositions to see how the fisheye lens can transform them into something extraordinary.
Remember, the key to mastering the fisheye lens is to experiment and let your creativity run wild. Don’t be afraid to push the boundaries and try new techniques to create stunning and unconventional images.
Share your fisheye photographs with others
Once you have created your homemade fisheye lens for your digital camera, you’ll undoubtedly want to share the unique and creative photographs you capture with it. Here are some tips on how to share your fisheye photographs with others:
1. Social Media
One of the easiest ways to share your fisheye photographs is through social media platforms such as Instagram, Facebook, and Twitter. Create a dedicated account or use hashtags to reach a wider audience interested in fisheye photography. You can also join photography communities and groups to network with like-minded individuals and receive feedback on your work.
2. Online Photography Portfolios
Showcase your fisheye photographs on online photography portfolios such as Flickr, 500px, or Behance. These platforms allow you to create albums or galleries specifically for your fisheye shots, making it easier for others to explore and appreciate your work. Don’t forget to include descriptions and tags to help people find your photographs.
Remember, the key to successfully sharing your fisheye photographs with others is to engage with the photography community. Interact with other photographers, join competitions, and seek inspiration from different sources. Don’t be afraid to experiment and push the boundaries of fisheye photography to create unique and captivating shots that will leave a lasting impression on others.
Take proper care of your fisheye lens for longevity
Once you have successfully made a fisheye lens for your digital camera, it is essential to take proper care of it to ensure its longevity and functionality. Here are some tips to help you maintain your fisheye lens:
| 1. Keep it clean: | Regularly clean the lens using a lens cleaning solution and a microfiber cloth. Avoid using harsh chemicals or abrasive materials that can damage the lens. Keeping the lens clean will help maintain its image quality. |
| 2. Protect it from scratches: | Always use lens caps or protective filters to guard the lens against scratches. When not in use, store the lens in a padded camera bag or case to minimize the risk of accidental damage. |
| 3. Handle with care: | Avoid touching the front element of the lens with your fingers as it can leave fingerprints or smudges. When attaching or detaching the lens from your camera, hold it firmly but gently to avoid any mishaps. |
| 4. Store in a dry place: | Moisture can be harmful to the lens, leading to fungus growth or corrosion. Store the fisheye lens in a dry place with low humidity to prevent any moisture-related issues. |
| 5. Avoid extreme temperatures: | Exposing the lens to extreme temperatures can cause damage. Avoid leaving the lens in a hot car or exposing it to freezing temperatures for prolonged periods of time. |
| 6. Use a lens hood: | A lens hood can help protect the lens from direct sunlight, which can lead to lens flares and reduce image contrast. Invest in a compatible lens hood for your fisheye lens to provide additional protection. |
| 7. Regularly check for damage: | Inspect your fisheye lens regularly for any signs of damage, such as cracks or loose parts. If you notice any issues, consult a professional for repair or replacement. |
By following these tips, you can ensure that your homemade fisheye lens remains in good condition, allowing you to capture unique and fascinating wide-angle images for years to come.
Question-answer:
What is a fisheye lens?
A fisheye lens is a wide-angle lens that creates a strong visual distortion, resulting in a unique curved appearance to the image.
Can I make a fisheye lens for my digital camera?
Yes, you can make a fisheye lens for your digital camera by using certain techniques and materials.
What materials do I need to make a fisheye lens?
To make a fisheye lens, you will need a convex lens, a cylindrical container, black paint or tape, and adhesive.


