
Welcome to our step-by-step guide on how to create your own DIY security camera using Raspberry Pi. With this simple and affordable project, you can monitor your home or office remotely, ensuring the safety and security of your property. Raspberry Pi, a small single-board computer, is the perfect tool for this project due to its low cost, versatility, and ease of use.
By following our instructions, you will learn how to assemble the necessary components, configure the software, and set up a live video feed accessible from any internet-connected device. Whether you want to keep an eye on your front door, backyard, or valuable possessions, this tutorial will provide you with all the information you need to build your own security camera system.
During the process, we will also explore additional features you can implement, such as motion detection, email alerts, and cloud storage. With these enhancements, your security camera will become even smarter and more efficient. So, let’s get started and turn your Raspberry Pi into a powerful security tool!
Why Use Raspberry Pi to Create a Security Camera?
There are several reasons why you should consider using a Raspberry Pi to create a security camera:
| Cost-effective: | The Raspberry Pi is an inexpensive single-board computer, making it a cost-effective solution for creating a security camera compared to purchasing a traditional security camera system. |
| Flexibility: | The Raspberry Pi is highly versatile and can be easily customized to meet your specific security camera needs. You have the freedom to choose and configure the camera module, storage options, and monitoring software according to your requirements. |
| Expandability: | With Raspberry Pi, you have the ability to expand your security camera system by adding additional sensors or modules. You can integrate features like motion detection, facial recognition, or remote access, enhancing the capabilities of your security camera. |
| DIY Approach: | Creating a security camera with Raspberry Pi allows you to learn and gain hands-on experience in electronics, programming, and networking. It’s a great DIY project that enables you to understand the inner workings of a security camera system. |
| Open Source Community: | The Raspberry Pi community is vast and actively developing new projects and software. You can benefit from the wealth of documentation, tutorials, and community support available, making it easier to troubleshoot issues and customize your security camera setup. |
Considering these advantages, using a Raspberry Pi to create a security camera system can be a cost-effective, flexible, expandable, and educational solution for ensuring the safety and security of your surroundings.
Step-by-Step Guide to Building a Raspberry Pi Security Camera
Building your own security camera using a Raspberry Pi is an exciting project that can enhance the security of your home or office. With the right hardware and software setup, you can create a reliable and cost-effective surveillance system. Here is a step-by-step guide to help you get started:
Step 1: Gather the Necessary Hardware
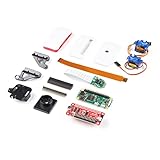
Before you begin, make sure you have all the necessary hardware components:
| – Raspberry Pi board |
| – Raspberry Pi Camera Module |
| – MicroSD card |
| – Power supply |
| – Ethernet cable or Wi-Fi dongle |
| – Mounting hardware |
Step 2: Install the Operating System
Download the latest version of Raspbian, the official operating system for Raspberry Pi, and install it on your MicroSD card. You can use the Raspberry Pi Imager tool available on the Raspberry Pi website to easily flash the operating system onto the card.
Step 3: Configure the Raspberry Pi
Insert the MicroSD card into the Raspberry Pi, connect the power supply, keyboard, mouse, and display. Boot up the Raspberry Pi and follow the on-screen prompts to configure the basic settings, such as language, timezone, and Wi-Fi credentials if applicable.
Step 4: Connect the Camera Module
Gently connect the Camera Module to the designated CSI port on the Raspberry Pi board. Make sure the connection is secure. If you are using a Raspberry Pi Zero, you will need an adapter cable to connect the camera.

Step 5: Install the Required Software
Open a terminal on the Raspberry Pi and update the system packages by running the following commands:
sudo apt update
sudo apt upgrade
Next, install the required software by entering the following command:
sudo apt install motion

Step 6: Configure the Motion Software
Edit the motion configuration file by running the following command:
sudo nano /etc/motion/motion.conf
Inside the configuration file, make the necessary changes such as setting the desired resolution, frame rate, and enabling any additional features you may require.
Step 7: Start the Surveillance System
Once you have configured the motion software, start the surveillance system by running the following command:
sudo service motion start

Your Raspberry Pi security camera is now up and running. You can access the live video feed by opening a web browser on any device connected to the same network as your Raspberry Pi and entering the IP address of the device followed by the port number specified in the motion configuration file.
That’s it! You have successfully built a Raspberry Pi security camera. Be sure to test and fine-tune the system to meet your specific needs. Enjoy enhanced security and peace of mind with your own DIY surveillance setup!
Choosing the Right Raspberry Pi Model for Your Security Camera
When it comes to building a security camera using a Raspberry Pi, one of the most important decisions you’ll need to make is choosing the right model for your needs. With several different models available, each with its own specifications and capabilities, it’s crucial to select the one that best suits your requirements.
Considerations for Choosing a Raspberry Pi Model
Here are some key factors to consider when selecting a Raspberry Pi model for your security camera:
- Performance: Determine the processing power you’ll need based on the complexity of your camera software and the number of cameras you plan to connect.
- Connectivity: Consider whether you need built-in Wi-Fi or if you’ll be using an Ethernet connection for internet access.
- Camera Interface: Check if the Raspberry Pi model you’re considering has a CSI (Camera Serial Interface) port for directly connecting a camera module.
- Video Output: Decide if you need a dedicated HDMI port for connecting a monitor or if you’ll be accessing the camera feed remotely.
- Power Requirements: Consider the power consumption and whether it can be easily powered using a standard USB power supply.
- Form Factor: Evaluate the size and physical dimensions of the Raspberry Pi model, especially if you plan to use it in a compact or discreet setup.
Comparison Table of Raspberry Pi Models
| Model | Performance | Connectivity | Camera Interface | Video Output | Power Requirements | Form Factor |
|---|---|---|---|---|---|---|
| Raspberry Pi 4 Model B | High-Performance Quad-Core | Built-in Wi-Fi, Ethernet | CSI | Dual HDMI | USB-C | Standard Size |
| Raspberry Pi 3 Model B+ | Quad-Core | Built-in Wi-Fi, Ethernet | CSI | HDMI | Micro USB | Standard Size |
| Raspberry Pi Zero W | Single-Core | Built-in Wi-Fi, Mini HDMI | CSI | N/A | Micro USB | Compact Size |
By carefully considering these factors and comparing the specifications of different Raspberry Pi models, you can choose the one that provides the optimal balance of features and performance for your security camera project.
Essential Components for Building a Raspberry Pi Security Camera
Building your own security camera using a Raspberry Pi can be a fun and rewarding project. To get started, you will need a few essential components that will form the foundation of your camera system. Here are the key components you will need:
Raspberry Pi
The Raspberry Pi is the heart of your security camera system. Choose a Raspberry Pi model that suits your needs and budget. The Raspberry Pi will handle the camera’s functions, storage, and video streaming.
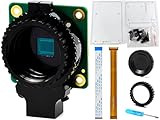
Camera Module
A camera module is essential for capturing video footage. Several camera modules are compatible with the Raspberry Pi, each offering different levels of resolution and features. Choose a camera module that suits your security requirements.
Power Supply
A stable power supply is crucial to keep your security camera running reliably. Make sure to choose a power supply that can provide enough current to support both the Raspberry Pi and the camera module.
MicroSD Card
A MicroSD card is necessary to store the Raspberry Pi’s operating system (OS) and store video footage. Select a high-quality and high-capacity MicroSD card to ensure smooth functioning and sufficient storage capacity.

Case
A case is essential to protect your Raspberry Pi and camera module from external damage. Look for a case that provides adequate ventilation and access to the necessary ports and connectors.
Network Connection
To access your security camera remotely, you will need a network connection. Connect your Raspberry Pi to your local network through Wi-Fi or Ethernet, depending on your setup and preferences.
Monitoring Device
To view the live video feed and recordings from your security camera, you will need a monitoring device such as a computer, smartphone, or tablet. Ensure that your monitoring device is compatible with the Raspberry Pi’s streaming capabilities.
Software
Software is what drives your security camera system. Choose a suitable software package that allows you to access and control your camera remotely. Popular options include MotionEyeOS, ZoneMinder, and Motion.
| Component | Description |
|---|---|
| Raspberry Pi | The main processing unit that handles camera functions and video streaming. |
| Camera Module | The module responsible for capturing video footage. |
| Power Supply | A stable power source for the Raspberry Pi and camera module. |
| MicroSD Card | Storage for the Raspberry Pi’s operating system and video footage. |
| Case | Protective housing for the Raspberry Pi and camera module. |
| Network Connection | Connectivity for remote access to the security camera system. |
| Monitoring Device | A device to view live video feed and recordings. |
| Software | The software that drives the security camera system. |
Configuring Motion Detection with Raspberry Pi
The Raspberry Pi can be used as a security camera by configuring motion detection. Motion detection allows you to monitor for any movement in the camera’s field of view and trigger actions, such as recording a video or sending an alert.

Follow these steps to configure motion detection with your Raspberry Pi:
- Connect the Raspberry Pi camera module to your Raspberry Pi board.
- Install the necessary software by running the command:
sudo apt-get install motion - Edit the motion configuration file using the command:
sudo nano /etc/motion/motion.conf - Configure the following options in the configuration file:
- Set
daemon onto run Motion as a background service. - Set
widthandheightwith the desired resolution of the camera. - Set
framerateto define the number of frames per second. - Set
target_dirto specify the directory to save the captured videos or images. - Enable
webcam_localhostto access the camera stream locally.
- Set
- Save the changes and exit the text editor.
- Start the motion service by running the command:
sudo service motion start - Access the camera stream by typing the Raspberry Pi’s IP address followed by the port number (default is 8081) in a web browser on your network.
With motion detection configured, your Raspberry Pi security camera is now ready to capture and react to any movement it detects. You can explore additional configuration options in the motion configuration file to enhance the camera’s functionality.
Setting up Remote Access for Your Raspberry Pi Security Camera
Once you have successfully set up your Raspberry Pi security camera, you may want to be able to access it remotely from anywhere. This will allow you to monitor your camera’s feed even when you are not at home. Here are the steps to set up remote access for your Raspberry Pi security camera:
| Step 1: | Enable SSH |
| Step 2: | Set Up Port Forwarding |
| Step 3: | Obtain Your Public IP Address |
| Step 4: | Configure Dynamic DNS |
| Step 5: | Access Your Raspberry Pi |
Step 1: Enable SSH
SSH (Secure Shell) allows you to remotely access and control your Raspberry Pi. To enable SSH, open a terminal on your Raspberry Pi and enter the following command:
sudo raspi-configNavigate to “Interfacing Options” and select “SSH”. Choose “Yes” to enable SSH and then select “Ok”.
Step 2: Set Up Port Forwarding
To access your Raspberry Pi security camera from a remote location, you need to set up port forwarding on your router. Every router has a different interface, so consult your router’s documentation to learn how to set up port forwarding.
Step 3: Obtain Your Public IP Address
To access your Raspberry Pi security camera remotely, you need to know its public IP address. You can obtain this address by visiting a website like WhatIsMyIP or by searching “What is my IP address” on a search engine.
Step 4: Configure Dynamic DNS
If your internet service provider assigns you a dynamic IP address (one that changes periodically), you will need to set up Dynamic DNS. Dynamic DNS allows you to use a domain name instead of an IP address to access your Raspberry Pi security camera. There are many dynamic DNS services available, and most routers have built-in support for them.
Step 5: Access Your Raspberry Pi
Once you have set up port forwarding and configured dynamic DNS, you can access your Raspberry Pi security camera from anywhere by opening an SSH client and entering your public IP address or domain name. You may need to provide your username and password to log in.
With remote access set up, you can now monitor your Raspberry Pi security camera’s feed from anywhere, giving you peace of mind and added security.
Options for Storing and Managing Surveillance Footage
When it comes to setting up a security camera system using Raspberry Pi, it is crucial to consider how you will store and manage the surveillance footage. This is important for both the security and convenience of accessing the recorded videos.
There are several options available for storing the surveillance footage from your Raspberry Pi security camera:
1. Local Storage
One option is to save the footage directly to a local storage device connected to your Raspberry Pi. This can be a USB drive, an external hard drive, or a network-attached storage (NAS) device. Local storage provides the advantage of quick and easy access to the videos, as they are stored on-site. However, it also has limitations in terms of storage capacity, and you need to ensure the physical security of the storage device.
2. Cloud Storage
Another option is to use cloud storage services to save your surveillance footage. Cloud storage allows for remote access to your videos from anywhere with an internet connection. It also provides secure storage and backups, so you don’t have to worry about losing your footage due to hardware failure or physical damage. However, it may come with a subscription fee and requires a reliable internet connection for uploading and accessing the videos.
When choosing a cloud storage provider, make sure to consider factors such as storage capacity, data privacy, and pricing. Some popular options include Google Drive, Dropbox, and Amazon S3.
In addition to storage, you also need to consider how you will manage and organize your surveillance footage:
3. Video Management Software
To efficiently manage and organize your surveillance footage, you can use video management software (VMS). VMS allows you to view, search, and analyze your recorded videos, as well as set up motion detection alerts and schedule recordings. There are both free and paid VMS options available, depending on your needs and requirements.
Some popular video management software for Raspberry Pi security camera setups include MotionEyeOS, ZoneMinder, and Shinobi.
With the right combination of storage and management options, you can ensure that your Raspberry Pi security camera system effectively records and protects your surveillance footage.
Enhancing Security with Additional Features for Your Raspberry Pi Camera
While a basic security camera setup using a Raspberry Pi can provide valuable surveillance for your home or office, you can enhance its capabilities by adding several additional features. These features will help you improve security, gather more information, and make better use of your camera system.
1. Motion Detection: By implementing motion detection technology, you can program your Raspberry Pi camera to start recording only when movement is detected within its field of view. This will save storage space and allow you to quickly review important footage.
2. Email Alerts: Set up your Raspberry Pi camera to automatically send email alerts whenever motion is detected. This way, you can receive notifications and take immediate action if an intruder or any suspicious activity is captured on camera.
3. Live Streaming: With the right configuration, you can set up your Raspberry Pi camera to stream live video feed over the internet. This will enable you to remotely monitor your property in real-time from any device with internet access.
4. Multiple Camera Setup: If you want to cover a larger area or monitor different angles, you can connect multiple Raspberry Pi cameras to a single system. This way, you’ll have a comprehensive surveillance network covering all your desired locations.
5. Video Analytics: By leveraging video analytics software, you can extract valuable data from your camera footage. This includes object detection, facial recognition, people counting, and much more. Such analytics can provide real-time insights and aid in improving security measures.
6. Access Control Integration: Integrate your Raspberry Pi camera with your existing access control system to enhance security further. By linking the camera with access control events, you can automatically trigger recording or adjust camera settings based on specific actions or alarms.
7. Remote Access: Set up remote access to your Raspberry Pi camera system, allowing you to view live feeds or recorded footage from anywhere in the world. This enables you to check on your property even when you’re away, increasing peace of mind.
8. Time-Lapse Recording: Utilize your Raspberry Pi camera’s capabilities to create time-lapse videos. This feature can be useful for monitoring long-term construction projects, capturing the changing seasons, or simply creating creative visual content.
9. Infrared Illumination: Consider adding infrared illumination to your Raspberry Pi camera setup. This will allow for better visibility in low-light environments, ensuring that you capture clear footage even at night.
10. Cloud Storage: Instead of storing your camera footage locally, consider utilizing cloud storage solutions. This will provide additional security by keeping your footage safe, even if the Raspberry Pi is compromised or damaged.
By incorporating these additional features into your Raspberry Pi camera setup, you can optimize your security system, enhance functionality, and make the most out of your surveillance efforts.
FAQ,
What is a Raspberry Pi?
Raspberry Pi is a small, affordable single-board computer that can be used for various projects and purposes.
Can I use a Raspberry Pi as a security camera?
Yes, you can use a Raspberry Pi as a security camera by connecting a camera module and installing the necessary software.
What camera module should I use for a Raspberry Pi security camera?
You can use the Raspberry Pi Camera Module, which is specifically designed for the Raspberry Pi and provides high-quality image and video capture.
What software do I need to install for a Raspberry Pi security camera?
You can install software like Motion or ZoneMinder to turn your Raspberry Pi into a security camera. These software packages allow you to configure motion detection, recording, and live streaming.
How can I access the live video feed from my Raspberry Pi security camera?
You can access the live video feed from your Raspberry Pi security camera by connecting to the Raspberry Pi’s IP address using a web browser or a video streaming application.


