If you are installing security cameras at your home or workplace, having the right coaxial cable is crucial for proper transmission of video signals. While you can easily find ready-to-use coax cables in the market, making your own can save you money and ensure that you have the exact length you need. Plus, it can be a fun and rewarding DIY project!
Making coax cables may seem intimidating at first, but it is actually a straightforward process. With a bit of knowledge and the right tools, you can create professional-quality coax cables that will ensure optimal performance for your security cameras. In this article, we will guide you through the steps of making coax cables for your security camera system.
Step 1: Gather the Materials
The first step in making coax cables is gathering all the necessary materials and tools. You will need coaxial cable, connectors, a coaxial cable stripper, a coaxial crimping tool, and a cable tester. Coaxial cable strippers and crimping tools are specifically designed for coax cables and will make the process much easier and more precise.
Pro tip: Make sure to choose high-quality coaxial cable and connectors to ensure excellent video transmission and durability.

Understanding the Importance of Coax Cable for Security Cameras
When it comes to setting up a security camera system, the choice of cables is crucial. Coax cable, also known as coaxial cable, plays a significant role in ensuring the proper functioning of security cameras.
What is Coax Cable?
Coax cable is a type of cable that consists of a central conductor, an insulating layer, a metallic shield, and an outer insulating jacket. It is designed to transmit signals with minimal interference, making it ideal for security camera installations.
Coax cable is commonly used for security camera systems because it can handle long cable runs without signal loss or degradation. It provides high-quality video transmission, ensuring clear and sharp image quality.
The Importance of Coax Cable for Security Cameras
Coax cable plays a crucial role in the overall performance and reliability of security camera systems. Here’s why it is important:
| Features | Importance |
|---|---|
| Signal Transmission | Coax cable ensures efficient transmission of video signals from the security cameras to the recording devices. It minimizes signal loss, noise, and interference, resulting in clear and high-quality video footage. |
| Distance | Coax cable is capable of handling long cable runs, allowing for flexible placement of security cameras. It can transmit signals over extended distances without any loss in signal quality. |
| Compatibility | Most security cameras are designed to be compatible with coax cable, making it a widely adopted choice for security camera installations. It ensures seamless integration between the cameras, cables, and recording devices. |
| Reliability | Coax cable is known for its durability and reliability. It is designed to withstand harsh environmental conditions, such as extreme temperatures and moisture, making it suitable for both indoor and outdoor security camera installations. |
In conclusion, selecting the right coax cable for your security camera system is vital for optimal performance, signal integrity, and reliability. It is recommended to consult with a professional to determine the appropriate coax cable type and specifications based on your specific security camera setup requirements.
Materials Needed for Making Coax Cable for Security Cameras
When it comes to setting up security cameras, having the right materials is crucial. One of the most important components of a security camera system is the coax cable. This cable connects the camera to the recording device or monitor, allowing for the transmission of video and audio signals.
Here are the materials you will need to make coax cable for security cameras:
1. Coaxial Cable: The first and most important material you will need is the coaxial cable itself. You can choose between RG-59 and RG-6 cables, which differ in terms of signal quality and maximum transmission distance. Ensure that the cable is long enough to reach the camera’s location without any strain.
2. Cable Strippers and Cutters: To properly prepare the coaxial cable for installation, you will need cable strippers and cutters. These tools allow you to remove the outer insulation and prepare the inner copper wire for connection.
3. Crimping Tool: A crimping tool is needed to attach connectors to the coaxial cable. This tool allows you to secure the connectors onto the cable, ensuring a strong and reliable connection.
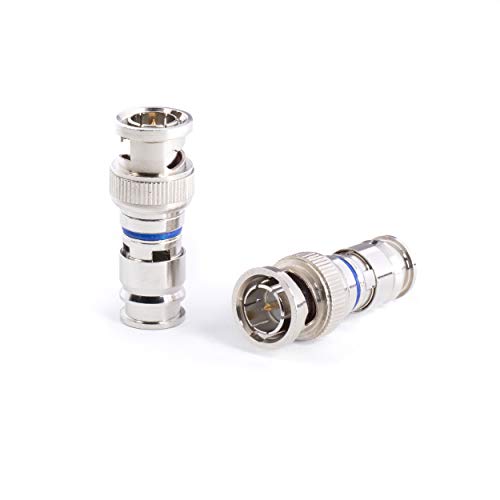
4. Coaxial Connectors: You will need coaxial connectors, such as BNC connectors, to connect the cable to the camera and the recording device or monitor. These connectors ensure a secure and stable connection, preventing any signal loss.

5. Heat Shrink Tubing: Heat shrink tubing is used to provide additional protection and insulation to the coaxial cable. It is applied over the connectors and then heated, which causes the tubing to shrink and seal the connection.
6. Cable Ties: Cable ties are essential for cable management and keeping the coaxial cable organized. They help secure the cable to walls or other structures, ensuring a neat installation.
7. Electrical Tape: Electrical tape is useful for securing the coaxial cable connectors and providing extra protection against moisture or other external elements. It helps keep the connection stable and secure.
Remember to carefully plan the installation of your security camera system and choose high-quality materials to ensure optimal performance and longevity. By having the right materials on hand, you can successfully make and install your own coax cable for security cameras.
Disclaimer: Ensure you have a clear understanding of electrical and cabling work before attempting any DIY projects. Always prioritize safety and consult a professional if needed.

Step-by-Step Guide to Stripping Coax Cable
Stripping coax cable is an essential skill when it comes to setting up security cameras. Whether you’re installing a new system or troubleshooting an existing one, knowing how to properly strip coax cable can save you time and ensure a reliable connection. Follow this step-by-step guide to strip coax cable like a pro.
Gather the Tools
Before you begin, make sure you have the necessary tools at hand. You’ll need a coaxial cable stripper, a coaxial cable cutter, and a small screwdriver. These tools can be found at most hardware stores or online.
Measure and Mark the Cable
Start by measuring the length of cable you need and mark it with a pen or marker. It’s important to measure carefully to avoid wasting any cable. Make sure to add a little extra length for flexibility.
Strip the Outer Jacket
Using the coaxial cable stripper, carefully cut through the outer jacket of the cable at one end, about an inch away from your mark. Rotate the stripper around the cable a few times to ensure a clean cut. Then, gently remove the cut section of the jacket, being careful not to damage the inner wires.
Expose the Shield
Once the outer jacket is removed, you’ll see a metallic shield covering the inner wires. Use the small screwdriver to carefully lift the shield away from the inner wires, exposing the white insulation underneath. Be cautious not to damage the insulation or the wires during this process.
Strip the Insulation
Now that the shield is lifted, you can strip the insulation from the inner wires. Insert the coaxial cable stripper into the exposed area and rotate it a few times to make a clean cut. Gently remove the cut section of insulation, being careful not to nick or damage the wires inside.
Check for Damage
Once you have stripped the insulation, inspect the exposed wires for any signs of damage. Look for cuts, breaks, or frayed ends. If you notice any damage, it’s best to trim the wires and start the insulation stripping process again.
Repeat the Steps
Repeat the stripping process on the other end of the coax cable, following the same steps. Remember to measure carefully and strip the outer jacket, expose the shield, and strip the insulation. This will ensure a clean and reliable connection.
Trim the Wires
After you have stripped both ends of the coax cable, use the coaxial cable cutter to trim the inner wires to the desired length. Make sure all the wires are trimmed evenly to ensure a proper connection.
Attach Connectors
To complete the process, attach the appropriate connectors to each end of the coax cable. This will depend on your specific security camera setup. Make sure to follow the instructions provided with your connectors for a secure and proper installation.

| Step | Description |
|---|---|
| Gather the Tools | Obtain a coaxial cable stripper, a coaxial cable cutter, and a small screwdriver. |
| Measure and Mark the Cable | Measure the length of cable you need and mark it with a pen or marker. |
| Strip the Outer Jacket | Carefully cut through the outer jacket of the cable and remove the cut section. |
| Expose the Shield | Lift the metallic shield away from the inner wires. |
| Strip the Insulation | Strip the insulation from the inner wires using the coaxial cable stripper. |
| Check for Damage | Inspect the exposed wires for any signs of damage. |
| Repeat the Steps | Strip the other end of the coax cable following the same steps. |
| Trim the Wires | Trim the inner wires to the desired length using the coaxial cable cutter. |
| Attach Connectors | Attach the appropriate connectors to each end of the coax cable. |
Crimping Connectors onto Coax Cable
Once you have prepared the coax cable by stripping away the outer jacket and shielding, it’s time to crimp connectors onto the cable. Crimping connectors onto coax cable is a relatively simple process that requires a few basic tools.
Here is a step-by-step guide on how to crimp connectors onto coax cable:
- Choose the appropriate connector for your coax cable. There are various types of connectors available, such as BNC, RCA, or F-type connectors. Make sure you select the connector that is compatible with your security camera system.
- Slide the connector’s body onto the coax cable, with the threaded part facing towards the stripped end of the cable.
- Expose the inner core of the coax cable by carefully trimming away the insulation using wire strippers. Be careful not to damage the inner core during this process.
- Once the inner core is exposed, twist the strands together to prevent them from fraying or separating.
- Insert the twisted inner core into the connector’s pin, ensuring it goes all the way in. The pin should make contact with the center conductor of the coax cable.
- Hold the connector securely in one hand and use a crimping tool to crimp the connector around the coax cable. The crimping process will secure the connector and create a strong connection.
- Repeat the process for the other end of the coax cable if needed.
After crimping the connectors onto the coax cable, you can now connect your security cameras to the DVR or monitor. Ensure the connectors are securely tightened to prevent signal loss or interference.
Crimping connectors onto coax cable is a crucial step in setting up a reliable and high-quality security camera system. Taking the time to properly crimp the connectors will ensure a strong and stable connection, providing you with clear and uninterrupted video footage.

Choosing the Right Type of Connectors for Coax Cable
When it comes to setting up a security camera system, choosing the right type of connectors for your coax cable is essential. The connectors play a crucial role in ensuring proper signal transmission and maintaining a reliable connection. Here are a few factors to consider when selecting connectors for your coax cable:
1. BNC Connectors:
BNC (Bayonet Neill-Concelman) connectors are commonly used in CCTV and security camera systems. They are popular because of their easy installation and great signal transmission capabilities. BNC connectors provide a secure connection and can be quickly connected or disconnected, making them ideal for residential and commercial applications.
2. RCA Connectors:
RCA (Radio Corporation of America) connectors are commonly used for audio and video connections. They are easy to recognize with their distinct red, white, and yellow color-coding. While RCA connectors are not as secure as BNC connectors, they are still suitable for some security camera systems, especially if the distance between the camera and the recording device is short.
3. Twist-On Connectors:
Twist-on connectors are often used in DIY installations. They are easy to install and do not require any special tools. Simply strip the coax cable, twist on the connector, and you’re good to go. However, it’s worth noting that twist-on connectors may not provide the same level of security and signal performance as BNC or RCA connectors.
When choosing connectors for your coax cable, it’s essential to consider the specific requirements of your security camera system. Factors such as distance, signal quality, and ease of installation should all be taken into account. It may be beneficial to consult with a professional or refer to the manufacturer’s recommendations to ensure you select the most suitable connectors for your security cameras.
Remember, selecting the right type of connectors for your coax cable is critical to ensure optimal performance and reliability for your security camera system. By choosing the appropriate connectors, you can achieve clear and uninterrupted surveillance footage for enhanced security and peace of mind.
Testing the Coax Cable for Proper Signal Transmission
Once you have successfully made the coax cable for your security cameras, it is important to test the cable to ensure proper signal transmission. Here are the steps you can follow to test the coax cable:
- Disconnect the coax cable from the security camera and the DVR or monitor.
- Connect one end of a coax continuity tester to the BNC connector on the cable.
- Connect the other end of the continuity tester to the center pin of the BNC connector.
- If the tester shows a continuity light or a sound is emitted, it means that the center pin is properly connected and the cable is intact.
- If the tester does not show a continuity light or a sound, it means there is a discontinuity in the cable.
- To further diagnose the issue, you can use a multimeter set to the Ohm scale. Touch one end of the multimeter probe to the center pin of the BNC connector and the other end to the outer metallic shield of the BNC connector.
- If the multimeter shows a reading close to zero, it means that the cable is properly connected. If the reading is infinite or significantly higher, there is a discontinuity in the cable.
- Repeat the process for all the coax cables you have made for your security cameras.
By testing the coax cables for proper signal transmission, you can ensure that your security cameras will function effectively. In case you detect any issues during the testing process, you may need to troubleshoot or remake the cables to ensure optimal performance.
Securing the Coax Cable for Installation
When it comes to installing security cameras, properly securing the coax cable is essential for ensuring a secure and reliable connection. Here are some steps to follow:
1. Plan the cable route:
Before you begin installing the coax cable, it’s crucial to plan the cable route. This involves identifying the best path from the camera to the recording device, taking into account any obstacles or potential interference.
2. Use cable clips:
To secure the coax cable along the planned route, use cable clips. These clips are specifically designed to hold the cable in place, preventing it from being accidentally pulled or damaged. Make sure to place the clips at regular intervals to provide proper support.
3. Avoid sharp bends:
When securing the coax cable, it’s important to avoid sharp bends or kinks. These can cause signal loss or damage to the cable. Instead, make gentle, gradual bends to ensure a smooth and uninterrupted signal flow.
4. Protect the cable outdoors:
If the cable will be exposed to outdoor elements, it’s essential to provide extra protection. Use conduit or weatherproof cable enclosures to safeguard the coax cable from moisture, UV rays, and other potential damages. This will help prolong the lifespan of the cable and maintain signal quality.
5. Label and organize:
As you secure the coax cable, consider labeling and organizing it. This will make future maintenance or troubleshooting much easier. Use cable labels or markers to identify each cable, and keep a record of the cable connections for reference.
By following these steps, you can ensure that the coax cable for your security cameras is securely installed and provides a reliable connection.
Tips and Tricks for Making Coax Cable for Security Cameras
Making your own coax cable for security cameras can save you money and give you more control over the length and quality of your cables. Here are some tips and tricks to help you create the perfect coax cable for your security camera installation:
| Tips | Tricks |
|---|---|
| Measure twice, cut once: | Before cutting your coax cable, double-check your measurements to ensure you have the correct length. It’s better to have a little bit of extra cable than to come up short. |
| Use quality connectors: | Invest in high-quality BNC connectors to ensure a strong and reliable connection. Cheap connectors may cause signal loss and affect the performance of your security camera. |
| Properly strip the cable: | Use a coaxial cable stripper to remove the outer insulation and shield without damaging the inner conductor. Be careful not to cut into the inner copper wire during the stripping process. |
| Twist the shielding: | After stripping the cable, twist the shielding around the inner conductor to maintain proper grounding and reduce interference. This will help ensure a clear and strong signal transmission. |
| Secure the connectors: | Once you have attached the connectors to the cable, use a compression tool to ensure a tight and secure connection. This will prevent any signal loss or interference. |
| Test the cable before installation: | Before running the cable through walls or ceilings, test it with a multimeter or cable tester to verify that it is working properly. This will save you time and effort if there are any issues with the cable. |
By following these tips and tricks, you can create high-quality coax cables for your security cameras that will provide you with clear and reliable video footage. Remember to take your time and be careful during the cable-making process to ensure the best results.
Frequently Asked Questions about Making Coax Cable for Security Cameras
1. What is coax cable?
Coax cable, short for coaxial cable, is a type of electrical cable that is commonly used for transmitting audio, video, and data signals. It consists of a central conductor, surrounded by insulation, a shielding layer, and an outer protective jacket.
2. Why is coax cable used for security cameras?
Coax cable is widely used for security cameras due to its ability to carry high-frequency signals over long distances without much loss of quality. It provides a secure and reliable connection that is essential for transmitting video footage from security cameras to monitoring devices.
3. Can I make my own coax cable for security cameras?
Yes, it is possible to make your own coax cable for security cameras. However, it requires some knowledge of cable assembly and proper tools to ensure a good connection and signal quality. It is recommended to consult a professional or follow a guide to ensure you do it correctly.
4. What are the steps involved in making coax cable for security cameras?
The process of making coax cable for security cameras involves the following steps:
- Choose the appropriate coax cable type based on your camera and application requirements.
- Prepare the cable by stripping the outer jacket and removing a section of the insulation to expose the central conductor.
- Attach the connector to the cable, making sure to match the conductor and shielding correctly.
- Check the connection for continuity and proper signal transmission.
- Secure any connections with appropriate tools and materials.
5. Are there any risks associated with making coax cable for security cameras?
Making coax cable for security cameras can be challenging, especially without the proper experience and tools. Improperly made cables can result in poor signal quality, interference, and even damage to your security camera system. It is advisable to seek professional assistance or thoroughly educate yourself before attempting to make your own coax cable.
6. Can I use any type of coax cable for security cameras?
No, it is important to select the appropriate type of coax cable for security cameras based on your specific requirements. Different cameras and applications may require different cable types, such as RG59 or RG6. Consult the camera manufacturer’s recommendations or seek professional advice to ensure you choose the right cable.
7. Is it cost-effective to make your own coax cable for security cameras?
The cost-effectiveness of making your own coax cable for security cameras depends on various factors, such as the quantity of cable needed and the tools and materials required. In some cases, it may be more cost-effective to purchase pre-made coax cables. However, if you have the necessary skills and resources, making your own cables can provide flexibility and customization options.
FAQ,
What is coax cable?
Coax cable, also known as coaxial cable, is a type of electrical cable that is commonly used for transmitting audio and video signals. It consists of a central conductor, which is surrounded by a layer of insulating material, and then a metallic shield. This construction helps to minimize interference and signal loss.
Why is coax cable commonly used for security cameras?
Coax cable is commonly used for security cameras because it provides a reliable and high-quality connection. It is capable of transmitting video signals over long distances without loss of quality. Additionally, coaxial cable is relatively inexpensive and easy to install, making it a popular choice for security camera systems.
Can I make my own coax cable for security cameras?
Yes, it is possible to make your own coax cable for security cameras. However, it can be a complex process that requires specialized tools and knowledge. If you are not experienced with working with coax cable, it may be best to purchase pre-made cables that are specifically designed for security camera systems.