
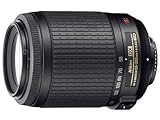
Have you ever wondered if it’s possible to create your own DSLR camera lens at home? While it may seem like a daunting task, with the right tools and a little bit of patience, you can actually make your own lens that produces high-quality images. Not only is this a fun DIY project, but it also allows you to experiment with different focal lengths and lens types without breaking the bank.
To start, you’ll need a few key components: a lens mount, lens elements, aperture blades, and a lens barrel. The lens mount is what attaches the lens to your camera body, so make sure you choose one that is compatible with your camera model. For the lens elements, you can either repurpose old lenses or purchase individual glass elements online. Keep in mind that different lens elements will give you different effects, so feel free to mix and match to achieve your desired results.
Next, you’ll need to assemble the lens elements into the lens barrel. This involves carefully aligning each element and securing them in place with adhesive or by using thread to create a lens stack. It’s important to note that the precise alignment of the elements is crucial for sharp and clear images, so take your time with this step. Once the lens elements are securely in place, you can attach the lens mount and aperture blades to the lens barrel.
Finally, it’s time to test your homemade lens. Mount it onto your DSLR camera, set the desired aperture, and start shooting! You may need to experiment with different settings and compositions to get the best results, but that’s all part of the fun. Keep in mind that since you’re creating a lens from scratch, it may not perform as well as a professionally manufactured one. However, with some practice and fine-tuning, you’ll be amazed at the quality of the images you can achieve.
So why not give it a try? Making your own DSLR camera lens at home is not only a rewarding experience but also a great way to expand your photography skills. With a bit of creativity, dedication, and some basic knowledge of lens mechanics, you can create a unique lens that adds a personal touch to your photography. Get ready to embark on an exciting journey into the world of DIY camera gear!

Gather the necessary materials
Before you start making a DSLR camera lens at home, it’s important to gather all the necessary materials. Here’s a list of what you’ll need:
Glass element |
Make sure to get a high-quality glass element that is suitable for use as a camera lens. This can be purchased online or salvaged from old lenses. |
Adapter ring |
You’ll need an adapter ring that allows the glass element to be attached to your camera body. This ring should match your camera’s lens mount. |
Camera body |
You’ll obviously need a DSLR camera body to attach the lens to. Make sure it is compatible with the adapter ring you have chosen. |
Mounting tools |
Various tools such as screwdrivers, wrenches, or pliers may be required to attach the lens to the adapter ring or camera body. Have a set of basic tools handy. |
Optional accessories |
Depending on the type of lens you want to create, you may need additional accessories such as lens caps, filters, or lens hoods. These can enhance the functionality and protection of your DIY lens. |
Once you have gathered all the necessary materials, you can proceed to the next steps of creating your homemade DSLR camera lens.
Select the lens elements
When it comes to making a DSLR camera lens at home, one of the most important aspects is selecting the right lens elements. The lens elements are the individual glass components within the lens that work together to focus and capture light. Each element plays a crucial role in determining the overall image quality and performance of the lens.
In order to select the lens elements for your homemade DSLR camera lens, there are a few things to consider:
1. Focal Length:
The focal length of a lens determines its angle of view and magnification capabilities. It is important to choose lens elements with the desired focal length to achieve the desired field of view and level of zoom. Different lens elements can be combined to create a lens with a specific focal length.

2. Aperture:
The aperture of a lens controls the amount of light that enters the camera. It is important to select lens elements with the desired aperture range to achieve the desired depth of field and low-light performance. Different lens elements can have different maximum and minimum aperture values.
Pro tip: Consider using lens elements with a wider maximum aperture for better low-light performance and the ability to create a shallower depth of field.
When selecting lens elements, it is also important to consider their optical quality. Look for lens elements that are made from high-quality glass and have been coated to reduce lens flare and ensure sharpness. Additionally, consider the size and weight of the lens elements, as these factors can affect the overall design and ergonomics of your homemade DSLR camera lens.
By carefully selecting the lens elements, you can create a homemade DSLR camera lens that meets your specific needs and produces high-quality images.
Acquire the lens barrel and mount
To make a DSLR camera lens at home, the first step is to acquire a lens barrel and mount. The lens barrel will serve as the main structure that holds all the necessary lens elements and components. You can find an empty lens barrel online or salvage one from an old camera lens.

Once you have the lens barrel, you will also need to acquire a lens mount. The lens mount is the part of the lens that attaches to the camera body. It allows the lens to communicate with the camera and transfer information such as focal length and aperture settings.
Make sure that the lens mount you choose is compatible with your camera body. Different camera brands use different lens mounts, so it’s essential to research and find the right mount for your camera model.
When acquiring the lens barrel and mount, it’s essential to ensure that they are in good condition. Check for any visible damage or scratches that may affect the performance of the lens. Additionally, make sure the lens mount is securely attached to the lens barrel and can withstand the weight and movement of the lens elements.
Once you have acquired the lens barrel and mount, you can proceed to the next steps in building your DIY DSLR camera lens.
Prepare the lens elements
Before you start building the DSLR camera lens, you need to gather all the necessary lens elements and gather some other tools and materials. Here is a list of what you will need:

Tools and materials:
- A magnifying glass or a lens element from an old pair of glasses
- A small glass or plastic container
- A small piece of aluminum foil
- A black permanent marker
- A ruler
- A craft knife
- A piece of sandpaper
- A lens cleaning cloth
Now that you have all the necessary tools and materials, follow the steps below to prepare the lens elements:
Step 1: Clean the lens element
Use the lens cleaning cloth to gently clean the lens element. Make sure there are no smudges, dust, or fingerprints on it, as they can affect the image quality.
Step 2: Measure and mark the center of the lens element
Using the ruler, measure the diameter of the lens element and mark the center point with a black permanent marker. This will help you align the lens elements later on.
Step 3: Cut the aluminum foil
Cut a small piece of aluminum foil that is slightly larger than the lens element. This will be used to create a makeshift lens mount.
Step 4: Sand the edges of the lens element
Using the sandpaper, carefully sand the edges of the lens element to remove any sharp edges or rough spots. This will prevent any damage to your camera or sensor when you attach the lens.

Once you have completed these steps, you are ready to move on to the next phase of building your DIY DSLR camera lens.
Clean the Lens Elements
Keeping your DSLR camera lens clean is essential to maintaining image quality and preventing any unwanted artifacts or smudges from appearing in your photos. Here are a few steps on how to properly clean the lens elements:
-
Gather the necessary supplies
Before starting the cleaning process, gather the necessary supplies: a lens cleaning solution, lens tissue or microfiber cloth, a blower brush, and a lens cleaning pen.
-
Remove any dust or debris
Use a blower brush to gently remove any loose dust or debris from the lens elements. Hold the camera with the lens facing downwards to prevent any particles from falling back onto the lens.
-
Apply the lens cleaning solution
Apply a small amount of lens cleaning solution to a lens tissue or microfiber cloth. Avoid applying the solution directly onto the lens, as it may damage the lens’ coatings. Instead, lightly dampen the cloth.
-
Clean the lens elements
Gently wipe the lens elements in a circular motion, starting from the center and moving towards the outer edges. Be careful not to apply too much pressure, as it could cause scratches. Use a lens cleaning pen for more stubborn smudges or fingerprints.
-
Inspect the lens
After cleaning, inspect the lens for any remaining smudges or dust particles. If necessary, repeat the cleaning process until the lens is completely clean.
By regularly cleaning your DSLR camera lens, you can ensure optimal image quality and prolong the lifespan of your equipment. Remember to exercise caution and avoid using any abrasive materials or harsh chemicals when cleaning.
Attach the lens elements together
To assemble your DIY DSLR camera lens, you will need to attach the lens elements together. The specific order and orientation will vary depending on the type of lens you are creating and the elements you have available. However, the general process is similar for most lenses.
1. Gather the lens elements: Start by collecting all the lens elements you have gathered or purchased for your lens. These elements will typically include a front element, several middle elements, and a rear element.

2. Clean the lens elements: Before attaching them together, make sure that each lens element is clean and free from any dust or smudges. Use a microfiber cloth or lens cleaning solution to gently wipe each element clean.
3. Identify the correct orientation: Each lens element will have a front and a back side. Look for any marks or indicators on the elements that indicate the correct orientation. These marks may include arrows, numbers, or specific notches.
4. Line up the elements: Once you have identified the correct orientation, carefully place each lens element on top of each other in the correct order. Take your time to ensure that each element is aligned properly.
5. Secure the elements: To keep the lens elements in place, you can use a lens barrel or any other cylindrical object that fits the size of the lens elements. Insert the elements into the barrel and ensure that they are held securely in place.
6. Test the lens: After you have attached the lens elements together, it is important to test the lens to ensure that it is functioning correctly. Attach the lens to your DSLR camera and take some test shots to evaluate the image quality and focus.

By following these steps, you can successfully attach the lens elements together for your DIY DSLR camera lens. Remember to be careful and take your time during this process to avoid damaging any of the lens elements.
Assemble the lenses
Once you have gathered all the necessary materials and components, it’s time to assemble the lenses for your homemade DSLR camera. Follow these steps to correctly assemble the lenses:
Step 1: Attach the lens mount
Take your lens mount and carefully attach it to the camera body. Make sure it is securely fastened and aligned properly to ensure that your lens will fit correctly.
Step 2: Insert the lens elements
Take your lens elements and carefully insert them into the lens mount. Make sure you follow the correct order as outlined in the lens diagram or instruction manual.
Each lens element has a specific purpose in focusing and magnifying the image, so it’s important to insert them in the correct sequence. Be gentle while handling the lens elements to avoid scratching or damaging them.
Step 3: Secure the lens barrel
Once all the lens elements are in place, carefully screw on the lens barrel to hold everything together. Make sure it is tightened securely but be cautious not to overtighten, as this may cause damage to the lens assembly.
Check that the lens moves smoothly, allowing you to adjust focus and zoom if applicable. If there are any issues, readjust the lens elements or double-check that they are in the correct order.
It’s worth noting that this homemade DSLR lens may not have the same optical quality as a commercially manufactured lens. However, with some experimentation and practice, you can still achieve great results.
Remember to handle the lens assembly with care to avoid any damage during use. Now that you have successfully assembled the lenses, you are one step closer to capturing stunning images with your homemade DSLR camera.
Place the lens elements in the lens barrel
Once you have gathered all the necessary lens elements, it’s time to assemble them inside the lens barrel. The lens barrel is the outer casing that holds the lens elements in place and connects to the camera body.
Before you begin, make sure to clean each lens element thoroughly using a lens cleaning solution and a microfiber cloth. Any dust or debris on the lens elements can significantly affect the image quality.
Step 1: Identify the lens elements
Each lens element has a specific shape and size, and it’s important to identify them correctly before placing them in the lens barrel. Refer to the lens diagram or documentation provided with your lens kit to ensure proper identification.
Step 2: Arrange the lens elements
Once you have identified the lens elements, arrange them in the correct order according to the lens design. The diagram or documentation should specify the order in which the lens elements should be placed.
Take extra care when handling the lens elements to avoid any fingerprints or smudges, as they can affect the image quality. Hold the lens elements by their edges and avoid touching the optical surfaces.
Step 3: Secure the lens elements
After arranging the lens elements, carefully place them inside the lens barrel one by one. Make sure each lens element is properly aligned and fits snugly in its designated position.

You may need to use thin spacers or shims to adjust the spacing between lens elements if required by the lens design. These spacers ensure the correct distance between the lens elements for optimal performance.
Step 4: Check for proper alignment
Once all the lens elements are in place, double-check their alignment to ensure they are correctly positioned. Use a light source and look through the lens barrel to see if the elements form a clear and well-centered image.
| Tip: | It’s advisable to use a lens alignment tool or consult a professional if you are unsure about the correct positioning of the lens elements. |
After confirming the alignment, secure the lens elements in place using the lens barrel’s mechanism, such as retaining rings or screws.
Handling the lens elements with care and precision during this process is crucial to achieve optimal image quality. Once the lens elements are securely placed in the lens barrel, your DIY camera lens is ready for use!
Question-answer:
What materials do I need to make a DSLR camera lens at home?
To make a DSLR camera lens at home, you will need the following materials: a lens mount, lens elements, lens barrel, focal length adjustment mechanism, aperture control mechanism, and a lens cap.
Can I make a DSLR camera lens without any prior experience or technical knowledge?
Making a DSLR camera lens at home requires a certain level of technical knowledge and experience. It involves precise measurements, intricate assembly, and an understanding of optical principles. It is recommended to have some background in optics or lens manufacturing before attempting to make a lens at home.
Are homemade DSLR camera lenses comparable in quality to commercial lenses?
The quality of a homemade DSLR camera lens may not be comparable to that of a commercial lens. Commercial lenses are manufactured using precision tools, advanced materials, and undergo rigorous testing to ensure optimum image quality. Homemade lenses, while they can be functional, may not have the same level of optical quality or performance.


