
If you are passionate about photography or videography, you know how important it is to have stable footage. Camera movement can ruin an otherwise perfect shot, especially when using a DSLR camera. This is where a gimbal comes in handy. A gimbal is a device that helps stabilize your camera and allows you to capture smooth, steady footage.
While there are many gimbals available on the market, they can be quite expensive. However, you can save money by making your own gimbal for your DSLR camera. Not only will this save you some cash, but it will also give you the satisfaction of creating something useful with your own hands.
To make a gimbal for your DSLR camera, you will need a few materials. The most important component is a set of brushless motors, which will provide stabilization. You will also need a frame or mounting plate to hold the camera and the motors. Additionally, you will need a controller board, which will control the movement of the motors, and a power supply to run the whole system.
Once you have gathered all the necessary materials, you can start assembling your gimbal. Begin by attaching the brushless motors to the frame or mounting plate. Make sure they are securely fastened and aligned properly. Next, mount your camera onto the frame, ensuring that it is centered and balanced.
Now it’s time to connect the motors to the controller board. Follow the instructions provided with the board to ensure correct wiring. Once everything is connected, you can power up the gimbal and calibrate it. This may require some trial and error to achieve optimal settings.

Once your gimbal is assembled and calibrated, you can start using it to capture smooth, steady footage with your DSLR camera. Experiment with different angles and movements to get the most out of your new gimbal. With practice, you will be able to achieve professional-looking shots that were once only possible with expensive equipment.
In conclusion, making your own gimbal for your DSLR camera is a cost-effective way to stabilize your footage and improve the quality of your shots. With a few basic materials and some patience, you can create a device that will greatly enhance your photography and videography skills. So why not give it a try and see the difference it can make in your work?
The importance of a gimbal for DSLR cameras
DSLR cameras are known for their exceptional image quality and versatility in capturing beautiful photographs and videos. However, one common challenge that arises when using a DSLR camera is the issue of camera shake. Camera shake can result in blurry images and shaky videos, which can greatly diminish the overall quality of your footage.
A gimbal for DSLR cameras is a device designed to counteract camera shake and stabilize your camera during recording. It consists of a set of motors and sensors that work together to keep your camera steady, regardless of the movements and vibrations around you.
There are several reasons why a gimbal is essential for DSLR cameras:
1. Improved Image and Video Quality:
A gimbal helps eliminate unwanted vibrations and movements, allowing you to capture smooth and stable footage. This leads to sharper images, more professional-looking videos, and an overall improvement in image quality. Whether you are filming an action-packed scene or capturing a still photograph, a gimbal ensures that your camera remains steady, resulting in clear and crisp shots.
2. Enhanced Creative Possibilities:
Using a gimbal opens up a whole new world of creative possibilities for photographers and videographers. It allows you to achieve smooth and seamless camera movements such as pans, tilts, and tracking shots. By adding dynamic movements to your footage, a gimbal helps bring your vision to life and adds a professional touch to your work.
3. Ease of Use:
Gimbals are designed to be user-friendly and easy to operate, even for beginners. They typically offer various modes and settings that can be adjusted to suit your needs. With simple controls and intuitive interfaces, gimbals make it effortless to stabilize your camera and focus on capturing exceptional shots.
4. Versatility:
Most gimbals are designed to be compatible with a wide range of DSLR cameras, providing versatility and flexibility for photographers and videographers. Whether you have a compact DSLR or a heavier professional-grade camera, you can find a gimbal that can handle the weight and provide the necessary stability for your camera.

In conclusion, a gimbal is an essential tool for DSLR camera users who want to improve the quality of their images and videos. By effectively reducing camera shake and providing stability, a gimbal allows you to capture smooth footage and unleash your creative potential.
Choosing the right parts
When it comes to making your own gimbal for a DSLR camera, choosing the right parts is crucial. There are a few key components that you will need to consider:
1. Motors: One of the most important parts of a gimbal is the motor. It is responsible for stabilizing the camera and keeping it level. When choosing a motor, make sure to consider its torque and speed capabilities to ensure it can support the weight of your DSLR camera.
2. Controller: The controller is the brain of the gimbal, and it is responsible for processing the input from the sensors and controlling the motors. Look for a controller that is compatible with your chosen motors and has features like adjustable stabilization settings and remote control options.
3. Sensor: The sensor is what detects the movement and orientation of the camera. It sends this information to the controller, which then adjusts the motors to keep the camera steady. There are different types of sensors available, such as gyroscopes and accelerometers. Consider the accuracy and sensitivity of the sensor when making your selection.
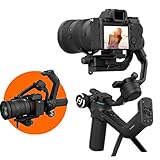
![Zhiyun Weebill S [Official] 3-Axis Gimbal Stabilizer for Mirrorless and DSLR Cameras](https://m.media-amazon.com/images/I/41dofxRBqiL._SL160_.jpg)
4. Frame: The frame of the gimbal holds all the components together and provides stability. It is important to choose a frame that is strong and durable, as it will need to support the weight of the camera and withstand any movement or vibrations. Look for materials like carbon fiber or aluminum for a lightweight yet sturdy frame.
5. Power source: Lastly, you will need a power source to run your gimbal. Depending on your preference, you can choose between batteries or a wired power supply. Make sure to consider the battery life or power requirements of your chosen gimbal components when selecting a power source.
By carefully choosing the right parts for your DIY gimbal, you can ensure that it is capable of providing smooth and stable footage for your DSLR camera.
Camera stabilizer options
When it comes to stabilizing your DSLR camera, there are several options available to choose from. These stabilizers help reduce shaky footage and produce smooth, professional-looking videos. Here are some popular camera stabilizer options:
Gimbal Stabilizers
Gimbal stabilizers are widely used by videographers and cinematographers to capture steady shots while on the move. They work by using motorized three-axis systems that stabilize the camera in real-time, compensating for any movements or vibrations. Gimbal stabilizers are known for their versatility, allowing users to capture smooth footage even while running or walking.
Vest and Arm Stabilizers
Vest and arm stabilizers are another option for stabilizing DSLR cameras. This system consists of a vest worn by the operator, with a support arm extending from the vest. The camera is mounted on the support arm, which helps distribute the weight and allow for more comfortable handling. These stabilizers are suitable for longer shoots or when you need to capture shots from higher angles.
When choosing a vest and arm stabilizer, make sure to consider the weight capacity and adjustability to suit your camera and shooting needs.
Handheld Stabilizers
Handheld stabilizers, also known as camera stabilizer rigs or camera stabilizer cages, are a portable and easy-to-use option for stabilizing DSLR cameras. These stabilizers typically consist of a handle and mounting system that keeps the camera steady while you move. They are lightweight and compact, making them ideal for shooting in tight spaces or capturing footage on the go.
Most handheld stabilizers also offer additional features such as adjustable counterweights and interchangeable mounts for accessories like external monitors or microphones.
Overall, choosing the right camera stabilizer depends on your specific shooting requirements, budget, and personal preferences. Whether you opt for a gimbal stabilizer, vest and arm stabilizer, or handheld stabilizer, investing in a stabilizer will greatly enhance the quality of your DSLR camera footage.
Gimbal Motor Selection
When it comes to building a gimbal for a DSLR camera, one of the most crucial components to consider is the motor. The motor is responsible for providing the necessary power and stability to keep the camera steady while capturing footage.
There are several factors to consider when selecting a gimbal motor:
1. Motor Strength:
The motor should be strong enough to support the weight of your DSLR camera and any additional accessories, such as lenses or external microphones. It is essential to choose a motor with enough torque to withstand any sudden movements or changes in camera position.
2. Motor Type:

There are various types of motors available for gimbals, including brushless DC motors (BLDC), coreless DC motors (CD), and stepper motors. BLDC motors are commonly used due to their high torque and efficiency. However, stepper motors provide excellent precision but may not deliver the same power as BLDC motors.
3. Motor Control:
The motor control system plays a crucial role in how the gimbal performs. Look for motors that offer smooth control, allowing you to adjust the camera’s position with ease. Some motors also come with built-in encoders, which provide precise feedback and help stabilize the camera even further.
4. Power Efficiency:
Choose a motor that is power efficient to maximize the battery life of your gimbal system. Motors with higher efficiency will use less power and allow you to film for longer periods without needing to recharge the batteries frequently.
5. Compatibility:
Finally, ensure that the motor you choose is compatible with your gimbal system’s design and specifications. Consider factors such as weight and size to ensure a seamless fit.
By carefully considering these factors, you can select the right gimbal motor for your DSLR camera, ensuring optimal stability and smooth movements during video recording.
Building your own gimbal
Building your own gimbal for a DSLR camera can be a rewarding project that allows you to customize and control the stabilization of your footage. While it may seem daunting, it can be accomplished with some basic tools and materials.
Here are the steps to build your own gimbal:
- Gather the necessary materials: You will need a 3-axis brushless motor gimbal controller, brushless motors, a frame, a power source, and a camera mount for your DSLR camera. You can find these materials online or at a hobby store.
- Assemble the frame: Follow the instructions provided with your frame to put it together. Ensure that it is sturdy and can support the weight of your camera.
- Mount the motors: Attach the brushless motors to the frame using screws or adhesive. Make sure they are securely fastened and aligned properly.
- Install the gimbal controller: Connect the 3-axis brushless motor gimbal controller to the brushless motors. This will allow you to control the movement and stabilization of the gimbal.
- Attach the camera mount: Fasten the camera mount to the gimbal frame. Ensure that it is firmly attached and can hold your DSLR camera securely.
- Connect the power source: Connect the power source to the gimbal controller. Make sure to follow the instructions provided with your specific controller to ensure proper connections.
- Calibrate and test: Once everything is assembled, calibrate the gimbal controller according to the manufacturer’s instructions. Test the gimbal’s movements and stability by attaching your DSLR camera and moving it around.
Building your own gimbal can be a fun and rewarding DIY project. It allows you to have more control over the stabilization of your footage and can potentially save you money compared to purchasing a pre-built gimbal. With some patience and attention to detail, you can create a professional-quality gimbal for your DSLR camera.
Gathering necessary tools
Before starting to build a gimbal for your DSLR camera, it is important to gather all the necessary tools. These tools will help you in creating a stable and functional gimbal that will enhance the stability and smoothness of your camera shots.
1. Screwdriver set: A screwdriver set with different heads is essential for assembling the different parts of the gimbal.
2. Allen wrenches: Allen wrenches of various sizes will be needed to tighten screws and bolts.
3. Pliers: Pliers can be used for gripping and bending wires, as well as for tightening small nuts and bolts.
4. Wire stripper: A wire stripper tool will be useful for removing the insulation from wires, allowing you to connect the necessary components.
5. Soldering iron: A soldering iron is required for soldering wires and components together to ensure secure connections.
6. Multimeter: A multimeter is an invaluable tool for testing electrical connections and measuring voltages and resistances.
7. Measuring tape: A measuring tape will come in handy when aligning and positioning the different parts of the gimbal.
8. Cutting tools: Cutting tools such as a hacksaw or a rotary tool will be necessary for cutting and shaping different materials.
9. Level: A level will help you ensure that the different parts of the gimbal are aligned correctly.
10. Safety equipment: Lastly, make sure to have safety equipment such as gloves and safety goggles to protect yourself while working with tools and materials.
Gathering these tools before starting the gimbal build will ensure that you have everything you need to complete the project efficiently and safely.
Assembling the frame
Once you have gathered all the necessary materials and tools, you can start assembling the frame of your gimbal for a DSLR camera. The frame is the main structure that will hold all the components together and provide stability and balance to the gimbal.
Here are the steps to assemble the frame:
1. Measure and cut the aluminum pipe
Start by measuring and cutting the aluminum pipe into the desired length. The length will depend on the size of your DSLR camera and your specific requirements. Use a hacksaw or pipe cutter to make accurate cuts.
2. Attach the motor mounts
Next, attach the motor mounts to the aluminum pipe. These mounts will hold the brushless motors that will control the movement of the gimbal. Secure the motor mounts tightly using screws or bolts.
3. Install the bearings
Install the bearings on the motor mounts. These bearings will allow for smooth movement of the gimbal. Make sure the bearings are properly aligned and press-fit them into the motor mounts.
4. Add the camera holder
Attach the camera holder to the top of the aluminum pipe. This is where the DSLR camera will be mounted. Make sure the camera holder is stable and securely fastened to the pipe to prevent any accidental movements or drops.
5. Secure the gimbal controller
Install the gimbal controller on the frame. The gimbal controller will be responsible for controlling the motors and stabilizing the camera. Attach the controller securely to the frame using screws or bolts.
6. Connect the wires
Finally, connect the wires from the motors to the gimbal controller. Ensure that each wire is connected to the appropriate port to ensure proper functionality. Test the connections to make sure everything is working correctly.
With the frame assembled, you are now ready to move on to the next steps of building your gimbal, such as calibrating and programming the controller, and fine-tuning the settings to achieve the desired results.
| Materials needed: | Tools needed: |
|---|---|
| – Aluminum pipe | – Hacksaw or pipe cutter |
| – Motor mounts | – Screwdriver |
| – Bearings | – Allen wrench |
| – Camera holder | – Wire cutters/strippers |
| – Gimbal controller | – Multimeter (for testing connections) |
| – Screws or bolts | – Soldering iron (if required) |
| – Wires |
Installing the motors
Installing the motors is a crucial step in the process of making a gimbal for a DSLR camera. The motors are responsible for stabilizing the camera and ensuring smooth movement during filming or photography.
Here is a step-by-step guide on installing the motors:
- Start by identifying the motor mounts provided with the gimbal kit. These mounts are designed to hold the motors securely in place.
- Attach the motor mounts to the designated spots on the gimbal frame, ensuring that they are aligned properly.
- Place the motors onto the mounts, making sure that they fit snugly and securely.
- Use small screws or bolts to fasten the motors to the mounts. Make sure to tighten them adequately to prevent any movement or vibrations.
- Once the motors are securely attached, connect the motor wires to the control board according to the instructions provided with the kit.
- Test the motors by powering on the gimbal. Make sure they are functioning correctly and responding to the commands.
It is essential to follow the instructions provided with your specific gimbal kit to ensure proper installation of the motors. Improper installation can lead to instability and potential damage to your camera.
Once the motors are installed and tested, you can proceed to the next steps of fine-tuning the gimbal to optimize its performance and calibrating it for your DSLR camera.
Calibrating your gimbal
Once you have built your gimbal for your DSLR camera, it is important to calibrate it properly in order to achieve smooth and stable footage. Calibrating your gimbal ensures that it is balanced and ready to use effectively.
Step 1: Start by checking that your camera is properly mounted on the gimbal. Make sure it is securely attached and that it sits in the correct position.
Step 2: Turn on your gimbal and ensure that it is leveled. This can be done using the built-in leveling tools or a separate bubble level. Adjust the axes of the gimbal until it is perfectly balanced.
Step 3: Check that the gimbal motors are functioning correctly. Rotate each axis to its maximum range of motion to make sure there are no restrictions or obstructions. If you notice any issues, contact the manufacturer for assistance.
Step 4: Connect your camera to the gimbal’s controller via a compatible cable. Make sure the connection is secure and the cable is not causing any tension or strain on the gimbal or camera.
Step 5: Power on your camera and gimbal controller. Follow the instructions provided by the manufacturer to calibrate the gimbal using the controller’s menu or buttons. This may involve adjusting the motor strength, responsiveness, or other settings to optimize performance.
Step 6: After calibration, test your gimbal by moving it in different directions and angles. Check that the camera stays level and stable, without any vibrations or jerky movements. Fine-tune the settings if necessary.
Step 7: Once satisfied with the calibration, securely lock all the axes and ensure that the camera is firmly attached. This will prevent any accidental movements or adjustments while shooting.
Step 8: It is recommended to periodically check and recalibrate your gimbal, especially if you notice any changes in performance or stability. This will help maintain optimal results and prolong the lifespan of your gimbal.
Following these steps will ensure that your gimbal is properly calibrated and ready to capture smooth and professional-looking footage with your DSLR camera.
Configuring the motor settings
Once you have assembled your gimbal, the next step is to configure the motor settings to ensure smooth and stable movements for your DSLR camera.
Here are the basic steps to follow:
- Connect your gimbal to your computer using the USB cable provided.
- Open the gimbal’s software or firmware interface on your computer.
- Select the motor settings option in the software.
- Calibrate the motors by clicking on the calibration button.
- Adjust the motor power by setting the appropriate values. The power settings will depend on the weight of your camera and lens combination.
- Set the motor speed to your desired level. Higher speed settings will allow for faster movements, while lower settings will provide smoother and more controlled motions.
- Enable or disable the motor stabilization function. This feature helps to keep the camera steady while shooting.
- Save the motor settings and disconnect the gimbal from your computer.
It is important to note that every gimbal model may have slightly different steps and options for configuring the motor settings. Therefore, it is essential to refer to the user manual or documentation provided by the gimbal manufacturer for specific instructions.
Once you have successfully configured the motor settings, you can now attach your DSLR camera to the gimbal and start capturing smooth and professional-looking footage.
Testing the balance
Once you have assembled your DIY gimbal for your DSLR camera, it is crucial to test the balance before using it. Proper balance ensures stable footage and reduces the strain on the motors.
Here is a step-by-step guide on how to test the balance of your gimbal:
- Start by mounting your DSLR camera onto the gimbal.
- Ensure that all the axes (roll, pitch, and yaw) are in their neutral positions.
- With the power on, hold the gimbal in your hand and make sure it is leveled horizontally.
- Next, release the gimbal and observe its behavior. It should stay level and not tilt or shake excessively.
- If the gimbal is tilting or shaking, you will need to adjust the balance using the adjustment knobs or sliding plates on the gimbal.
- Start by adjusting the roll axis. Loosen the respective adjustment knob or slide the plate until the camera remains level when released.
- Repeat the same process for the pitch and yaw axes, making adjustments as necessary.
- After each adjustment, test the balance again by releasing the gimbal and observing its behavior.
- Continue making adjustments until the camera remains stable and level when released.
- Once you have achieved the desired balance, tighten the adjustment knobs to secure the camera in place.
It is important to note that achieving perfect balance may require some trial and error. Be patient and take your time to fine-tune the gimbal to your camera’s weight and dimensions. Once you have successfully balanced your DIY gimbal, you can now confidently use it for smooth and stable footage with your DSLR camera.
Question-answer:
What is a gimbal and why is it used for DSLR cameras?
A gimbal is a device that is used to stabilize a camera and reduce any unwanted movement or shaking during video recording. It is especially important for DSLR cameras because they are often used to shoot professional-grade video footage, where stability and smoothness are crucial.
What are the main types of gimbals available for DSLR cameras?
There are mainly two types of gimbals available for DSLR cameras: handheld gimbals and motorized gimbals. Handheld gimbals are operated manually and require the user to hold the gimbal during filming. Motorized gimbals, on the other hand, use built-in motors to stabilize the camera automatically.
Is it possible to make a DIY gimbal for a DSLR camera?
Yes, it is possible to make a DIY gimbal for a DSLR camera. There are various DIY tutorials available online that provide step-by-step instructions on how to build a gimbal using basic materials like PVC pipes or wood. However, it is important to note that the resulting DIY gimbal may not provide the same level of stability and smoothness as commercial gimbals.
What are some important factors to consider when choosing a gimbal for a DSLR camera?
When choosing a gimbal for a DSLR camera, it is important to consider factors like weight capacity, battery life, control options, and compatibility with your specific camera model. Additionally, it is also helpful to read reviews and compare different gimbal options to find one that best suits your needs and budget.


