If you’re looking for an affordable and customizable security camera solution, look no further than Raspberry Pi. With its low cost and versatile capabilities, Raspberry Pi is the perfect tool to create your own homemade security camera.
Raspberry Pi is a small, single-board computer that can be easily connected to a camera module. By utilizing its powerful processing power and GPIO pins, you can turn Raspberry Pi into a fully functional security camera that can capture and stream video footage.
One of the advantages of making your own security camera with Raspberry Pi is the ability to customize its features and functionalities. You can choose different camera modules with varying resolutions and field of view to meet your specific requirements. Additionally, you can install various software and tools to enhance the camera’s capabilities, such as motion detection, video recording, and remote access.
In this article, we will guide you through the process of setting up your own homemade security camera using Raspberry Pi. We will cover the hardware and software components you’ll need, as well as the step-by-step instructions to assemble and configure your camera. Whether you’re a beginner or an experienced Raspberry Pi user, this guide will help you create a cost-effective and efficient security camera system to protect your property and loved ones.
What is a homemade security camera?
A homemade security camera is a camera system that you can create yourself using a Raspberry Pi. It allows you to monitor your home or any other area you choose, providing you with peace of mind and added security.
By utilizing a Raspberry Pi board, which is a small and affordable single-board computer, you can create a customized security camera system that fits your specific needs. This can be a great alternative to purchasing expensive commercial security cameras.
With a homemade security camera, you can set up motion detection, live streaming, and storage features according to your preferences. This means that you can record videos and capture images only when motion is detected, saving storage space and making it easier to review footage.
The Raspberry Pi offers a wide range of capabilities, allowing you to connect the camera module, configure software, and access the camera feed remotely. This gives you the flexibility to monitor your property from anywhere using a computer, smartphone, or tablet.
Overall, a homemade security camera with a Raspberry Pi is an exciting project that combines the world of technology with home security. It allows you to have more control over your security system and offers an affordable option for those looking to enhance the safety of their property.
Choosing the right equipment
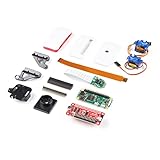
When it comes to creating a homemade security camera with Raspberry Pi, choosing the right equipment is crucial for a successful project. Here are some key factors to consider:

| Equipment | Description |
|---|---|
| Raspberry Pi Board | The heart of your security camera system, the Raspberry Pi board is responsible for processing and controlling the camera feed. Make sure to choose a compatible model, such as Raspberry Pi 3 or Raspberry Pi 4, with enough processing power and storage capacity. |
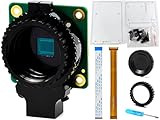
| Camera Module | Selecting the right camera module is essential for capturing high-quality video footage. The Raspberry Pi Camera Module V2 is a popular choice due to its small size, good image quality, and easy integration with the Raspberry Pi board. |
| Power Supply | Ensure you have a stable power supply to keep your security camera running continuously. A micro USB power adapter with a sufficient output rating, such as 5V 2.5A, is recommended to provide enough power for the Raspberry Pi board and camera module. |
| SD Card | An SD card is required to store the operating system and video recordings. It’s recommended to use a high-quality SD card with sufficient capacity to accommodate your needs, preferably a Class 10 or faster card for better performance. |
| Mounting Hardware | Consider the mounting hardware options that best suit your installation needs. Whether you prefer a wall mount, tripod, or other creative solutions, ensure it provides a stable and secure position for your security camera. |
| Network Connection | For remote access and video streaming capabilities, make sure your Raspberry Pi security camera is connected to a stable network. Ethernet connection or Wi-Fi dongles can be used, depending on your setup and preferences. |
By carefully selecting the right equipment, you can build a powerful and reliable homemade security camera using Raspberry Pi. Make sure to check the compatibility and specifications of each component before making any purchase decisions.
Raspberry Pi and its capabilities
Raspberry Pi is a small single-board computer that offers a wide range of possibilities for DIY projects. Its affordability, versatility, and ease of use make it a popular choice for enthusiasts and professionals alike.
One of the key features of the Raspberry Pi is its ability to run various operating systems, making it adaptable to different applications. From Raspbian, a modified version of Debian Linux, to Windows 10 IoT Core, the Raspberry Pi can support a range of software environments.
The Raspberry Pi’s GPIO (General Purpose Input/Output) pins allow for easy interaction with external devices, making it ideal for hardware projects. You can connect sensors, buttons, and other components to the GPIO pins to create your own custom electronics.
Processor and memory
The Raspberry Pi is equipped with a powerful ARM processor, ranging from entry-level models with a single core to advanced models with quad-core processors. This enables it to handle a wide range of tasks, from basic computing to multimedia applications.

Depending on the model, the Raspberry Pi comes with different amounts of RAM, typically ranging from 512MB to 4GB. Sufficient memory allows for smooth multitasking and the ability to run resource-intensive applications.
Connectivity options
The Raspberry Pi offers various connectivity options, including USB ports, Ethernet, Wi-Fi, and Bluetooth. This allows you to connect the device to the internet, external storage devices, input peripherals, and more.
Additionally, the Raspberry Pi has an HDMI port for connecting to displays, allowing you to use it as a media center or desktop computer. It also has a 3.5mm audio jack for connecting headphones or speakers.
In conclusion, the Raspberry Pi’s small size and affordability make it a powerful tool for DIY projects. Its versatility and wide range of capabilities, from running different operating systems to its GPIO pins and connectivity options, make it an excellent choice for creating a homemade security camera system.
Setting up Raspberry Pi for security camera
Before you start setting up your Raspberry Pi as a security camera, you will need to gather a few things:

- A Raspberry Pi board (preferably a newer model)
- A micro SD card with at least 8GB of storage
- A power supply for the Raspberry Pi
- An Ethernet cable or a Wi-Fi dongle for internet connectivity
- A compatible camera module for the Raspberry Pi
Once you have all the necessary hardware, you can follow these steps to set up your Raspberry Pi as a security camera:
- Download the latest version of Raspberry Pi OS from the official Raspberry Pi website.
- Using a computer, format your micro SD card and install Raspberry Pi OS using the Raspberry Pi Imager tool.
- Insert the micro SD card into your Raspberry Pi and connect all the necessary cables, including the power supply, Ethernet cable or Wi-Fi dongle, and the camera module.
- Power on your Raspberry Pi and wait for it to boot up.
- Once booted, open the terminal and run the following commands to update your Raspberry Pi:
sudo apt-get update
sudo apt-get upgrade
- Install the necessary software packages for the security camera. This may include motion detection software, video streaming software, and any additional tools or libraries:
sudo apt-get install motion
- Configure the security camera software by editing the configuration file, typically located at
/etc/motion/motion.conf. Adjust the settings according to your preferences, such as resolution, frame rate, and motion detection sensitivity. - Save the changes to the configuration file and restart the motion service:
sudo service motion restart

Your Raspberry Pi is now set up as a security camera. You can access the camera’s live feed by entering its IP address in a web browser on any device connected to the same network. You can also customize the security camera further by exploring additional features and software options.
Installing the necessary software
Before setting up your homemade security camera, you will need to install the necessary software on your Raspberry Pi.
First, start by installing the Raspbian operating system on your Raspberry Pi. This can be done by downloading the Raspbian image from the official Raspberry Pi website and flashing it onto a microSD card.
Once Raspbian is installed, boot up your Raspberry Pi and connect it to the internet. Open a terminal window and run the following command to update the package list:
sudo apt-get update
After the package list is updated, run the following command to upgrade all installed packages:
sudo apt-get upgrade
Next, you will need to install the motion detection software that will turn your Raspberry Pi into a security camera. Run the following command to install motion:
sudo apt-get install motion
During the installation process, you will be prompted to configure motion. Choose “Yes” when asked if you want to create a motion configuration file.

Once motion is installed, you will need to edit the configuration file to customize the settings for your security camera. Run the following command to open the configuration file in a text editor:
sudo nano /etc/motion/motion.conf
Make any necessary changes to the configuration file, such as adjusting the resolution, frame rate, and motion detection settings. Save the changes and exit the text editor.
Finally, start the motion service by running the following command:
sudo service motion start
Your Raspberry Pi security camera is now ready to use!
Configuring the camera
Once you have set up your Raspberry Pi, it’s time to configure the camera module. Follow these steps to get your camera up and running:
Step 1: Enable the camera interface
By default, the camera interface is disabled on the Raspberry Pi. To enable it, open the Raspberry Pi configuration menu by typing sudo raspi-config in the terminal and pressing Enter. Navigate to the “Interfacing Options” section and select “Camera”. Follow the prompts to enable the camera interface and then restart the Raspberry Pi.
Step 2: Connect the camera module
Connect the camera module to the designated camera port on the Raspberry Pi board. Make sure it is securely attached and properly aligned. The camera connector is a ribbon cable connector, so handle it with care.
Step 3: Verify camera functionality
To verify that the camera is functioning correctly, open a terminal window and enter the following command: raspistill -v -o test.jpg. This command captures a still image and saves it as “test.jpg” in the current directory. If no errors are displayed, the camera is working properly.
Step 4: Adjust camera settings (optional)
If you want to adjust the camera settings, you can do so by creating a configuration file. Open a new terminal window and enter the command: sudo nano /boot/config.txt. This opens the configuration file in the nano text editor. Scroll down or use the search function to find the camera-specific settings and make any necessary changes. Save the file and exit the editor by pressing Ctrl + X, then Y, and finally Enter.
With the camera module configured, you are now ready to start using it for your homemade security camera system.
Connecting the camera module
Before you can start using your Raspberry Pi as a security camera, you will need to connect the camera module to the Raspberry Pi board. Here are the steps to do so:
Step 1: Turn off the Raspberry Pi
Make sure that your Raspberry Pi is powered off before proceeding with the camera module installation. This will prevent any potential damage to the board.
Step 2: Locate the camera connector
On the Raspberry Pi board, you will find a small rectangular connector labeled “Camera”. This is where you will connect the camera module.
Step 3: Insert the camera module
Take the camera module and gently insert its ribbon cable into the camera connector on the Raspberry Pi. Make sure that the cable is properly aligned with the connector and fully inserted.
Step 4: Secure the camera module
Once the ribbon cable is inserted, gently press down on the connector’s tab to secure the camera module in place. This will ensure a stable connection between the module and the Raspberry Pi board.
Step 5: Power on the Raspberry Pi
Now that the camera module is connected, you can power on your Raspberry Pi. Wait for the system to initialize and boot up.
Once the Raspberry Pi has booted up, you can start configuring the camera module and setting up your homemade security camera system.
Monitoring your security camera
Once you have set up your homemade security camera using Raspberry Pi, it is important to know how to effectively monitor the footage to ensure the safety of your premises. Here are some tips on monitoring your security camera:
1. Accessing the camera feed
To monitor your security camera, you will need to access the camera feed. This can be done by connecting to the Raspberry Pi via SSH or using remote desktop software. Once connected, you can view the camera feed on your computer or mobile device.
2. Maintaining a constant connection
It is important to ensure that your Raspberry Pi is always connected to the internet so that you can monitor the camera feed in real-time. Consider using a reliable internet connection and setting up your Raspberry Pi to automatically connect to the network on startup.
Tip: You can also configure your Raspberry Pi to send you notifications or alerts whenever there is any suspicious activity detected by the security camera.
3. Setting up motion detection
To optimize the monitoring process, you can enable motion detection on your security camera. This feature allows the camera to only record when it detects motion, saving storage space and making it easier to review the footage later.
Note: Make sure to adjust the sensitivity settings of the motion detection feature to avoid false alarms triggered by moving trees, pets, or other non-threatening objects.
4. Reviewing and storing the footage
Regularly review the recorded footage from your security camera to check for any suspicious activity or incidents. It is recommended to store the footage on an external hard drive or cloud storage, preferably with encryption, to prevent unauthorized access.
Remember: Keep your security camera software up to date to ensure it is protected against any vulnerabilities and works efficiently.
By following these tips, you can effectively monitor your homemade security camera and enhance the security of your premises.
FAQ,
What is a Raspberry Pi?
Raspberry Pi is a small single-board computer that can be used for various projects, including building a homemade security camera.
What do I need to make a homemade security camera with a Raspberry Pi?
To make a homemade security camera with a Raspberry Pi, you will need a Raspberry Pi board, a camera module, a power supply, a microSD card, and some basic programming knowledge.