
Are you tired of being confined to the small screen on your DSLR camera when trying to capture those amazing moments? Well, we have the solution for you – a wireless camera screen for your DSLR! With this innovative device, you can now view your photos and videos on a larger screen without the hassle of connecting cables or transferring files.
So, how does it work?
First, you will need a wireless transmitter that can be attached to your camera. This transmitter will send the video signal from your camera to a wireless receiver, which can be connected to any screen of your choice – be it a smartphone, tablet, or even a TV. The receiver will display the live view of your camera and you can see exactly what your camera is capturing in real-time!
But wait, there’s more!
Not only can you view the live images on a larger screen, but you can also control the settings of your camera remotely. This means that you can change the aperture, shutter speed, ISO, and other settings without even touching your camera! This feature comes in handy, especially when you are taking group photos or self-portraits and need to adjust the settings quickly.

Additionally, some wireless camera screens also allow you to transfer files wirelessly. This means that you can instantly share your photos and videos with friends and family or upload them to social media platforms directly from your camera – no more wasting time on transferring files!
In conclusion, a wireless camera screen for your DSLR is a game-changer when it comes to photography. It allows you to view your images on a larger screen, control your camera remotely, and even transfer files wirelessly. So, why settle for a small screen when you can have a wireless camera screen and take your photography to the next level?
Setting up a Wireless Camera Screen for DSLR
Wireless camera screens offer convenience and flexibility, allowing photographers to monitor their shots without the need for cumbersome cables. Setting up a wireless camera screen for your DSLR can enhance your photography experience by providing you with a real-time view of your images in a more comfortable and convenient way.
Here are the steps to set up a wireless camera screen for your DSLR:
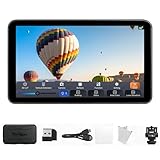
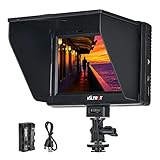
- Choose a wireless camera screen: Look for a wireless camera screen that is compatible with your DSLR camera model. There are many options available in the market with varying features and price ranges. Consider factors such as screen size, resolution, and wireless range before making your decision.
- Power on the wireless camera screen: Ensure that the wireless camera screen is fully charged or connected to a power source. Most wireless camera screens come with a rechargeable battery.
- Enable Wi-Fi on your DSLR camera: Check your DSLR camera settings to enable the Wi-Fi feature. This will allow the camera to establish a wireless connection with the camera screen.
- Connect the wireless camera screen to your DSLR: Follow the manufacturer’s instructions to connect the wireless camera screen to your DSLR camera wirelessly. This usually involves selecting the Wi-Fi network on the camera screen and entering the password, if applicable.
- Adjust the settings on the camera screen: Once the connection is established, you may need to adjust the camera screen settings to display the live view from your DSLR camera. You can usually find this option in the camera screen’s menu.
- Start using the wireless camera screen: With the setup complete, you can now use the wireless camera screen to monitor your shots. The live view will be displayed on the camera screen in real-time, allowing you to adjust settings, frame your shots, and ensure optimal composition.
By setting up a wireless camera screen for your DSLR, you can enhance your shooting experience and take your photography to the next level. Enjoy the freedom and flexibility that wireless technology offers while capturing stunning images.

Please note that the exact steps may vary depending on your specific camera model and the wireless camera screen you choose. Refer to the user manuals for both devices for detailed instructions.
Choosing the Right Equipment
When it comes to setting up a wireless camera screen for your DSLR, it is important to choose the right equipment to ensure optimal performance and compatibility. Here are some factors to consider when choosing your equipment:
- Wireless Transmitter: Look for a wireless transmitter that is designed for use with DSLR cameras. It should have a strong signal range and a reliable connection to ensure smooth transmission.
- Wireless Receiver: The wireless receiver should be compatible with your chosen transmitter and have a user-friendly interface for easy setup and use. It should also have a secure connection to prevent interference or unauthorized access.
- Screen Display: Consider the screen size and resolution of the wireless camera screen. A larger screen will make it easier to view your photos and videos, while a higher resolution will result in clearer and more detailed images.
- Battery Life: Check the battery life of the wireless camera screen to ensure it will last for the duration of your shooting sessions. It is also helpful to have a screen with a low power consumption feature to extend battery life.
- Compatibility: Make sure the wireless camera screen is compatible with your specific DSLR model. Check for compatibility with the camera’s firmware and any additional features you may require.
- Portability: Consider the weight and portability of the equipment. If you plan to use it for outdoor photography or on-the-go shooting, look for lightweight and compact options that are easy to carry and transport.
By taking these factors into consideration, you can choose the right equipment for your wireless camera screen setup and enhance your DSLR photography experience.
Connecting the Wireless Transmitter
Once you have set up your DSLR camera and wireless transmitter, it’s time to connect them together. Here are the steps to connect the wireless transmitter to your camera:
Step 1: Power off your camera
Before connecting any external device, it’s important to turn off your DSLR camera to ensure safety and prevent any damage.

Step 2: Locate the USB port
Next, locate the USB port on your camera. This is usually located on the side or back of the camera, depending on the make and model. It is a small rectangular port that allows you to connect external devices to your camera.
Step 3: Connect the transmitter
Take one end of the USB cable provided with the wireless transmitter and plug it into the USB port on your camera. Make sure the cable is securely connected. The other end of the USB cable will be used to connect the transmitter to a power source later on.
Step 4: Mount the transmitter
Once the USB cable is connected, mount the wireless transmitter securely on the hot shoe mount of your camera. The hot shoe mount is usually located on top of the camera and is designed to attach various accessories, such as flashes or wireless transmitters.
Step 5: Power on your camera
After mounting the transmitter, power on your camera. You may need to refer to your camera’s user manual to find the power button if you are not familiar with its location.
Step 6: Connect the transmitter to a power source
Using the other end of the USB cable, connect the transmitter to a power source. This can be a wall outlet or a portable power bank, depending on your setup. Make sure the transmitter receives a stable power supply to ensure uninterrupted transmission.

Once you have completed these steps, your wireless camera screen should be connected and ready to use. You can now remotely view the camera’s live feed on your wireless screen, giving you more flexibility and freedom in your photography.
Pairing the Transmitter and Receiver
Before you can start using your wireless camera screen setup, you need to pair the transmitter and receiver units together. This process ensures that the video signal from your DSLR camera is transmitted and received properly.
To begin pairing, follow these steps:
1. Power on both the transmitter and receiver units
Connect the power cables of both the transmitter and receiver units to a power source. Make sure that they are properly plugged in and turned on.
2. Set the same frequency on both units
On both the transmitter and receiver units, set the same frequency. This is usually done using buttons or switches on the units themselves. Check the user manual for detailed instructions on how to set the frequency.
3. Establish a connection
Once the same frequency is set on both units, they should automatically establish a connection. This connection ensures that the video signal from the DSLR camera is transmitted wirelessly and received by the receiver unit.
You can verify that the pairing is successful by checking the screen or display on the receiver unit. If you see the video feed from your DSLR camera, then the pairing was successful.
Note that the range and signal quality of the wireless camera screen setup may vary depending on the specific units you are using. It is recommended to keep the transmitter and receiver units within the specified range for optimal performance.
| Transmitter Unit | Receiver Unit |
|---|---|
| Power on | Power on |
| Set the frequency | Set the frequency |
| Establish a connection | Establish a connection |
Mounting the Receiver on the DSLR
In order to wirelessly transmit the camera feed from your DSLR, you will need to mount the receiver onto the camera itself. This will allow the receiver to receive the wireless signal and display the camera feed on its screen.
Step 1: Choose a Mounting Solution
There are several different ways to mount the receiver onto your DSLR. You can choose to mount it directly onto the hot shoe of your camera, or use a mounting bracket that attaches to the tripod mount on the bottom of the camera.

If you decide to use a mounting bracket, make sure it is compatible with both your DSLR and the wireless receiver.
Step 2: Attach the Mounting Solution
Once you have chosen your mounting solution, follow the manufacturer’s instructions to attach it securely to your DSLR. Make sure it is tight and stable, so that the receiver does not move or fall off during use.
Step 3: Connect the Receiver
After attaching the mounting solution, you will need to connect the receiver to your DSLR. This may involve using a cable or adapter to connect the receiver to your camera’s HDMI or AV output.
Refer to the receiver’s user manual for specific instructions on how to connect it to your DSLR.
Once the receiver is securely mounted and connected to your camera, you will be ready to wirelessly view the camera feed on the receiver’s screen. This will give you the flexibility to monitor your shots from a distance, making it easier to capture the perfect shot.
Powering the Wireless System
In order to make your camera screen wireless, you will need to provide power to both the camera as well as the wireless transmitter. There are several options for powering the wireless system, and you can choose the one that best suits your needs.
Battery Power
One option is to power the wireless system using batteries. This is a convenient option as it allows you to easily move around without the need for a power outlet. You can use rechargeable batteries to minimize waste and save money in the long run. Make sure to check the battery life of your wireless transmitter and choose a battery with enough capacity to last for the duration of your shooting session.
External Power Source
Another option is to power the wireless system using an external power source. This can be useful if you are shooting in a studio or any location where a power outlet is readily available. You can use an AC adapter or a power bank to provide continuous power to the wireless transmitter. Make sure to check the voltage requirements of your wireless transmitter and choose a compatible power source.
Power Management
Regardless of the power source you choose, it is important to manage your power efficiently. Always carry extra batteries or a backup power source in case of emergencies. Make sure to turn off the wireless system when not in use to preserve battery life. You can also consider using power-saving features on your camera screen to extend battery life. Lastly, regularly check the power levels of your batteries or power source to avoid unexpected disruptions during your shooting session.
| Power Source | Pros | Cons |
|---|---|---|
| Battery | Portable, no need for a power outlet | Requires regular recharging or replacement |
| External Power Source | Continuous power supply | May restrict mobility |
Adjusting the Screen Settings
Once you have set up your wireless camera screen for your DSLR, you may want to adjust the screen settings to optimize your viewing experience. Here are some key adjustments you can make:
- Brightness: Adjust the brightness level of the screen to ensure that it is neither too bright nor too dim. This will help you see the details in your photos clearly.
- Contrast: Modify the contrast level to enhance the difference between light and dark areas on the screen. This can make your images appear more vibrant and detailed.
- Color Temperature: Fine-tuning the color temperature can help achieve accurate color representation on the screen. You can choose between warmer or cooler tones based on your preference and the lighting conditions.
- Sharpness: Adjust the sharpness setting to enhance the clarity and crispness of the images displayed on the screen. Be careful not to over-sharpen, as it may result in unnatural-looking photos.
- Aspect Ratio: Set the aspect ratio of the screen to match the aspect ratio of your photos. This will ensure that your images are displayed in their intended proportions without any distortion.
- Display Mode: Depending on your usage, you can choose different display modes such as full screen, grid view, or live view. Explore the options and find the display mode that works best for your needs.
By adjusting these screen settings, you can customize your wireless camera screen to provide a more accurate and enjoyable viewing experience for your DSLR photography.
Testing the Wireless Connection
After setting up your wireless camera screen and DSLR, it is important to test the wireless connection to ensure that everything is working properly.
Step 1: Checking the Camera Settings
First, make sure that your DSLR is set to connect wirelessly and that it is linked to the camera screen. Refer to the user manual of your DSLR to find instructions on how to set up the wireless connection.
If the camera screen does not connect to the DSLR, double-check that both devices are connected to the same network and that the Wi-Fi settings on both devices are configured correctly.
Step 2: Testing the Live View
Once the wireless connection is established, test the live view feature of the camera screen. This allows you to see a real-time display of what the camera is capturing.
Take a few test shots using different settings (such as aperture and exposure) and make sure that the live view on the camera screen shows the changes accurately.
If there are any delays or lag in the live view, try adjusting the distance between the camera screen and the DSLR, as well as eliminating any obstructions or interference that may be affecting the wireless signal.
Step 3: Checking Remote Control Functionality
Next, test the remote control functionality of the camera screen. This allows you to adjust camera settings and trigger the shutter remotely.
Try changing the focus, exposure, and other settings using the camera screen. Ensure that the changes are applied to the DSLR correctly.
Additionally, test the shutter release button on the camera screen. Take a few photos remotely and check that they are captured by the DSLR.
Note: It is important to have a stable and reliable wireless connection for the camera screen to function properly. If you experience any issues during the testing process, refer to the user manuals of both devices for troubleshooting tips or consider seeking technical support.
With a successfully tested wireless connection, you can take advantage of the convenience and flexibility offered by a wireless camera screen while shooting with your DSLR.
Using the Camera Screen Wirelessly
Wirelessly connecting your DSLR camera to a screen is a convenient way to view and control your camera settings without being tied down by cables. With the right equipment and software, you can enjoy the freedom of shooting remotely while still having full control over your camera’s features.
Here are the steps to set up a wireless camera screen for your DSLR:
1. Wi-Fi-Enabled Camera
Make sure your DSLR camera has built-in Wi-Fi capability or supports Wi-Fi adapters. Not all cameras have this feature, so check your camera’s specifications or user manual to confirm. If your camera doesn’t have Wi-Fi, you may need to purchase an external Wi-Fi adapter.
2. Wireless Transmitter
You will need a wireless transmitter or a wireless HDMI kit to transmit the camera’s video output to a remote screen. Connect the transmitter to your camera’s HDMI port and make sure it’s securely attached.
3. Remote Viewing Device
Next, you’ll need a device such as a smartphone, tablet, or laptop to act as the remote viewing screen. Make sure this device is connected to the same Wi-Fi network as your camera.
4. Camera Control App
Download and install a camera control app on your remote viewing device. There are several apps available for different camera models and brands. These apps allow you to control your camera’s settings, adjust exposure, focus, and even remotely trigger the shutter.
5. Connect and Pair
Launch the camera control app on your remote viewing device and follow the instructions to connect and pair it with your camera. This will establish a wireless connection between your camera and the remote device.
6. Enjoy Wireless Camera Screen
Once the connection is established, you can now use your remote viewing device as a wireless camera screen. The app will display a live video feed from your camera, allowing you to see what the camera sees in real-time. You can adjust settings, focus, and trigger the shutter remotely.
| Advantages | Disadvantages |
|---|---|
|
|
Using a wireless camera screen can greatly enhance your photography workflow, especially for situations where you can’t physically be near your camera. Experiment with different camera control apps and wireless transmitters to find the setup that works best for you.
Troubleshooting Common Issues
While setting up a wireless camera screen for your DSLR, you may encounter some common issues. Here are some troubleshooting steps to help you resolve them:
No Signal on the Camera Screen
- Check if the wireless transmitter and receiver are properly connected.
- Ensure that the camera and the screen are within the wireless range.
- Make sure that the camera is turned on and properly functioning.
- Try resetting the wireless connection and reconnecting the devices.
- Verify that the batteries in both the camera and screen are charged.
Interference or Poor Image Quality
- Make sure that there are no other electronic devices nearby that may be causing interference.
- Try changing the wireless channel on both the transmitter and receiver.
- Adjust the antennas on both devices for better reception.
- Check if there are any physical obstructions blocking the wireless signal.
- Ensure that the camera’s resolution is set to the appropriate setting for optimal image quality.
Camera Screen Lag or Delay
- Check if there is a delay setting enabled on the camera or screen and disable it if necessary.
- Reduce the distance between the camera and the screen to minimize lag.
- Make sure that the wireless connection is stable and not affected by external factors.
- Try restarting both the camera and screen to refresh the connection.
If you are still experiencing issues, consult the user manual of your wireless camera screen system or contact the manufacturer for further assistance.
Additional Tips and Considerations
While setting up a wireless camera screen for your DSLR, there are a few additional tips and considerations to keep in mind:
1. Compatibility
Ensure that your wireless camera screen and DSLR are compatible with each other. Check the specifications of both devices to ensure they can communicate wirelessly.
2. Range
Consider the range of the wireless camera screen. If you plan to use it in outdoor settings or from a distance, make sure the wireless range is sufficient for your needs.
Additionally, keep in mind that walls, obstacles, and other wireless devices in the vicinity may affect the range and signal quality. Test the wireless camera screen in different scenarios to find the optimal placement and range.
3. Power Source
Check the power requirements of the wireless camera screen. Depending on the model, it may need to be powered by batteries or through a power outlet. Ensure that you have the necessary power source available during your photoshoots.
4. Security
Keep in mind that wireless transmissions can be intercepted. If you’re concerned about the privacy and security of your wireless camera screen feed, consider using encryption or password protection features, if available.
5. Interference
Wireless signals can be susceptible to interference from other devices operating on the same frequency. If you encounter interference or a poor signal, try changing the wireless channel or moving away from other wireless devices in the area.
It’s also essential to note that the larger the number of devices connected to the same wireless network, the more likely it is to experience congestion and potential slowdowns. Consider limiting the number of connected devices or using a dedicated wireless network for your DSLR and camera screen.
By following these additional tips and considering various factors, you can enhance the performance and reliability of your wireless camera screen setup for your DSLR.
Question-answer:
What is a wireless camera screen for DSLR?
A wireless camera screen for DSLR is a device that allows you to view the live feed from your DSLR camera on a separate screen, such as a smartphone or tablet, without the need for any physical connection between the camera and the screen.
Why would someone want to make a wireless camera screen for their DSLR?
There are several reasons why someone would want to make a wireless camera screen for their DSLR. Firstly, it provides the convenience of being able to view the live feed from your camera without having to look through the viewfinder. This can be particularly useful when shooting in awkward positions or angles. Secondly, it allows for remote viewing, which is beneficial for photographers who want to capture self-portraits or group shots where they want to be in the frame. Lastly, it can also be used for monitoring purposes, such as setting up a wildlife camera or a surveillance camera.


