
Are you tired of spending a fortune on professional lighting equipment for your photography or video projects? Look no further! In this article, we will show you how to make your own ring light for your DSLR camera. A ring light is a type of light that provides a soft and even illumination, casting a unique halo-like ring-shaped reflection in the eyes of the subject. It is commonly used in portrait and macro photography to eliminate harsh shadows and create a captivating and professional look.
To make your own ring light, you will need a few simple and affordable materials. Firstly, you will need a large plastic or metal ring that fits around the lens of your camera. This can be found at any hardware store or online. Secondly, you will need a set of LED light strips or individual LED bulbs that can be attached to the ring. LED lights are ideal for this project as they are energy-efficient, produce little heat, and provide a consistent and natural-looking illumination.
Once you have gathered your materials, it’s time to start assembling your ring light. Begin by attaching the LED light strips or bulbs around the inner circumference of the ring. Make sure they are evenly spaced and securely fastened. Next, connect the wiring of the LED lights to a power source. This can be done by using a power adapter or a battery pack. It’s important to test the lights before finalizing the wiring to ensure they are functioning properly.
Once you have successfully connected the LED lights to the power source, you can attach the ring light to your DSLR camera. Simply slide the ring over the lens and securely fasten it in place. You may need to use some tape or an adjustable mount to ensure stability. Now, you are ready to start capturing professional-looking photos or videos with your DIY ring light!
In conclusion, making your own ring light for your DSLR camera is a cost-effective and creative way to enhance your photography or video projects. By following these simple steps and using affordable materials, you can create a professional-looking ring light that will provide a soft and even illumination for your subjects. So, why spend a fortune when you can make your own? Give it a try and see the difference it makes in your images and videos!

Choosing the right materials
When it comes to making your own ring light for your DSLR camera, choosing the right materials is essential to ensure a high-quality and functional lighting setup. Here are some key materials you will need:
| Material | Description |
|---|---|
| LEDs | LEDs are the most popular lighting choice for ring lights due to their low power consumption, long lifespan, and ability to produce bright and even light. Look for LEDs with a high CRI (Color Rendering Index) to ensure accurate color reproduction. |
| Diffuser | A diffuser is used to soften and spread the light produced by the LEDs, creating a more natural and flattering lighting effect. Consider using materials like frosted acrylic or diffusion paper for effective light diffusion. |
| Power source | To power your ring light, you will need a suitable power source. This can be a DC power adapter, rechargeable batteries, or a power bank depending on your preference and availability. |
| Ring frame | The ring frame holds the LEDs and diffuser in place and gives your ring light its characteristic shape. You can use various materials for the ring frame, such as PVC pipes, aluminum strips, or even repurposed hula hoops. |
| Mounting hardware | To attach the ring light to your DSLR camera or tripod, you will need appropriate mounting hardware. This can include brackets, screws, clamps, or adhesive materials depending on your specific setup and requirements. |
| Wiring and connectors | Proper wiring and connectors are necessary to connect the LEDs to the power source and control the light intensity. Make sure to choose suitable wire gauge and connectors that can handle the power requirements of your ring light. |
By carefully selecting the right materials for your DIY ring light, you can ensure a well-functioning and reliable lighting solution for your DSLR camera setup. Remember to consider factors like light quality, power source, and ease of assembly while choosing the materials for your project.
Building the base
Before you start building your own ring light, you’ll need to gather the materials and tools necessary for the project. Here’s a list of what you’ll need:
- A circular piece of plywood, approximately 12 inches in diameter
- A piece of clear acrylic, also 12 inches in diameter
- A metal ring or hoop, with an inner diameter of about 10 inches
- An LED strip light, long enough to fit around the inner diameter of the metal ring
- A power supply compatible with the LED strip light
- An on/off switch
Once you have all the materials ready, you can start building the base of your ring light:
- Place the circular plywood piece on a flat surface.
Once you have completed these steps, the base of your DIY ring light is ready. You can now move on to building the diffuser and adding any additional features you may want!
Wiring the lights
Once you have gathered all the necessary materials and components for your ring light, it’s time to start wiring the lights. Proper wiring is essential to ensure that the ring light functions correctly and safely.
1. Prepare the power source
Before you start connecting wires, make sure you have a suitable power source for your ring light. This could be a battery pack or a power adapter with the appropriate voltage output.
2. Connect the LEDs
Each LED strip has two wires, a positive (anode) and a negative (cathode). Begin by connecting the positive wire from the first LED strip to the positive wire of the second LED strip using a wire connector or soldering them together. Then, connect the negative wire of the first LED strip to the negative wire of the second LED strip in the same manner.
To ensure a secure connection, you can use wire connectors or solder the wires together. It’s crucial to make sure the connections are tight and well-insulated.
3. Connect the power source
Connect the positive wire from your power source to the positive wire of the first LED strip. Similarly, connect the negative wire from your power source to the negative wire of the first LED strip.
Again, ensure that the connections are secure and insulated properly to avoid any electrical hazards.
4. Test the lights
Before fully assembling your ring light, it’s essential to test the lights to ensure they are functioning correctly. Connect the power source to the LED strips and turn it on. Check if all the LEDs are lighting up evenly and if there are no flickering or dim areas. If any issues are identified, double-check the wiring connections and make any necessary adjustments.
| Qty | Item |
|---|---|
| 1 | LED strip lights |
| 1 | Power source (battery pack or power adapter) |
| 1 | Wire connectors or soldering equipment |
| 1 | Insulation tape |

Mounting the lights
Once you have all the required materials, it’s time to mount the lights. Follow these steps to mount the lights in the most effective way:
- First, decide where you want to mount your lights. This will depend on the type of shots you want to capture and the desired lighting effect. You can mount the lights on a tripod or any stable surface.
- Position the lights at an angle that suits your needs. Experiment with different angles to find the best lighting setup for your shots.
- Secure the lights to the mount using the provided clamps or brackets. Make sure the lights are stable and won’t fall off during use.
- If you’re using multiple lights, consider using a light stand or boom arm to position them at different heights or angles.
- Connect the lights to a power source using the included power cables. Make sure the power source is easily accessible and can handle the power requirements of the lights.
Once the lights are mounted and connected, you’re ready to start using your DIY ring light for your DSLR camera. Adjust the settings on your camera to achieve the desired lighting effect, and start capturing stunning photos and videos.
Adding diffusers
Adding diffusers to your DIY ring light can greatly improve the quality of the light produced. Diffusers help to soften harsh shadows, reduce glare, and create a more even distribution of light.
There are several materials you can use for diffusers, such as diffuser sheets, wax paper, or even white tissue paper. These materials help to scatter the light, making it more diffused and natural-looking.
To add diffusers to your ring light, simply cut the chosen material to fit the size of your light ring, making sure to leave enough space for the LEDs to shine through. Attach the diffuser to the front of the ring light using adhesive or tape, making sure it is secure and doesn’t block any of the LED bulbs.
Experiment with different materials and thicknesses to achieve the desired diffusion effect. Keep in mind that thicker materials will diffuse the light more, but may also reduce the overall brightness of the ring light.
With the addition of diffusers, your DIY ring light will produce a soft, even light that is perfect for capturing professional-looking photos and videos. Don’t be afraid to get creative and try different diffuser materials to achieve the desired lighting effect for your specific needs.
Testing and adjusting
Once you have built your DIY ring light, it’s important to test and adjust it to get the best lighting conditions for your DSLR camera. Here are some steps you can follow to ensure optimal results:
1. Power on the ring light
Connect your ring light to a power source and turn it on. This will allow you to see the actual effect of the light on your subject.
2. Adjust the brightness
Most DIY ring lights come with adjustable brightness settings. Start at a lower brightness level and gradually increase it until you achieve the desired amount of light. Take test shots with your DSLR camera to evaluate the results.
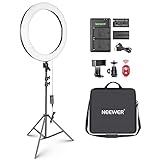
![Neewer Ring Light Kit [Upgraded Version-1.8cm Ultra Slim] - 18 inches, 3200-5600K, Dimmable LED Ring Light with Light Stand, Rotatable Phone Holder, Hot Shoe Adapter for Portrait Makeup Video Shooting](https://m.media-amazon.com/images/I/41WWWC2hysL._SL160_.jpg)
3. Positioning the ring light
Experiment with the positioning of the ring light to achieve the desired lighting effect. You can place it directly in front of your subject for an evenly lit look or try different angles to create various shadows and highlights.
4. Use diffusers or gels
If you find the light to be too harsh or you want to add a creative touch, consider using diffusers or gels. Diffusers soften the light, while gels can add color to the scene. Attach them to the front of the ring light and assess the impact on your shots.
5. Take test shots
Take a series of test shots with your DSLR camera after each adjustment you make. This will allow you to compare the different lighting effects and choose the settings that work best for your specific project.
Remember that lighting is subjective, and it may take some trial and error to achieve the desired results. Take your time to experiment with different settings and techniques, and don’t be afraid to tweak things until you are satisfied with the outcome.
- Power on the ring light.
- Adjust the brightness.
- Positioning the ring light.
- Use diffusers or gels.
- Take test shots.
Final touches and maintenance
Once you have assembled your DIY ring light, there are a few final touches you can add to enhance its functionality and appearance.

- Adjusting bulb placement: Based on your personal preference, you can experiment with adjusting the placement of the bulbs within the ring. This will allow you to customize the intensity and direction of the light.
- Installing a dimmer switch: To have more control over the brightness of the light, you can consider installing a dimmer switch. This will enable you to adjust the brightness according to the specific lighting requirements of your photography or videography project.
- Add a diffuser: To create a softer and more even light, you can attach a diffuser to the front of the ring. This can be made using a thin white fabric or even a white shower curtain. It will help to reduce harsh shadows and produce a more flattering and professional lighting effect.
- Regular cleaning: To maintain the quality and performance of your DIY ring light, it’s important to clean it regularly. Use a soft cloth or duster to remove dust and debris from the bulbs and the frame. Avoid using any liquid cleaners that may damage the electrical components.
By following these final touches and maintaining your DIY ring light, you can ensure optimal performance and longevity. Now you’re ready to capture stunning photos and videos with your DSLR camera!
Question-answer:
What materials do I need to make my own ring light for my DSLR camera?
To make your own ring light for your DSLR camera, you will need the following materials: a cardboard tube, LEDs, a power source (such as a battery pack or power adapter), wires, a switch, a diffuser material, and tools like a hot glue gun and wire cutters.
Is it difficult to make a ring light for a DSLR camera?
While it may require some basic DIY skills, making a ring light for a DSLR camera is not overly difficult. As long as you have the necessary materials and follow a tutorial or guide, you should be able to successfully create your own ring light.
What are the benefits of using a ring light for photography?
Using a ring light for photography offers several benefits. First, it provides even and soft lighting that helps eliminate shadows and reduce harsh highlights on the subject’s face. This can result in more flattering portraits. Additionally, a ring light creates a distinct circular catchlight in the subject’s eyes, which can add a unique and appealing look to the photos.


