Having a security camera at home or at your business can provide peace of mind and a sense of security. However, there may be times when you want to make your security camera public, either to share the live feed with family and friends, or to monitor a specific area for safety reasons. In this article, we will discuss how you can make your security camera public and some important considerations to keep in mind.
1. Choose the right camera: Before you can make your security camera public, you need to ensure that you have a camera that supports this feature. Not all cameras have the capability to be accessed remotely or to be made public. Look for cameras that offer cloud storage or have built-in compatibility with third-party apps or platforms.
2. Set up remote access: Once you have the right camera, you will need to set up remote access. This usually involves creating an account with the camera manufacturer or app provider, and connecting your camera to that account. Follow the instructions provided by the camera manufacturer or app to complete the setup process.
3. Enable public access: After setting up remote access, you can enable public access to your security camera. This will allow anyone with the necessary access credentials, such as a username and password, to view the live feed from your camera. Be sure to choose a strong and secure password to prevent unauthorized access.
4. Consider privacy concerns: While making your security camera public can be convenient and useful, it is important to consider privacy concerns. Ensure that you are not unintentionally monitoring private areas or violating the privacy of others. Be aware of any laws or regulations regarding the use of surveillance cameras in your area and comply with them.

By following these steps, you can make your security camera public and share the live feed with others. Remember to prioritize your privacy and security when making your camera accessible to the public.
Step-by-Step Guide: Making Your Security Camera Public
Do you want to make your security camera public and easily accessible for others to view? This step-by-step guide will walk you through the process:
Step 1: Set Up Your Security Camera
Before making your security camera public, you need to have it set up and properly functioning. Install the camera in the desired location and connect it to your network. Make sure it has its own static IP address.
Step 2: Configure Port Forwarding
In order for your security camera to be accessible from outside your local network, you need to configure port forwarding on your router. Access your router’s settings and find the port forwarding option. Select the security camera’s static IP address and choose a port number to forward.
It is recommended to use a non-standard port to increase security. Also, enable HTTPS encryption if supported by your camera.

Step 3: Set Up Dynamic DNS
If your public IP address is dynamic and subject to change, you need to set up a dynamic DNS service. Search for a dynamic DNS provider and create an account. Follow their instructions to link your router’s public IP address to a domain name.
Step 4: Test Accessibility
Once you have completed the above steps, it’s time to test the accessibility of your security camera. Open a web browser and enter your domain name followed by the port number you forwarded (e.g., http://yourdomain.com:portnumber). If everything is correctly set up, you should be able to view your camera’s live feed.
Step 5: Ensure Security
While making your security camera public allows others to view it, it is important to ensure the security of your camera and network. Use strong and unique passwords for your camera and router. Regularly update the firmware of your camera and router to patch any vulnerabilities.
| Step | Description |
|---|---|
| Step 1 | Set up your security camera and connect it to your network. |
| Step 2 | Configure port forwarding on your router to allow external access. |
| Step 3 | Set up dynamic DNS to link your changing IP address to a domain name. |
| Step 4 | Test the accessibility of your camera using your domain name and port number. |
| Step 5 | Ensure the security of your camera and network by using strong passwords and regularly updating firmware. |
Understanding the Benefits
There are several benefits to making your security camera public.
Firstly, by making your security camera public, you are increasing the level of security in your area. When people know that there are public security cameras installed, they are less likely to commit crimes, as they know they are being watched. This can help deter potential criminals and create a safer environment for everyone.

Secondly, making your security camera public can also serve as a deterrent for other undesirable behaviours, such as harassment or vandalism. When people know that their actions are being recorded and can potentially be seen by others, they are less likely to engage in such actions.
Additionally, making your security camera public can contribute to the overall safety of your community. By sharing your camera feed with local law enforcement or neighborhood watch groups, they can have an extra set of eyes to monitor the area and identify any suspicious activities. This collaboration between residents and authorities can help improve response times and ensure a more effective handling of any potential incidents.
Furthermore, having a public security camera can also provide peace of mind for residents. Knowing that there is an additional layer of surveillance and that others are looking out for their safety can help alleviate concerns and create a sense of security within the community.
Lastly, making your security camera public can also contribute to a greater sense of community and trust. By openly sharing your camera feed, you are showing that you are invested in the well-being of your neighborhood and are willing to contribute towards a safer environment. This can help foster positive relationships and a stronger sense of unity among residents.
In conclusion, making your security camera public offers numerous benefits, including increased security, deterrence of unwanted behaviors, improved community safety, peace of mind, and a sense of unity among residents.
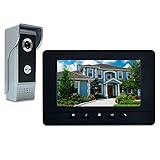
![[355°Pan+90°Tilt Person/Vehicle Detection] Hiseeu PT Wired Security Camera System 8ch 5MP H.265+ DVR 4PCS Cameras 1TB HDD Home CCTV Camera System Outdoor&Indoor,Remote Access,Night Vision,24/7 Record](https://m.media-amazon.com/images/I/41ylwLth1+L._SL160_.jpg)
Assessing Camera Compatibility
Before making your security camera public, it is important to assess its compatibility with your network and platform. Here are some steps to help you determine if your camera is compatible:
1. Check Network Connectivity
- Ensure that your camera is connected to the same network as the device you will use to access it remotely.
- Verify that the camera has a stable internet connection by accessing its settings or connecting it to a wired network if necessary.
2. Review Camera Specifications
- Check the camera’s specifications and make sure it meets the requirements for the platform or software you plan to use for remote access.
- Verify if the camera supports the necessary protocols, such as RTSP, MJPEG, or ONVIF, for compatibility with third-party applications.
3. Assess Security Features
- Consider the security features of your camera, such as encryption and password protection.
- Ensure that the camera allows you to set strong passwords and enable encryption to protect your video streams from unauthorized access.
4. Check Vendor Support
- Research the camera’s manufacturer or vendor to determine if they provide regular firmware updates and technical support.
- Having access to firmware updates and support can help ensure the camera remains secure and compatible with future network upgrades.
By following these steps, you can assess the compatibility of your security camera and ensure a secure and reliable remote access experience.
Configuring Router Settings
Step 1: Connect to your router administration panel. Open a web browser and type in the IP address of your router, followed by the appropriate port number (usually 80 or 8080). This information can be found in the user manual of your router or on the manufacturer’s website.
Step 2: Enter your router’s username and password to log in. If you haven’t changed these credentials, you can find the default username and password in the user manual or on the manufacturer’s website.
Step 3: Look for the “Port Forwarding” or “Virtual Server” option in your router settings. This option allows you to redirect external requests to your security camera’s IP address.

Step 4: Click on the “Add” or “Create” button to set up a new port forwarding rule.
Step 5: Specify the necessary information for the port forwarding rule. This includes the service name (e.g., “Security Camera”), the external and internal ports (usually 80 for HTTP), and the IP address of your security camera.
Step 6: Save your settings and exit the router administration panel. The router will apply the changes and redirect incoming requests to your security camera.
Note: It’s important to enable security features on your router to protect your network and camera from unauthorized access. Consider changing the default username and password, enabling encryption (e.g., WPA2), and disabling remote administration.
Setting Up Port Forwarding
To make your security camera public and viewable from outside your local network, you need to set up port forwarding on your router. Port forwarding allows incoming traffic from the internet to be directed to a specific device on your local network.
Here’s a step-by-step guide to help you set up port forwarding:
Step 1: Find your camera’s local IP address
First, you need to find the local IP address of your security camera. Usually, you can find this information in the camera’s settings or documentation.
Step 2: Access your router’s settings
Open a web browser and enter your router’s IP address in the address bar. This IP address is usually printed on the router itself or can be found in the router’s documentation. Press enter, and you will be directed to your router’s login page. Enter your username and password to access the settings.
Step 3: Locate the port forwarding settings
The location of the port forwarding settings can vary depending on the router’s brand and model. Look for options like “Virtual Servers,” “Port Forwarding,” or “Applications & Gaming” in the router’s settings menu.
Step 4: Add a port forwarding rule
Once you’ve found the port forwarding settings, click on the option to add a new rule. Provide a name for the rule (e.g., “Security Camera”), and enter the local IP address of your camera in the appropriate field.

Next, specify the external and internal ports. The external port is the port number that will be used to access your security camera from the internet. The internal port should be set to the same port number that your camera uses for communication.
Choose the protocol (TCP or UDP) and save the settings.
Step 5: Configure your security camera
Now that port forwarding is set up on your router, you need to configure your security camera to use the specified external port number. Access your camera’s settings, usually through a web interface or mobile app, and locate the port or network options. Enter the external port number you set in the previous step and save the configuration.
Once you’ve completed these steps, your security camera should be accessible from the internet, using your router’s public IP address and the specified external port number. Remember to also ensure that your camera has proper security features enabled, such as authentication and encryption, to protect your privacy.
Note: It’s important to keep in mind that making your security camera public exposes it to potential security risks. Always follow best practices for securing your device and network, including using strong passwords, keeping your camera firmware up to date, and regularly monitoring for unauthorized access.
Now that you’ve successfully set up port forwarding, you can remotely monitor your security camera from anywhere using a web browser or a dedicated mobile app!
Enabling Remote Access
Enabling remote access to your security camera allows you to monitor your property from anywhere in the world. Follow these steps to enable remote access:
- Connect your security camera to your home network using an Ethernet cable or Wi-Fi.
- Access the settings menu on your security camera. This can usually be done by typing the camera’s IP address into a web browser.
- Find the option for remote access or remote viewing. This may be called something like “Internet access” or “Remote management”.
- Enable remote access by toggling the switch or selecting the option.
- Set up a username and password for remote access. Make sure to choose a strong password to protect your camera from unauthorized access.
- Configure any additional settings, such as port forwarding, if needed.
- Save your settings and exit the camera’s settings menu.
- Download a dedicated security camera app on your smartphone or tablet. There are many options available, so choose one that is compatible with your camera brand.
- Launch the app and sign in using your username and password.
- You should now be able to remotely view your security camera’s feed from your mobile device.
Remember to always keep your security camera’s software up to date to ensure optimal performance and to minimize the risk of vulnerabilities.
Securing Your Camera’s Connection
When making your security camera public, it is important to take steps to secure your camera’s connection to protect your privacy and prevent unauthorized access. Here are some tips to help you secure your camera’s connection:
|
Change the default login credentials: Many security cameras come with default usernames and passwords, which are easy for hackers to find. Make sure to change the default login credentials to a unique username and a strong password that includes a combination of letters, numbers, and special characters. |
|
Enable encryption: Encrypting your camera’s connection adds an extra layer of security by making it harder for hackers to intercept and decode your video feed. Check if your camera supports encryption protocols such as HTTPS or SSL/TLS, and enable them if available. |
|
Keep your camera’s firmware up to date: Manufacturers often release firmware updates that include security patches to fix vulnerabilities. Regularly check for firmware updates for your camera, and install them as soon as they become available. |
|
Use a strong Wi-Fi password: Your camera’s connection is only as secure as your Wi-Fi network. Set a strong, unique password for your Wi-Fi network to prevent unauthorized access to your camera’s feed. |
|
Enable two-factor authentication: Two-factor authentication adds an extra layer of security by requiring a second form of verification, such as a code sent to your smartphone, in addition to your username and password. Check if your camera supports two-factor authentication and enable it for added security. |
|
Regularly monitor your camera’s activity: Keep an eye on your camera’s activity logs and monitor for any suspicious activity. If you notice any unauthorized access attempts or unusual behavior, take appropriate action, such as blocking the IP address or contacting the manufacturer for assistance. |
|
Consider using a virtual private network (VPN): A VPN can add an extra layer of security by encrypting your camera’s data traffic and masking your IP address. This can help protect your camera’s connection when accessing it remotely. |
Testing the Public Access
Once you have set up your security camera for public access, it is important to test its functionality to ensure that everything is working correctly. Here are some steps to follow:
- Check the camera feed: Access the publicly available URL or IP address of your security camera from a different device or network to see if the camera feed is accessible.
- Test the video quality: Make sure that the video quality is clear and not pixelated. Check if the camera captures footage in the desired resolution.
- Verify the live stream: Check if the camera provides a live stream of the footage. Make sure there is no significant delay between the live feed and the actual events.
- Test remote access: Try accessing the camera feed from a different location or network, such as using a mobile data connection or a different Wi-Fi network. This will ensure that the camera is accessible from anywhere.
- Ensure proper security settings: Authenticate and verify the security measures you have put in place. Ensure that unauthorized users cannot access the camera feed.
By testing the public access of your security camera, you can make sure that it is functioning as intended and providing the necessary surveillance. Regularly check the camera’s accessibility and quality to maintain optimal performance.
Monitoring and Managing Public Access
Once you have made your security camera public, it is important to monitor and manage the public access to your camera feed to ensure the safety and privacy of both yourself and others. Here are some strategies to consider:
- Regularly check the camera feed: It is important to regularly check the camera feed to ensure that everything is functioning properly and that there are no unauthorized access attempts.
- Set up alerts: Configure your security camera system to send you alerts whenever there is any unusual activity or attempted unauthorized access.
- Implement password protection: Protect your camera feed by using strong passwords and implementing two-factor authentication for an added layer of security.
- Monitor user access: Keep track of who has access to your camera feed and regularly review the list of authorized users. Remove any users who no longer need access.
- Update firmware: Regularly update the firmware of your camera system to ensure that you have the latest security patches and improvements.
- Secure your network: Make sure that the network on which your security camera system is connected is secure. Use strong encryption protocols and change the default login credentials of your network equipment.
By following these strategies, you can effectively monitor and manage public access to your security camera feed, ensuring the safety and privacy of everyone involved.


