
Installing a security camera on an overhang can be an effective way to enhance the security of your property. Whether it’s a porch, garage, or any other overhang, this guide will provide you with step-by-step instructions on how to mount a security camera on an overhang. With the right tools and a little patience, you’ll have a reliable surveillance system that can help deter potential thieves and provide you with peace of mind.
Before you start the installation process, it’s important to choose the right camera for your needs. Look for a camera with features such as high-definition video quality, night vision, and motion detection. Additionally, consider whether you want a wired or wireless camera, depending on the accessibility of power sources and your preferences.
Once you have your camera, the first step is to determine the best location for mounting. Look for an area that provides a wide field of view and covers the most vulnerable areas. It’s also important to ensure that the camera is not obstructed by any objects that may interfere with its view. Take into account the angle at which the camera will be mounted and adjust it accordingly to capture the best footage.
After selecting the location, mark the spots for the mounting screws using a pencil or marker. Use a drill to create pilot holes for the screws to ensure a secure and stable mount. If you’re mounting the camera on a wooden overhang, make sure to choose screws that are suitable for wooden surfaces. For other types of materials, such as concrete or metal, use appropriate anchors for a secure installation.
Once the camera is securely mounted, connect it to a power source and configure it according to the manufacturer’s instructions. Test the camera to ensure that it’s capturing clear footage and that all the features are working properly. Consider adjusting the camera settings, such as motion sensitivity and recording preferences, to suit your specific needs.
In conclusion, mounting a security camera on an overhang can provide an extra layer of protection for your property. By following these step-by-step instructions, you’ll be able to install a security camera effectively and ensure that your property is well-guarded. Remember to regularly check and maintain your camera to ensure its optimal performance and keep your property safe and secure.
Preparing for Installation
Before installing a security camera on an overhang, it is important to adequately prepare for the installation process. Taking the time to properly plan and gather all the necessary tools and materials will ensure a successful and secure installation. Here are some steps to follow:
- Choose the right location: Select a suitable spot on the overhang where the camera will have a clear view of the desired area. Consider factors such as lighting, obstructions, and the camera’s field of view.
- Measure and mark: Use a measuring tape and a pencil to measure and mark the exact position where the camera will be mounted. Double-check the measurements to ensure accuracy.
- Gather tools and materials: Gather all the required tools and materials for the installation, including a drill, screws, anchors, mounting bracket, cable clips, and a power source.
- Ensure proper power source: Ensure that there is a proper power source available near the installation location. If not, consider using a power extension or other alternatives.
- Check camera compatibility: Verify that the selected camera is compatible with the chosen overhang and meets all the necessary requirements for installation.
- Prepare cables and connections: If necessary, prepare the cables and connections for the camera installation. Measure and cut the cables to the appropriate length and ensure all necessary connectors are available.
- Plan for cable concealment: Plan for how the cables will be concealed and routed to avoid any obstructions or potential tampering. Consider using cable conduits or other hiding techniques.
By following these preparation steps, you will be well-equipped and ready to proceed with the installation of your security camera on an overhang.
Getting the Right Equipment
When it comes to mounting a security camera on an overhang, it’s crucial to have the right equipment to ensure a secure and stable installation. Here are a few key items you’ll need:
1. Security Camera: Choose a camera that is specifically designed for outdoor use and can withstand different weather conditions. Look for features such as infrared night vision, motion detection, and high-resolution video quality.

2. Mounting Bracket: A sturdy mounting bracket is essential for securing the camera to the overhang. Opt for a bracket that is adjustable and provides a wide range of motion to capture the desired area effectively.
3. Screws and Anchors: To securely attach the mounting bracket to the overhang, you’ll need screws and anchors that are suitable for the specific material of the overhang. Ensure they are strong enough to hold the weight of the camera and bracket.
4. Power Source: Consider the power source for your security camera. If there is no accessible power outlet nearby, you may need to invest in a camera with a rechargeable battery or consider a solar-powered option.
5. Wiring and Extension Cables: Depending on the location of the camera and the distance from the power source, you may need wiring and extension cables to connect the camera to the power supply. Make sure they are weatherproof and properly concealed.
6. Tools: Have the necessary tools on hand, such as a drill, screwdriver, level, and wire cutters, to assist with the installation process.

By ensuring you have the right equipment for mounting your security camera on an overhang, you’ll be well-prepared to set up a reliable and effective surveillance system.
Choosing the Perfect Spot
When it comes to mounting a security camera on an overhang, choosing the perfect spot is crucial for ensuring optimal coverage and functionality. Here are some factors to consider when selecting the ideal location for your camera:
- Line of Sight: Ensure that the camera has a clear line of sight to the area you want to monitor. Avoid obstructions such as branches, walls, or other objects that may block the camera’s view.
- Height: Mount the camera at a height that provides a comprehensive view of the area. Higher placement can help prevent tampering, while lower placement may provide better facial recognition.
- Lighting Conditions: Consider the lighting conditions in the area. If it’s too bright, it may wash out the footage, while low light conditions may affect the camera’s performance. Aim for a spot with balanced lighting.
- Security Risks: Identify potential security risks or blind spots that may exist in the area. Pay attention to entry points, valuable assets, or areas that are more vulnerable to theft or vandalism.
- Weather Protection: Ensure that the chosen spot provides adequate weather protection for the camera. Look for an overhang or sheltered spot that shields the camera from rain, snow, and extreme temperature fluctuations.
- Accessibility: Consider the accessibility of the camera for maintenance and adjustments. Look for a spot that is easy to reach without compromising safety or the camera’s positioning.
- Power and Connectivity: Ensure that the chosen spot is within reach of a power source and offers reliable connectivity for the camera. This will ensure uninterrupted surveillance and easy access to the footage.
Taking these factors into account will help you choose the perfect spot for mounting your security camera on an overhang, maximizing its effectiveness in monitoring and safeguarding your property.
Gathering the Necessary Tools
Before you begin mounting your security camera on an overhang, it’s important to gather all the necessary tools. Having the right tools on hand will make the process much easier and ensure that the camera is securely installed.
Here is a list of the tools you will need:

- Power drill: You will need a power drill to create holes for mounting the camera.
- Drill bits: Different sized drill bits will be necessary depending on the type of mounting hardware you are using.
- Screwdriver: A screwdriver will be needed to secure the mounting hardware in place.
- Level: Use a level to ensure that the camera is straight and properly aligned.
- Tape measure: Measure the area where you plan to mount the camera to ensure it is the correct size and distance from other objects.
- Camera mounting hardware: This includes brackets, screws, and any other necessary hardware to securely mount the camera.
- Extension cables: If your camera requires power and data cables, make sure you have the appropriate length extension cables.
- Ladder: Depending on the height of the overhang, you may need a ladder to reach the installation area safely.
- Protective gear: Wear safety glasses or goggles to protect your eyes from debris while drilling and installing the camera.
Gathering these tools beforehand will save you time and frustration during the installation process. Once you have all the necessary tools ready, you can proceed with mounting your security camera on the overhang.
Drill and Bits
When it comes to mounting a security camera on an overhang, having the right tools is essential. One of the key tools you’ll need is a drill, along with the appropriate drill bits. The drill will be used to create the holes necessary to secure the camera and its mounting bracket.
Choosing the Right Drill
When selecting a drill for this task, it’s important to consider the size and power. A cordless drill is often the most convenient option, as it allows for easier maneuverability and doesn’t require a power source nearby. Look for a drill with adjustable speed settings, as this will give you more control over the drilling process.
Selecting the Correct Drill Bits
Equally important as having the right drill is having the right drill bits. The type and size of the drill bit you’ll need will depend on the material you’ll be drilling into. For most overhangs, a standard masonry drill bit will be suitable. These drill bits are designed to handle materials like concrete or brick, which are commonly found in overhangs.
However, if your overhang is made of a different material such as wood or metal, you’ll need a different type of drill bit. For wood overhangs, a wood drill bit will be most effective, while a metal drill bit will be needed for metal overhangs.

It’s important to choose the right size of the drill bit as well. The size of the drill bit will depend on the size of the screws or anchors that will be used to secure the camera and mounting bracket. Refer to the instructions provided with your camera for the recommended size of the drill bit.
Once you have the appropriate drill and drill bits, you’ll be ready to start mounting your security camera on an overhang. Remember to follow all safety precautions and guidelines provided by the manufacturer, and take your time to ensure a secure and stable installation.
Ladder
A ladder is a useful tool for mounting a security camera on an overhang. It provides a stable platform and enables easy access to the desired location. It is important to choose the appropriate size and type of ladder for the job, ensuring it is strong enough to support your weight and any additional equipment you may need.
Types of Ladders
There are several types of ladders available, including step ladders and extension ladders. Step ladders are self-supporting and have a hinged design, making them easy to set up and use. Extension ladders are adjustable in length and usually require leaning against a stable surface for support.
Ladder Safety Tips:
Before using a ladder, it is important to follow these safety guidelines:

| 1. | Inspect the ladder for any defects or damage before use. |
| 2. | Ensure the ladder is placed on a stable and level surface. |
| 3. | Always maintain three points of contact with the ladder (two hands and one foot or two feet and one hand). |
| 4. | Avoid overreaching or leaning to the side while on the ladder. |
| 5. | Never stand on the top two rungs of a ladder. |
| 6. | Do not exceed the maximum weight capacity of the ladder. |
| 7. | Keep the area around the ladder clear to prevent tripping hazards. |
By following these ladder safety tips, you can ensure a safe and successful installation of your security camera on an overhang.
Installing the Mounting Bracket
Before you begin the installation process, it is important to select the appropriate mounting bracket for your security camera. The bracket should be specifically designed for overhang installations to ensure proper stability and viewing angles.
Once you have chosen the suitable mounting bracket, follow these steps to properly install it:
- Choose the installation location: Determine the best location on the overhang where you want to mount your security camera. Ensure the area has a clear view of the desired surveillance area.
- Position the bracket: Hold the mounting bracket up to the chosen location and mark the areas where the screws will go. Use a level to ensure the bracket is straight.
- Drill pilot holes: Using an appropriate size drill bit, drill pilot holes into the marked areas on the overhang.
- Attach the bracket: Line up the holes on the bracket with the pilot holes and securely attach the bracket to the overhang using screws and a screwdriver or drill.
- Secure the camera: Depending on the specific camera model, follow the manufacturer’s instructions to attach the camera to the mounting bracket. This may involve using screws, brackets, or other hardware.
- Adjust the position: Once the camera is attached, adjust the position and angle to get the desired view of the surveillance area. You may need to tighten screws or use adjustment knobs to securely hold the camera in place.
Following these steps will help you properly install the mounting bracket for your security camera on an overhang. Make sure to double-check the stability of the bracket and the clarity of the camera’s view before finalizing the installation.
Marking the Pilot Holes
Before you begin the installation process, you will need to mark the pilot hole positions on the overhang. This step is crucial as it will ensure that the security camera is properly aligned and securely mounted.

Start by positioning the camera mount on the desired location of the overhang. Use a level to ensure that the mount is perfectly straight. Once you are satisfied with the placement, mark the center of each mounting hole with a pencil.
Next, remove the camera mount and double-check the accuracy of the pencil marks. Make any necessary adjustments to ensure that the pilot holes will be positioned correctly. Once you have confirmed the accuracy, use a small nail or awl to create a small indentation at each pencil mark. These indentations will serve as a guide when drilling the pilot holes.
It is important to note that the size of the pilot holes will depend on the type of camera mount you are using. Check the manufacturer’s instructions to determine the appropriate drill bit size. Once you have the correct drill bit, securely attach it to your drill.
With the drill in hand, carefully position the tip of the drill bit in the center of one of the indentations. Apply gentle pressure and begin drilling slowly. It is crucial to keep the drill straight and avoid applying excessive force, as this can damage the overhang.
Continue drilling until the pilot hole is deep enough to accommodate the anchor or screw. Repeat this process for each of the other pilot hole indentations.
Once you have finished drilling the pilot holes, remove any debris and proceed to the next step of the installation process. Now, you are ready to securely mount your security camera on the overhang.
Securing the Bracket
Before mounting the security camera on the overhang, it is important to ensure that the bracket is securely attached. Follow these steps for a secure bracket installation:
- Locate an appropriate spot on the overhang to mount the bracket.
- Ensure that the surface is clean and free from any debris.
- Hold the bracket against the overhang and mark the locations of the screw holes on the surface.
- Drill pilot holes at the marked locations to make it easier to insert the screws.
- Attach the bracket to the overhang using screws and a screwdriver.
- Tighten the screws snugly, but avoid overtightening to prevent damage to the overhang.
- Double-check the bracket’s stability by gently shaking it to ensure it is securely attached.
Properly securing the bracket is essential to ensure the security camera stays in place and provides accurate surveillance. Once the bracket is securely attached to the overhang, you can proceed with mounting the security camera onto the bracket according to the manufacturer’s instructions.
Running Cables
When installing a security camera on an overhang, running cables becomes an essential part of the process. Proper cable management ensures the camera is connected to its power source and recording device without cluttering or tangling the wires.
Here are some steps to run cables for your security camera:
- Plan your cable route: Before running the cables, decide on the path they will take. Consider concealing them within the overhang or using cable clips to secure them.
- Purchase the right cables: Use high-quality cables that are designed for outdoor use and have the necessary connectors for your camera and recording device.
- Measure and cut the cables: Take measurements of the distance between your camera and the power source or recording device. Cut the cables accordingly, leaving a little extra length for any adjustments or repositioning in the future.
- Prepare the cables: If your cables have connectors attached, leave them as they are. If not, strip the ends of the cables to expose the wires and attach connectors using appropriate tools.
- Secure the cables: Use cable clips or adhesive mounts to fasten the cables along the path you planned earlier. This helps prevent them from hanging or getting damaged by wind or other environmental factors.
- Connect the cables: Connect the power cable to your camera and the recording device. Ensure a secure connection, and use waterproof connectors if the overhang is exposed to the elements.
- Test the setup: Before finalizing the cable installation, test the camera’s functionality. Make sure it receives power and transmits video signal properly.
- Hide or cover the cables (optional): If you want a neater appearance, you can use cable covers or conceal the cables within the overhang’s structure or walls. This step can improve the overall aesthetics of your security camera setup.
By following these steps, you can safely and effectively run cables for your security camera on an overhang. Remember to prioritize the protection of the cables from external elements and ensure proper connections for reliable performance.
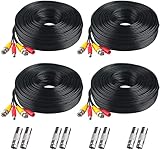
Choosing the Right Cable
When it comes to mounting a security camera on an overhang, selecting the right cable is crucial. The cable connects the camera to the power source and allows for the transmission of video data. Here are some factors to consider when choosing a cable for your security camera:
Cable Length
The length of the cable is an important consideration. Measure the distance between your camera and the power source to determine the length of cable needed. It’s always a good idea to choose a cable that is slightly longer than the measured distance to allow for flexibility in installation.
Cable Type
There are various types of cables available for security camera installations, including coaxial cables, Ethernet cables, and power cables. Coaxial cables are commonly used for analog cameras, while Ethernet cables are recommended for IP cameras. Power cables are required to supply electricity to the camera.
Pro Tip: If you are using a PoE (Power over Ethernet) camera, make sure to select an Ethernet cable that supports PoE.
Cable Quality
Investing in high-quality cables is important to ensure reliable and clear transmission of video data. Look for cables that are made of durable and weather-resistant materials, such as copper conductors and PVC jacketing. These cables are designed to withstand outdoor conditions and provide uninterrupted power and video transmission.
Note: It is recommended to consult with a professional or refer to the manufacturer’s specifications to ensure compatibility between the camera and the chosen cable.
Hiding the Cables
When mounting a security camera on an overhang, it is essential to hide the cables for a clean and professional installation. Here are some tips on how to hide the cables effectively:
- Use cable raceways: Cable raceways are plastic or metal channels that conceal and protect the cables. These raceways can be easily mounted on the surface of the overhang, providing a neat and organized look.
- Route the cables through the wall: If possible, you can route the cables through the wall of the building, hiding them from sight completely. This may require drilling holes in the wall and using wall plates to cover the openings.
- Paint the cables: If the cables are visible and cannot be concealed using other methods, you can paint them to match the color of the overhang. This will help to camouflage them and make them less noticeable.
- Use cable clips or ties: Cable clips or ties can be used to secure the cables to the surface of the overhang, keeping them in place and preventing them from hanging or dangling.
- Utilize existing structures: If there are any existing structures, such as columns or pillars, near the overhang, you can use them to hide the cables. Simply run the cables along these structures, ensuring they are secured properly.
Remember, it is crucial to ensure that the cables are protected from the elements and potential damage. Use weatherproof cable covers and ensure the cables are properly insulated to prevent any issues.
FAQ,
What is an overhang?
An overhang is a projection, such as a roof or awning, that extends beyond the edge of a building.
Why would I want to mount a security camera on an overhang?
Mounting a security camera on an overhang provides an elevated position for better surveillance coverage. It can help capture a wider view and reduce the risk of vandalism or tampering.
What tools do I need to mount a security camera on an overhang?
You will typically need a drill, screws, screwdriver, ladder or scaffolding, and possibly a mounting bracket or arm, depending on the camera and overhang design.
Are there any tips for choosing the right security camera for an overhang?
When choosing a security camera, consider factors such as weather resistance, resolution, night vision capabilities, and the field of view. It’s also important to select a camera with an adjustable mount to ensure proper positioning when mounted on an overhang.


