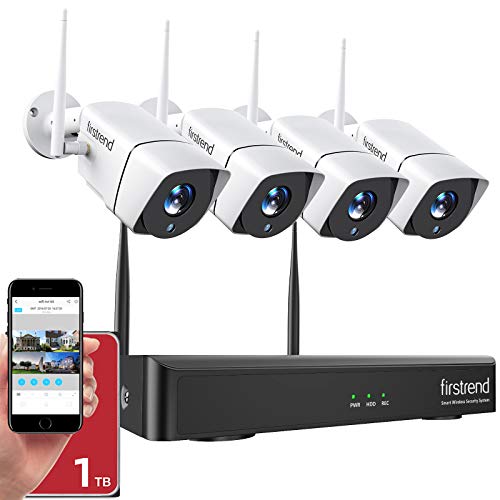
Installing a security camera is an essential step in ensuring the safety and security of your property. Camius security cameras are known for their high-quality performance and advanced features, making them a popular choice for both residential and commercial use. Mounting a Camius security camera is a straightforward process that can be completed by following a few simple steps.
Step 1: Choose the Right Location
Before you start mounting your Camius security camera, it is important to choose the right location. Consider the areas you want to monitor and the angle at which you want the camera to capture footage. Make sure the location provides a clear view of the area without any obstructions.
Pro Tip: It is recommended to mount the camera at a height of 9-10 feet to avoid tampering and achieve optimal coverage.
Step 2: Secure the Mounting Bracket

Once you’ve determined the ideal location, use the provided screws and mounting bracket to secure the camera. Make sure the bracket is tightly secured to ensure stability. Double-check that the angle and position of the bracket align with your desired surveillance coverage.
Pro Tip: If you’re mounting the camera to a wall, use wall anchors for added stability.
Step 3: Connect the Camera
After securing the mounting bracket, connect the camera to the power source and any necessary cables. Camius security cameras typically come with easy-to-follow instructions for connecting the camera properly. Ensure that the cables are neatly organized and hidden to maintain a clean and professional installation.
Pro Tip: Consider using cable clips or conduits to hide and protect the cables from external elements.

By following these steps, you can successfully mount your Camius security camera and start monitoring your property with confidence. Remember to adjust and test the camera’s positioning to optimize its performance and maximize your surveillance capabilities.
Choosing the Right Location
When it comes to mounting your Camius security camera, choosing the right location is crucial for optimal performance. Here are some factors to consider:
| Visibility | Ensure that the camera has a clear line of sight and is not obstructed by objects such as trees, walls, or other structures. This will provide a better view and minimize false alarms. |
| Coverage | Determine the areas you want to monitor and position the camera to cover those areas effectively. Consider the camera’s field of view, and if necessary, use multiple cameras to ensure comprehensive coverage. |
| Lighting | Take into account the lighting conditions in the chosen location. If monitoring an outdoor area, ensure the camera has built-in infrared capabilities or additional lighting to capture clear footage during the night. |
| Accessibility | Mount the camera in a location where it can be easily accessed for maintenance or adjustments if needed. This will make it easier to clean the lens, adjust the angle, or perform any necessary troubleshooting. |
| Security | Consider the vulnerability of the camera to tampering or theft. Opt for locations that are less accessible or use additional security measures, such as mounting the camera higher or installing protective casings. |
By taking these factors into account, you can ensure that your Camius security camera is installed in the ideal location, providing you with reliable surveillance and peace of mind.
Gathering the Tools
Before you begin mounting your Camius security camera, it’s important to gather all the necessary tools. Having the right tools will make the installation process much easier and ensure a secure and reliable setup.
Here are a few tools you’ll need:

- Power drill: You’ll need a power drill with a masonry bit to securely mount the camera bracket to the wall.
- Screwdriver: A screwdriver will be necessary for attaching the camera to the mounting bracket.
- Level: To ensure that your camera is properly aligned, you’ll need a level to check for any tilting or unevenness.
- Tape measure: Measuring the distance and positioning of the camera is crucial for getting the right angle and coverage.
- Pencil or marker: Use a pencil or marker to mark the exact spots where you’ll be drilling the holes for the camera bracket.
- Masking tape: Applying masking tape on the wall before drilling can help protect the surface from any potential damage.
- Extension cables: Depending on the location of your camera, you may need extension cables to connect it to the power source or the network.
Gathering these tools beforehand will save you time during the installation process and ensure that you have everything you need to mount your Camius security camera properly.
Preparing the Mounting Surface
Before mounting your Camius security camera, it is important to properly prepare the surface where it will be installed. This will ensure a secure and stable installation, allowing the camera to function effectively and provide reliable surveillance.
1. Determine the Mounting Location
Decide on the specific location where you want to mount your security camera. Consider factors such as the area you want to monitor, the angle of coverage required, and any obstructions that may affect the camera’s view. It is also important to ensure that the mounting location is within reach of a power source and has a stable surface to support the camera.
2. Gather the Necessary Tools and Equipment
- Power drill
- Screws or anchors suitable for your mounting surface
- Screwdriver (if required)
- Level
- Tape measure
Make sure you have all the necessary tools and equipment at hand before you start the installation process. This will save you time and prevent any delays during the mounting process.
3. Clean the Mounting Surface
It is essential to clean the mounting surface before installing the camera. Remove any dirt, dust, or debris that may interfere with the adhesive or mounting process. Use a soft cloth or a mild cleaning solution to ensure a clean and smooth surface for optimal adhesion and stability.
4. Mark the Mounting Holes
Using a tape measure and level, mark the locations where the mounting holes will be drilled. Ensure that the marks are aligned and properly spaced according to the camera’s mounting bracket. Double-check the measurements to ensure accuracy before proceeding with the drilling.
Following these steps will help you prepare the mounting surface for your Camius security camera installation. Once the surface is properly prepared, you can proceed with mounting the camera securely and enjoy the benefits of enhanced security and surveillance.
Installing the Mounting Bracket
Before installing your Camius security camera, you will need to set up the mounting bracket. The mounting bracket is an essential component that allows you to securely attach the camera to a wall or ceiling. Here are the steps to install the mounting bracket:
Step 1: Choose the Installation Location
First, you need to determine the best location to mount the camera. Consider the area you want to monitor and ensure that the camera has a clear view. It is also important to ensure that the mounting surface is stable and can support the weight of the camera.
Step 2: Mark the Mounting Holes
Once you have determined the installation location, use a pencil or marker to mark the spots where you will be mounting the bracket. Make sure to measure and align the bracket properly to ensure a secure installation.
Step 3: Drill the Holes
Using an appropriate drill bit, carefully drill the holes into the marked spots. Make sure to use a level to ensure that the holes are drilled straight. It’s important to use the correct size drill bit to match the screws provided with your mounting bracket.
Step 4: Attach the Mounting Bracket
Line up the holes on the mounting bracket with the drilled holes on the wall or ceiling. Insert the screws into the holes and use a screwdriver to securely fasten the bracket in place. Make sure to tighten the screws firmly, but be careful not to overtighten and damage the bracket or the wall surface.
Once you have installed the mounting bracket, you are now ready to attach the Camius security camera to it. Follow the manufacturer’s instructions for attaching the camera to the mounting bracket properly. Ensure that the camera is securely attached and properly aligned for optimal surveillance coverage.
Remember to consult the user manual or contact the Camius support team if you encounter any difficulties during the installation process. Following the steps provided will help ensure a successful installation and proper functioning of your Camius security camera.
Connecting the Camera
After you have mounted the Camius security camera in your desired location, it’s time to connect and set it up. Follow the steps below to ensure a successful installation.
- Locate the power adapter that came with your Camius security camera.
- Plug one end of the power adapter into the camera’s power input port.
- Connect the other end of the power adapter to a power outlet.
- Ensure that the camera receives power by checking if its LED lights up.
- Next, connect the camera to your network using an Ethernet cable.
- Plug one end of the Ethernet cable into the camera’s Ethernet port.
- Connect the other end of the Ethernet cable to your router or switch.
- Wait for the camera to establish a connection with your network. This may take a few minutes.
- Once connected, you can access the camera’s interface by opening a web browser on a computer connected to the same network.
- Enter the camera’s IP address in the browser’s address bar to access the camera settings.
By following these steps, you will be able to connect your Camius security camera to your network and access its settings for configuration and monitoring.
Adjusting the Camera Angle
To get the best surveillance coverage, it’s important to adjust the camera angle properly. Follow these steps to ensure you achieve optimal results:
- Start by mounting the camera securely on a wall or ceiling using the provided mounting bracket. Make sure the camera is placed at a height and location that provides a wide viewing angle.
- Once the camera is securely mounted, use a ladder or step stool to reach the camera. Be cautious when climbing to avoid any accidents or injuries.
- Locate the adjustable arm or bracket connected to the camera. This arm allows you to change the angle and direction of the camera.
- Gently loosen the screws on the adjustable arm with a screwdriver or the provided tool. Make sure not to loosen too much, as you want to keep the camera stable.
- After loosening the screws, adjust the camera angle by holding the camera and moving it up, down, left, or right. Experiment with different angles to find the best position.
- Once you have found the desired angle, tighten the screws on the adjustable arm to secure the camera in place. Make sure the camera doesn’t move or shift after tightening.
- Double-check the camera’s field of view to ensure it covers the desired area. Walk around the monitored area to test the angle and adjust if necessary.
- Lastly, connect the camera to the power source and the recording device, following the manufacturer’s instructions. Test the camera’s functionality to ensure it captures clear and crisp images.
By carefully adjusting the camera angle, you can maximize the effectiveness of your Camius security camera and ensure reliable surveillance coverage.
Securing the Camera in Place
Once you have determined the ideal location for your Camius security camera, it is crucial to securely mount it in place to ensure proper functionality and maximum security coverage. Follow these steps to securely mount your Camius security camera:
- Identify a sturdy mounting surface:
- Mark and drill pilot holes:
- Drill holes:
- Secure the mount:
- Attach the camera:
- Verify stability:
Choose a solid surface that can support the weight of the camera and withstand external environmental factors. Ideal locations include walls, ceilings, or specialized mounting brackets.
Position the camera mount on the selected surface and mark the spots where pilot holes should be drilled. Ensure that the camera will be level and aligned as desired.
Using an appropriate drill bit, carefully drill the pilot holes into the marked spots. Be cautious of any obstacles that may be behind the selected surface.
Align the mount with the drilled holes and use screws or bolts to securely attach it to the surface. Ensure that the mount is level and tightened properly.
Depending on the specific model, the camera may be attached directly to the mount or require additional mounting brackets. Refer to the manufacturer’s instructions for precise installation steps.
Once the camera is attached, gently test its stability by giving it a slight shake. If it remains firmly in place, the camera is securely mounted.
Following these steps will ensure that your Camius security camera is securely mounted in place, providing optimal surveillance and peace of mind.
Testing the Camera
Before you mount your Camius security camera, it is important to test its functionality to ensure it is working properly. Follow these steps to test your camera:
Step 1: Power on the Camera
Connect the camera to a power source using the provided power adapter. Make sure the camera is receiving power by checking for the LED indicator light.
Step 2: Connect to the Network
Use an Ethernet cable to connect the camera to your network router. Once connected, the camera should receive an IP address from the router.
Step 3: Access the Camius Web Interface
Open a web browser on your computer and enter the camera’s IP address into the address bar. This will bring up the Camius web interface.
Step 4: Login and Verify Settings
Enter the login credentials for your camera (usually the default username and password are admin/admin) to access the camera’s settings. Check the camera’s resolution, frame rate, and other settings to ensure they are configured correctly for your needs.
Step 5: Test Video and Audio
Within the Camius web interface, navigate to the live view or video playback section. Check if the camera is capturing clear video and if the audio is working properly. Adjust the position and angle of the camera if needed.
Step 6: Test Motion Detection and Alerts
Enable the motion detection feature in the camera’s settings and adjust the sensitivity if necessary. Walk in front of the camera to test if it successfully detects motion and triggers the appropriate alerts.
Step 7: Review Recordings and Storage
If your camera supports local recording or has a microSD card slot, test recording a few videos and verify that they are being saved properly. Check the available storage space and consider setting up remote storage options for added backup.
By following these steps, you can ensure that your Camius security camera is functioning correctly before mounting it in its final location. This will help to minimize any potential issues and ensure you get the most out of your camera’s surveillance capabilities.
Maintenance and Troubleshooting
Regular maintenance is crucial to ensure that your Camius security camera operates efficiently and effectively. By following these maintenance guidelines, you can extend the lifespan of your camera and maximize its performance.
1. Clean the Camera:
Periodically clean the camera lens and housing to remove dirt, dust, and debris. Use a soft, lint-free cloth or a cotton swab with a small amount of lens cleaning solution. Avoid using abrasive materials or harsh chemicals as they may damage the camera.
2. Check the Camera Connections:
Inspect the camera connections, including cables and connectors, to ensure they are secure and free from damage. Loose or damaged connections can result in poor video quality or loss of signal. If any issues are found, tighten or replace the connections as necessary.
3. Verify the Power Supply:
Check the power supply to ensure that it is functioning correctly. Make sure the power cable is securely plugged into the camera and the power outlet. If the camera is not receiving power, try using a different power cable or outlet to determine if the issue lies with the camera or the power source.
4. Update Firmware:
Periodically check for firmware updates for your Camius security camera. Firmware updates often include improvements in performance and functionality, as well as bug fixes. Follow the manufacturer’s instructions to download and install the latest firmware version.
5. Troubleshooting:
If you encounter any issues with your Camius security camera, refer to the user manual for troubleshooting steps. Common troubleshooting techniques include power cycling the camera, adjusting camera settings, or resetting the camera to its factory default settings. If the issue persists, contact Camius customer support for further assistance.
By following these maintenance and troubleshooting guidelines, you can ensure that your Camius security camera continues to provide reliable surveillance and peace of mind.
FAQ,
What tools do I need to mount a Camius security camera?
To mount a Camius security camera, you will need the following tools: a power drill, screws, screwdriver, a level, and a ladder or step stool if needed.
Do I need any special knowledge or skills to mount a Camius security camera?
Mounting a Camius security camera does not require any special knowledge or skills. The process is fairly simple and can be done by anyone with basic DIY skills. However, if you are not comfortable working with tools or climbing ladders, it is recommended to hire a professional for the installation.
How do I determine the best location to mount my Camius security camera?
When choosing a location for your Camius security camera, consider the following factors: the area you want to monitor, the camera’s field of view, the availability of power source, proximity to a Wi-Fi signal (if applicable), and any potential obstructions or blind spots. It is advisable to test the camera’s view from different angles before mounting it permanently to ensure optimal coverage.