Mounting security cameras on brick can be a challenging task, but with the right tools and techniques, you can ensure a secure installation. Brick walls provide a sturdy surface for mounting cameras, offering added security for your property. Whether you’re looking to monitor your front yard, backyard, or any other area of your home or business, this guide will walk you through the step-by-step process of mounting security cameras on brick.
Step 1: Choose the Right Location
Before mounting your security cameras, it’s important to determine the best location for optimal coverage. Consider areas with high traffic or vulnerable entry points, such as doors or windows. Make sure the chosen location offers a clear view and minimizes obstructions.
Tip: Place your camera at a height of 9-10 feet to avoid tampering and ensure a wide-angle view.
Step 2: Gather the Necessary Tools

To mount your security camera on a brick wall, you will need the following tools:
- Drill
- Masonry drill bit
- Screws or anchors
- Camera mounting bracket
- Pencil or marker
- Screwdriver or drill bit holder
Tip: Ensure the masonry drill bit matches the diameter of the screws or anchors you are using for a secure fit.
Step 3: Mark and Drill Holes
Using the camera mounting bracket as a guide, mark the desired location on the brick wall with a pencil or marker. Double-check the alignment and make any adjustments if needed. Then, using the masonry drill bit, carefully drill the marked holes into the brick wall.
Tip: Start with a smaller drill bit size and gradually increase to the desired diameter to avoid damaging the brick.
Step 4: Attach the Camera Mounting Bracket
Once the holes are drilled, remove any debris from the holes and align the camera mounting bracket with the holes. Securely attach the bracket to the brick wall using screws or anchors that are appropriate for your wall type.
Tip: Consider using screw plugs or epoxy for added stability in areas with extreme weather conditions.
Congratulations! Your security camera is now securely mounted on the brick wall. Remember to connect the camera to a power source and adjust the angle for the best view. Regularly clean and maintain your security camera to ensure optimal performance and longevity.
Note: It’s always recommended to consult professional installation services if you feel unsure or uncomfortable performing the installation yourself.

By following these steps, you can effectively mount security cameras on brick and enhance the protection of your property.
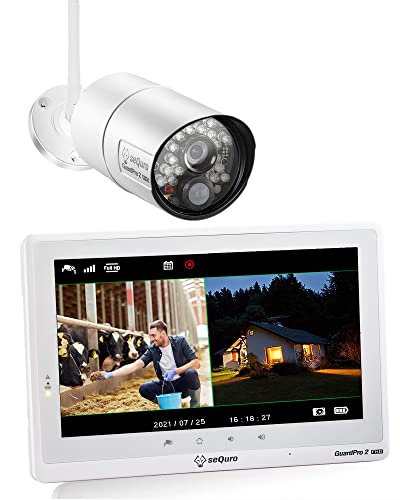
What are security cameras
Security cameras, also known as surveillance cameras or closed-circuit television (CCTV) cameras, are devices used to monitor and record activities in different locations. They are widely used in both residential and commercial properties to enhance security and prevent crimes.
Security cameras consist of a camera, lens, and video processing system that captures and records video footage. They can be connected to a local recording device or to a network video recorder (NVR) that allows for remote monitoring and access to the recorded footage.
These cameras come in various types, including dome cameras, bullet cameras, and PTZ (pan-tilt-zoom) cameras. Dome cameras are popular for their discreet design and wide coverage, while bullet cameras are known for their long-range capabilities. PTZ cameras can be remotely controlled to pan, tilt, and zoom in on specific areas.
Security cameras can be used for various purposes, such as monitoring entrances and exits, deterring criminal activity, and providing evidence in case of incidents. They can also be integrated with other security systems, such as alarms and access control systems, to create a comprehensive security solution.

Benefits of security cameras
- Deterrence: Security cameras can act as a deterrent to potential criminals, as the presence of cameras can make them think twice before committing a crime.
- Remote monitoring: With the ability to connect to the internet, security cameras allow for remote monitoring, enabling users to view live footage and recordings from anywhere using a smartphone, tablet, or computer.
- Evidence gathering: In case of incidents or crimes, security cameras can provide valuable evidence, including video footage that can be used in investigations or legal proceedings.
- Employee monitoring: Security cameras can be used to monitor employee activities, enhancing productivity and detecting any potential misconduct.
- Insurance benefits: Having security cameras installed may lead to lower insurance premiums, as they can reduce the risk of theft, vandalism, and other incidents.
Considerations when installing security cameras
- Camera placement: It’s important to strategically place security cameras to ensure optimal coverage and minimize blind spots.
- Power source: Cameras require a power source, so it’s necessary to consider electrical outlets or alternative power options when planning the installation.
- Outdoor vs. indoor cameras: If you need surveillance for outdoor areas, make sure to choose cameras specifically designed for outdoor use, as they are built to withstand harsh weather conditions.
- Legal considerations: Before installing security cameras, it’s essential to familiarize yourself with local laws and regulations regarding privacy and video surveillance.
The importance of security cameras
Security cameras play a crucial role in keeping our homes and businesses safe. They provide a constant watchful eye, deterring potential criminals and providing evidence in case of any unlawful activities. Here are some key reasons why security cameras are important:
- Deterrence: The presence of security cameras can deter criminals from targeting your property. Knowing that they are being monitored can make potential intruders think twice before attempting to break in.
- Surveillance: Security cameras provide continuous surveillance, allowing you to monitor your property 24/7, even when you are not physically present. This can help you identify any suspicious activities or incidents as they happen.
- Evidence: In the unfortunate event of a crime or an incident, security cameras can provide valuable evidence that can assist law enforcement agencies in identifying and apprehending the culprits. The footage captured by security cameras can be used in court as evidence.
- Peace of mind: Having security cameras installed can give you peace of mind, knowing that your property is being monitored and protected. Whether it’s your home or business, you can have a sense of security and confidence in your surroundings.
- Insurance benefits: Some insurance companies offer reduced premiums for properties that have security cameras installed. Having security cameras can lower the risk of potential loss or damage, thus making you eligible for insurance discounts.
- Remote access: Many security cameras nowadays offer remote access, allowing you to monitor your property from anywhere using your smartphone or computer. This can be incredibly convenient, especially for homeowners or business owners who are frequently away.
In conclusion, security cameras are an essential component of a comprehensive security system. They provide a deterrent effect, constant surveillance, evidence collection, peace of mind, insurance benefits, and remote access. Investing in security cameras is a proactive measure towards ensuring the safety and security of your property.
Choosing the right security camera
When it comes to selecting a security camera for your brick wall, there are several factors to consider in order to ensure the utmost protection for your property. Here are some important considerations:
Determine your surveillance needs
First and foremost, you need to determine what you want to monitor and the level of detail you require. Are you looking to cover a specific area, such as your front door or driveway? Or do you need wider coverage for your entire property? Knowing your surveillance needs will help you choose the appropriate type of camera.
Choose the right camera type
There are different types of security cameras available in the market, each with its own unique features and benefits. Here are a few popular options:

- Fixed cameras: These cameras have a fixed lens and provide a specific field of view. They are ideal for monitoring a specific area and are more budget-friendly.
- PTZ cameras: Pan-Tilt-Zoom cameras offer the ability to pan, tilt, and zoom in and out, providing more flexible coverage. They are ideal for monitoring larger areas or those that require flexible surveillance options.
- Dome cameras: Dome cameras are popular for both indoor and outdoor use. They are compact, vandal-resistant, and provide a wide-angle view.
Consider camera features
Aside from the camera type, there are several features to consider based on your specific needs:
- Resolution: Higher resolution cameras provide clearer and more detailed images, allowing for better identification and recognition.
- Night vision: If you need to monitor your property during the night, consider cameras with infrared LEDs or low-light sensors for enhanced visibility in the dark.
- Weatherproofing: For outdoor installation, ensure that the camera is weatherproof to withstand various environmental conditions.
- Wireless or wired: Decide whether you prefer a wired or wireless camera system, considering the convenience and flexibility of each option.
Remember to consult with professionals or conduct thorough research before making a final decision. Choosing the right security camera will greatly enhance the safety and security of your property.
Preparing to Mount Security Cameras
Before mounting security cameras on brick, it is important to carefully plan and prepare for the installation process. By following these steps, you can ensure a successful mounting and seamless integration with your existing security system:
| Step 1: | Evaluate your surveillance needs: Determine the areas you want to monitor and identify the type of cameras that are most suitable for your purposes. Consider factors such as camera resolution, field of view, and weatherproof ratings. |
| Step 2: | Select the right mounting location: Choose areas where the cameras will have optimal coverage and visibility. Look for a solid brick surface that provides stability and minimizes camera movement. |
| Step 3: | Check the local regulations: Familiarize yourself with any local laws or regulations regarding surveillance cameras. Ensure that your installation complies with privacy laws and does not infringe on your neighbors’ rights. |
| Step 4: | Gather the necessary tools and equipment: Ensure you have all the required tools such as a drill, masonry drill bits, screws, and anchors. Consider using a stud finder to locate the most secure spots on the brick. |
| Step 5: | Measure and mark the mounting points: Use a measuring tape to mark the exact locations where the cameras will be mounted. Double-check the measurements to guarantee the accuracy of the installation. |
| Step 6: | Prepare the brick surface: Clean the area where the cameras will be mounted and remove any debris or loose material. This will ensure a secure attachment and a clean installation. |
| Step 7: | Drill pilot holes: Use a masonry drill bit to create pilot holes at the marked locations. Make sure the holes are slightly smaller than the diameter of the screws or anchors to ensure a tight fit. |
| Step 8: | Secure the mounting brackets: Attach the camera mounting brackets to the brick using screws or anchors, depending on the type of surface. Ensure the brackets are tightly secured to prevent any movement or instability. |
| Step 9: | Mount the cameras: Attach the cameras to the mounting brackets following the manufacturer’s instructions. Ensure that the cameras are properly aligned and adjusted for optimal viewing angles. |
| Step 10: | Test the installation: Once the cameras are mounted, test the system to ensure that they are functioning correctly. Adjust the camera settings if necessary and make any final adjustments to optimize the surveillance coverage. |
By carefully preparing for the installation of security cameras on brick, you can maximize the effectiveness of your surveillance system and enhance the security of your property.
Gathering the necessary tools
Before you can mount security cameras on a brick wall, it is important to gather the necessary tools. Here are some tools that you will need:

– Power drill: A power drill will be necessary for drilling holes in the brick wall to secure the camera mounts.
– Masonry drill bit: This special drill bit is designed to drill through brick and other masonry materials.
– Screws and anchors: You will need screws and anchors to secure the camera mounts to the brick wall.
– Screwdriver: A screwdriver will be necessary for tightening the screws and anchors.
– Level: To ensure that the camera mounts are installed straight and level, a level will be necessary.

– Ladder: Depending on the height of the wall, a ladder may be needed to access the installation area.
– Camera mounting brackets: These brackets will be used to securely attach the cameras to the wall.
– Security cameras: Of course, you will need security cameras that are suitable for outdoor and brick wall installation.
By gathering all the necessary tools, you will be ready to start the process of mounting security cameras on a brick wall.
Determining the location
Before mounting security cameras on a brick wall, it’s crucial to determine the best location for installation. Here are some factors to consider when choosing the placement:
1. Surveillance area
Identify the specific areas you want to monitor. Whether it’s the front entrance, driveway, or backyard, understanding the surveillance area will help determine the number of cameras needed and their placement.
2. Line of sight
Make sure the camera’s view is unobstructed and has a clear line of sight to the surveillance area. Avoid placing the camera behind objects that may block the view, such as branches, tall plants, or fences.
Additionally, consider the angle at which the camera should be mounted. It’s recommended to position the camera slightly downward to capture individuals’ faces and any potential activities.
By carefully considering these factors, you can ensure optimal camera placement for effective surveillance and security monitoring on your brick wall.
Mounting security cameras on brick
When it comes to mounting security cameras on brick, there are a few important steps to keep in mind. Mounting cameras on brick can be a bit more challenging compared to other surfaces, but with the right tools and techniques, it can be done effectively.
Here’s a step-by-step guide on how to mount security cameras on brick:
| Step 1 | Choose the right location on the brick wall where you want to mount the camera. Make sure it provides a good field of view and covers the areas you want to monitor. |
| Step 2 | Measure and mark the locations where you will drill the holes for the camera mount. Use a level to ensure that the markings are straight and aligned. |
| Step 3 | Drill pilot holes at the marked locations using a masonry drill bit. Make sure to use a drill bit that is suitable for brick or masonry surfaces. |
| Step 4 | Insert wall anchors into the pilot holes. Wall anchors are essential for providing stability and support for the camera mount on the brick wall. |
| Step 5 | Attach the camera mount to the wall anchors using screws or bolts. Make sure to tighten them securely, but be careful not to overtighten and damage the brick. |
| Step 6 | Adjust the angle and position of the camera mount to ensure the camera is pointing in the desired direction. Use a level to make sure it is straight. |
| Step 7 | Attach the security camera to the mount according to the manufacturer’s instructions. Make sure to secure it tightly to prevent any movement. |
By following these steps, you can successfully mount security cameras on brick walls and enhance the security of your property. Remember to always consult the camera’s installation manual for specific instructions and guidance.
Securing the camera in place
Once you have determined the ideal location for your security camera and have drilled the necessary holes in the brick wall, it’s time to securely mount the camera in place. Follow the steps below to ensure a proper and stable installation:
|
1. Insert wall plugs: Before attaching the mounting bracket to the wall, make sure to insert wall plugs into the drilled holes. Wall plugs provide additional support and prevent the screws from loosening over time. |
2. Attach the mounting bracket: Take the mounting bracket that came with your security camera and align it with the drilled holes. Use screws and a screwdriver to securely attach the bracket to the brick wall. Make sure the bracket is level and straight. |
|
3. Connect the camera: Most security cameras come with a flexible arm or a pivot mechanism that allows you to adjust the angle and position of the camera. Mount the camera onto the bracket and use any included screws or clips to secure it in place. |
4. Conceal the wires: If your security camera requires power or has additional cables, make sure to neatly conceal them along the wall or use cable clips to secure them. This will help to prevent any potential damage or interference with the camera’s functionality. |
|
5. Test the camera: Once the camera is securely mounted, double-check all connections and ensure that the camera is powered on. Use the camera’s app or software to adjust the settings, view the live feed, and test the recording functionality. |
6. Regular maintenance: Periodically check the camera’s stability and ensure that the mounting bracket and screws remain tight. Clean the camera lens and make any necessary adjustments to maintain optimal performance. |
By following these steps, you’ll be able to securely mount your security camera on a brick wall and ensure your property remains protected at all times.
Testing the camera
After successfully mounting the security camera on the brick wall, it is essential to test its functionality. The testing process ensures that the camera is properly installed and will provide optimal surveillance.
1. Check the camera angle
Start by verifying that the camera is positioned at the desired angle. Ensure that the area you want to monitor is within the camera’s field of view. Adjust the camera if necessary to achieve the desired coverage.
2. Verify the power supply
Ensure that the camera is properly connected to a power source. Check if the power supply is stable and uninterrupted. Confirm that the camera is receiving adequate power to function efficiently.
3. Test the video quality
Monitor the video feed from the camera to assess the quality. Look for any distorted or pixelated images. Ensure that the video resolution is satisfactory and provides clear visibility of the monitored area.
4. Evaluate the night vision capabilities
If the security camera has night vision capabilities, test them in low light conditions. Verify that the camera can capture clear images in the dark. Check for any issues such as glare or inadequate illumination.
5. Test the motion detection feature
If the camera has motion detection capabilities, activate this feature and test it thoroughly. Walk in front of the camera to confirm that it detects movement and records accordingly. Adjust the sensitivity settings if necessary.
By following these testing procedures, you can ensure that your security camera is functioning correctly and providing reliable surveillance for your property.
FAQ,
What tools do I need to mount security cameras on brick?
To mount security cameras on brick, you will need a power drill, masonry drill bit, screws or anchors, a screwdriver, a level, a pencil, and a ladder.
Can I use regular screws to mount security cameras on brick?
No, regular screws are not suitable for mounting security cameras on brick. You will need screws or anchors specifically designed for masonry, as they provide better stability and grip.
How do I find the right spot to mount security cameras on brick?
When finding the right spot to mount security cameras on brick, consider the area you want to cover, the camera’s field of view, and potential obstructions. You can use a pencil and a level to mark the spot before drilling.
Can I install security cameras on brick without drilling?
Yes, there are alternative methods to mount security cameras on brick without drilling. Some options include using adhesive mounts or magnetic mounts that can hold the cameras securely in place without damaging the brick surface.
Is it difficult to mount security cameras on brick?
Mounting security cameras on brick can be a bit challenging, especially if you are not familiar with the process. However, with the right tools and instructions, it is a manageable DIY task that can be accomplished with patience and care.


