
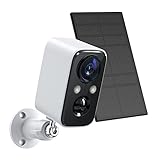
Installing security cameras outside your home or business is an essential step in securing your property. Whether you want to deter potential burglars or monitor your surroundings, proper mounting is crucial to ensure optimal performance and coverage. In this article, we will guide you through the necessary steps to mount security cameras outside effectively.
1. Choose the right location: Before installing security cameras, carefully choose the locations that provide the best coverage for your needs. Consider entry points, such as doors and windows, as well as blind spots that require monitoring. It’s also important to ensure that the cameras are protected from harsh weather conditions.
2. Determine the mounting method: There are various mounting methods available, including wall mounts, pole mounts, and corner mounts. The type of mount you choose depends on the location and the angle you want to achieve. Make sure the mounting method is secure and stable to avoid unwanted movements or vibrations.
3. Position and angle the camera: Once the mounting method is determined, position the camera at the desired angle. It’s essential to aim the camera towards the areas you want to monitor while avoiding obstructions, such as trees or walls. Experiment with different angles to find the optimal position for capturing the necessary footage.
4. Ensure proper cable management: To maintain a clean and professional appearance, carefully plan the cable management. Use cable clips or conduit to secure and protect the cables from damage. Additionally, consider using weatherproof cable connectors to ensure the integrity of the camera’s connection.

5. Test the camera’s functionality: After mounting the security camera, test its functionality to ensure proper operation. Check the field of view, image quality, and night vision capabilities. Make any necessary adjustments or refinements to optimize the camera’s performance before finalizing the installation.
By following these steps, you can successfully mount security cameras outside and enhance the security levels of your property. Remember to regularly clean and maintain the cameras to ensure their longevity and reliable performance.
Choosing the Right Security Cameras
When it comes to selecting security cameras for your outdoor surveillance needs, there are several factors to consider. Here are some key considerations to help you choose the right security cameras:
1. Outdoor Compatibility: Look for cameras specifically designed for outdoor use. These cameras should be weatherproof and able to withstand harsh environmental conditions such as rain, snow, dust, and extreme temperatures.
2. Resolution: Higher resolution cameras will provide clearer and more detailed images, allowing for better identification of individuals and objects. Consider cameras with at least 1080p resolution for optimal image quality.

3. Night Vision: If you require surveillance during the night, choose cameras with built-in infrared LEDs or low-light capabilities. This will ensure that the cameras can capture clear images even in complete darkness.
4. Field of View: Determine the coverage area you want to monitor and choose cameras with an appropriate field of view. Wide-angle lenses can provide a broader view, while cameras with adjustable lenses or PTZ (pan-tilt-zoom) capabilities allow for greater flexibility in capturing specific areas.
5. Connectivity: Consider how the cameras will be connected to your recording device or network. Options include wired Ethernet, Wi-Fi, or Power over Ethernet (PoE) for simplified installation and maintenance.
6. Storage: Determine the amount of storage you will need for storing your surveillance footage. Some cameras offer onboard storage options while others may require an external storage solution such as a network video recorder (NVR) or cloud-based storage.
7. Integration: If you already have an existing security system in place, ensure that the cameras are compatible with your current setup. Look for cameras that support integration with other security devices or software for seamless operation.

8. Budget: Lastly, consider your budget and prioritize your requirements accordingly. While higher-end cameras may offer advanced features, a mid-range option can still provide adequate security for most outdoor surveillance needs.
By considering these factors and thoroughly researching your options, you can choose the right security cameras to meet your specific outdoor surveillance requirements.
Determining the Ideal Locations
When it comes to mounting security cameras outside, choosing the right locations is crucial for their effectiveness. Here are some factors to consider when determining the ideal locations:
1. Coverage area: Evaluate the areas that need surveillance and determine the coverage required. This can help you decide how many cameras you need and where to position them.
2. Entry points: Identify the main entry points to your property, such as doors, windows, and gates. These are prime locations for placing cameras to capture any potential intruders or suspicious activities.

3. Blind spots: Look for areas where the natural layout or structures may create blind spots. These are areas that are not easily visible or covered by the cameras. Consider adding additional cameras or adjusting their angles to minimize blind spots.
4. Lighting conditions: Take note of the lighting conditions during different times of the day. Cameras positioned in areas with poor lighting may need additional lighting fixtures or infrared capabilities to capture clear footage during the night.
5. Height and angle: Mount the cameras at an appropriate height and angle to maximize their field of view. They should be positioned high enough to prevent vandalism or tampering but low enough to capture facial features if needed.
6. Weather protection: Ensure that the camera locations provide adequate weather protection. Use weatherproof housing or enclosures to shield the cameras from rain, snow, and extreme temperatures.
7. Wiring and power source: Consider the availability of power sources and the routing of wires. Opt for locations near electrical outlets or install cameras with wireless capabilities to avoid extensive wiring work.

8. Legal considerations: Familiarize yourself with any local laws or regulations regarding the placement of security cameras. Ensure that you comply with privacy laws and respect the rights of others when positioning the cameras.
By carefully evaluating these factors, you can determine the ideal locations to mount your security cameras outside, ensuring comprehensive surveillance coverage and enhanced security for your property.
Assessing Wiring Options
When it comes to mounting security cameras outside, one important aspect to consider is the wiring options available. Properly assessing and choosing the appropriate wiring option is crucial for the overall functionality and effectiveness of your outdoor security camera system. In this section, we will discuss some common wiring options to help you make an informed decision.
1. Wired Connection
A wired connection is a reliable and traditional option for outdoor security cameras. This involves running cables, such as Ethernet or coaxial cables, from the camera to a power source and the recording device or monitor. Wired connections offer stable and uninterrupted transmission of video footage, making them suitable for areas with a reliable power supply. Additionally, some wired systems can utilize Power over Ethernet (PoE) technology, which allows both power and data to be transmitted through a single cable, simplifying the installation process.
2. Wireless Connection
If running cables is not feasible or desirable, wireless connections provide a convenient alternative. Wireless security cameras use Wi-Fi or other wireless communication technologies to transmit the video footage to a recording device or monitor. This eliminates the need for extensive wiring and allows for more flexible camera placement. However, it is important to note that wireless connections can be subject to signal interference, which may impact the quality and reliability of the video transmission. It is crucial to ensure a strong and stable Wi-Fi signal for optimal performance.

| Wiring Option | Advantages | Disadvantages |
|---|---|---|
| Wired Connection | – Reliable and stable video transmission – Suitable for areas with reliable power supply – Some systems support Power over Ethernet (PoE) |
– Requires running cables – Limited flexibility in camera placement |
| Wireless Connection | – No extensive wiring required – More flexible camera placement |
– Signal interference may affect video quality – Requires a strong and stable Wi-Fi signal |
Ultimately, the choice between wired and wireless connections depends on your specific requirements and constraints. Consider factors such as the distance between the cameras and the recording device, the availability of power sources, and the potential for signal interference. Assessing your wiring options can help you determine the most suitable solution for your outdoor security camera system.
Installing Outdoor Mounts
When it comes to installing security cameras outside your home or business, choosing the right outdoor mounts is essential. Proper installation ensures that your cameras are securely positioned, allowing for maximum coverage and effectiveness.
Before installing your outdoor mounts, carefully consider the following factors:
| Location | Choose an area that provides the best vantage point while also keeping the camera out of reach from potential vandals. Make sure the location has a sturdy surface for mounting. |
| Height | Mount the cameras at an appropriate height, such as 9-12 feet above ground level. This height allows for a wide field of view without making the cameras too accessible. |
| Angle | Position the cameras at an angle that captures the desired area without any obstructions. Avoid placing the cameras too far away, as this may reduce their effectiveness. |
| Weatherproofing | Ensure that your outdoor mounts are designed to withstand the elements. Look for mounts made from durable materials such as aluminum or stainless steel. |
| Accessibility | Consider how easily you can access the cameras for maintenance and adjustments. Choose mounts that allow for easy installation and removal if needed. |
Once you have considered these factors, follow these steps to install your outdoor mounts:
- Using a pencil, mark the desired locations for the camera mounts on the wall or surface.
- Drill pilot holes at the marked locations to provide a guide for the mounting screws.
- Securely attach the mounts to the wall or surface using the provided screws.
- Adjust the angle of the mounts to ensure optimal camera positioning.
- Attach the cameras to the mounts using the appropriate screws or brackets.
- Connect the cameras to your surveillance system and test their functionality.
By following these guidelines and steps, you can ensure that your outdoor security cameras are installed correctly and positioned to provide the best possible surveillance coverage.
Setting up the Camera System
Before you begin setting up your security camera system, it is important to plan and prepare. Here are some steps to help you get started:
1. Choose the right location: Assess your property and identify the areas where you want to place the cameras. Consider factors such as line of sight, coverage area, and vulnerability. It is recommended to have cameras installed at all entry points, corners, and other strategic locations.
2. Check the camera specifications: Make sure the cameras you have purchased are suitable for outdoor use. Look for features such as weatherproofing and an appropriate temperature range. This will ensure the cameras can withstand the elements and operate effectively.
3. Install the mounting brackets: Use the provided mounting brackets to securely attach the cameras to the desired locations. Ensure they are properly aligned and tightened to prevent any movement once installed. If needed, use anchors or additional hardware for extra stability.
4. Run the cables: Connect the cameras to the main control unit or recorder using the provided cables. Depending on the system, this may involve running the cables through walls, conduits, or other discreet pathways. Take care to hide and protect the cables to prevent tampering or damage.
5. Adjust camera settings: Once the cameras are connected, access the camera settings through the control unit or by logging into the camera’s interface. Configure settings such as resolution, motion detection, and recording schedules according to your requirements. Test the cameras to ensure they are capturing the desired footage.
6. Monitor and maintain: Regularly check the camera system to ensure it is functioning properly. Clean the cameras and lenses as needed to maintain clear image quality. Keep an eye out for any signs of tampering or damage, and address them promptly to ensure the continued security of your property.
By following these steps, you can successfully set up your camera system and enhance the security of your property. Remember to consult the manufacturer’s instructions and seek professional assistance if needed.
Connecting to a power source
Before installing your security cameras outside, it is essential to ensure they have a reliable power source. Here are some steps to help you connect your cameras to a power supply:
1. Determine the power requirements
Start by checking the power requirements of your security cameras. This information is usually included in the manufacturer’s documentation or can be found online. It will specify the voltage and current needed to power the cameras.
2. Choose the appropriate power supply
Based on the power requirements, select a compatible power supply for your security cameras. You can use either a plug-in power adapter or a power over Ethernet (PoE) switch, depending on your camera’s capabilities. Make sure the power supply matches the voltage and current requirements of your cameras.
Note: If you opt for a PoE switch, ensure that your cameras support PoE technology. This method eliminates the need for separate power cables, as both power and data are transmitted through a single Ethernet cable.
3. Connect the power supply
Once you have chosen the appropriate power supply, connect it to your security cameras. For plug-in power adapters, simply plug one end of the power cable into the camera and the other end into an available power outlet. If you are using a PoE switch, connect one end of the Ethernet cable to the camera and the other end to the switch. The switch should then be connected to a power source.
4. Test the power connection
After connecting the power supply, test the power connection to ensure your cameras are receiving power correctly. Check that the camera’s LED indicators or power lights are lit, indicating proper power supply.
Note: Always follow the manufacturer’s guidelines and safety precautions when connecting your security cameras to a power source. If you are unsure about the installation process, consult a professional.
Adjusting Camera Settings
Once you have mounted your security camera outside, it is important to adjust its settings to ensure optimal performance. Here are some steps to follow:
- Access the camera’s web interface by typing its IP address into a web browser.
- Log in with the camera’s username and password.
- Once logged in, navigate to the settings or configuration page.
- Adjust the camera’s resolution settings. Higher resolutions provide better image quality but may require more storage space.
- Configure the camera’s frame rate. Higher frame rates capture more details but may result in larger file sizes.
- Set the camera’s exposure mode. Automatic mode adjusts the exposure based on lighting conditions, while manual mode allows you to set a fixed exposure.
- Enable motion detection if your camera supports it. This feature can help reduce false alarms and save storage space.
- Configure any additional settings, such as night vision, motion zones, or video compression.
- Save the changes and exit the web interface.
It is recommended to test the camera after adjusting the settings to ensure everything is working correctly. Regularly check the camera’s settings to make any necessary adjustments based on changing lighting conditions or security requirements.
Testing and Troubleshooting
Once you have installed your outdoor security cameras, it is important to test and troubleshoot to ensure that they are functioning properly. Here are some steps you can take to ensure that your cameras are working correctly:
- Check the camera’s power supply: Make sure that the camera is receiving power by checking the power supply and cables. Ensure that the power outlet is working properly and that there are no loose connections.
- Verify the camera’s network connection: Check that the camera is properly connected to the network. You can do this by accessing the camera’s settings and checking the network settings. Ensure that the camera has a stable internet connection.
- Adjust camera angles and focus: Make any necessary adjustments to the camera angles and focus to ensure that the camera is capturing the desired area. Test the camera’s field of view by monitoring the live feed or reviewing recorded footage.
- Test night vision capabilities: If your cameras have night vision capabilities, test them in low-light conditions to ensure that they are working properly. Make any adjustments to the camera settings if necessary.
- Check for any obstructions: Ensure that there are no physical obstructions that may be blocking the camera’s view. Trim any branches or vegetation that may obstruct the camera’s field of view.
- Review camera footage: Regularly review the camera’s footage to check for any issues or abnormalities. This will help you identify any potential problems or areas that need further adjustments.
By following these steps, you can ensure that your outdoor security cameras are properly installed and functioning correctly. Regularly test and troubleshoot your cameras to maintain optimal security surveillance.
FAQ,
What are some important factors to consider when mounting security cameras outside?
When mounting security cameras outside, it’s important to consider factors such as the camera’s field of view, weather resistance, and accessibility. You should also make sure the camera is properly secured and positioned to capture the desired area.
Can security cameras be installed without professional help?
Yes, security cameras can be installed without professional help. Many modern security cameras come with DIY installation instructions, making it easier for individuals to set them up on their own. However, if you’re unsure or uncomfortable with the installation process, it’s always best to seek professional assistance.
What are the different types of security cameras that can be used outdoors?
There are several types of security cameras that can be used outdoors, including bullet cameras, dome cameras, PTZ cameras, and wireless cameras. Each type has its own advantages and features, so it’s important to choose the one that best suits your specific security needs.
How can I protect my outdoor security cameras from theft?
To protect outdoor security cameras from theft, you can take several measures. Firstly, make sure the cameras are properly mounted and secured to a sturdy surface. You can also consider installing cameras with tamper-proof features or placing them in hard-to-reach locations. Additionally, using signage to indicate the presence of surveillance cameras can act as a deterrent to potential thieves.
Are there any privacy concerns with outdoor security cameras?
Yes, there can be privacy concerns with outdoor security cameras, especially if they are positioned in a way that captures areas beyond the intended surveillance area. To address these concerns, it’s important to ensure that the cameras are only capturing the necessary areas and to comply with any local laws or regulations regarding the use of surveillance cameras.


