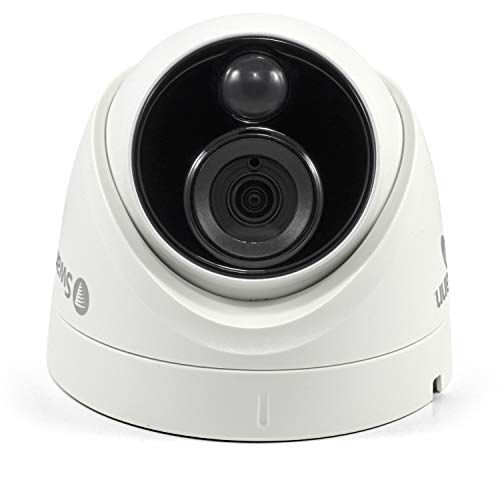
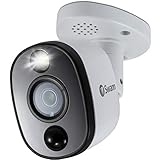
Swann security cameras are a popular choice for those looking to secure their homes or businesses. With their high-quality video capabilities and advanced features, Swann cameras provide reliable surveillance solutions.
Mounting a Swann security camera is an essential step in the installation process. Properly positioning and securing the camera ensures optimal coverage and a clear view of the area you want to monitor.
In this article, we will provide a step-by-step guide on how to mount a Swann security camera properly. Whether you are a beginner or a seasoned DIY enthusiast, our easy-to-follow instructions will help you get the job done.
Choosing the Right Location
When it comes to mounting your Swann security camera, choosing the right location is crucial for ensuring optimal surveillance coverage. Here are some key factors to consider when determining the perfect spot:
1. Coverage Area:

Identify the specific areas you want to monitor with your security camera. Consider the range of the camera and make sure it covers the desired area. You may need to install multiple cameras for comprehensive coverage.
2. Height:
Mount the camera at a suitable height to get a clear view of the surroundings. Placing it too high may limit the details captured, while mounting it too low can risk vandalism or accidental damage.
3. Accessibility:
Ensure easy access for maintenance, cleaning, and adjustments. Choose a location that allows you to reach the camera easily when required while still keeping it out of reach from potential tampering.

4. Lighting Conditions:
Consider the lighting conditions in the chosen location. Make sure there is adequate natural or artificial lighting to capture clear images and videos, especially during low-light or nighttime scenarios.
5. Obstructions:
Avoid mounting the camera in areas with obstructions that could obstruct the camera’s field of view, such as trees, buildings, or other objects. Clear any potential obstacles that may interfere with the camera’s coverage.
By taking these factors into account, you can select the most appropriate location to mount your Swann security camera and ensure effective surveillance of your property.

How to Find the Best Spot for Your Swann Security Camera
Mounting a Swann security camera in the right spot is essential for maximizing its effectiveness. By choosing the perfect location, you can ensure that your camera captures clear and accurate footage of any potential intruders. Here are some tips to help you find the best spot for your Swann security camera:
Evaluate the Area
Before installing your security camera, take the time to evaluate the area you want to monitor. Look for any potential blind spots or areas that may have obstructions. Consider the lighting conditions and whether there are any reflective surfaces that could impact the camera’s view. Understanding the layout and potential challenges of the area will help you determine the best spot for your camera.
Consider the Camera’s Field of View
Each Swann security camera has a specific field of view, which indicates the area it can capture. It’s important to consider this when choosing the installation spot. Determine the range and angle you want the camera to cover and position it accordingly. This will ensure that you have maximum coverage of the desired area.
Tip: If you need to cover a larger area, consider using multiple cameras strategically placed to provide complete coverage.
Ensure Proper Mounting
Once you have identified the perfect spot, make sure to mount the camera securely. Swann security cameras typically come with mounting brackets, making installation relatively straightforward. Follow the manufacturer’s instructions for proper installation.

Tip: Position the camera at a height that is both inconspicuous and provides a clear view of the area. This may vary depending on the location and purpose of the camera.
Test the Camera’s View
After mounting the camera, test its view to ensure that there are no obstructions and that the camera captures the desired area adequately. Use the Swann camera’s live view feature to check the footage before finalizing the installation. Make any necessary adjustments to the camera’s angle or positioning if needed.
Remember, finding the ideal spot for your Swann security camera is essential for effective surveillance. Take the time to evaluate the area, consider the camera’s field of view, ensure proper mounting, and test the camera’s view before finalizing the installation. With these steps, you can maximize the effectiveness of your security camera system and enhance the safety of your property.
Gathering the Necessary Tools
Before you begin the process of mounting your Swann security camera, it is important to gather all the necessary tools. Having the right tools on hand will make the installation process much smoother.
Here are the tools you will need:
- Drill: You will need a drill to create holes in the desired mounting location.
- Screwdriver: A screwdriver will be needed to secure the camera to the mounting bracket.
- Tape Measure: Use a tape measure to ensure accurate placement of the camera.
- Pencil: A pencil will be useful for marking the drill holes and other measurements.
- Spirit Level: A spirit level will help you ensure that the camera is mounted straight.
- Power Drill Bits: Depending on the mounting surface, you may need different drill bits for drilling the holes.
- Mounting Hardware: Check the Swann security camera kit or consult the user manual to ensure you have all the necessary mounting hardware.
Having these tools ready will save you time and ensure that you have everything you need to successfully mount your Swann security camera.
Essential Tools for Mounting Your Swann Security Camera
When it comes to mounting your Swann security camera, having the right tools is crucial. With the proper equipment, you can ensure a secure and reliable installation. Here are some essential tools you’ll need:
1. Power Drill: A power drill is essential for creating holes in walls or other surfaces for mounting brackets.
2. Screwdriver: You’ll need a screwdriver to secure the camera mounting brackets and adjust their positioning.
3. Level: A level will help you ensure that your camera is installed perfectly straight, helping to eliminate any unwanted angles or misalignments.

4. Measuring Tape: A measuring tape is useful for accurately measuring distances and ensuring proper camera placement.
5. String or Wire: Using a string or wire can help you determine the ideal camera angle and positioning before drilling any holes.
6. Ladder or Step Stool: Depending on the height of the installation location, you may need a ladder or step stool to safely reach and install the camera.
7. Penetrating Oil (if applicable): In some cases, you may need penetrating oil to loosen any tight or rusted screws or bolts.
By having these essential tools on hand, you’ll be well-equipped to mount your Swann security camera effectively and efficiently. Remember to always follow the manufacturer’s instructions when installing your camera to ensure optimal performance and security.

Preparing the Mounting Surface
Before you can mount your Swann security camera, it’s important to properly prepare the surface to ensure stability and optimal performance. Follow these steps to get your mounting surface ready:
1. Choose the Right Location
Decide where you want to install your security camera. Look for a location that offers a clear view of the area you want to monitor and is positioned at a suitable height for optimal coverage.
2. Gather the Tools
Make sure you have all the necessary tools and equipment for mounting the camera. This may include a drill, screws, screwdriver, level, and a pencil for marking the holes.
3. Check the Surface
Inspect the mounting surface to ensure it is clean and free from any debris or obstructions. Remove any dirt, dust, or spiderwebs that could interfere with the mounting process or the camera’s performance.
4. Plan the Placement
Using the camera’s mounting bracket as a guide, mark the placement of the screw holes on the mounting surface with a pencil. Double-check the alignment and make any necessary adjustments before proceeding.

5. Drill the Holes
Using a suitable drill bit, carefully drill the holes at the marked locations on the mounting surface. Be sure to choose a drill bit size that matches the screws provided with your camera.
6. Mount the Bracket
Securely attach the camera’s mounting bracket to the surface using the screws provided. Ensure that the bracket is level and tightly secured to prevent any movement or wobbling once the camera is installed.
Once you have prepared the mounting surface, you can continue with the installation process of your Swann security camera. Refer to the camera’s instruction manual for further guidance on mounting and setup.
Cleaning and Measuring the Installation Area
Before mounting your Swann security camera, it is important to clean and measure the installation area to ensure a proper fit and clear view. Follow these steps to prepare the area:
- Start by cleaning the area where you plan to mount the camera. Remove any dirt, dust, or debris that could obstruct the camera’s view.
- Use a measuring tape to determine the ideal height and angle for the camera placement. Consider factors such as the desired field of view, any potential obstructions, and the range of the camera’s motion detection.
- Mark the mounting holes on the wall or surface where the camera will be installed. Make sure the marks are level and aligned with your desired placement.
- If necessary, use a power drill and appropriate drill bit to create pilot holes for the mounting screws. This will help prevent any damage to the wall or surface during installation.
- Once the pilot holes are created, you can proceed with mounting the camera according to the manufacturer’s instructions. Ensure that the camera is securely attached and level.
By thoroughly cleaning and accurately measuring the installation area, you can ensure that your Swann security camera is mounted correctly and provides optimal surveillance coverage.
Mounting the Camera
Mounting your Swann security camera is a straightforward process that can be done in a few simple steps. Follow the instructions below to ensure a secure and stable installation:
- Choose the location: Select a suitable location for your camera that provides a clear view of the desired area while also considering the need for power and a stable mounting surface.
- Prepare the mounting surface: Ensure that the mounting surface is clean, flat, and sturdy. Use a pencil to mark the desired mounting holes for the camera.
- Drill pilot holes: Use an appropriate drill bit to create pilot holes at the marked locations. These holes will help guide the screws during installation.
- Attach the mounting bracket: Securely attach the mounting bracket to the mounting surface using the provided screws. Make sure the bracket is level and aligned with the pilot holes.
- Connect the camera: Carefully connect the camera to the mounting bracket, ensuring that it is properly aligned and securely fastened.
- Adjust the angle: Once the camera is mounted, adjust its angle and direction to achieve the desired view. Use the provided adjustment knobs or tools to make the necessary adjustments.
- Secure the cables: Use cable clips or other suitable methods to secure the camera cables along the mounting surface and prevent them from being accidentally damaged or disconnected.
- Test the installation: After the camera is mounted, test its functionality by connecting it to a power source and checking the live video feed or recording.
By following these steps, you can successfully mount your Swann security camera and ensure optimal surveillance coverage for your home or business.
Step-by-Step Guide to Mounting Your Swann Security Camera
Step 1: Choose the Desired Mounting Location
Before you begin, carefully consider the area where you want to mount your Swann security camera. Look for a spot that provides a clear view of the area you want to monitor, and make sure it is within reach of a power outlet if your camera requires one.
Step 2: Gather the Necessary Tools

Make sure you have all the tools you will need for the installation, including a drill, screws, screwdriver, and any additional mounting hardware that may be required for your specific camera model.
Step 3: Attach the Mounting Bracket
Use the drill and screws to attach the mounting bracket to the chosen location. Make sure it is securely fastened and level.
Step 4: Connect the Camera to the Bracket
Depending on your camera model, you may need to connect the camera to the mounting bracket using the provided screws or brackets. Follow the manufacturer’s instructions for this step.
Step 5: Adjust the Camera Position
Once your camera is attached to the bracket, adjust its position to ensure it is pointing in the desired direction. Use the adjustment mechanisms provided by the camera or bracket to achieve the desired angle.
Step 6: Secure the Camera and Test
Tighten any screws or brackets that hold the camera in place to ensure it is secure. Finally, test the camera to ensure it is functioning correctly and capturing the desired footage.
Note: It is important to consult your specific camera’s installation guide for detailed instructions, as different Swann security camera models may have slightly different installation processes.
Wiring and Connecting
Properly wiring and connecting your Swann security camera is crucial for ensuring a reliable and effective surveillance system. Here are step-by-step instructions on how to do it.
1. Determine the Placement
Before you start the wiring process, carefully decide where you want to mount your Swann security camera. Consider the areas that require monitoring and ensure that the camera will have a clear view. Take note of any obstacles or obstructions that may affect the camera’s field of view.
2. Gather the Necessary Tools and Equipment
Make sure you have all the tools and equipment you need before starting the wiring process. This typically includes a power drill, drill bits, a screwdriver, a ladder or step stool (if needed), and the necessary cables and connectors provided with your Swann security camera system.
3. Run the Cables
Using the power drill and appropriate drill bits, create holes in the walls or ceilings where you want to run the cables. Be cautious and avoid drilling into any electrical wiring or plumbing pipes. Carefully thread the cables through the drilled holes, ensuring they are secure and will not be easily damaged or disconnected.
4. Connect the Power Supply
Locate a nearby power source or outlet and connect the Swann security camera’s power supply. This is typically done by plugging the power supply cable into the camera and then plugging the other end into an electrical outlet. Make sure the power supply is securely connected and that there are no loose or exposed wires.
5. Connect the Video Cable
Attach one end of the video cable to the video output port on the Swann security camera. Then, connect the other end of the cable to the video input port on your recording device or monitor. Ensure a secure and tight connection to prevent any signal loss or interference.
6. Test and Adjust
Once all the connections are made, power on the Swann security camera system and check for a clear and stable video feed. If necessary, adjust the camera’s position or reposition it to optimize its field of view. Test the camera in different lighting conditions to ensure optimal performance.
Following these steps will ensure a proper wiring and connection process for your Swann security camera system. Remember to refer to the manufacturer’s instructions and guidelines for specific details and requirements.
Wiring Your Swann Security Camera for Optimal Performance
When it comes to installing your Swann security camera, proper wiring is essential for optimal performance. Whether you are setting up a single camera or a complete surveillance system, following the correct wiring methods will ensure reliable operation and maximum coverage. Here are some guidelines to help you wire your Swann security camera:
1. Plan your camera placement
Before starting the wiring process, carefully plan the placement of your Swann security camera. Consider the areas you want to monitor and determine the best angles for capturing the desired footage. Ensure that your camera is positioned in a way that minimizes blind spots and covers the necessary areas.
2. Use quality cables
When wiring your Swann security camera, it is important to use high-quality cables that are specifically designed for CCTV applications. These cables have better shielding and insulation to minimize interference and ensure reliable signal transmission. Avoid using cheap or low-quality cables, as they can negatively impact the camera’s performance.
3. Connect the cables properly
Make sure to connect the cables properly to your Swann security camera. If your camera supports Power over Ethernet (PoE), use an Ethernet cable to transmit both power and data signals. For cameras that require separate power sources, connect the power cable to a reliable power outlet or use a power distribution box for multiple cameras.
4. Consider using a surge protector
To protect your Swann security camera from power surges and voltage spikes, it is recommended to use a surge protector. This device will help prevent damage to your camera caused by external electrical fluctuations. Make sure to connect the surge protector directly to a grounded power outlet for maximum effectiveness.
5. Test the camera after wiring
Once you have completed the wiring process, it is essential to test your Swann security camera to ensure that it is functioning properly. Check the camera’s video feed and adjust the positioning if necessary. Additionally, inspect the wiring connections to ensure that they are secure and properly insulated.
Following these guidelines will help you wire your Swann security camera correctly and optimize its performance. If you are unsure about any aspect of the wiring process, consult the camera’s user manual or seek professional assistance.
| Guidelines | Benefits |
|---|---|
| Plan camera placement | Minimize blind spots and maximize coverage |
| Use quality cables | Ensure reliable signal transmission |
| Connect cables properly | Ensure correct data and power transmission |
| Consider using a surge protector | Protect camera from power surges and voltage spikes |
| Test camera after wiring | Verify proper functionality and connection |
FAQ,
Can I mount a Swann security camera on a tree?
Yes, it is possible to mount a Swann security camera on a tree, but it may require additional equipment or accessories. You will need to ensure that the camera is securely attached to the tree and has the correct angle and position for optimal surveillance. It is also important to consider the camera’s visibility and exposure to the elements when mounting it on a tree.
Do I need professional help to mount a Swann security camera?
No, you do not necessarily need professional help to mount a Swann security camera. The process can be done by following the manufacturer’s instructions and using common tools. However, if you are unsure about the installation process or do not have the necessary tools or skills, it may be beneficial to seek professional assistance to ensure proper installation and functionality of the camera.


