If you own a Zmodo security camera system, you may find yourself needing to move channels to optimize your monitoring setup. Whether you want to prioritize certain areas of surveillance or rearrange your camera views for better coverage, knowing how to move channels on your Zmodo security cameras is essential.
Step 1: The first step in moving channels on your Zmodo security cameras is to access the camera settings menu. This can usually be done by logging into the camera system through the Zmodo app or web interface.
Step 2: Once you have accessed the camera settings menu, navigate to the channel configuration section. This is where you will be able to make changes to the channel assignments.
Step 3: In the channel configuration section, look for an option to “move” or “reorder” channels. This will allow you to rearrange the cameras in the order you desire. Simply select the camera you want to move and choose the new position for it.
Step 4: After selecting the new position for the camera, save your changes and exit the camera settings menu. Your Zmodo security camera system will then update to reflect the new channel arrangement.

By following these steps, you can easily move channels on your Zmodo security cameras and optimize your surveillance setup to fit your specific needs. Whether you want to reposition cameras for better monitoring or prioritize certain areas of surveillance, knowing how to move channels is a valuable skill for any Zmodo security camera system owner.
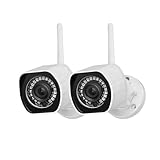
Overview of Zmodo Security Cameras
Zmodo is a leading company in the home security industry, offering a range of high-quality security camera systems for residential and commercial use. With their innovative technology and user-friendly design, Zmodo cameras provide reliable surveillance and peace of mind.
Key Features
Zmodo security cameras offer a variety of features that set them apart from other brands:
- High Definition Resolution: Zmodo cameras capture video in high definition, providing clear and detailed images.
- Wide Viewing Angle: These cameras have a wide viewing angle, allowing you to monitor a larger area.
- Night Vision: Zmodo cameras are equipped with infrared LEDs, enabling them to capture clear footage even in low light conditions.
- Motion Detection: These cameras have built-in motion sensors that trigger recording and send alerts to your smartphone when activity is detected.
- Remote Viewing: With the Zmodo app, you can view live footage from your cameras anywhere, anytime using your smartphone or tablet.
Zmodo Security Camera Models
Zmodo offers a range of security camera models, catering to different needs and budgets:
| Model | Resolution | Indoor/Outdoor | Night Vision | Motion Detection |
|---|---|---|---|---|
| ZM-W0002 | 720p | Indoor | Yes | Yes |
| ZP-IBH13-W | 1080p | Indoor/Outdoor | Yes | Yes |
| ZH-IXB1D | 4MP | Indoor/Outdoor | Yes | Yes |
These are just a few examples of the Zmodo security camera models available. Each model offers its own unique set of features, so you can choose the one that best fits your security needs.
Overall, Zmodo security cameras provide reliable surveillance and advanced features to help keep your property safe and secure. Whether you need a camera for indoor or outdoor use, Zmodo has a solution for you.
Understanding Channels on Zmodo Security Cameras
When it comes to Zmodo security cameras, understanding channels is an important aspect of their functionality. Channels refer to the number of video feeds that a camera system can handle at once. This feature allows you to view and record multiple camera streams simultaneously.
The number of channels available on a Zmodo security camera system can vary depending on the specific model. Some systems may have 4 channels, while others may have 8 or even 16 channels. You can choose a system with the appropriate number of channels based on your surveillance needs.
Each channel on a Zmodo security camera system corresponds to a specific camera. For example, if you have a 4-channel system, it means that you can connect up to 4 cameras to the system and view or record the video feed from each camera individually or all at once.
Channels are often displayed on the monitoring device, such as a monitor or smartphone app, as separate screens or tiles. You can switch between channels to view the live video feed from each connected camera. This allows you to monitor different areas simultaneously, providing enhanced security and surveillance coverage.

When setting up your Zmodo security camera system, it is important to consider the number of channels available and how you plan to distribute your cameras accordingly. If you need to add more cameras in the future, make sure to select a system with enough channels to accommodate your expanding surveillance needs.
In conclusion, understanding channels on Zmodo security cameras is crucial for maximizing the effectiveness and functionality of your surveillance system. Take the time to evaluate your surveillance needs and select a camera system with the appropriate number of channels to meet your requirements. This will ensure that you can monitor and protect your property or premises with ease and efficiency.
Reasons for Moving Channels
Moving channels on your Zmodo security cameras can provide several benefits and opportunities for optimizing your surveillance system. Here are some reasons why you might consider moving channels:
1. Enhanced Coverage
By moving channels, you can strategically position your cameras to cover blind spots in your property. This can help improve your overall surveillance coverage and provide a more comprehensive view of your surroundings.
2. Improved Monitoring
If you want to monitor specific areas more closely or prioritize certain locations, moving channels allows you to align your cameras accordingly. This way, you can focus on high-risk areas or important entry points, ensuring effective surveillance and quick response to any suspicious activity.

3. Flexibility
Moving channels provides flexibility in customizing your surveillance setup based on your changing needs. Whether you want to address specific security concerns or rearrange camera positions for a different vantage point, moving channels allows you to adapt to evolving requirements.
4. Upgraded Technology
When upgrading your Zmodo security cameras or adding new devices to your system, moving channels becomes necessary to accommodate the changes. This ensures that all your cameras are correctly assigned to the appropriate channels and are fully integrated into your surveillance network.
5. Troubleshooting
If you are experiencing issues with a particular channel or camera, moving channels can be a helpful troubleshooting step. By experimenting with different channel assignments, you can isolate and identify any potential hardware or software problems, allowing you to address the issue more effectively.
Overall, moving channels on your Zmodo security cameras offers greater flexibility, improved monitoring capabilities, and the ability to optimize your surveillance system to better protect your property and assets.
Steps to Move Channel on Zmodo Security Cameras
When it comes to managing your Zmodo security cameras, moving a channel can be a useful feature. This allows you to change the arrangement of your camera feeds, making it easier to monitor and access specific cameras. Here are the steps to move a channel on Zmodo security cameras:

Step 1: Access the Zmodo App
Open the Zmodo app on your smartphone or tablet. Make sure you are logged in to your Zmodo account.
Step 2: Select the Camera
Tap on the camera from the list that you want to move to a different channel.
Step 3: Go to Channel Settings
Once the camera feed opens, locate the settings icon, usually represented by a gear or three dots. Tap on it to access the camera settings.
Step 4: Choose Move Channel
In the camera settings menu, look for the option to move the channel. This option may be named differently depending on the Zmodo app version or camera model. Tap on it to proceed.
Step 5: Select Destination Channel
A list of available channels will be displayed. Choose the channel where you want to move the camera feed.

Step 6: Confirm the Move
After selecting the destination channel, a confirmation prompt may appear. Confirm your choice to proceed with the channel move.
Step 7: Verify the Channel Move
Once the channel move is complete, go back to the camera list or live view screen to verify that the camera feed has been moved to the desired channel.
By following these steps, you can easily move a channel on your Zmodo security cameras. This feature allows you to customize the arrangement of your camera feeds and optimize your surveillance setup according to your preference.
Troubleshooting Moving Channel Issues
If you are experiencing issues with moving the channel on your Zmodo security camera, there are a few troubleshooting steps you can follow to resolve the problem. Please ensure that you have completed these steps before proceeding.
| Issue | Possible Solution |
| The channel does not move when I press the corresponding button on the remote control. | 1. Make sure the remote control is properly synced with the security camera. Refer to the camera’s manual for instructions on how to sync the remote control. 2. Replace the batteries in the remote control. Low battery power can cause issues with button operations. 3. Ensure that there are no obstructions between the remote control and the camera. Remove any objects that may be blocking the signal. 4. Try moving closer to the camera and press the button again. 5. Restart the security camera and try again. |
| The channel moves, but the video freezes or is distorted. | 1. Check the camera’s cables and connections. Ensure that all cables are securely connected and undamaged.
2. Adjust the camera’s resolution settings. High resolution settings may strain the camera’s capabilities. 3. If you are using a wireless connection, ensure that the camera and the router are within range of each other and that there are no other wireless devices interfering with the signal. 4. Try using a different channel to see if the issue persists. |
| I am able to move the channel, but there is no audio. | 1. Check the camera’s audio settings. Ensure that the audio is not muted and that the volume is turned up.
2. Check the cables and connections for the camera’s audio feed. 3. If using a wireless connection, ensure that the camera and the audio receiver are properly synced. 4. If the camera has a built-in microphone, make sure it is not covered or obstructed. 5. Restart the camera and try again. |

If you have followed these troubleshooting steps and are still experiencing issues with moving the channel on your Zmodo security camera, it is recommended to contact Zmodo customer support for further assistance.
Recommendations for Channel Management on Zmodo Security Cameras
Zmodo security cameras offer the ability to manage multiple channels, providing a comprehensive surveillance solution for your home or business. Efficient channel management is crucial for ensuring optimal functionality and effective monitoring. Here are some recommendations for channel management on Zmodo security cameras:
1. Organize Channels Strategically
When setting up your Zmodo security cameras, it is essential to organize channels strategically. Assign each channel to a specific camera or area that you want to monitor. For example, you can assign Channel 1 to the front entrance, Channel 2 to the back door, and so on. This approach allows for quick and easy access to the desired camera feed, improving surveillance efficiency.
2. Prioritize Important Channels
If you have multiple cameras and limited screen space, it is recommended to prioritize important channels. Assign higher channel numbers to cameras that capture critical areas or vulnerable spots. This way, you can easily focus on the most crucial feeds when monitoring your security system.
3. Customize Channel Names
Zmodo security cameras allow you to customize channel names, which can be helpful for identifying specific cameras or locations. Take advantage of this feature by assigning descriptive names to each channel. For instance, if Channel 3 monitors your backyard, renaming it as “Backyard Camera” enables easy identification.
4. Utilize Channel Masking
If there are certain areas within a camera’s field of view that you do not want to record or monitor, consider using channel masking. This feature allows you to mask out specific regions on the camera feed, ensuring that only relevant areas are monitored. Channel masking can help reduce false alarms and unnecessary recordings.
5. Balance Resolution and Frame Rate
When managing channels on Zmodo security cameras, it is vital to balance resolution and frame rate settings. Higher resolutions provide clearer images, while higher frame rates ensure smoother video playback. However, keep in mind that higher resolutions and frame rates require more network bandwidth and storage space. Adjust these settings based on your specific needs and available resources.
Channel Management Table
| Channel Number | Camera Location | Channel Name |
|---|---|---|
| 1 | Front Entrance | Front Door Camera |
| 2 | Back Door | Back Door Camera |
| 3 | Backyard | Backyard Camera |
Effective channel management plays a crucial role in maximizing the functionality of your Zmodo security cameras. By organizing channels strategically, prioritizing important feeds, customizing channel names, utilizing channel masking, and balancing resolution and frame rate settings, you can optimize your surveillance system to meet your specific needs.
Tips for Optimizing Channel Performance on Zmodo Security Cameras
If you are using Zmodo security cameras and want to improve the performance of your channels, there are several tips you can follow to optimize their performance. By implementing these suggestions, you can ensure that your cameras deliver high-quality video and perform efficiently.
1. Manage Bandwidth Usage
One of the key factors that affect channel performance is bandwidth usage. To optimize your cameras’ performance, consider monitoring and managing your bandwidth consumption. You can achieve this by:
- Limiting the number of devices connected to the same network. Excessive network traffic can lead to slower camera feeds and reduced performance.
- Using Quality of Service (QoS) settings on your router to prioritize video streaming from your Zmodo cameras over other network activities.
- Investing in a higher-speed internet connection if you frequently experience lag or delays in video transmission.
2. Position Cameras Strategically
The placement of your cameras plays a crucial role in channel performance. To optimize performance:
- Ensure that your cameras have a clear line of sight to the areas you want to monitor. Obstructions such as walls or window reflections can negatively impact the quality and reliability of the video feed.
- Adjust the camera angles and heights to capture the desired field of view effectively. Experiment with different positions to find the optimal setup.
- Avoid positioning cameras in areas with direct exposure to extreme weather conditions, as this can affect their performance and durability.
3. Regularly Update Firmware
Zmodo releases firmware updates periodically to improve system performance and address any bugs or security vulnerabilities. To ensure optimal channel performance:
- Check for firmware updates regularly and apply them to your cameras as soon as they become available.
- Follow the manufacturer’s instructions for updating the firmware to avoid any issues.
By implementing these tips, you can optimize the channel performance of your Zmodo security cameras and ensure that they deliver reliable and high-quality video feeds.
FAQ,
How can I move a channel on my Zmodo security camera?
If you want to move a channel on your Zmodo security camera, you will need to access the camera’s settings through the Zmodo app or web interface. From there, you can rearrange the order of the channels as desired. Keep in mind that the specific steps may vary depending on the model of your Zmodo camera.