Traveling with a DSLR camera can be both exciting and daunting, especially when it comes to packing it for a flight. As a valuable and delicate piece of equipment, it’s important to ensure your camera is well-protected during the journey.
Step 1: Gather the Necessary Supplies
Before you begin packing your camera, make sure you have all the necessary supplies. This includes a sturdy camera bag or case, padded dividers or foam inserts, lens cleaning solution and cloth, and extra memory cards and batteries. These items will help keep your DSLR camera safe and ready for use throughout your travels.
Step 2: Remove the Lens and Accessories
Start by removing the lens from your DSLR camera body. Be sure to cap both the lens and the camera body to prevent any dust or debris from getting inside. Additionally, remove any other accessories attached to your camera, such as a flash or external microphone. Pack these items separately to prevent any damage or scratches.

Step 3: Secure the Camera Body
Place the camera body in the main compartment of your camera bag or case. If your bag has padded dividers or foam inserts, use them to create a snug fit for your camera. This will help prevent any movement and potential damage during the flight. If your bag doesn’t have these dividers, wrap the camera body in a soft cloth or bubble wrap before placing it in the bag.
Step 4: Protect the Lens and Accessories
Wrap each lens individually in a soft cloth or lens pouch and place them in their designated compartments in the camera bag. If you have any additional accessories, such as extra batteries or memory cards, pack them securely in separate compartments or pouches to prevent any damage.
Step 5: Close and Secure the Bag

Once your DSLR camera, lenses, and accessories are safely packed in their respective compartments, close the bag or case, ensuring all zippers or clasps are securely fastened. Give the bag a gentle shake to check for any movement. If you feel any, rearrange the items or add extra padding to eliminate any potential shifting during the flight.
Step 6: Carry the Camera Bag as Carry-On
It’s recommended to carry your DSLR camera as a carry-on item rather than checking it in. This way, you have more control over its safety. Remember to check with your airline for any specific regulations concerning the transportation of fragile items, such as cameras.
By following these steps and taking the necessary precautions, you can ensure your DSLR camera remains safe and protected during your flight. Enjoy capturing stunning moments during your travels!
Essential Tips for Packing Your DSLR Camera for a Flight
When travelling with your DSLR camera, it’s important to pack it properly to ensure its safety and to avoid any damage during the flight. Here are some essential tips to follow when packing your DSLR camera for a flight:
1. Separate Your Camera and Lenses
Before packing, make sure to remove the lens from your camera body and keep them separate. This will help to prevent any unnecessary strain on the lens mount and reduce the risk of damage during the journey.
2. Use a Protective Camera Bag
Invest in a high-quality camera bag that provides proper padding and protection for your DSLR camera and lenses. Look for a bag that is specifically designed for camera equipment and has compartments to keep everything organized and secure.
Ensure that your camera is placed in the bag with the lens facing downwards, as this will help to distribute the weight evenly and reduce the risk of any impact on the lens.
3. Pack with Cushioning Material
Fill any empty spaces in your camera bag with soft cushioning materials such as bubble wrap or foam inserts. This will help to further protect your camera and lenses from any impact or shock during the flight.
Make sure to securely pack everything inside the camera bag to avoid any loose items shifting around and potentially causing damage to your camera equipment.

4. Remove Batteries and Memory Cards
Before packing your DSLR camera, always remove the batteries and memory cards. This will not only help to prevent any potential damage caused by battery leakage, but it will also make the overall weight of your camera lighter, which can be helpful when travelling.
Store your batteries and memory cards in a separate, secure compartment in your camera bag to keep them safe and easily accessible.
By following these essential packing tips, you can ensure that your DSLR camera is well-protected during the flight and ready for capturing beautiful moments at your destination.
Choosing the Right Camera Bag for Travel
When traveling with your DSLR camera, it’s important to have a reliable and secure camera bag. The right camera bag will not only protect your equipment from any potential damage, but it will also provide you with easy access and organization for your gear.
Considerations for Choosing a Camera Bag:
- Size: Choose a camera bag that is spacious enough to accommodate your DSLR camera body, lenses, and other accessories. However, keep in mind that your bag should still be compact enough to fit within the size restrictions for carry-on luggage if you plan to bring it on the plane.
- Protection: Look for a camera bag that offers good padding and protection to keep your gear safe from bumps and drops during travel. Some bags even have dedicated compartments with customizable dividers to provide additional protection and prevent your equipment from shifting.
- Comfort: Consider the comfort of carrying your camera bag for extended periods of time. Look for bags with padded straps and back panels, as well as adjustable straps to distribute the weight evenly on your shoulders and hips.
Types of Camera Bags:
There are several types of camera bags to choose from, depending on your specific needs and preferences:

- Backpack: A backpack-style camera bag is great for those who will be traveling on foot and need to carry their gear for long periods. It offers good weight distribution and typically has multiple compartments for easy organization.
- Messenger Bag: A messenger bag is a stylish option that can be worn across the body. It provides quick access to your camera and lenses, making it ideal for photographers who need to capture moments on the go.
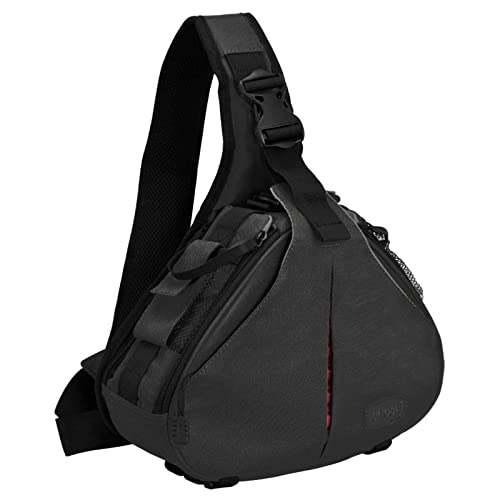
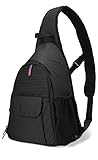
- Sling Bag: A sling bag combines the benefits of a backpack and a messenger bag. It has a single strap that can be worn over one shoulder, allowing you to swing the bag to the front for quick access to your camera.
- Rolling Case: If you have a lot of camera gear or plan on carrying additional equipment, a rolling case can be a convenient option. It provides easy mobility and allows you to transport your gear without straining your back.
Remember to choose a camera bag that suits your specific needs and offers the right combination of protection, accessibility, and comfort. By selecting the right camera bag for your travel adventures, you can ensure that your DSLR camera and accessories stay safe and organized throughout your journey.
Protecting Your Camera and Lenses
When packing your DSLR camera for a flight, it is crucial to take the necessary precautions to protect your camera and lenses from any potential damage. Here are some tips to ensure the safety of your valuable equipment:
1. Use a Sturdy Camera Bag or Case
Invest in a high-quality camera bag or case that offers sufficient padding and protection. Look for a bag that is specifically designed for DSLR cameras and has compartments to keep your lenses and accessories separate.
2. Remove the Lens from the Camera Body
Before packing your camera, detach the lens from the camera body. This reduces the risk of damage to the lens mount during transportation. Additionally, it prevents any accidental changes to the lens settings while in transit.
3. Protect Your Lenses
Each lens should be individually protected to prevent scratches or other damage. Use lens caps or lens pouches to keep them safe. It is also advisable to pack your lenses in a way that they are not stacked on top of each other to avoid any pressure or impact.

4. Use Lens Filters
Installing a protective filter on each lens can provide an extra layer of protection. A UV or clear filter can serve as a sacrificial element, taking the brunt of any damage instead of your lens.
5. Wrap Your Camera Body
Wrap your camera body in a soft cloth or bubble wrap to shield it from scratches. This additional layer of protection can help absorb any impact during handling and transport.
6. Secure the Camera Bag
Make sure the zippers and closures on your camera bag are secure. This prevents any accidental openings that could lead to your camera and lenses falling out or getting damaged.
7. Carry Your Camera Bag as Hand Luggage
Whenever possible, carry your camera bag as hand luggage instead of checking it in. This way, you have more control over the handling of your equipment and can ensure it remains intact and safe during the flight.
By following these tips, you can protect your camera and lenses during air travel, ensuring they arrive in the best condition possible and ready to capture those unforgettable moments.

Organizing Your Camera Gear
When packing your DSLR camera for a flight, it’s essential to keep your gear organized to ensure its safety and easy access during your journey.
Here are a few tips for organizing your camera gear:
1. Camera Bag: Invest in a sturdy, padded camera bag that offers compartments and dividers. This will help protect your gear from any potential bumps or shocks during the flight.
2. Lens Pouches: Use individual lens pouches to keep your lenses safe and separated. It’s also a good idea to store your lenses in their original dust bags or use lens wraps for added protection.
3. Camera Body: Make sure to detach the lens from your camera body and secure the lens cap before packing. Place the camera body in a padded compartment or wrap it with a lens wrap to avoid any scratches or damage.
4. Memory Cards: Keep your memory cards organized by using a memory card wallet or case. This will help prevent them from getting lost or damaged during the flight.
5. Cables and Accessories: Use small pouches or cable organizers to store your cables and accessories, such as battery chargers, lens filters, and remote shutter releases. Keeping them organized will make it easier to find what you need when you reach your destination.
6. Tripod: If you’re bringing a tripod, consider investing in a lightweight and compact travel tripod that can easily fit into your camera bag or be attached to the outside. Ensure that it’s securely fastened or strapped to prevent any movement or damage.
7. Personal Items: Don’t forget to pack any personal items you may need, such as lens cleaning kits, UV filters, camera straps, and camera manuals. These items will come in handy during your trip.
By following these tips and organizing your camera gear properly, you can ensure a worry-free flight and have all your equipment readily available to capture those memorable moments.
Packing Tips for Carry-on or Checked Baggage
When it comes to travelling with your DSLR camera, it’s important to pack it safely and securely, whether you plan to carry it on or check it in as baggage. Here are some tips to help you ensure your camera arrives at your destination in perfect condition.
Carry-on Tips:
If you’re planning to carry your DSLR camera with you on the plane, it’s crucial to pack it in a way that is not only easy to access, but also protects it from damage. Here are a few suggestions:
| 1. | Invest in a camera bag or backpack that provides ample padding and compartments specifically designed for camera equipment. |
| 2. | Remove any detachable lenses and place them in protective lens cases. Pack them separately to avoid any potential damage. |
| 3. | Wrap your camera body in a soft cloth or use a camera sleeve to provide additional protection against scratches. |
| 4. | Place your camera bag in the overhead bin or under the seat in front of you, ensuring it’s secure and won’t shift during the flight. |
Checked Baggage Tips:
If you decide to check your DSLR camera in your baggage, it’s important to keep in mind that your bag might not receive the same level of care as your carry-on items. Here’s how you can protect your camera:
| 1. | Wrap your camera and lenses in bubble wrap or a soft cloth, providing an extra layer of protection from potential impacts. |
| 2. | Place your camera gear in a sturdy, hard-shell case or a padded camera bag specifically designed for checked baggage. |
| 3. | Add a fragile sticker or label to your checked bag to inform the handlers that there are delicate items inside. |
| 4. | Consider including insurance coverage for your camera equipment in case of loss or damage during transit. |
By following these packing tips, you can ensure that your DSLR camera remains safe and protected throughout your journey, whether it’s in your carry-on or checked baggage.
Additional Precautions for International Flights
When packing a DSLR camera for an international flight, there are a few additional precautions you should take to ensure the safety and protection of your equipment.
1. Check the Airline’s Rules and Regulations
Before your international flight, it is important to check the rules and regulations imposed by the airline regarding the transportation of electronic devices, including DSLR cameras. Some airlines may have specific guidelines on the size, weight, and packaging requirements for such items. Make sure you comply with these regulations to avoid any complications during your journey.
2. Invest in a Secure Camera Bag
To protect your DSLR camera during an international flight, consider investing in a high-quality, secure camera bag. Look for a bag that is well-padded and specifically designed to hold camera equipment. Make sure it has compartments to separate your camera body, lenses, and accessories, providing optimal protection and minimizing the risk of damage.
3. Remove Batteries and Memory Cards
Prior to packing your DSLR camera in your luggage, remove the batteries and memory cards. This precautionary measure ensures that the camera remains inactive during the flight, reducing the risk of accidental activation and potential damage. Keep the batteries and memory cards in a separate, secure case to prevent any loss or damage.
4. Consider Insurance Coverage
For added peace of mind, consider obtaining insurance coverage for your DSLR camera and other valuable electronic equipment prior to your international flight. This coverage can protect you financially in the event of theft, loss, or damage to your camera during your journey. Check with your insurance provider to understand the scope of coverage offered.
5. Keep Your Camera with You
Whenever possible, it is recommended to keep your DSLR camera as carry-on luggage rather than checking it in. By keeping your camera with you, you can closely monitor its whereabouts and ensure its safety throughout the flight. Additionally, storing it in the overhead compartment or under the seat in front of you provides better protection from potential mishandling or damage.
By following these additional precautions for international flights, you can help safeguard your DSLR camera and enjoy your journey with peace of mind.
Question-answer:
What is the best way to pack a DSLR camera for a flight?
The best way to pack a DSLR camera for a flight is to store it in a padded camera bag or case. Make sure to remove any detachable lenses and wrap them individually in lens pouches or bubble wrap. Place the camera and lenses in the bag, ensuring they are secure and won’t move around during the flight. It’s also a good idea to carry the camera with you in your carry-on luggage rather than checking it in.
Can I pack my DSLR camera in a checked bag for a flight?
While it is technically possible to pack a DSLR camera in a checked bag for a flight, it is not recommended. Checked baggage can be mishandled or subjected to rough handling during the flight, which can potentially damage the camera. It is best to carry your DSLR camera with you in your carry-on luggage to ensure its safety.


